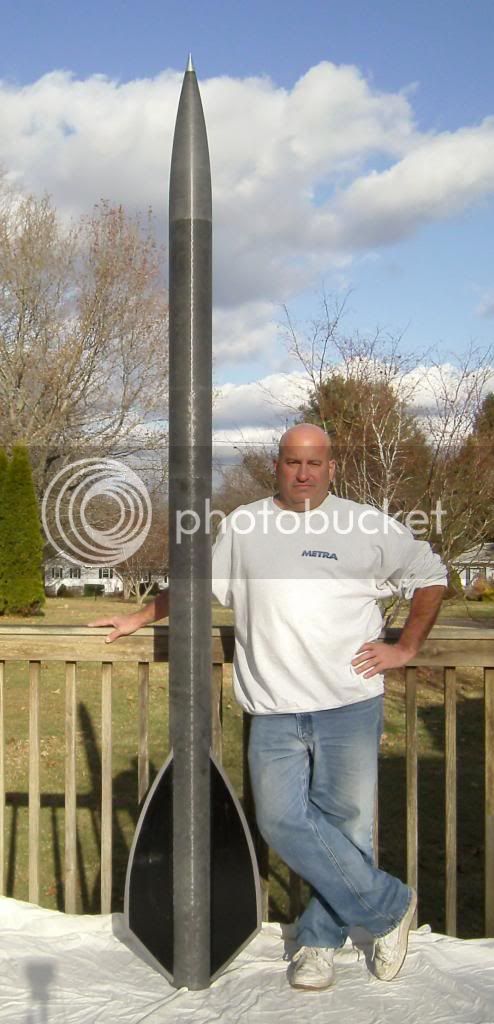
Going For My Canadian Level 1-3 HPR Certification! - Wildman Shape Shifter Jr...

The Rocketry Forum

Help Support The Rocketry Forum:

This site may earn a commission from merchant affiliate links, including eBay, Amazon, and others.
Sebastian,
Looking good so far. Personally I'd go with internal fillets over the foam. Here is some info you can use for your sims.

Weight - 4.62lbs (ready to fly no motor)
Chute used - 36"
CP - 44.7" from NC tip. This is a Ratio between Barroman & RockSim

Real World Flights:
  • CTI I303BS - 4061'
  • CTI I242WH - 4090'
  • CTI J270G - 4661'

View attachment 156186View attachment 156187

Thanks! 4661' for the J270 is great as that is well below the 6000' waiver at our smaller field.

That sure is a great liftoff shot of the I242! I'll consider using that motor for the level 2.

As far as I can tell CTI doesn't make a Green^3 "I" motor right? I was hopping to do level 1, 2, and 3 with motors using that propellent...
 
Got some Sticker Shock goodness coming my way!:grin:

I went with the green, and also got decal set for the Mini (in green as well).

Now if my stuff from Wildman would get here already...:rant:
 
Got some Sticker Shock goodness coming my way!:grin:

I went with the green, and also got decal set for the Mini (in green as well).

Now if my stuff from Wildman would get here already...:rant:

That's gonna look nice!
now you just need the five in. shape shifter lol!
 
Just to wet your whistle.


ShapeShifter5_zps23ca1bd3.jpg
 
No I have not forgotten about this thread!

Apparently my Wildman order shipped on Dec 30th... I think it's due to an item being on backorder. (I think Tim mentioned in another thread that the Recon chutes were out of stock.) Anyway at least it's now on it's way!

I received my decals from Mark @ Stickershock a few days ago. They look very nice! Thanks Mark!

I'll be documenting the build of the Mini Shapeshifter in this thread as well so stay tuned.

image-1179996406.jpg
 
I just bought a Shapeshifter Jr. 2 stage from the Black Saturday sale. Still waiting for it to arrive. A 2 stage rocket will add a new dimension to my fleet and learning curve.Gonna go for some altitude at URRF this summer. I like the green decals from Stickershock but I fear they will be so popular that mine would be just another Shapeshifter in the crowd. So I need to think on this one.
 
I just bought a Shapeshifter Jr. 2 stage from the Black Saturday sale. Still waiting for it to arrive. A 2 stage rocket will add a new dimension to my fleet and learning curve.Gonna go for some altitude at URRF this summer. I like the green decals from Stickershock but I fear they will be so popular that mine would be just another Shapeshifter in the crowd. So I need to think on this one.

I debated getting them in another colour for the same reason; but in the end went with the green 'cause it just looks so freekin' good!

Please do a build thread as well!

Edit: I just noticed you're in Canada. Where do you fly?
 
I am a member of NAPAS (North American Propulsion & Aerospace Society) We are a TRA affiliated high power rocket club in Southern Ontario. I also like going to Upstate New York to fly at some of the larger meets like URRF.
 
At last, at long last; my Black Saturday stuff has arrived! Everything looks great.

I'm sure looking froward to doing some actual building:grin:

Looking back I'm not sure if I ordered enough shock cord, but If need be I'll just get some nylon cord.

SDC10136.jpg
 
At last, at long last; my Black Saturday stuff has arrived! Everything looks great.

I'm sure looking froward to doing some actual building:grin:

Looking back I'm not sure if I ordered enough shock cord, but If need be I'll just get some nylon cord.

Wonderful!!
Everything looks great! How much shock cord did you order?
I guess you'll have to do a build thread on the mini shapeshifter, as I was so excited to do my first FG build I didn't take time to do a build thread :rolleyes::lol:

Nate
 
Wonderful!!
Everything looks great! How much shock cord did you order?

~21 feet.

I guess you'll have to do a build thread on the mini shapeshifter, as I was so excited to do my first FG build I didn't take time to do a build thread :rolleyes::lol:

Nate

Well at least post pics of the finished product!:wink:

I'm actually going to document the build of the mini in this thread as well (who knows... maybe one day I'll be documenting the build of the 5" one here too:wink:)


I've already given the mini's components a bath to get rid of that nasty fiberglass dust.
SDC10142.jpg


Next up for both rockets will be: Sanding and fitting...:shock:
 
Here are my Shape Shifter stats (all Aerotech / all dual deploy)...

H170M - 1,957ft 5lb 10oz
I225FJ - 2,396ft
I285R - 2,782ft 6lb 0oz
J350W - 5,073ft 6lb 4.7oz
I161W - 1,777ft 5lb 12oz

I fly mine w/o a drogue chute and use a 50" LOC chute for the main. if you are going to stuff a 'J' in that rocket, I hope you are planning dual deploy. it disappears in a hurry!

Good luck with the certs.
 
A fun flier in my Darkstar Jr is an I357, made it disappear in a hurry!

[video=youtube;pLtiRJt3pfo]https://www.youtube.com/watch?v=pLtiRJt3pfo[/video]
 
You can never have too much shock cord... provided you can still fit the sections together :)

You might check with Tom to see if he still has that spool of Kevlar pull tape... my bet is he still has miles of the stuff. Beats nylon any day!
 
~21 feet.

Well at least post pics of the finished product!:wink:

I'm actually going to document the build of the mini in this thread as well (who knows... maybe one day I'll be documenting the build of the 5" one here too:wink:)

I've already given the mini's components a bath to get rid of that nasty fiberglass dust.
View attachment 158735

Next up for both rockets will be: Sanding and fitting...:shock:

What do you do to bath the fiberglass parts? Yes it would be cool to have a small, med, & large version. I too got rocket mail today, my estes warrenty magician came....I'm turning it into a 29mm motor :)
 
What do you do to bath the fiberglass parts? Yes it would be cool to have a small, med, & large version. I too got rocket mail today, my estes warrenty magician came....I'm turning it into a 29mm motor :)

I fully submerge them in water in my basement sink, and (while submerged) wipe the parts with a rag (for the inside of a tube, tape the rag to a pole and pass it through the tube a few times).
 
What do you do to bath the fiberglass parts? Yes it would be cool to have a small, med, & large version. I too got rocket mail today, my estes warrenty magician came....I'm turning it into a 29mm motor :)

From what I understand, when bathing FG just soaking for a whe and then some scrubbing is sufficient to remove most dust.

Not to sidetrack the thread, but what happened to your magician?
Edit: mr. Rocket geek beat me to it! :)
Nate
 
Building has now officially begun!

There is something very satisfying about having everything all laid out before the start of a build!
SDC10144.jpg

Over the course of the evening I got most of the sanding on the Jr done. I still have to notch one of the CRs for the shock cord and didn't do any of the bulkheads, but for the most part I'm ready to start mixing some epoxy!:grin:

After the sanding, it was time for bath 2.0 and then a dry fit of the components. It's going to look quite nice when finished and dressed up in some vinyl!:grin:
SDC10156.jpg

I love the fin design. I find the Aero Pack complements the business end very well...:grin:
SDC10153.jpg

Today I was going to order some parts for the glue-less nosecone mod (as well as some parts for my Ceiling Pusher 29 build, which can be found in the scratch build section), but as it turns out the vendor was out of stock for a few of the things I wanted, so that will have to wait. Only thing Ill need anytime soon is rail buttons, and since I'm out, and don't want to pay for shipping multiple times, I think for now I'll just "borrow" a set from my MPR rockets.

I was hoping to get some more work done on the Mini as well, but never got around to it.

Here is a size comparison between the Mini and Jr. Quite the difference. Next time I order from Wildman, I'm going to get a dual deploy kit and a FWFG nosecone (I rather dislike these resin or whatever nosecones that Wildman uses for their mini's) for it to make it a better downscale of the Jr.
SDC10159.jpg

'Tis all for tonight. Next up: Sanding the Mini and assembling the MMT for the Jr.
 
Looking awesome! Thanks for the update. I agree about the mini NC, not a huge fan of it, but IMHO not worth $30 for a FWFG one. I have to admit, I'm jealous of that shape shifter Jr! The mini is awesome, but as you mention, it ain't got nothing on the Jr!
Looking forward to following both builds!

Two questions: what exactly I'd the glueless NC mod? And how is the fit of the NC in the BT on the Jr? In my DS Lite, it's a tad loose.
 
Looking good. Just got my Shapeshifter 2 stage in the mail. It is a long sucker with that booster stage.
 
Looking awesome! Thanks for the update. I agree about the mini NC, not a huge fan of it, but IMHO not worth $30 for a FWFG one. I have to admit, I'm jealous of that shape shifter Jr! The mini is awesome, but as you mention, it ain't got nothing on the Jr!
Looking forward to following both builds!

Two questions: what exactly I'd the glueless NC mod? And how is the fit of the NC in the BT on the Jr? In my DS Lite, it's a tad loose.


The glueless nose cone mod allows you to use the nose cone for altimeters/tracking.
 
Looking awesome! Thanks for the update. I agree about the mini NC, not a huge fan of it, but IMHO not worth $30 for a FWFG one. I have to admit, I'm jealous of that shape shifter Jr! The mini is awesome, but as you mention, it ain't got nothing on the Jr! Looking forward to following both builds! Two questions: what exactly I'd the glueless NC mod? And how is the fit of the NC in the BT on the Jr? In my DS Lite, it's a tad loose.

Thanks.

As for your questions, it looks like Crazy Jim and BB beat me to answering the first one.

In answer to your second question; the fit of my nosecone is fine, but my av-bay coupler is a tad loose. I think a little bit of variance between parts is to be expected. I wouldn't worry. You can always use masking tape to build the shoulder up. (As an aside, the fit of the NCs for both my Mini SS, and Mini Eagle Claw are very loose and require a good amount of tape to build them up properly.)

If you haven't already built it you should do a build thread for the DS Lite. I think you'd be the first, and I really enjoyed your Jr HPR build thread!:)
 
Thanks for the responses guys,
I haven't built it yet, that will come later.

Now back to Sebastian's builds!
 
Time for the some epoxy...

This evening, I began assembling the motor mount.

Using a file, I notched one of the centering rings in two places not quite opposite each other to make sure the shock cord doesn't block one of the fins from touching the motor tube.
SDC10166.jpg

It was then time for for a dry fit:
SDC10167.jpg SDC10168.jpg


My first impressions on Rocketpoxy are good. It's a bit thick; which while good for applying to parts, makes measuring out equal amounts of both parts a little difficult (hopefully I was close enough!). I'm going to use CarVac's suggestion and transfer some of the epoxy into squeeze bottles to make it easier to measure out correctly. Also, it has no strong oder unlike most hobby epoxies, which smell very strongly. I mixed a little too much epoxy, so I used some of the excess to glue to pieces of wood together, that I will then try to break apart when fully cured - as a test to see for myself how strong this stuff is.
IMG_1559.jpg SDC10169.jpg SDC10170.jpg

Once my epoxy was all mixed, I glued the shock cord and forward centering ring to the motor tube. I left off the rear centering ring, as I'm planning on going against Wildman tradition, and doing my internal fillets the more traditional method, rather then injecting.
SDC10173.jpg SDC10177.jpg SDC10179.jpg

Finally here is a photo of the Recon chute I'll be using.
IMG_0339.jpg
It looks and feels absolutely fantastic! Thanks to Danno for the recommendation. I'm hoping to be able to do a drop test outside, to get a good photo of it when inflated.

Again I was hoping to get around to sanding the Mini's components, but didn't feel up to it by the time I was done working on the Jr. for the night.

Next up: Installing the Motor mount in the Jr and sanding the Mini (I hope!).

Thanks for looking!
 
Back
Top