Certify with us build thread - Level 2 - AGM-33 Pike

The Rocketry Forum

Help Support The Rocketry Forum:

This site may earn a commission from merchant affiliate links, including eBay, Amazon, and others.

gdiscenza

Well-Known Member
Joined
Jul 2, 2010
Messages
1,613
Reaction score
42
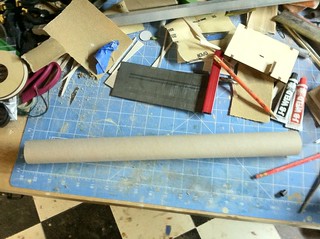
This begins my build thread for my L2 project.


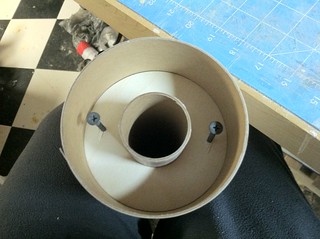
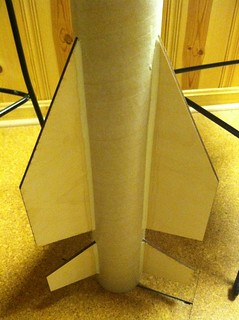
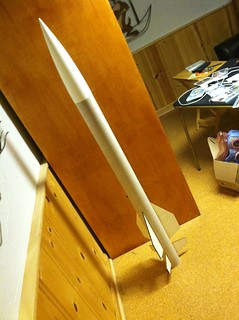
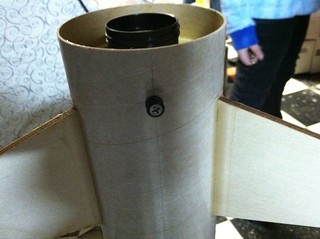
I plan to build a MadCow 4" AGM-33 Pike and certify at Red Glare in April on a CTI J394 green.

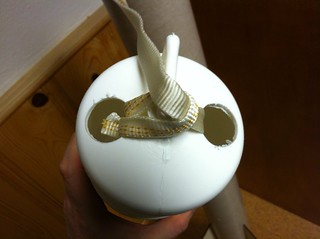
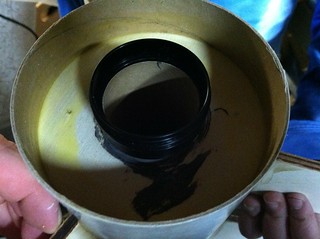
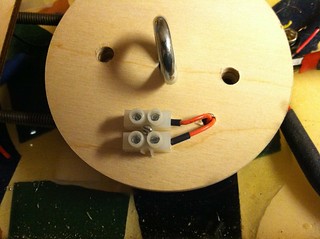
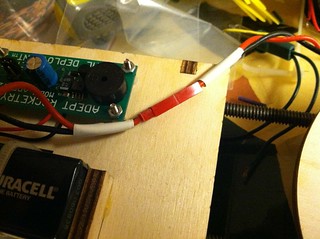
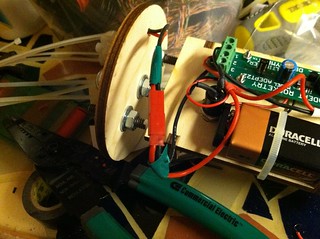
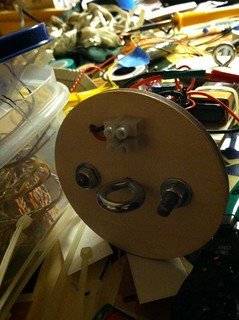
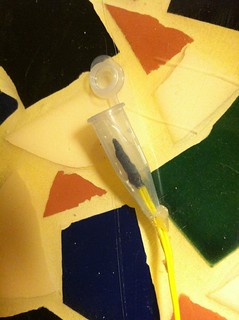
I will be using an Adept22 for dual deploy, and an Aeropack retainer.
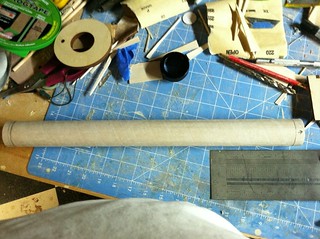
The parts are here!

G.D.

Sent from my iPhone using Forum Runner

image-529273023.jpg
 
Looks a little small and light for a L2 project. (Can't fly K or L motors) Should certainly work for the cert. A quick sim says 0.84 Mach and 4,500 ft. Good Luck!
 
I can't wait to see the flight at Red Glare XIV!
I think its a cool choice. I did my L2 on a wildman jr to 1 mile...no problems, it still came down. Used a screamer to help find it, but didn't need it because it hit one of the away cells at LDRS 28
 
You typically want a cert flight to be fairly low and slow so you can see it and find it easier.

That depends a lot on your philosophy on it.

My view is more of "certify on what you fly" -- a friend likes minimum diameter Machbusters. His Level 2 was a VB Extreme 54. Mine, on the other hand, was a 4" scratch build.

I know someone who's Level 3 was an N that broke Mach 2; mine was a pile of buckets that went 3,000 feet on a decent sized M.

-Kevin
 
How so? How can something be too light?

To me, if I have to wait 6 - 12 months for the perfect no-wind conditions to fly a rocket because it goes too high to fly in normal/average conditions at my flying field, that is too light.

Some have said you want a cert flight low an slow, I don't really agree with that. I wasn't really thinking about the altitude or the cert flight, I was thinking about after you cert. With a 38mm MMT, the only L2 motors you can fly are small Js. A larger rocket with a 54mm MMT would let you fly J, K and small L motors.

My opinion is that if you are going to build a L2 rocket, build one that can fly as wide of range of L2 motors as possible, and do it under the normal conditions you find at the field you fly at the most.
 
Thanks you too, and I agree it will be fun!

To answer your question, I must say both yes and no.

Yes I have launched a DD rocket before and No, it didn't work.

For this attempt I will simplify. No extra connection blocks to make the wiring "cleaner", nothing but the Adept22, the battery, 2 ejection charges, and a simple Po-Po switch.

Fun!

G.D.
 
Last edited:
AGM-33 Pike build commences!

I got a ton of work done this weekend, so here is the recap.... (I apologize if the pix come out strange, but I didn't want to type all this in on the iPhone, so I used Flickr to store the photos I used)

I sanded the MMT with 100grit sandpaper to promote glue adhesion, then marked for CR location and retainer (as well as orientation)


AGM-33Pike build by Gregg Discenza, on Flickr


AGM-33Pike build by Gregg Discenza, on Flickr


I checked the MMT for spacing of the fin tabs against the pre-slotted lower airframe, then glued on the forward CR (after affixing the eyebolt with some JB Weld)


AGM-33Pike build by Gregg Discenza, on Flickr


AGM-33Pike build by Gregg Discenza, on Flickr

Cont'd

G.D.
 
I added a pair of drywall screws to the aft CR to aid in removal for internal fillets, then roughed up the inside of the lower airframe, then glued in the MMT.

AGM-33Pike build by Gregg Discenza, on Flickr
While that was drying, I constructed the avionics sled that came with the av-bay upgrade from Madcow.

AGM-33Pike build by Gregg Discenza, on Flickr
Once the glue was dry, I installed the fins using CJ's Chip-clip technique (no pictures, I forgot to take them). When the fins were dry, I removed the aft CR and applied healthy internal fillets to all 6 fins.

AGM-33Pike build by Gregg Discenza, on Flickr

While the internal fillets were drying, I turned my attention to the av-bay, installing the push-on/push-off switch and the altimeter, then soldering up the wiring to match the demo cabling that Tommy sent me (which contradicts the printed docs I got with the Adept22 in regards to switch location)

AGM-33Pike build by Gregg Discenza, on Flickr

AGM-33Pike build by Gregg Discenza, on Flickr

Once the glue was dry on the internal fillets (which were done with Titebond) I applied external fillets with Titebond Molding and Trim Glue (nice stuff).

AGM-33Pike build by Gregg Discenza, on Flickr

More to come!

G.D.
 
Minor things accomplished during the week.

I drilled 2x 1" holes in the nosecone base for the TN shock cord, and tied it on with a bowline knot.


AGM-33 Pike build by Gregg Discenza, on Flickr

Then for grins, I did an all-up assembly of the rocket:


AGM-33 Pike build by Gregg Discenza, on Flickr

Still need to attach the aft rail button, JB Weld the Aero Pack, wire up the av-bay bulk plates, and ground test the charges. Then it should be warm enough to paint.

G.D.
 
Got some more done over the past week or so:

Filleted the aft CR and attached the Aeropack.

More Pike build by Gregg Discenza, on Flickr
Installed the aft rail button

More Pike build by Gregg Discenza, on Flickr
Wired up the bulkplates and the rest of the av-bay

More Pike build by Gregg Discenza, on Flickr

More Pike build by Gregg Discenza, on Flickr

More Pike build by Gregg Discenza, on Flickr

More Pike build by Gregg Discenza, on Flickr
Prepped my ejection charge holders

Ejection charge capsule by Gregg Discenza, on Flickr
I also had some fun today, but that will have to wait until I can edit the terrible video...

G.D.
 
Ground Test!

This is with 1cc of FFFFg Goex black powder in the ejection charge capsule I show in the above posting.

https://www.flickr.com/photos/92487555@N06/8463344172/

The igniter is homemade using nichrome and a dip I found online that works well for ejection charges. I cut off the end of a cone-ended centrifuge vial, hot-glued in the igniter, then filled the space with the measured amount of BP and capped it with dog barf.

I set it off with a 9v battery and a long lead wire. I think the ejection was less energetic than I was hoping. I will re-test with 1.25cc probably next weekend.

G.D.
 
Last edited:
Was the sound really that subdued? Actually I am hoping it is that quiet, I will start BP testing next week and was concerned that the neighbors would call the police.
 
Yeah, it looks like it needs a little bit more pop... are you going to use your homemade matches for the flight?


Later!

--Coop
 
Guess it depends on where you live. I've ground tested here a bit --never a problem. Then again: I can launch most of the kids Estes kits in the backyard...


Later!

--Coop
 
I tried using the home made igniters I made with 34 ga. nichrome wire with limited success. You can read about it here:
https://www.rocketryforum.com/showthread.php?48387-Stratologger-data

The bottom line is don't trust them to work every time. It's much easier to use a commercial igniter like the Quest Q2G2 or an e-match for your dual deploy ejection charges. Especially if it's a L-2 attempt.
 
Layne,

Yes it really was that subdued. In every ground test I've tried, when I use the BP calculator on info-central, the ejection just gives a little "pop".

I agree that the event was underwhelming. I wonder if I need more bp, or I need to wrap the vial with some black tape to ensure a bigger "boom"... Thoughts anyone?

As for my homemade igniters, I'm using 40 gauge nichrome, soldered to either shooters wire or CAT5, and then dipped into nitrocellulose lacquer/bp pyrogen. A thin layer gives an immediate flash which never fails to ignite an ejection charge, either by direct 9v or through the altimeter in a pressure chamber.

I will post videos of the bigger main test, as well as the apogee test when I get around to testing them. Hopefully I'll have a helper to hold the camera while I set off the charges (the crappy video for this test was because I was doing it all myself....I apologize)

G.D.
 
There were a couple of responses to my thread regarding the gauge of wire that works for ejection charges, and 40 ga. was recommended. When I used the BP calculator for my 54mm payload, it recommended .5 grams, but when I used that amount, the chute did not leave the BT. I ended up using 1.3 grams for a good ejection. I used the exact same vial you have pictured, but it would not hold the 1.3 grams of BP. So I tamped it down with a small dowel and used masking tape twisted tight to seal the top. It's amazing what a small increase in BP does to the energy created by it's ignition.
 
Last edited:
I finally had some time to get back to this. Weight without paint or motor is just shy of 80 oz, so it's gonna get way up there on a J. I will be flying it naked next Saturday to test the DD bits, so I set up some ejection canisters.

image-284883880.jpg

I'm gonna do a ground test of the apogee charge tomorrow, since I already tested the main charge. Then I'll order the motor from Wildman VA, and I will be ready to go for Culpeper.

If Culpeper goes well, all that will be left will be paint, and on to Red Glare!

I have been taking the NAR practice tests online, and I know I can pass the L2 exam.

G.D.

Sent from my iPhone using Forum Runner
 
Here's wishing you well! Look forward to seeing this at Red Glare!


Later!

--Coop
 
Ground test today, for the apogee event - 1cc of Goex FFFFg black powder:

[video=youtube;GDEbOkuubss]https://www.youtube.com/watch?v=GDEbOkuubss[/video]

I tested the main event earlier, and that will take 1.25cc - my only concern now is that the firing is not instant, instead the charge goes off about 1/4 of a second after applying power.... I might make up some charge tubes from coathanger cardboard and buy some ematches from Wildman VA...still have to decide that....

G.D.
 
The delay in firing is probably due to the current needed for the igniter, Greg. Some low-current matches or the Quest igniters will probably give you the reaction time you're looking for--worth checking out in testing...


Later!

--Coop
 
As for my homemade igniters, I'm using 40 gauge nichrome, soldered to either shooters wire or CAT5, and then dipped into nitrocellulose lacquer/bp pyrogen. A thin layer gives an immediate flash which never fails to ignite an ejection charge, either by direct 9v or through the altimeter in a pressure chamber.
G.D.

I tested the main event earlier, and that will take 1.25cc - my only concern now is that the firing is not instant, instead the charge goes off about 1/4 of a second after applying power.... I might make up some charge tubes from coathanger cardboard and buy some ematches from Wildman VA...still have to decide that....

G.D.

When you make your wraps, how long is the "bridge" between the two wires? If you shorten it up, it should heat up quicker and give you a quicker response.

I've made matches like these with 34 ga nichrome and found the best bridge length is between 1/16" and 1/8".
I also bought the match head chips and used those. the nitrocellulose and ground BP dip won't work with those. I had to buy a dip for them and they still only work <50% of the time. The bridge wires burn, but don't ignite the coating when attached to an altimeter. They work great with a single AA battery. Guess the altimeters put out too much current and vaporize the bridge before it can light the dip.

I also check the resistance of the matches when I make them. It's usually 1 - 2 ohms. If you store them any length of time, check them before flight. The resistance can go up for various reasons and if it gets too high, they won't fire. Yours should last longer then mine since you solder yours.
 
You know I abandoned home made igniters after the issues I had. I'm having a hard time understanding why you would continue to experiment with them. This is your L-2 rocket right? Any type of failure really sets you back, why take the chance? Q2G2's or e-matches will give you reliable performance.
 
Back
Top