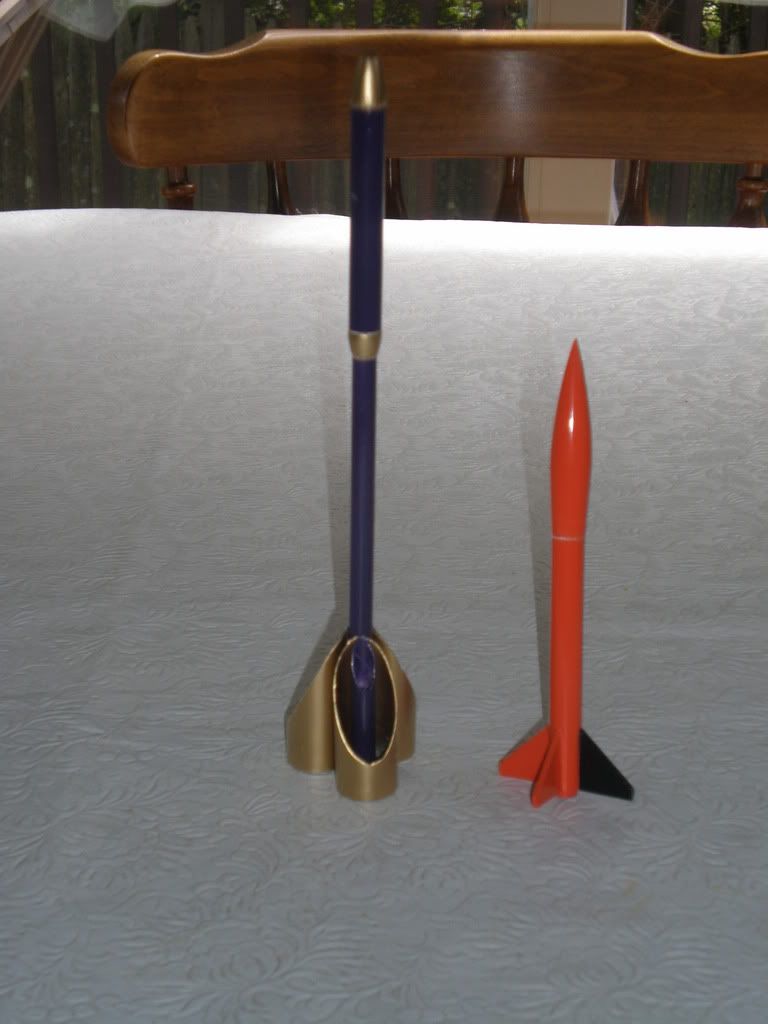
Micro help for C.J..... I've been bitten!

The Rocketry Forum

Help Support The Rocketry Forum:

This site may earn a commission from merchant affiliate links, including eBay, Amazon, and others.

blackjack2564

Crazy Jim's Gone Banana's
Joined
Jan 17, 2009
Messages
9,168
Reaction score
1,424
Location
Savannah Ga
Well I must have been bitten by some kinda bug last night. Decided to take the leap over to the ''GRAY" side.
Gonna Go Micro.
It will be strange building a rocket the size of my avatar! Don't know how I'll get those stickers downsized that small!

Decided to share my lack of experience with ya'll, maybe some others might catch the bug too. Couple of questions for you pro's to help me out.

If I remember correct, it was advised on an old thread to get the Quest MMX combo deal for starters. This comes with a decent controller and pad to get me started? Any other recommendations or was this right?

I would assume the rockets are plastic and that's OK, figure I'll probably lose a couple right off the bat.

What would be a good starter rocket from Flis? I know I want that darn Little John, but don't want to lose it right off.

Am I going to be able to track these things ? [re: comment from Flis about losing one behind a blade of grass]

Is there a fin alignment guide that comes with them?

How in the heck is recovery attached when fingers are larger then the tubes!

I 'm sure I'll drive you nuts with more questions, once I get my stuff.
Totally fascinated by that micro-micro that used a launch lug for a body tube. What the heck do you use for a LL?

I probably have most of the required tools,but any little tips would be appreciated on some possible "special" ones.

Figuring since the Winternats are canceled, plenty of time to fool around with this, and there is a nice big park 2 blocks away.

And I will keep everyone up dated on my MMX experience as I travel over to the 'Gray' side. Kinda interesting to think I can carry everything in a small box, instead of loading up my truck, to go launch.

I just visited Quest's site. Are they actually charging Hazmat on micro motors? Man that would make shipping 35.00 on a 40.00 order!
 
Last edited:
Hey John (Micromeister), looks like we got us 'nother one in the bag :D

Blackjack, welcome to the world of the insane.

All I can say is that you really have to try it. Really get into it. You'll never look at them the same again.

As for a good first rocket from FlisKits, I would recommend something like the doo Hickey (super easy. Not the highest flier so you won't loose it.

Another easy one to build is the Teeny Triskelion

Before long, you'll have the entire fleet (fit'em all in a shoe box with room to grow :) )

As for recovery, our kits use streamers (or featherweight or glide). The streamer, frankly, is more for visibility than anything else...

Launch lugs on FlisKits Micro to the MAXX kits are small 1/10" diameter lugs that fit over a launch rod that is 0.035" - 0.050". The rig that I use is a 14" length of rod material glued to the nozzle end of a SPENT 18mm motor. I then glue a standard launch lug on the side of the casing. Now I can slide this onto any standard model rocket launch pad and convert it to micro use. Also, it fits in my range box :) (see the attached image)

Good luck!
jim

launch pad.jpg
 
Dude, if it makes noise and goes up then it's cool to me.

Rockets is Rockets...big or small I like 'em all.
 
You can get all of the micro sized parts needed to build a rocket from FlisKits. Also on his website is a body tube size converter for downscaling rockets. The MicroMaxx launch controller and pad are not absolutly nessesary. After taking the igniter out of a little plastic housing I use a Estes E launch controller.

micros.jpg
 
You can get all of the micro sized parts needed to build a rocket from FlisKits. Also on his website is a body tube size converter for downscaling rockets. The MicroMaxx launch controller and pad are not absolutly nessesary. After taking the igniter out of a little plastic housing I use a Estes E launch controller.
Hey, I use my Aerotech Interlock Controller (with the Interlock clip replaced with standard microclips) and a 12 volt battery to launch my Micromaxx rockets - the same setup I use to launch my G's! I never have any problem igniting both motors in my Diminutive Deuce!

C. J.: The Gray side?!? :p Welcome to the Light!!! :D

One way to get used to building on nano-scale without losing your mind (and going blind) is to build a few free paper rockets, either those designed as Micromaxx-sized, or else downscales of larger paper rockets (just scale them down in the Print dialog box). Both Art Applewhite and FlisKits have nice Micromaxx-scale free paper rockets at their respective websites. Building them helps you get used to the sizes of the parts that you will be working with and the scale that you will be working on. For all the usual reasons, paper Micromaxx rockets are a great way to get familiar with building teeny rockets that fit into your shirt pocket; that is, they cost next to nothing and if you screw up, just print them out again and start over.

By the way, here's a super-simple design for a Micromaxx odd-roc that is dirt-simple to build, gets decent performance, has no recovery system to pack, and is easy to track in the air and find on the ground. The design and review write-up were done by one mad Micromaxx flier and profligate forum poster -- oh, OK, it was me. :p

Another great reason to start with a few of the micro versions of Art's saucers and Jim's micro Triple Threat saucers is that they help you get used to launching and visually losing, uhhh, I mean tracking ( ;) ), Micromaxx rockets.

A couple of tips about tracking your micros in flight:

  1. Even though you only need a minimum of 15' of stand-off distance for safety purposes when you launch the little buggers, it is a good idea to get a bit further back from the pad. Even if your rocket only gets, say, 60 feet in altitude (most non-odd-roc designs will do appreciably better than that), that still means that you will be looking almost straight up as you try to follow its flight if you are only 15 feet from the pad. It is not so easy to follow an ascending rocket, especially one that is the size of a ballpoint pen, from that angle. So back up a bit in order to get a better view.
  2. It definitely helps to pick the right time of day, the right kind of sky, and the right kind of lighting conditions when you go to launch your micros. You can launch Micromaxx odd-rocs in just about any kind of daylight, against any kind of sky (sunny, overcast, or anywhere in-between); it won't make much of a difference with them. But with traditional fin-stabilized designs that launch faster and fly higher (especially smaller, simpler high-performance designs), I have found that it helps to launch them when the angle of the sun provides good side-lighting, and there is a good, strong contrast between the amount of light hitting the rocket and the ambient light in the sky behind it. I have had some of my best, prettiest flights when I have launched my micros in the middle to late afternoon against a clear sky with the Sun behind me. As the rockets ascend, they get brightly lit by the low-angled Sun and really stand out against the darkening eastern half of the sky. But don't go out too late, because you will have real trouble finding your rockets afterwards if the ground is in shadow. You can avoid that last problem by launching early in the morning, before the Sun gets too high in the sky. At this time of year, doing that doesn't require quite as much self-discipline as it does during the summer! The lighting factor is one of the reasons why I tend to fly more micros in the fall and winter (whenever I can fly at all) than I do my larger rockets.
So welcome aboard and enjoy Lilliputian rocketry!

Mark \\.
 
Last edited:
Correction to my previous post:

Well, it doesn't look like Art has any of his Micromaxx saucer designs posted on his website anymore, but he does still have his Bic Stick rocket plan there (which is a great design, BTW), along with the two Micromaxx versions of the Six. The saucer plans are available in the Files section of the Micromaxrockets group at Yahoo! Groups, though, which is another good reason to join that group. :D

Mark \\.
 
Last edited:
If you make scale micros then the decals can be really teeny. (I built one for a sport scale contest last year and the judges wrote my NAR number on it with marker because they didn't want to use a magnifying glass to prove that it WAS on the rocket.:D) To help with teeny decals, a set of tweezers are nice, I have some that I got cheap at Harbor Freight. Some are straight some angles, some spring open some spring closed. I also picked up a set of tiny files. When the fins are smaller than my fingernails there's no way I can hold one to sand a taper on the fin. Instead I can hold the fin (or glue it n the rocket and then shape it) and shape it with small files. As you build, you will decide what sorts of things will work best for you.

Paper rockets is a great idea. You might also consider modifying one of the small 13mm "fire and forget" (tumble recovery) rockets to use MMX motors and a streamer or parachute. These are actually recoverable this way!
 
Well I must have been bitten by some kinda bug last night. Decided to take the leap over to the ''GRAY" side.
Gonna Go Micro.
It will be strange building a rocket the size of my avatar! Don't know how I'll get those stickers downsized that small!

Decided to share my lack of experience with ya'll, maybe some others might catch the bug too. Couple of questions for you pro's to help me out.

If I remember correct, it was advised on an old thread to get the Quest MMX combo deal for starters. This comes with a decent controller and pad to get me started? Any other recommendations or was this right?

I would assume the rockets are plastic and that's OK, figure I'll probably lose a couple right off the bat.

What would be a good starter rocket from Flis? I know I want that darn Little John, but don't want to lose it right off.

Am I going to be able to track these things ? [re: comment from Flis about losing one behind a blade of grass]

Is there a fin alignment guide that comes with them?

How in the heck is recovery attached when fingers are larger then the tubes!

I 'm sure I'll drive you nuts with more questions, once I get my stuff.
Totally fascinated by that micro-micro that used a launch lug for a body tube. What the heck do you use for a LL?

I probably have most of the required tools,but any little tips would be appreciated on some possible "special" ones.

Figuring since the Winternats are canceled, plenty of time to fool around with this, and there is a nice big park 2 blocks away.

And I will keep everyone up dated on my MMX experience as I travel over to the 'Gray' side. Kinda interesting to think I can carry everything in a small box, instead of loading up my truck, to go launch.

I just visited Quest's site. Are they actually charging Hazmat on micro motors? Man that would make shipping 35.00 on a 40.00 order!

Welcome to the Lighter side of Mod-Rocs C.J....LOL!!
Lots to do and see. One picture is always worth a thousand words so the attached I hope will help with answering some of the questions about Materials for scratch building. Biggest thing to remember; If you can't find something locally Fliskits has a Complete line of micro Materials for sale. You can get tubes, payload sections and fin stock just about anywhere. Cones and transitions can be turned yourself or purchased. Launch lugs can come from a number of sources, Stir sticks, dollar store plastic stem Q-tips, or Drilled out 1/16" Plasticstruct tubing with a .050" bit.

Remember with micros weight as ALWAYS the enemy. build as Light as possible.
Quests original LPB's (Little Plastic Bricks) models are very Heavy, some fly OK others are real dogs. Art Applewhites 3" micro saucers get about twice the altitude of the LPB quest version..neither go all that high.
converting a couple Bic Stic pens with folded computer paper fincans is a trip. the Pen flys exceptionally well, out of sight many times.

Fliskits Triskelion is a great little flyer about the only thing i'd change is the shock line supplied is a bit thin. I think I got 3 flights before breaking the line and replacing it with 90lb kevlar.
I really like the look of the Doo-Hickey also being a T3 (.375") body and interlocking fins unit are fun.
ASP has a few scale micro kits that are pretty interesting and all are pretty good flyers as well.
Fliskits also has motors, personally I generally don't notice the Haz-mat thing as I like to purchase in multi case lots (12pks/case) minimum. which greatly helps get the cost per flight down even further.
As several have mentioned Come and join us on the MicroMaxRockets yahoo group. theres a ton of info, model plans and photos that can be a big help in finding and enjoying micros to the max;)

MM Parts-a-sm_tubes clear payload rings_12-26-04.jpg

MM Fliskits cones-transitions and parts labeled-sm_07-05.jpg

MM 258Lp18a-sm_Bic Pen on Pad_01-18-09.JPG
 
What about finishing? Do you guys fill the spirals on the micros? Or do you just smooth things out and go for light weight?
 
On the micros I've built, I tend to go for light weight, but you could if you really wanted. Seems like more of a pain than it's really worth though IMHO.
 
What about finishing? Do you guys fill the spirals on the micros? Or do you just smooth things out and go for light weight?


Depends on the model:
Some are finished just as smooth as a babies butt other Like all paper and/or competition models are left raw or finished with markers.
I don't use and other type of filler then Grey primer. most of which is sanded off leaving a perfectly smooth base for a coat or two of whatever paints.
decals are Alps printed and sealed with krylon UV clear or Microscale liquid decal film.
Here are a few examples.

s_03-03-04.jpg
 
Did you click on the big blue "FREE STUFF" link?

https://www.artapplewhite.com/free.html

Correction to my previous post:

Well, it doesn't look like Art has any of his Micromaxx saucer designs posted on his website anymore, but he does still have his Bic Stick rocket plan there (which is a great design, BTW), along with the two Micromaxx versions of the Six. The saucer plans are available in the Files section of the Micromaxrockets group at Yahoo! Groups, though, which is another good reason to join that group. :D

Mark \\.
 
Something that might be missed:
Art Applewhite is the OWNER of the MicroMaxRockets yahoo group;)

Here are a few more, Finishing types.
Gliders, Helicopters, competition PD and SD models are almost always marker or mylar finished.

MM 215a3-a01c_8thA HD RotaRoc 2-Pic_09-08-08.jpg

s_8-30-04.jpg

MM 217e1-sm_Custom Fiberglass-Mylar SD models_04-09-05.jpg
 
Here are my first two micro's, both from FlisKits. They are the Doo-Hickey and Honest John. No flights yet, hopefully this week.

100_0862.jpg
 
As soon as the attachment size limits get increased, I'll be re-posting my BT-5 wraps for Estes downscales. I was going to poste them a few days ago, but the pdf files are too large for the current limit.

So, in a few days, I'll post the BT-5 downscales of the Alpha, Cherokee D and Red Max. Might do a couple others as well - you never know! :D
 
Well it's a done deal, no turning back now.

Ordered several kits from Flis [very helpful also, to talk to] and enough parts for several scratch builds. Got a brick of motors as per Micro, enough for 100 flights, from Quest.
Talking with Nettie [ at quest] was quite the revelation, and after a little name dropping and NSL talk, she offered me a deal I couldn't refuse. So now all I have to do is wait out the arrival of my magical minute missiles!

This has got me just as excited as my L-3 project, and one heck of alot cheaper1

Thanks everyone for all the help so far, I'm taking all of it in, especially the reply about sighting the flights, by MarkII.

Is there a preferred glue for these, CA or wood?

Keep all the pics and advice coming, looks like we got some more passengers on "The Crazy Train" to Micro Land.

All advice is welcomed and taken to heart.

Boosterdude nice rockets....those are both in my order. Outstanding finish. The Honest John what started me on this adventure. I liked it enough to order 2.
Micro.....what can I say..... you all ready given me some ideas. You and Flis are responsible for this madness. lLike those paper ones in the rack. Do they fly very high, their sure big enough for micros.
 
Last edited:
I use yellow glue for all of my rockets, including micros. But I wouldn't go very heavy with the glue on these little ones. They can take a beating pretty well. I have the Honest John and Diminutive Deuce. I've opened them but I still have yet to start them, however the parts are top notch, as usual. So which ones did you order?
 
I ordered:
Doo Hickey
2 Honest Johns
Tiny Triskileon
Enough parts for 3 more scratch.

I will attempt a mini Comp 4 for the first scratch.
 
What about finishing? Do you guys fill the spirals on the micros? Or do you just smooth things out and go for light weight?
I use just about all of the same methods for finishing my micros that I use for finishing my larger rockets. I don't spend as much time fussing (and obsessing) over the finish on the nose cone, simply because there is often so little nose cone to work with! I fill spirals when necessary (FlisKits tubing often has almost undetectable spirals), seal and fill balsa and basswood fins, and prime, sand, prime, sand, topcoat and apply decals (when there are any). Same as I do with anything else. Granted, it's a bit trickier; I try to do as much filling, sealing and sanding as I can on the various parts that need it before I assemble them, but I do that with my larger rockets, too. The main things that I have learned about putting finishes on micros is to use a light touch, and that in most cases, less is more.

Mark \\.
 
If you are scratch-building, or otherwise need to cut your own fins from stock, Andy Jackson of ASP includes this tip in many of his Micromaxx kits: place a length of double-sided scotch tape onto your cutting surface, and then lay the fin stock on it. This keeps the stock in place and keeps your fingers out of the way. The same technique can be used when you want to sand fins that have already been cut, or when you seal and fill the laser-cut fins that came with your kit.

When you build and finish typical low-powered rockets, you usually just hold the part in one hand while you do apply some technique or process to it with the other hand. With micros, you often have to find some other way to hold the part steady so that you can work on it and rotate or turn it over as needed, without using your hands. Adult-sized fingers are often just too big and clumsy for some of the work that needs to be done - at least mine are!

Mark \\.
 
Did you click on the big blue "FREE STUFF" link?

https://www.artapplewhite.com/free.html
Yes, and after clicking through the "Liability Limit" page, I get to a page that contains links to all of Art's free plans. But noticeably absent are the plans for the Micro Qubits, the Micro Stealth, Micro Scimitar, Micro Delta Saucer, Micro Original Saucer and Micro Cone Rocket. Also missing are the plans for both versions of Art's Micro Monocopter, the plans for Dick Stafford's micro monocopter and his micro bicopter, the plan for the Czech micro boost glider, and Art's plans for a simple Micromaxx launch pad and launch controller. The only Micromaxx plan left on the page is the one for the Bic Stick rocket. (A GREAT plan, by the way - I have built and flown many of them, as well as buying one or two of Art's kits for that rocket.)

When I resumed building and flying rockets in 2004, after a 33 year "sabbatical," the free plans at Art Applewhite's site and FlisKits' site served as my re-introduction to rocket construction techniques! They are what I mainly built during my first year as a BAR, and in that period I built various versions of most of those plans over and over again, and upscaled and downscaled them. These plans were how I reacquainted myself with the whole process of building, flying and recovering a model rocket after all those years. Those free plans are a valuable resource!

As I mentioned before though, all of the missing plans of Art's designs that I listed above can be found in the Files section of the Micromaxrockets Yahoo! group.

Mark \\.
 
I ordered:
Doo Hickey
2 Honest Johns
Tiny Triskileon
Enough parts for 3 more scratch.

I will attempt a mini Comp 4 for the first scratch.

Jim,

In our phone conversation I missed the 2 honest john kits.... I'll add them tonight to the order and hope to get the order out tomorrow!

Great talking with you earlier :)
jim
 
Fin alignment, Micromaxx style:

Micromaxx kits usually come with a flat fin alignment guide. Marking and drawing fin lines on BT-4 and BT-3 tubing doesn't feel all that different from doing the same thing on BT-5; it is when you have to mark up BT-2.5, the Micromaxx minimum diameter tubing, that things get kind of tricky. I don't know about anyone else, but I have real trouble keeping the tube steady and centered over the guide when I try to use one to mark up BT-2.5. You can take a spent Micromaxx motor and glue it to the center of the fin guide, and then slip the tubing over it. If you are a beginner and don't actually have a spent MMX motor yet, you can substitute a short length of 1/4" dowel. (You may have to sand it a tiny bit.)

I like to use wrap-around fin guides, though; if the kit doesn't have one, I'll just print one up in VCP or VCT. And yes, I have made fin marking wrappers for BT-2.5! (I must be insane! :eek: ) They worked just fine, too! :D (See the attachments.)

And you know how many people use a length of aluminum angle to connect the markings they made on the tube in order to draw the fin alignment lines on it? Well, for BT-2.5 I use a length of 1/8" brass angle, and for BT-3 and BT-4, I use a length of 1/4" brass angle. I found both pieces in the metal parts section of my local hobby shop. You can also use styrene angle for this as well, as long as you take care to keep it from flexing.

Mark \\.

VCP screen grab.jpg

DSCF0722-TRF2.JPG

DSCF0726-TRF2.JPG
 
I've found over the years wrap around fin alignment guides cumbersome and inaccruate, partucularly on smaller tubes.

As mentioned one of the easiest ways to make a good fin marking jig is to glue a spent casing to the marking guide provided or better yet make your own permanent making guide with a scrap piece of plastic and motor casing.
Once made these tube marking fixtures will last a lifetime.

Simply layout the base piece first with a protractor and scrib the lines with an awl, nail or what-have-you. The base doesn't have to be round, drill and epoxy in the motor casing or plastic ID tube vertical aligning with a square.

I've also found a better way to extend lines on smaller tubes. but stacking two or more pices of plate glass. 6" x 6" sample pieces can be had at most any glass distrubutor 1/8, 3/16, 1/4, 3/8, and 1/2" thick pieces can be offset. layin the tube on the perfectly flay lower glass plate. rotate the tube, with a mandrel inside to keep if from flexing until your make is aligned with the top edge of the upper glass plate, extend you line as far as needed. rotate and repeat.
I've gotten so used to doing this now it feels funny and awkward to use my old stand by's aluminum channels and angles.....even on Larger tubes;)

Well crud! I thought I had a pic of the glass plates tube marking but apparently I didn't take it. I'll try to remember to take a couple this evening showing the process.
 
Last edited:
Mostly use elmer's carpenters yellow glue for all my model building Micro to Midpower, saving epoxy for fillets. and CA for competition (Flyaway Models) CA gets very brittle in just a year or so. Where as I have 30yr and older models built entirely with white or yellow glue that are still actively flying.

Ultimately the choice of glues and adhesives is the modelers.. use what your comfortable with;)


All my launcher use at least 50foot leads, why you ask. Because the further back you get the better you can follow and photograph the Launches. I actually caught more Micros at the last sport launch with my same old 5mp canon digital as I have in all the previous years launching. I thing it was simply I was trying to stand to close for the photos.

I've also noticed it's very important to add a streamer of some type to just about every model NO matter how small. I've been flying a little Nano-Dot at club launches and have yet to have anyone...with as many as 50 or more folks watching...see one on the way down... I build them a doz at a time now:( but the TeenyWeeny Crayon which is only a tiny bit larger and has a tiny white teflon streamer has been recovered 4 or 5 times. I have launched and recovered the No-see em but i think that was on a MMX-I motor.
 
I just purchased and recieved the Flis Fleet 2007. I have about 12 MMX rockets built, some kits (all Flis Kits), a paper Der Red Max and Goblin using Estes BT5 nose cones, a Mosquito and Quark conversion and a couple of downscales. Great fun, I can launch em right out on the front lawn. Below are couple of the Flis Kits.

FlisMMX3.jpg
 
I've found over the years wrap around fin alignment guides cumbersome and inaccruate, partucularly on smaller tubes. [...]
They've worked fine for me so far, anyway, but I haven't used them in too many Micromaxx builds yet. I should mention, too, that I always have to tweak the "diameter" setting to get the two ends of the wrapper to meet exactly, because you cannot just plug in the vendor's published tube OD into the wrapper tool's diameter setting box. (Because you are wrapping a piece of material around that tube's OD, your wrapper's circumference will always be greater.) If you look closely at the screen shot attached to me previous post, you will notice that the diameter setting is larger than FlisKits' published OD for BT-2.5. I keep a text document with diameter settings that have worked for me for various tube sizes in the Fin Wrapper tool in VCP and VCT.

Having to make sure that the wrapper is sized precisely right is the biggest problem with using that method, and the flat marking guide method can be more accurate, if you can hold the tube steady enough and exactly in the center of the guide as you crouch over it to mark the spots all the way around. It also helps greatly to have the end of your tube (the end being held against the guide) be exactly squared up. (Kit tubes are, but if you scratch-build, and cut your own tubes, you need to be sure to take that extra step if you are going to use this method.) Constructing permanent dedicated flat marking guides, one for each of the smaller tube sizes, with a permanent post in the center of each one, is, as you said, probably the best way to go. (VCP and VCT also have a tool to print out customized fin marking guides.) They wouldn't be that hard to make, either, because they wouldn't need to be all that big or complicated. Hmmm, I might just need to start working on making some for myself.

Mark \\.
 
As seems to happen to me alot lately I didn't get around to taking any pics of the Glass plates "tube Marking" as I wanted, got side tracked on something then completely forgot about it. I'll tie another string around a finger and try again this evening....maybe DOH!

While were on the subject of using glass plates. They are also very handy for a number of other tasks.
Over the years i've collected a number of different size and thickness Plate glass slabs for use in several areas. One that comes to mind first is sanding glider wings and helicopter rotor airfoils. Keeping wings and rotors flat is sometimes a problem and sanding even thickness airfoils sometimes a challange. Years ago I purchased a 12" x 24" x 3/4" thick piece of scrap storefront Plate glass. The glass company cut and ground the edges smooth. With it and a roll of double faced masking tape it makes pretty quick work of sanding Glider wings, stabs and tons of Helicopter rotors.
Since it's very close to dead flat (nothings perfect;)) it makes a great base for precision assembles, setting angles and squares. With the addition of other smaller 6" x 6" pieces of glass, positioning and square assemblies are made much easier. Add a few precision steel squares, blocks and bars you can fit up and glue just about anything.
Using D/F masking tape to hold parts while sanding rotors, fins and wings as Mark mentioned is pretty much a breeze. Freeing both hands to hold the sanding block and your balance. Double faced Scotchtape is a little easier to find, both may need to be slightly "de-tacked" by repeatedly touching the tape strip on the glass with your finger, not to much, but enough to slightly reduce the tapes grab. If you can find D/F masking tape it seems to retain its holding power longer in the balsa dust environment. I've also found a very thin artist plastic pallet knife is an idea tool to help free the thinly sanded part from the tape.
Here are a couple shots of the Glass plates being used as assembly fixtures and a roll of D/F masking tape

MM 318p02_Body-pods&motor mount in_07-22-06.jpg

MM 318p04_Saddles applied_07-22-06.jpg
 

Attachments

  • MM 313-pa6-sm_head-on align w 2deg.+ Incidence_08-25-05.jpg
    MM 313-pa6-sm_head-on align w 2deg.+ Incidence_08-25-05.jpg
    74.3 KB · Views: 17
One more Home made tool I've found very helpful are these building, part attachment and decaling jigs. the Larger one has a 1/2" (13mm) dowel spindle base with spent 18 and 25mm motor casing slip-on adaptors, i've since added an 18 to10.5mm casing and a 7.1mm micro stem to the 1/2" core dowel so this fixture can be used with any size model Micro to D size motor mounts. The free rotating spindle wheel allow the motor mounted model to be repositioned at will, without touching for detail painting and application of decals or other parts.

The smaller micro fixture was downsized just for micro building with extra 7.1mm holes for additional support dowels while drawing paint or decaling more then one model at a time.

Both are made to stand in either horizontal or vertical postions for fin and parts attachment and alignment.

Both are built from scrap junk wood (1"x 2", 2"x4"s etc) and other odds and ends found floating around the woodshop. I seem to recall the outside turning wheels were scrap from holesawing clock movements and rejected candle holder turnings.

I've had the larger one more the 20 years now, short of shows once you make a tool it'll be around a long time;)

Std  Assembly & Detailing jig-c-sm_2-pic Pg_05-15-04.jpg
 
Back
Top