mikekebert
Keep the pointy end up!
I built my first model rocket at cub scout camp when I was 8 or 9. A few decades and about a dozen Estes models later, I earned my Level 1 certification on July 31st, 2021 at LDRS 39. What a great event! With the help of UROC and Tripoli staff, some total strangers, and some beginner's luck, my certification flight went about as perfectly as one could hope for. Here are a few pictures if you're interested: https://www.rocketryforum.com/threads/ldrs-39.154954/page-5#post-2165708
Now I'm hooked more than ever.
I've laid out a roadmap for myself to work up from Level 1 to Level 3, slow and steady. I live 4+ hours from any high power clubs and launch sites I know of, so my launches will be infrequent and it's going to take me a while.
In order to get to Level 3, and sometimes as a fun detour on the way, I have some things I want to explore:
Blue Star

This rocket has 3 main purposes: allow me to work through a range of 38mm motors, use a single altimeter to deploy at apogee, and to install and use a tracker in the nose cone. Because of the risk of not having a backup deployment method, I hope to be at this stage for a short time. I'll probably launch this one on 3-4 increasingly powerful I motors.
Deep Blue Star

This rocket is a big step up in complexity because I'm looking to get redundant dual deploy working. It uses the exact same booster and nose cone as Blue Star to help minimize new work and unknowns. This one should fly on 3 different J motors I have picked out.
Green Star

This rocket will use the same redundant dual deploy e-bay as Deep Blue Star. New elements will include a nose cone tuned for flights at 80%+ of Mach 1 and a booster built for 54mm motors. I hope to fly this one on high Js and some low Ks.
Deep Green Star

This rocket will use the same nose cone and booster as Green Star. The new element here is an extended e-bay to allow space for cameras and to improve the stability margin for rockets approaching or exceeding Mach 1. I want to fly this one on low to mid K motors.
Deep Red Star

The final rocket in the series is the craziest and may not be possible with mailing tubes at all (or would require fiberglassing them). It uses the extended e-bay from Deep Green Star but includes a new booster that will be a minimum diameter 75 mm setup. The nose cone will be exactly the same as the Green Stars but will be new simply so I can paint it red. If this rocket ever comes to be, I want to fly it on high K and from low to 80%ish L motors.
Some general notes about the rockets:
There will be changes and challenges along the way, but man is it going to be fun!
Now I'm hooked more than ever.
I've laid out a roadmap for myself to work up from Level 1 to Level 3, slow and steady. I live 4+ hours from any high power clubs and launch sites I know of, so my launches will be infrequent and it's going to take me a while.
In order to get to Level 3, and sometimes as a fun detour on the way, I have some things I want to explore:
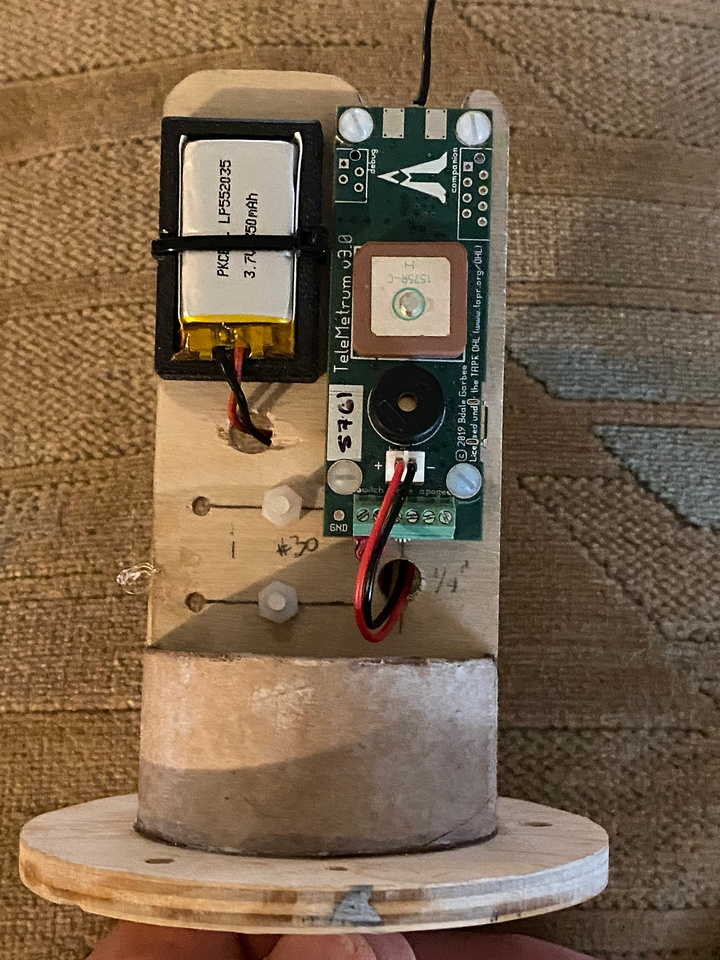
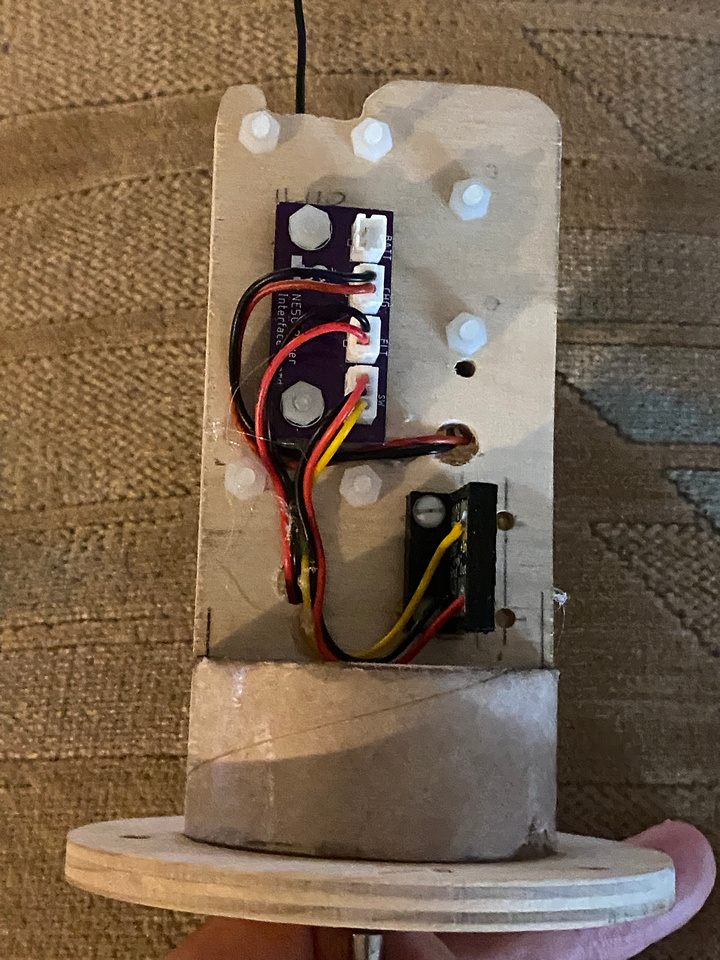
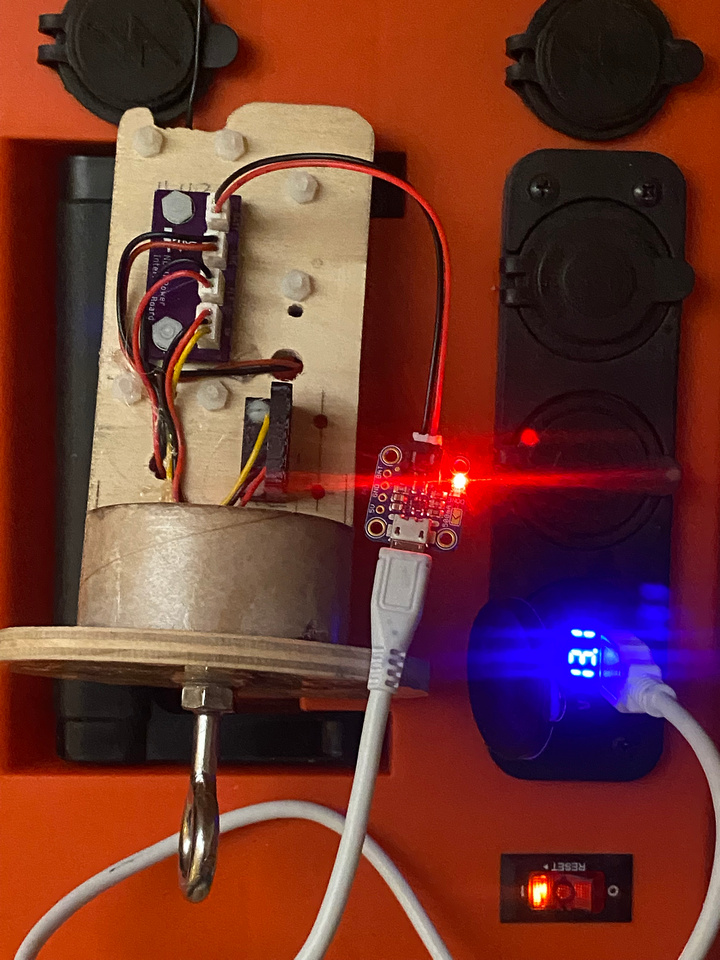
- Electronics. Altimeters, trackers, dual deployment, and cameras.
- The speed of cardboard. I have a big pile of 3" mailing tubes and I'm going to see how far I can push them. With care, I hope to go to about Mach 1.5. See https://www.rocketryforum.com/threads/what-is-the-speed-of-cardboard.161482/ for some of my inspiration. I may need to fiberglass them to get there, and that will be good learning, too. Or I will decide I hate them and switch, we'll see!
- 3D printing. I have a new 3D printer and I would love to make some of the following things for my rockets:
- Centering rings and bulkheads. With tube sizes that may be off from other rocket supplies, it may be important for me to be able to repeatedly create my own. If these suck, I'll switch to ordering custom cut plywood or give in and skip the mailing tubes.
- Avionics sleds. I have seen some inspiring work and when well done, printed sleds are so clean and tight.
- Nose cones. I would love to make some fancy nose cones that allow for tracking devices and adjustable weights. I want to make some harder-to-find shapes as well, such as some elliptical profiles.
- Drilling guides. I want to be able to reliably place holes for rivets and shear pins in the same place every time. See the next point for the reason why!
- Interchangeable and repeatable parts. I would like to be able to share parts among rockets and more quickly produce replacements for when stuff breaks or gets lost. This could also help me share some useful creations with others.
Blue Star
This rocket has 3 main purposes: allow me to work through a range of 38mm motors, use a single altimeter to deploy at apogee, and to install and use a tracker in the nose cone. Because of the risk of not having a backup deployment method, I hope to be at this stage for a short time. I'll probably launch this one on 3-4 increasingly powerful I motors.
Deep Blue Star
This rocket is a big step up in complexity because I'm looking to get redundant dual deploy working. It uses the exact same booster and nose cone as Blue Star to help minimize new work and unknowns. This one should fly on 3 different J motors I have picked out.
Green Star
This rocket will use the same redundant dual deploy e-bay as Deep Blue Star. New elements will include a nose cone tuned for flights at 80%+ of Mach 1 and a booster built for 54mm motors. I hope to fly this one on high Js and some low Ks.
Deep Green Star
This rocket will use the same nose cone and booster as Green Star. The new element here is an extended e-bay to allow space for cameras and to improve the stability margin for rockets approaching or exceeding Mach 1. I want to fly this one on low to mid K motors.
Deep Red Star
The final rocket in the series is the craziest and may not be possible with mailing tubes at all (or would require fiberglassing them). It uses the extended e-bay from Deep Green Star but includes a new booster that will be a minimum diameter 75 mm setup. The nose cone will be exactly the same as the Green Stars but will be new simply so I can paint it red. If this rocket ever comes to be, I want to fly it on high K and from low to 80%ish L motors.
Some general notes about the rockets:
- All the boosters except for Deep Red will feature 3 or 4 centering rings and through-the-wall fin mounting.
- I went with low-span trapezoidal fins with long roots to maximize strength and minimize flutter. The body tube extends just beyond the fins to minimize the chances of the fins breaking off. At the lowest level, I'll be using 1/8" basswood, and I'll beef the fins up as needed.
- The launch lugs depicted in the images are just used as placeholders for 1010 rail buttons. When I find a way to bring those in to OpenRocket, I'll swap them out. The rail buttons will be screwed into centering rings for mounting strength.
- Just about everything will be epoxied. I'm pretty comfortable working with epoxy and I will need all the strength I can get.
- I aimed for stability margins of around 1.5 for sub-Mach rockets and for around 2 (or as close as I could get to 2) for Mach+ rockets.
- I used an elliptical nose cone for flights up to Mach .8 and an LV-Hack nose cone for faster than that.
There will be changes and challenges along the way, but man is it going to be fun!
")