Baffle Concept

The Rocketry Forum

Help Support The Rocketry Forum:

This site may earn a commission from merchant affiliate links, including eBay, Amazon, and others.

Weldo

Washing Hands
Joined
Feb 28, 2020
Messages
141
Reaction score
50
Location
Pittsburgh, PA
Howdy gents! I've been curious about baffles for a while now and just tried my hand at a design I've not seen before.

I'm trying to learn a little Fusion 360, so this made a good exercise! All I got is some screen caps though. I'm not yet sure about exporting and sharing and all that.

First up is a orthogonal view. It's actually two separate pieces. Imagine this whole unit is shoved into a body tube. The idea is that the gases will enter the baffle chamber from the series of holes about the circumference of the aft bulkhead. The gases will then swirl around until they find their way to the center tube, which is spaced just 1/8" from the aft bulkhead, and on to the parachute bay through the fore bulkhead's center hole. Hopefully the gases will be sufficiently cooled by the time they reach the chute.

Baffle Concept 01.jpg

A straight on side view.

Baffle Concept 02.jpg

And finally a simple diagram done in OpenRocket trying to anticipate the path of hot gases.

Baffle design.jpg

I haven't built anything yet to test but I'm looking for second opinions on the plausibility of the design.

Thanks!
 
If you have room for the baffle... why not just make the endplate solid... and let the spool push out the recovery device?
 
Imagine this whole unit is shoved into a body tube

Put it in a coupler?

Hopefully the gases will be sufficiently cooled by the time they reach the chute.

I don't think a baffle gives the gasses that much more time to cool (the thermal conductivity of air is really low and not much of the gas will come into contact with the surfaces of the baffle -- which will also be poor conductors of heat), but it does intercept the burning solids.
 
That's a great practice on F360! Yes cylindrical objects are how I started out too! Also hmmm, seems like a cool concept, but I'm not really sure it would cool the gases fast enough. When that ejection fires, it's fast and it will punch through. I would focus on protecting the chute, rather then cooling it. Also I feel like you might lose some pressure due to the unnecessary cavity the gases must go through. But once again, this is a super cool concept. I think Maybe a piston ejection system would solve most of the issues
 
Put it in a coupler?


I don't think a baffle gives the gasses that much more time to cool (the thermal conductivity of air is really low and not much of the gas will come into contact with the surfaces of the baffle -- which will also be poor conductors of heat), but it does intercept the burning solids.

Bingo! Intercepting the buring chunks of BP is where baffles shine, they also allow the laundry to be kept away from directly against the ejection charge well.
 
Put it in a coupler?


I don't think a baffle gives the gasses that much more time to cool (the thermal conductivity of air is really low and not much of the gas will come into contact with the surfaces of the baffle -- which will also be poor conductors of heat), but it does intercept the burning solids.[/QUOT

I too believe this is the key to how baffles work. Not cooling the gasses, but stopping/trapping the hot solid particles that do real damage.
 
Not sure how I screwed up the last post where I tried quoting jlbrasca (sometimes me and technology don't agree).

I too believe that the key to baffles is not "cooling" the charge, but trapping the hot, solid particles that do the real damage.
 
I see. I was under the impression that if a baffle is utilized, then wadding and chute protectors were unnecessary. Perhaps that is a flawed assumption.

I also toyed around with the idea of filling the baffle up with stainless steel ribbons, like a pot scrubber. Then it would kind of be like a car muffler.

If you have room for the baffle... why not just make the endplate solid... and let the spool push out the recovery device?

That would be considered a piston ejection system, correct? Such a system is another way to eliminate the need for wadding. But to keep things light and simple how about just using a piece of rigid foam insulation? Like a green foam board you can buy at Lowes. You can get it in various thicknesses.
 
I see. I was under the impression that if a baffle is utilized, then wadding and chute protectors were unnecessary. Perhaps that is a flawed assumption.

Your assumption isn't exactly incorrect, just incomplete. Imagine a rocket with regular ejection and no wadding. There is "cool" air in the space between the recovery setup and the top of the motor. when the ejection charge fires, the gasses pressurize the body under that cool air, so the cool air does the actual work of pushing the nose off. The problem here is that burning chunks of ejection charge material, bits of propellant or delay grain that never made it out the nozzle, and a blast of flame move forward along with the pressurized air, but move fast enough to burn the recovery system before it has the chance to exit the body. With a baffle, those hot particles and flame are stopped in the same way that a car muffler is also a spark arrestor. At the same time, the hot gasses pressurize the bottom end, thus pushing the cooler air up front to pop the nose off. Therefore, a properly built baffle DOES allow one to forgo the use of wadding and chute protectors. The baffle doesn't cool the hot air, but rather lets the pressure buildup to do its thing without the hot debris striking the recovery setup.
 
Thanks for that explanation! It makes more sense to me now.

In that case I believe my design may be suitable. Might be worth a prototype!
 
If I may suggest something to add to your design, cover the bottom of the first disk with a coat of JB Weld or a couple layers of aluminum tape. By itself, I think your baffle design will work well, but there is a chance that after several flights, the bottom disk will be damaged by the hot ejection material and you could end up with a burned hole in the center that will allow those hot chunks of material to pass right up the middle and through the baffle altogether. With a coat of JB Weld or the aluminum tape, those materials can take considerably more abuse than the wood disk by itself, and your baffle will last longer.
 
If the pictures are to scale, the spacing between the core tube and the front plate looks too small to me. I'm never sure how to calculate how much open space must be provided for airflow, but just subjectively it seems like it should be more than that.
 
If I may suggest something to add to your design, cover the bottom of the first disk with a coat of JB Weld or a couple layers of aluminum tape.

Noted! Thanks!

If the pictures are to scale, the spacing between the core tube and the front plate looks too small to me.

It's very possible that you are correct. I wanted to keep it to a minimum but I'm not sure if it's too small. In the drawing it's 1/8" but it could probably go up to 1/4" and still work as intended.

As far as calculations I would estimate that if the surface area of the cylinder of space is about the same as the area of the inner diameter of the central tube it should flow roughly the same.
 
As far as calculations I would estimate that if the surface area of the cylinder of space is about the same as the area of the inner diameter of the central tube it should flow roughly the same.
That sounds reasonable. If my calculations are correct that would put the spacing equal to diameter/4.

How bit is your central tube, and how big is the motor mount? I always worry about providing adequate airflow for the ejection charge, and never know how to calculate the requirement.
 
Just like car exhaust systems, you don't want a backpressure buildup because of going through a reduction in space. Maybe a better idea would be to calculate the area of each of the holes in the first disk, and have the open gap at the base of the central tube be the same or greater.

For example, if your disk has eight holes .25" in diameter, that gives a total open area of .392 square inches. From there, suppose you are using a 24mm tube for the central part. The circumference of that tube is 75.4mm, or 1/32" short of three inches, so let's call it three inches. If you cut a cylindrical tube and flatten it out, you get a rectangle, right? So, imagine the open space being a cylinder flattened out. The length is 3 inches, and the total area is .392 inches. .392 divided by 3 is 0.1306667. So, an eighth inch is 0.125", so that is a bit too small, but a 1/4" is plenty big. When it comes to the gap you want between the central tube and the first disk, bigger is better until you begin to allow a direct path for burning material to pass.

To mitigate that problem, one idea is to fit short tubes into the first baffle disk holes so the burning material and flame MUST pass your central gap before they can turn around and enter the gap. The added tubes don't have to be very long, maybe a quarter inch longer than your open gap. See below my terribly done MS Paint edit to your design:
Baffle Concept 01.jpg
 
The central tube is 1.125" OD and 1" ID. I ran the numbers as well and it looks like 1/4" space is about equal to the area of the 1" ID. The holes in the aft bulkhead are 1/2". This was for a rocket with a 3" ID tube but it could be scaled down or up. You'd have to figure out the hole and gap sizings as @ebruce1361 has done above.

As far as placement I figured this whole baffle unit to be placed well forward of the motor mount, toward the middle of the rocket body. My thinking was that the further the baffle is from the ejection charge, the more effective it may be.
 
Mounting it further forward also moves the CG forward, so it's a win-win.
So long as you have room for shock cord, recovery gear, nose shoulder and nose attachment point, also any electronics such as altimeters, in the remaining forward compartment space.

A big baffle plus is it keeps the shock cord attachment away from the motor. Let’s just say the “flameproof” qualities of Kevlar are heavily overrated.

If you have a plastic chute, and you use sheet wadding, doesn’t hurt to put a sheet between your baffle and your chute, Call it insurance.
 
Ya know, I've never had a plastic chute work properly for me. Maybe once in 15 flights. I've tried them with Estes kits with even more wadding than recommended and every time I see failure to deploy or a half inflation with a tiny spot on the chute welded together.

It may be me since I'm pretty new at this but I've made a few parachutes from a space blanket and they seem to work more reliably.

It's been suggested to me to try cellulose insulation in lieu of sheet wadding. I haven't tried that yet. Bummer is that we just did a demo job a few weeks ago where we threw away literally over 20 contractor bags full of the stuff! That was before I knew it had rocketry applications!

I like to use one sheet of Estes or Quest wadding as a cup for the dog barf, the trick I have found to using Estes type plastic chutes is to open them up and re-fold them if stored in the rocket between flights, coat them with a little bit of Talcum powder (not baby powder made with starch but the real talcum stuff), and don't use them in cold weather, other than that I have some that are nearing 30 or more years old that still work.
 
As far as plastic parachutes go, the ones that come with Estes kits are good for lightweight and relatively rugged models like the Alpha or Alpha III for one or two flights. For anything bigger than that, I like to make my own. I recently started sewing ripstop nylon chutes, but that is time consuming and more suitable for BT60 and bigger models. For smaller ones, I use a single layer of a heavy duty black trash bag cut into an octagon of whatever size is appropriate, and 0.5mm nylon cord for the shroud lines. To reinforce the mounting points, I stick on a strip of duct tape folded over onto both the top and bottom of the canopy, and pierce through it with a sharp pencil or something similar to thread the shroud line through. Granted, a trash bag parachute still has some of the potential issues of the Estes chutes, but the lack of printed ink on the parachute reduces some of the sticking issues, and since it's thicker plastic, it's more difficult for the motor ejection to melt the chute to itself.
 
FWIW I get many flights out of my plastic chutes, and still use them in many of my new rockets. My Solar Warrior has six flights on it and the parachute is still mint.

Certainly, one mishap (e.g. failure to eject) can end its life, but if you're careful with wadding those mishaps can be few and far between.
 
One belated comment on the above design: it looks like it will be pretty much impossible to shake the little hard fragments out of the baffle as they accumulate. Different baffle designs vary in how they behave in this regard.

This may not matter.

That's a good point.

Regarding plastic chutes, I know lots of people use them with success which makes me feel like I'm the odd man out with my failures. I like the idea of wrapping a bit of cellulose with a sheet of wadding. I may adapt that to use even without the cellulose. Maybe wrap the chute in a sheet or two in addition to stuffing several sheets into the body tube. And the powder thing probably helps too.
 
For plastic chutes, ideally they should be packed just before flight. If you pack them the night before, I think they stiffen up or memorize their folded position.
 
Maybe that's my main problem. Most of my plastic chutes have been folded up for months! Next time I fly one I'll unfold it and ruffle it up a bit before repacking.
 
Maybe that's my main problem. Most of my plastic chutes have been folded up for months! Next time I fly one I'll unfold it and ruffle it up a bit before repacking.
Best suggestion, if you can't store them open* , is to at least open them up the night before, then apply talc and refold as close to launch time as possible.

* "Open" is probably not the right word; intent is to remove them from the rocket and hang them by the snap swivel, so at least they're not crunched up
 
Definitely! Even with nylon parachutes and streamers, I unpack them and fluff them out completely at the launch site before repacking them. I don't think I've ever flown a rocket that had the recovery packed for more than an hour before launch.

As @neil_w said, the best option would be to leave the parachutes unpacked and hanging "open" when in storage. However, I (and I'm sure a lot of others as well) have space limitations at home and I am concerned about tangling or snagging the parachutes. For small rockets with plastic chutes, I pack them loose and without folding them in half (if the length of the body tube allows). For nylon chutes, I always make mine with really long shroud lines, so they can get tangled if stored in that manner. For those, I fold them as I would for flight, and secure the bundle with an elastic hair tie. Once at the launch field, I open the parachute, tug on the mounting point a few times to get air fully into it, and let it lay loose for a few minutes while I load the motor or fill out the flight card. Then, it's repacked and walked to the pad.
 
Last edited:
Right on! Thanks guys, these tips are gonna help me out for sure!

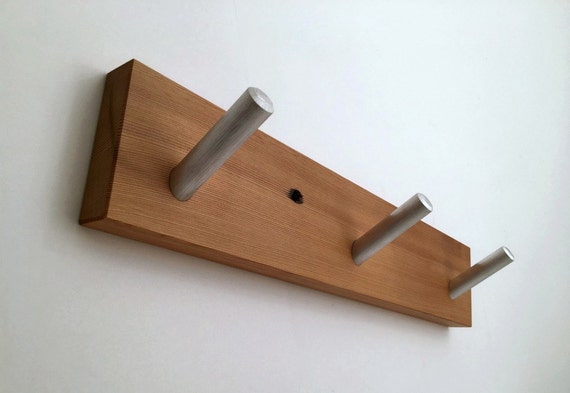
Now I'll probably spend the next hour looking around the house for a space to put something like this up...

il_570xN.1112418291_dxwa.jpg


Chute rack!
 
Back
Top