Show us your switches

The Rocketry Forum

Help Support The Rocketry Forum:

This site may earn a commission from merchant affiliate links, including eBay, Amazon, and others.
That’s pretty neat. Do you check the foil for cracks before flight? In the photo it looks like one may be starting. I would be tempted to use copper braid instead of foil.


I concur. This is a very unique solution.

I am very impressed with the variation of switches.
 
Last edited:
That’s pretty neat. Do you check the foil for cracks before flight? In the photo it looks like one may be starting. I would be tempted to use copper braid instead of foil.
Steve,
I haven't checked them before but I will now. I did take that switch apart and I don't see any cracks. There is a crease in the foil that I will fix because it is a weak point. I usually put the foil on both sides of the switch block for redundancy.
 
I haven't checked them before but I will now. I did take that switch apart and I don't see any cracks. There is a crease in the foil that I will fix because it is a weak point. I usually put the foil on both sides of the switch block for redundancy.
Thought about using something like brass shim for the contact? Might be more robust.
 
Thought about using something like brass shim for the contact? Might be more robust.
G'day Mate. I hadn't thought about trying that. I have the shim stock on hand it just seemed so easy to use the single sided pcb material and the thin copper foil. I got the foil for another project from a luthier supply store.
 
Here is my version of the screw switch and ebay. It fits inside a 54mm coupler. It is made from a sandwich of single sided PCB and 3D printed PLA. It is made tall enough to place the switch just beneath the body of the rocket to make it easy to reach with a screw driver. I used copper foil for the connections from top to bottom of the stack. During assembly I can adjust the friction on the screw so that it turns easily with a screw driver but wont turn due to vibration.
View attachment 382269

The top view of the rest of the ebay. There is a cut out area underneath each altimeter to allow for the components on the bottom side of the PCB. The board are spaced off the surface of the sled by a flat washer to allow air flow.

View attachment 382270

The bottom of the ebay. I don't like the idea of putting tie wraps around LiPo batteries to hold them in place so I created a well with a cover to hold mine in place. The SL-100 is powered by two batteries wired in series. Each battery has a plug so I can just unplug them to recharge them.
View attachment 382271

The ebay has survived several hard landings with no ill effects. Not the lightest way to build it but it works for me.

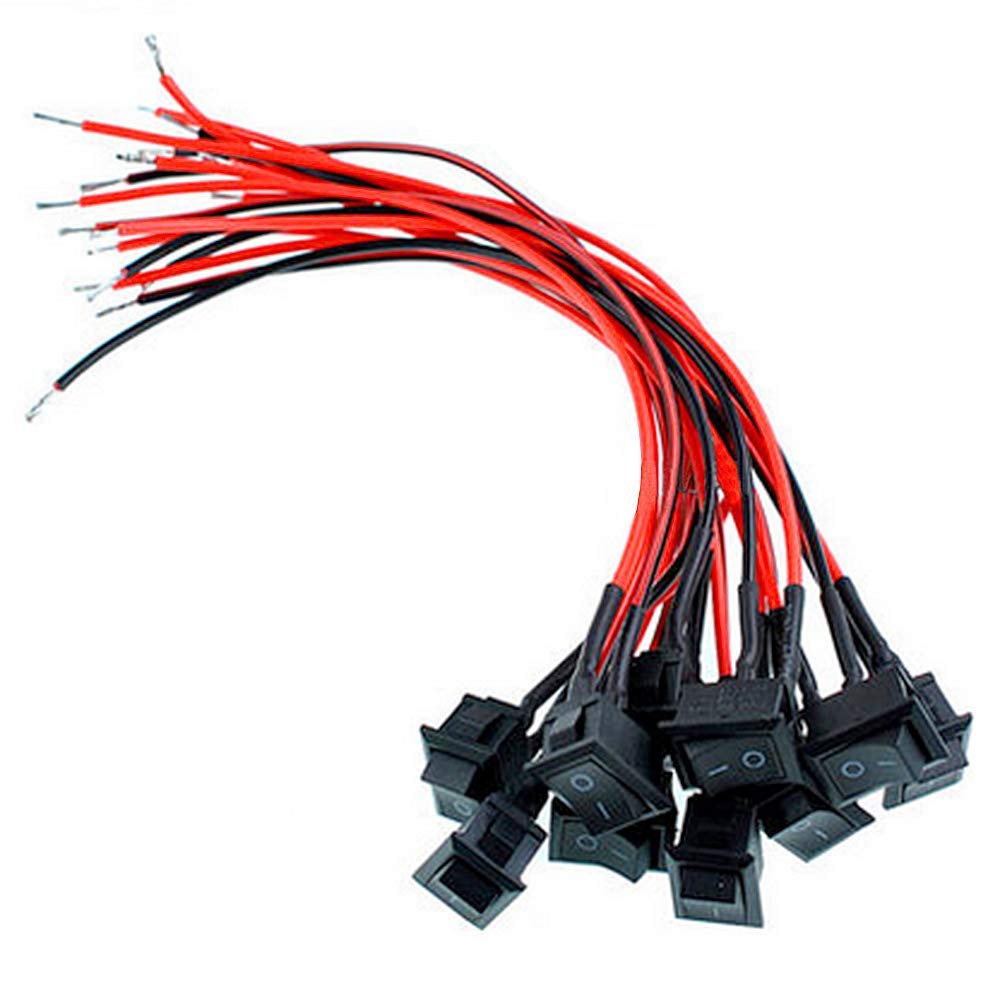
I've used apogee push switches on mid power rockets well enough, but for my L2 I used these flat rocker switches
They're not tiny, but they're solid and don't have much unsupported mass susceptible to g-loading.

Only good view of them in use I have at hand is from laying out the ebay on Long Tom

61boyCMYegL._SL1000_.jpg
20180624_231209-jpg.356456

Two more fantastic options!
 
I would never recommend this. The transients introduced to the avionics when you’re twisting and taping could result in the avionics being left in an unexpected state.
This is for general sport flying. For high performance rockets I use screw switches. If you don't get a completely normal startup sequence don't fly the rocket!
 
This is for general sport flying. For high performance rockets I use screw switches. If you don't get a completely normal startup sequence don't fly the rocket!

That presumes the ejection charges don’t blow as a result of an abnormal startup sequence. I think most altimeters now have de-bounce protection, but I’ve had AltAccs blow charges as a result of transients on startup.
 
I like MissleWorks screw switches that I arm through the airframe, the static port holes providing my access to the arming screws, and no switch band. Photos are of a 3" AV Bay. The sled goes from rocket to rocket while each rocket gets its own AV Bay...

IMG_4746.JPG IMG_4744.JPG IMG_4743.JPG IMG_4742.JPG IMG_4740.JPG IMG_4739.JPG IMG_4738.JPG
 
+3 on the Featherweight magnetic switches. I have them in three of my rockets and am considering buying more.
 
Anyone know where I bought these from? Would like to buy a few more, and I simply cannot remember where I got them from. Searched several of my go-to vendors and do not see this kind with the terminal block at the end of the switch.
IMG_20191027_124035.jpg IMG_20191027_123911.jpg IMG_20191027_124004.jpg IMG_20191027_124035.jpg
 
Designed and made one of these from scratch. uses a standard microswitch and has a lid to keep things neat. Used with pull-pin and "remove before flight" flag. I plan to install it in the av bay with the lever down. 2019-10-27 15.33.11 (Medium).jpg
Pin in, "off" position.2019-10-27 15.33.22 (Medium).jpg
Pin out, "on" position.

I was using a Radio Shack headphone jack the same way, and while the can take the G forces in the correct orientation, they are fragile mechanically. I broke mine by bumping the pin against the launch rail. Fortunately, it broke in the "on" position!
 
You’re right. I should have said bounce protection or a debounce circuit. Mea culpa, mea culpa, mea maxima culpa. [emoji20]

https://www.allaboutcircuits.com/technical-articles/switch-bounce-how-to-deal-with-it/

the article, while informative, does not apply to the microcontroller chips used in the alitmeters. Early microcontrollers did not have any built-in protection that basically delayed startup of the micro until power was thought to be stable. They required a capacitor, resistor, and typically a diode on the microcontroller's reset line. When power bounced off the diode would drain energy from the capacitor and when power bounced on, the capacitor would charge through the resister. If the reset pin managed to reach a threshold voltage, the microcontroller would start at a boot location and run code.

I know a lot of people use the Shurter switch - it is not a power switch. It is designed to route wires when power is not applied for voltage selection in some 110v/220v powered device. It is not designed with any concern for switch bounce or even long term usage as a switch (it was meant to be used a few times switching to whatever line voltage you have in your house or work). The slide versions of a voltage selector switch are better than the rotary one at least for the switch bounce aspect. I can't comment on switch longevity for those.

At least the microcontrollers I design with have some digital counter available that holds off the micro from starting up too soon.

If you are using a commercial switch that is designed as a power switch, then whatever you do should be just fine.
 
If you can get some images of the markings on the case, we might be able to find the part.
 

I made a round tube with 2 4-40 brass nuts printed inside by departed by 2mm of plastic filament. I then solder wires to the nuts. A screw completes the circuit.
 
No physical switches. Plug the Quantum in at the prep table. And magnetic switch on the power perch. 1025190439.jpg
 
Back
Top