What did you do rocket wise today?

The Rocketry Forum

Help Support The Rocketry Forum:

This site may earn a commission from merchant affiliate links, including eBay, Amazon, and others.
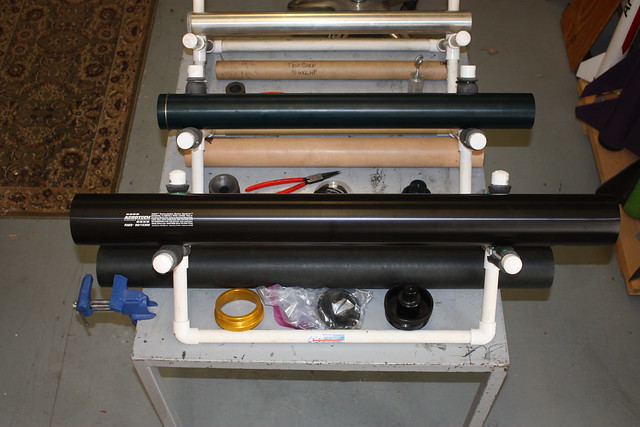
How well do those adapters hold up to the heat of a composite engine?

I use the 24 to 29mm adapter quite often with CTI motors. They work great! It just takes a little work with a Dremel so that the front of the motor can fit through the front of the adapter. I also sand (grind) off the bottom of the motor closure. The bottom of the adapter gets charred a little from the exhaust. I haven't had a set become unusable.

IMG_20190825_134058185.jpg
 
Inventoried the boxes of motors under my bench. I am well supplied with everything but B6-4s and D12-5s. The pile of HPR composite motors makes me sad.

There is a slim (but real) chance that I will get to Sheridan for the September OROC launch. I want to test the "loomed fiber" (Velcro™️) shock absorber that I was too timid to load for my L2 cert flight, and I have two in-progress HPR projects (as well as the TAO bit of nonsense) that I really want to launch.
 
Last edited:
Finished packing the toy hauler for LDRS. Drove over to the truck scales, numbers look better than last year. Came back and built another 76/6000 NYWR motor. Sharon thinks we don't have enough of this formula for this launch. :rolleyes:
 
The "Blue Streak" looks done after many delays between finding times to spray paint. The rocket itself, being very basic, went together in less than an hour. I hope that it fulfills the 30 second streamer flight criteria for NARTREK bronze. It needs something besides just "blue," though. Hm. Custom decals. I'll have to look into those.
 

Attachments

  • IMG_7625.JPG
    IMG_7625.JPG
    68.6 KB · Views: 38
So, I’ve been working on my shop (rocket barn) for the last few years. It sits on a pad and the water would come under the sill when it rained hard or when the snow was melting, so two years ago, I took off the bottom few boards to run ice and water shield covered by flashing up the walls and down along the foundation. I gave it a coat of stain after putting the boards back on. My wife and I did some planting last year and it was looking great, but since this is the first thing you see when you come up the driveway, I wanted some art for one big wall. I thought about a wagon wheel with some flower pots or some bicycle art. My wife and I had talked about mounting a rocket that looked like it had launched through the eves. So, since I acquired a rocket this summer that was taking up a lot of room in the middle of the floor, I came up with this. I put it up quickly while my wife was playing in a golf tournament and the responses was good, but you could see the Unistrut and pressure treated stand offs. So, those got painted and stuck up this morning for good (or at least until it gets launched.)

What do you think?

IMG_20190825_103345037_HDR.jpg
 

Attachments

  • upload_2019-8-25_14-52-28.jpeg
    upload_2019-8-25_14-52-28.jpeg
    347.8 KB · Views: 24
Good results with the Triple 7, how close are the amounts used to the predicted amounts by a black powder calculator?

It takes quite a bit less Triple 7. It is hard to say for sure, though, I haven't done a good, direct A-B comparison. The BP gets loaded into a traditional charge well, and I load the Triple 7 into a centrifuge canister. I put a small hole in the bottom for the e-match wires. There is only enough Triple 7 to surround the ematch. I ought to just take a photo. I only get good results with the Triple 7 when it is well contained, I glue the lid on the centrifuge canister. That is very convenient for small BT-55 and BT-60 rockets where there isn't much room. I also really appreciate how much cleaner the Triple 7 is, it leaves behind very little residue, compared to BP.
 
Yesterday and evening:
Lightened my build pile by three.
Fliskits Charon, V-2, and ARS MX Hurricane.

I really like that Charon; Fliskits rockets are just genius. I'll be really curious to see how such asymmetric design flies. Knowing Fliskits, I'm sure it will be great. I ought to add that to my bucket list, build all Fliskits.
 
I put two flights on my Mini Bertha with B4-4 motors, plenty of power for a small park with lots of trees! Put one flight on my Mini "A" Heli which didn't go so well. Even while building it I didn't like the cardboard parts used for the hinge part of the rotors. Being careful to coat them with thin CA they still get loose really quick. On the next one I think I'll use some thin model airplane ply in place of the cardboard. When the wind slows down, I'll put the 3rd light coat of white primer on my Patriot. In my last post someone asked for pics but I don't have any of the Patriot yet, but here's one of my Airborne Surveillance Missile. The clear coat is FINALLY dry! 20190820_192229.jpg
 
I'm starting slog 2 through the AutoCAD archives. Things are starting to organize despite themselves. I have a folders for glider prototypes pf the '90s and another folder for glider prototypes of the 2000s. Tonight I'm going to try and solve some chronic elephant foot on the 3D printer.
 
Added an Estes Mean Machine and Vagabond to the fleet! The Vagabond was mostly built a few years ago, but it sat unfinished in my workshop for the longest time after my cat chewed on the fins. This weekend, I dusted it off, fixed up the fins and gave it a good coat of paint. I did a build thread for the Mean Machine over in the LPR section for those interested.

IMG_5534.jpg

IMG_5532.jpg
 
Did some preliminary testing of firing an e-match using a 50 ft long 14 gauge 120v extension chord... using a small 9 volt battery, like the one's used in smoke alarms.

Worked just fine.
 
Cut and prepped fins for the Viking project.
IMG_20190825_171010.jpg

Drilled holes in the payload section for the altimeter. I found an unused fishtank filter in the garage and was able to fashion that into a snug foam housing for altimeter.
IMG_20190825_171141.jpg
 
Looking at flight data from my Eggtimer Proton. Flight data in blue, OpenRocket sim data in red.

The accelerometer data is a great match - look at the trust curves in the lower left. And the accelerometer derived altitude is a good match to the sim. The baro-alt is way high - but I think that how I made the avbay ports.

It's beautiful, right up to the CATO.

2019-08-25.png
 
IMG_2304.PNG IMG_2303.jpg

Tested drogue and main deployment charges on my MD38 build.
I put the rocket on a launch rail laying horizontal.
This allows the rocket to move rearward more closely simulating a free body separation.
Looks like .5gm for the main and .8gm for the drogue will work about right.
 
Bonded the grains for an AT N2200-DM and layed out everything to assemble 3 of the 4 motors I am planning to fly at LDRS. All grains have been bonded to the liners for an M1205-VOL and L-1050-VOL. Realized I was out of smoke grains so I fired up the mixer and poured a few. Finished the afternoon and evening prepping 3 altimeter bays - 1x3" / 1x4" / 1x6"
Tomorrow morning I will start with motor assembly then time to hook up and load the trailer. I am making some extra preparations in case of rain in Kansas over the labor day weekend, but am uber pumped to get to the rocket pasture.
 
I'm still doing the Slog II through the old AutoCAD archives. Today I had the minor heartbreak of going through the eight lost Holverson Designs slated for 2000, but got Fishmanned. Of the many big cheats in my life, Fun Rockets and the comics are the two I feel cheated to the marrow about.

On a lighter note, I adjusted the bed on the 3D printer down last night and got rid of the elephant foot. But bigger pieces won't adhere right. I'm going to tweak it up a little tonight. I might show my gear-head roots by even using an old school feeler gauge.
 
Took off the tape today from the weekend spraypaint hoohaa... results ok, but not perfect... there was a little bit of bleed-through the tape probably because I'm still applying too much paint... it could be much worse, though, and I plan to add another layer anyway. So hopefully it won't matter in the long run.

Also, received beautiful new Shenzou replacement tubes today! Whoooo hoooooo!!!
 

Attachments

  • IMG_7640.JPG
    IMG_7640.JPG
    74.4 KB · Views: 46
  • IMG_7642.JPG
    IMG_7642.JPG
    88.2 KB · Views: 47
Back
Top