Mperegrinefalcon, thanks very much!
Hope this helps. One image has the parts loosely set apart, the other shows the tailcone section. As I stated, I've not begun the build yet, so nothing has any adhesives on it. I'm trying to understand how far back the retainer should sit in relation to the butt-end of the tailcone.
When playing around with it, there are a number of choices. The instructions say "Ideally, the aft end of the motor tube should be flush with the aft end of the tailcone to allow easy retainer attachment."
I'm getting the impression (as I write this), that the inner part of the retainer should be about half in, half out of the tailcone. But, given what I've read, I'm a little skeptical about this (why, I'm not sure).
What do you think is the right way to go here?
View attachment 388698 View attachment 388699
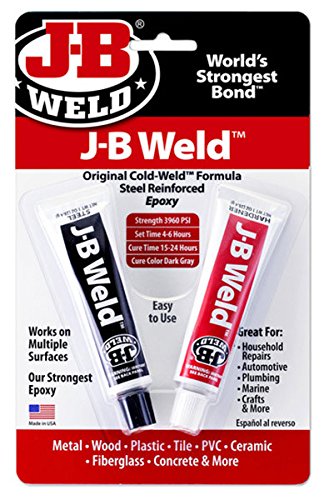
If you epoxy the motor mount tube in flush with the tail cone it should be fine, as long as the Aeropack can fit on the motor tube fully and you can screw the retainer cap on. you NEED to use JB weld epoxy to attach this. Wait until the rocket is mostly built to epoxy this.
If you haven't yet, wash all components with warm water and dish soap to get rid of any grease or dust on them. The cleanliness of your surface helps the epoxy bond.
Any time you are epoxying a component these are the steps you should go through:
Gloves on (No finger grease allowed)
wipe down with acetone or rubbing alcohol. Either will work fine, I use acetone as a gallon is ~$15 and lasts a few rocket builds.
With clean sandpaper, Sand vertically, horizonally, and diagonally. This roughens up the surface for a mechanical bond and activates it. Use 120-220 grit sandpaper. I use 150 usually.
Then you wipe down with acetone or rubbing alcohol again to get rid of fiberglass dust.
Now you can bond the components. Make sure everything is aligned and measure twice.
This is the cliffnotes version of this:
https://www.rocketryforum.com/threa...our-government-doesnt-want-you-to-know.58389/
Amazing post and always at the top of the HPR form for a reason
")
Steps I go through for motor mounts:
Get the top centering ring placement, I usually put this just above the top of the slot for fins, but I don't know what the slots/tabs look like on those fins.
get the rear centering ring placement. I would put this on after the fins are on and just press it against the fin tabs, but I again don't know how this works with this kit.
Next thing to do is sand the entire motor mount tube, never sand anything before it is cleaned as it just pushes the grease or dirt into the glass fibers. Mark with pencil the location of the forward centering ring, you can wrap a piece of paper around the tube to make sure it is horizontal. Make sure to clean and sand the CR. Check the fit, if it is loose I will put a drop of CA (super glue) in the joint to hold it, then do fillets on both sides of the centering ring, after the CA has cured. The excess CA needs to be sanded after it cures before the fillets. You need just enough to hold the ring in place for the fillets. A gloved finger should work fine for fillets on this part.
Make sure you have figured out how you will mount the shock cord. For a 38mm mount in 2.6" AF a 1/4" eyebolt fits but is tight and you have to make sure the rotation is correct or you could end up blocking the motor tube. You could also wrap some 1/4" kevlar around the top of the motor tube against the CR, just make sure it wont get in the way of fin tabs, so the upper CR needs to be further forward. The eyebolt will fit, I used one on my 2.6" ARCAS and Delta, both fitting well, I just had to trim the washer and drill it through the fillets. Forged eyebolts are worth the extra money, I have had the non welded or forged ones bend open from overzealous ejection charges before, luckily the recovery harness stayed on and that bolt is not deep inside an airframe. Either way, make sure you have enough shock cord to come to a point you easily can reach attached to the motor mount before it is installed, otherwise it will be impossible to attach. Do not use a granny knot. I use either a figure 8 follow through knot (the standard knot for rock climbers) or a locked half blood knot. I use these because they do not reduce the strength of the line. I use the figure 8 for permanent fixtures like the eyebolt on a motor tube, or just tie one with a loop to use for quick links. I use the locked half blood knot to tie directly to loops as it is easier to untie than the figure 8, but not for the rocket as it is a self tightening knot.
figure 8 knot:
Locked half blood knot:
I use 20 feet of 1/4" kevlar for shock cords on kits this size. It is overkill, but I have never gotten a zipper using this much, and it can be transferred from rocket to rocket.
Figure out how you will mount rail buttons. I prefer using weld nuts epoxied directly inside the airframe and have the buttons slide on the post and just use a machine screw to hold the button on with a bit of loctite, but a small bit of plywood against the airframe and a wood screw works just as well. If you go with the weld nuts, you need to put them in first and sand a flat side on the upper CR so it slides past. Wait until after the motor tube is in to place your wood block to screw into if you go that route.
If you haven't worked with epoxy before, use some cardboard or plywood and make some practice fillets. I would recommend a plastic spoon for drawing them. Make sure you mask off anywhere you do not want epoxy. It is a lot easier to remove epoxy with the tape then it is to sand it, also make the fillets as well as you can while the epoxy is wet as it is less work for later. I don't like the epoxy putty Tim Van Milligan uses, it just makes smoothing out fillets more difficult.
If you need anything else, feel free to PM me
I just mean to offer my experiences and what I found works best for me. There are thousands of ways to build working HPRs, and none of them are necessarily right or wrong. I got lucky and my L1 went off without a hitch. It was my first composite motor, and first rocket I had built since a Fliskits Richter Wrecker at 14 (I did my L1 at 17 as a junior NAR), and boy was I nervous, but I had people on the forums and at clubs to ask questions of who were very helpful and knowledgeable. Take your time to learn with this build, an L1 is not something to rush. I guarantee there is something you will wish you had done differently, and that will be for the next rocket, then the same and so on.