LOC Athena 3 Build (Level 1)

The Rocketry Forum

Help Support The Rocketry Forum:

This site may earn a commission from merchant affiliate links, including eBay, Amazon, and others.

Luke

Well-Known Member
Joined
Jun 13, 2013
Messages
253
Reaction score
7
Returning to the hobby after a few years and decided to delve straight in where I left off, getting into HPR. I have a 4" LOC V-2 which needs finishing, a scratch build planned for which I have the components and another scratch build which lawn darted and needs repairing, plus a Wildman Wildchild which is finished and I just need the courage to fly...

To keep things simple though, I decided to order a new kit and refresh the memory before messing around with projects I haven't touched in years. I like decent sized rockets and wanted something that would be easy to build an AV bay in and achieve a level 1 certification. I've never built anything with split fins and something about the Athena looked quite good to me, when I saw/heard it's ability to whistle I was sold and placed an order.

athena3-pk-37.jpg


Plans for the build so far;

- Fibreglass the tubes and fins for durability and smooth finishing.

- Upgrade to a 38mm MMT (I thought I had a spare 29mm Aeropack retainer but I do not. I do however have a 38mm one, so it made sense to make the rocket more versatile with a 38mm mount than to spend more money on a new retainer).

- AV bay in upper payload. I intend to run dual deployment from a single break with a cable cutter around the main.

- Colour scheme is going to be hot pink with some black & white detailing.

Can't wait for it to turn up :) There's not much out there on the Athena from the searching I've done. Any photos or advice from those who've built it would be appreciated.
 
I have one. Mine came with 38mm motor mount and so I added an Aeropack retainer. You could go with the standard clips if you wanted. I also added rail buttons as it came standard with 1/4" lug. Don't need to glass anything unless you're planning on trying to use a high impulse motor (Warp9, etc.) I added a Av-bay and made the upper section 30" rather than the stock 20ish. I wanted more room for a bigger main.
 
Interesting, was it advertised as having a 38mm motor mount when you bought it?

It will be having an aeropack retainer and rail buttons. I like to 'overbuild' somewhat, however to me it makes the rocket look much more professional and as such I enjoy them more.

I realise there is no need to glass it, but I want to do it anyway to help protect it during transport and recovery as well as providing a nice surface on which to paint. With a 38mm motor in it I won't notice the additional weight.
 
Interesting, was it advertised as having a 38mm motor mount when you bought it?
I got it 2-ish years ago and it came 38mm without me asking for anything special. I don't remember how it was advertised. Flown it on G through I and it handled them all without issue.
 
So last night I went ahead and purchased an RRC3. I need to look into the best options for Lipo's to suit both the RRC3 and my stratologger. If anybody can advise I would be grateful. I intend to use mini Deans connectors to connect everything as they are simple to solder and provide a snug connection.
 
This one is pretty much the holy grail of 2S lipos for onboard electronics. About half the size of a 9volt.
https://www.ebay.com/itm/Turnigy-Nano-Tech-300mAh-2s-7-4v-45C-90C-LiPo-Battery-Pack-with-JST-Power-Plug/263034617344?ssPageName=STRK:MEBIDX:IT&_trksid=p2060353.m1438.l2649


If for some reason you're committed to a 1S lipo, this is a very popular one, also about half the size of a 9 volt in thickness.
https://www.ebay.com/itm/Turnigy-Nano-Tech-750mAh-1S-LiPo-Battery-Pack-3-7V-35C-70C-Walkera-V120D02S/262356527130?ssPageName=STRK:MEBIDX:IT&_trksid=p2060353.m1438.l2649

Both are well proven, well flown batteries for our rockets. The connectors on them are also more than sufficient to the task. Both will fit in any 9volt battery case with room for another lipo.

Add in a B6 charger and you're set for several flying seasons. They're cheap and easy enough to get that if they go bad, or at the end of the season that they're throw aways.

Ebay links shown to give you an idea of street prices. You can order direct from Turnigy, but they're not always available from the US warehouse, and there's shipping, so compare/contrast and buy what you're most comfortable with. Usually when direct is sold out, there are tons of them on ebay.
 
Last edited:
Thanks very much for the detailed reply. I actually already owned one of the Turnigy lipo's previously, however found that it had swollen up after being left so long. As you've recommended them again I've just ordered two more.
 
Thanks very much for the detailed reply. I actually already owned one of the Turnigy lipo's previously, however found that it had swollen up after being left so long. As you've recommended them again I've just ordered two more.

To store lipo batteries, they need to be discharged to 'storage levels', and periodically maintained. Surprisingly, they'll often run fine 'puffed'. I save the puffed ones for bench testing.
 
Have been editing an existing Rocksim file I found for the Athena. I am currently looking at maiden flight on a CTI G50 Imax, which is simming at just over 1k feet. In all likelihood my build will be a little on the heavy side due to my intentions to fibreglass. So will weigh as I go along and reevaluate the motor once built.

Out of curiosity, an I motor was seeing me at over 4k feet nearing mach 1 :rolleyes:

Original intentions were to paint the whole thing pink, I'm now debating whether to mix that up with dualtone. Not many photos of pink rockets so difficult to gauge.

full


full


Got a lot of parts collected, but still waiting for the kit to turn up :(
 
When I paint mine (rare!) I paint them so they stand out from the blue sky and so they stand out from the green grass or the brown corn/beans. A dark color like the black you have is good in the sky and then a pink/red/orange for when its on the ground.

I've never pushed mine towards mach. I'd be interested in how the split fins handle it.
 
Cheers Kevin. I think I will go with the pink/black combo.

I’ve seen your build thread and enjoyed it. It was one of the deciding factors for purchasing this model.

Can I ask about your dual deployment setup. I’ve never done dual deployment however I’ve built a couple of rockets now setup for dual deployment through single separation as I felt it was easier....

Did you build the AV bay into the coupler with the drogue in lower half and main in upper separated by shear pins? Perhaps this is more straight forward and reliable than the cable cutter route I was planning.
 
Did you build the AV bay into the coupler with the drogue in lower half and main in upper separated by shear pins?
Yes, the AV bay was built into the coupler. Drogue in lower half, main upper. To make things a little simpler and lighter, I glued the coupler into the payload (upper) tube.
 
Thanks Kevin, I wasn't clear from your build thread how your dual separation worked, how do you access the payload end of the AV bay (my hands are too big to fit in a 3" tube)?

I think if I was to go the dual separation route I would like to have the payload stuck to the nosecone and be able to access both ends of the AV bay. I've not used shear pins before so it's a little daunting to me however reading more it seems simple enough.

I'm going to have a think before proceeding, but now drawn to having a central AV bay with switch band. My only concern is using the shear pins through the cardboard tube and coupler. I suppose if I glass the body that should add some durability, and I see people mention using thin metal sheet on the inside to help 'guillotine' the pin.
 
Thanks Kevin, I wasn't clear from your build thread how your dual separation worked, how do you access the payload end of the AV bay (my hands are too big to fit in a 3" tube)?

With the coupler bonded to the payload (upper) tube I simply do the following to remove and install the avionics sled and bulkplates:

Here's a picture of my sled and bulkplates during early assembly, but it should help with visualizing the procedures I've detailed below:
IMG_1888.JPG

1. Disassembly
a. remove the two nuts holding lower bulkplate.
b. disconnect the drogue charge screw terminal connector, set bulkplate aside.
c. Pull out the AV sled & attached upper blukplate using main shock cord.

2. Load charge wells
a. load Drogue well on lower bulkplate, then set aside.
B. load Main well on the upper end of the assembled avionics sled.

3. Assemble for flight (or storage with empty charge wells)
a. lower the AV sled & attached upper bulkplate assembly down from the top of the payload tube using the shock cord.
b. verify upper bulkplate is seated in the upper part of the coupler using "feel".
c. connect drogue charge screw terminal connector
d. verify the screw switch (altimeter on/off switch) is aligned with the vent hole. (I turn on/off the altimeter using a screwdriver through a vent hole.)
e. attach the lower bulkplate to the 2 av bay threaded rods, making sure it seats correctly on the lower end of the coupler. Carefully tighten the two nuts, do not overtighten.

4. Verify proper friction fits (VERY SUBJECTIVE)
a. verify drogue joint is snug,roughly 1 to 2 lbs friction.
b. verify nosecone is moderately snug, but not so much the ejection charge will fail. Roughly 4 to 6 lbs friction. (even with a 20 ft shock cord, the shock created when the drogue shock cord snaps tight can dislodge the nosecone if there's insufficient friction)

I have been thinking about adding some small shear pins to the nosecone joint...
 
Very clear. And now makes sense to me that having the payload attached to the nosecone would mean the ejection charge firing the main further up into the payload tube rather than pushing it out. I also like the fact you've kept it quite smart without the added switch band etc.

I think I would run some shear pins in the NC, I don't know how you calculate the required amount. I was going to use two small ones.

2 x 2/56 shear pins is more than sufficient to retain the nose cone of the average 3 inch plywood and paper rocket. The same calculators for figuring out the ejection charges usually also have a shear pin force computation, too.

Point of fact, 1 pin is probably enough, but everyone will tell you that 1 pin is a bad idea. 1 can be done, you just have to know how and why, and it has to be properly executed.
 
Look what I got...

full


Unfortunately I'm missing a couple of vital bits. Another couple of bulkheads to make the AV bay. And I had called the vendor to change the order so I could modify to 38mm MMT however the length they've sent is too short for the fin arrangement.

full
 
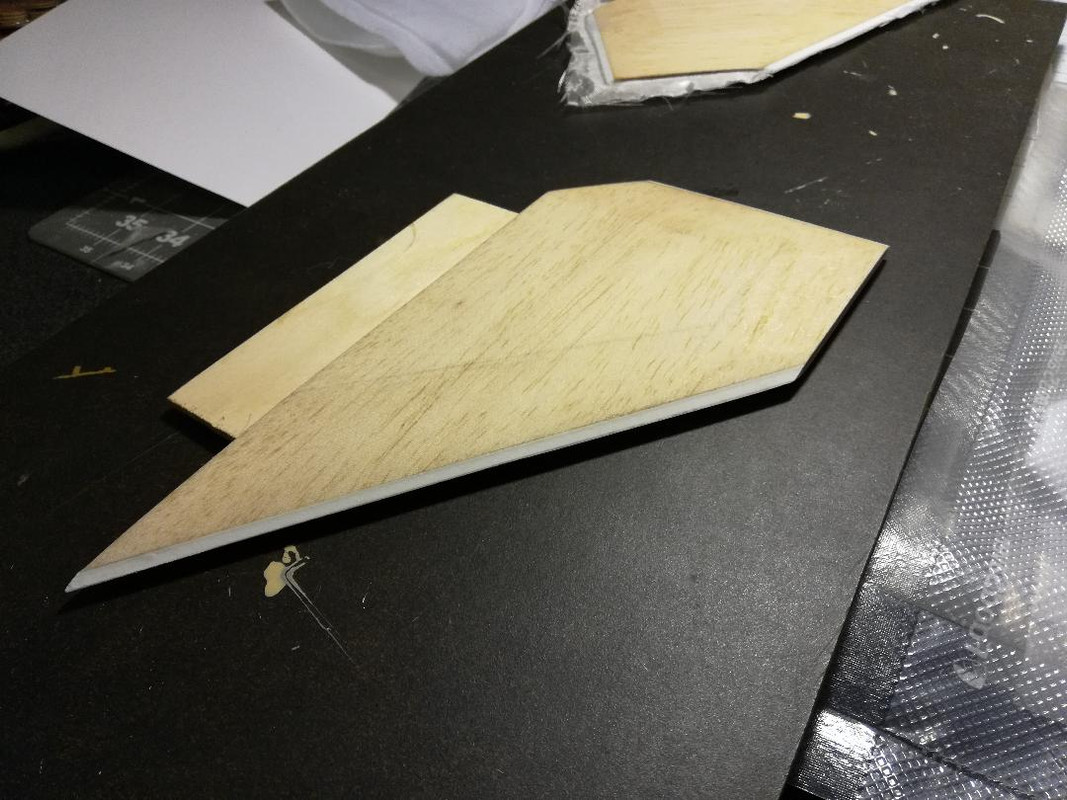
I wanted to make a sanding jig, however I don't have access to power at my lock up/garage and so it was going to have to be something I could use by hand. I knocked up one of John Coker's jigs and decided with a larger flat base I could run a square sanding block along it should work. Well, it worked far more efficiently than I thought, I did the leading edge of each fin in just a couple of minutes...

full


full


Question for those who've built the Athena before, I've bevelled the leading edge of the forward fin and trailing edge of the aft fin, I know that the trailing edge and leading edge between the two needs to be kept square for optimal whistle, but did anybody bevel the sides/fin tips? If so, what results? I think it would look more aesthetically pleasing with a bevel on every side except for the two 'adjoining'.
 
Question for those who've built the Athena before, I've bevelled the leading edge of the forward fin and trailing edge of the aft fin, I know that the trailing edge and leading edge between the two needs to be kept square for optimal whistle, but did anybody bevel the sides/fin tips? If so, what results? I think it would look more aesthetically pleasing with a bevel on every side except for the two 'adjoining'.

Your bevels look very nice. I chose not to bevel the fins, but rather round forward fin leading edge, and lightly round the side edges of the fins. My thinking on this is that the plywood would be vulnerable to dings/dents if beveled thin.
As you mention, the forward fin's trailing edge and aft fin's leading edges are left squared off for improved whistle.

IMG_1908.JPG IMG_1909.JPG IMG_1945.JPG
 
Last edited:
Your bevels look very nice. I chose not to bevel the fins, but rather round forward fin leading edge, and lightly round the side edges of the fins. My thinking on this is that the plywood would be vulnerable to dings/dents if beveled thin.

Plastruct makes 1/8" triangular styrene sticks, and I used them as LE/TE edge protectors on my LOC IV fins to make them a little tougher for minor impacts. (I also vacuum bagged on shaped balsa skins to give them an airfoil shape and strengthen them a bit).

fin-2.jpg
 
How is the Athena Build Progressing? I'm looking forward to "hearing" your first flight video!
 
I haven't really managed to do as much as I would like due to work commitments. The longer length of MMT has now arrived so I have everything required now.

I did make a start by glassing the tubes. Now it's been a long time since I've worked with fibreglass and as such I'm not at all happy with the results. I started with the booster section, and foolishly used a paintbrush to apply the epoxy. As a result I have one or two hairs trapped under the fabric, as well as a few 'pimpled' areas with dirt/debris which I assume was trapped in the brush, plus some air bubbles/blisters where the fabric is not bonded to the tube. I'm really not happy with the finish and would like some advice as to where to go. Should I apply the second coat of epoxy to fill the weave, then sand down, removing all the raised areas, but in the process obviously removing fabric from areas that are raised etc. Or should I go at it with a heavy grit paper now and try to remove the fabric so I can start over?

The upper payload tube I rewatched John Cokers video and realised the mistake with the brush. I used an old credit card to apply the epoxy to the fabric and the results were day & night, so I am very happy with the application to this section.
 
To my mind, you have 3 different choices:
1. Budget. Accept what you have and move forward having learned several valuable lessons, possibly trying a new technique with filler to correct the cosmetic mistakes on the lower half.
2. Labor. Try to correct your mistakes, possibly making further problems for yourself, possibly making the bottom look as good as the top on the re-do.
3. Project of a Lifetime. Start over with new materials having learned several valuable lessons.

Me, I'd put on a second coat of epoxy to see what it did, and sand it all smooth anyway and move forward. IF you end up sanding through any areas, you can always put in a patch piece. If you make a total hash of it, just buy a replacement tube and start over.
 
Back
Top