- Joined
- Jul 15, 2015
- Messages
- 3,955
- Reaction score
- 2,709
Part 1 of 2
I’ve mentioned several times that I use .005 brass plate/shim material to make shear plates in cardboard body tubes for nose cone shear pins, and I’ve been asked to do a tutorial more than once. I'm sure that there are other ways to do it, and I'm open to critique and useful conversation!
Not being one that documents things that I do well, this is my first attempt at a tutorial thread, so I’ll do the best that I can.
Determine how many and where you want your shear pins (there are many schools of thought on that, you decide what is best for your application). In this example I’m using 3 2-56 shear pins in a 3 inch LOC tube to secure a Pinnacle nose cone equipped with a MAC nose cone tracker bay. I’ve already marked the locations, so I drill my 1/16” holes in the three locations through the body tube and the nose cone. As I drill each hole, I leave a steel pin in the hole to ensure alignment. Remove nose cone. Treat holes with thin CA to harden the cardboard. I put a drop inside and out, blow the hole clear, and allow to cure.
Take your brass shim stock, in this case I used K&S .005 brass shim stock from Hobby Lobby, $3.49. I use a quarter as a template. Draw as many circles as you need for your rocket and cut out. I use standard hobby scissors.
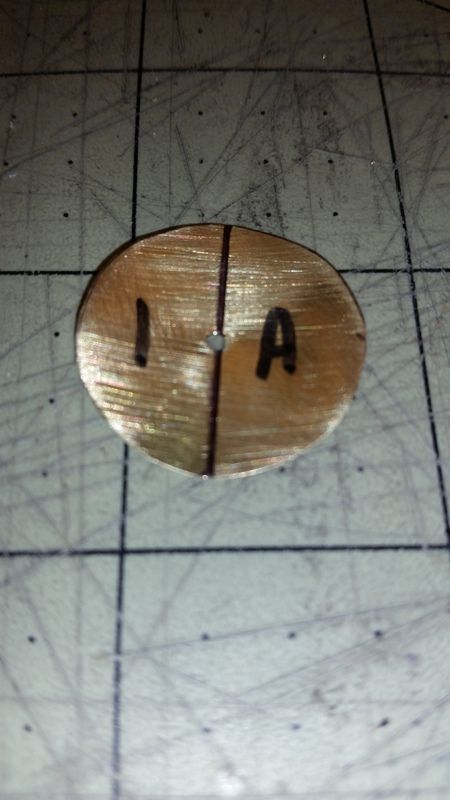
I make another marking template out of paper (yellow circle), and fold it in half, then half again to find the center. I poke a hole in the center and use this to mark the center line of the brass circles. Drill out the center with a 1/16” drill bit. DO NOT PRESS HARD, you want a hole without a burr on the back side. In the event that you do get a burr, just hit it with a hammer gently to flatten it out, and run the drill bit through again. I then mark the circles to correspond to the hole that they will go into and a vertical line for alignment. Here you can see 1/A, 2/B, 3/C.
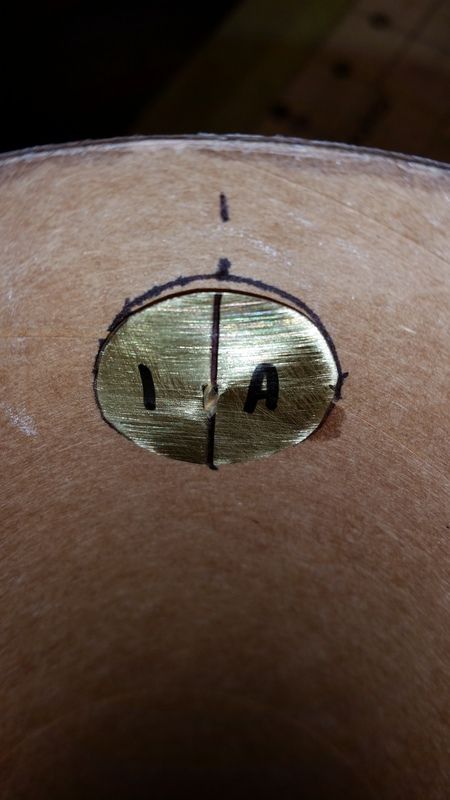
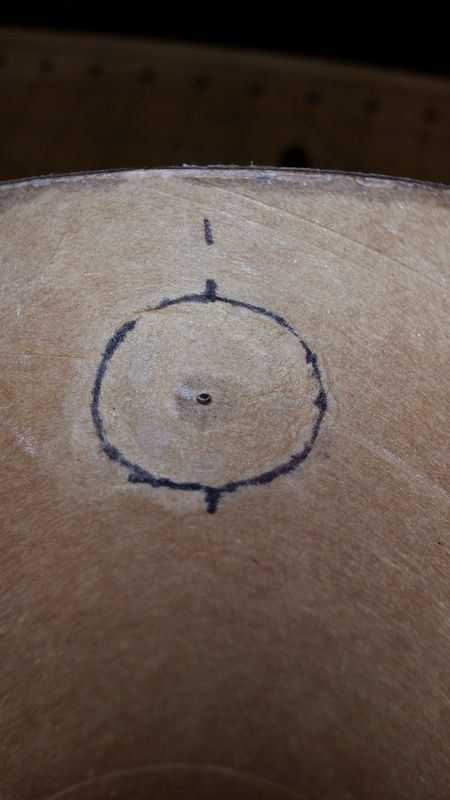
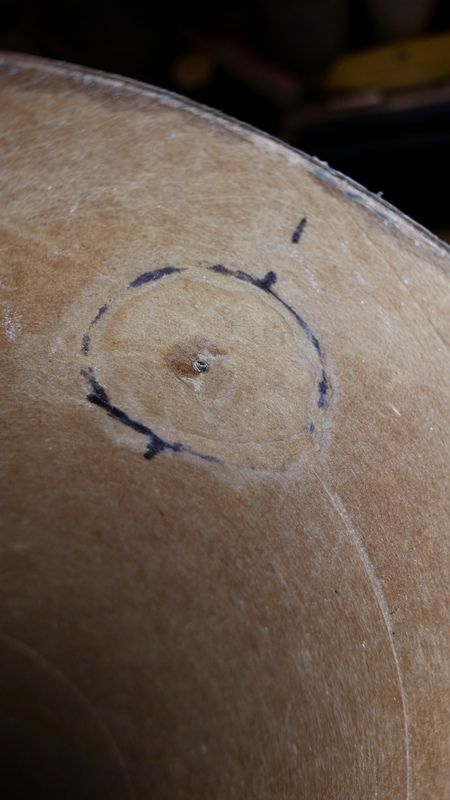
Poke the drill bit through the hole that you drilled into the airframe and on the inside, hang one of your brass circles. Press it flat against the inside of the tube and mark around the circle and the center line. Label accordingly so that you don’t get them all mixed up.
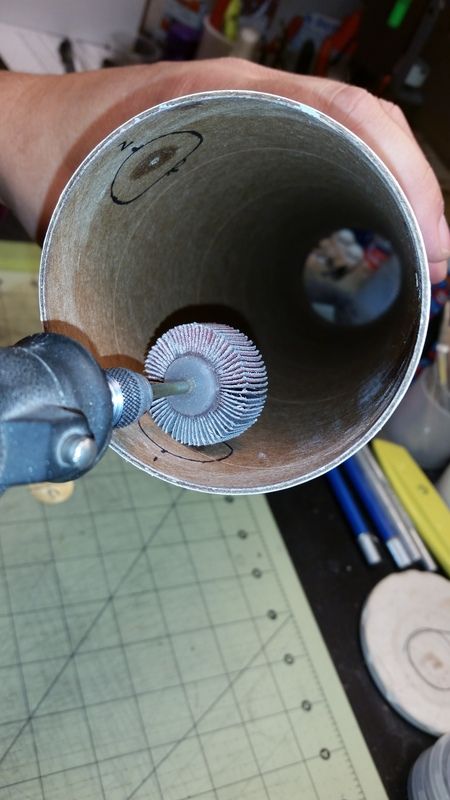
This is a Dremel #503 120grit 3/8” flap brush. We’re going to use this to excavate a recess in the tube for our shim. You can use a different tool if you like, but I find that this particular one gives the fastest, best controlled results.

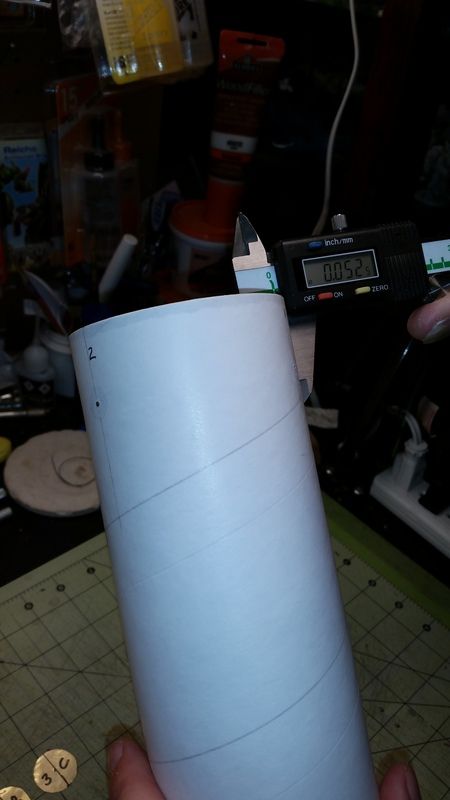
Before we start, measure the thickness of your tube. DON’T trust the advertising hype….measure it! In this case we get .052”. I’m happy with the dry fit of the nose cone shoulder, so a little math is in order here. I want the brass shim, which is .005 thick, about .005 recessed into the cardboard. So .005 shim + .005 recess = .010 to remove from a .052 tube, leaving a thickness of about .042. A little DEEPER isn’t so bad, but a little SHALLOW can be bad and interfere with the fit of the nose cone. GO SLOW, measure twice, cut once.
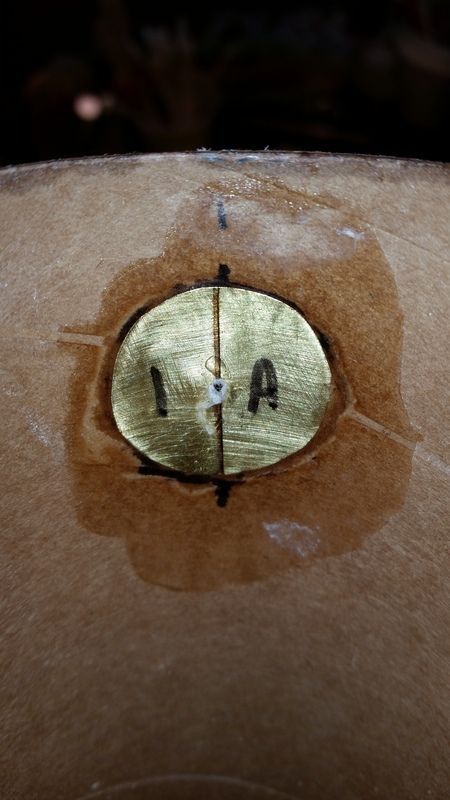
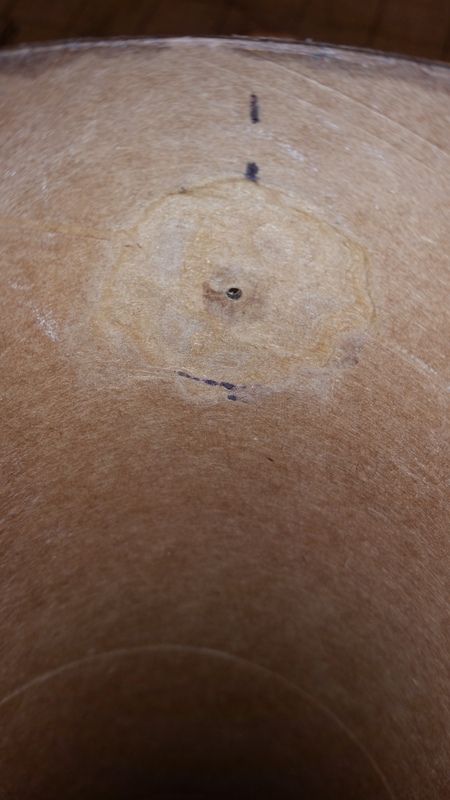
Use the flap brush to CAREFULLY excavate your recess. Go all the way out to the lines of the circle that you drew! You will see the layers of the cardboard peel away a little at a time, and the hardened center where your hole is will be a little tougher. GO SLOWLY and carefully.
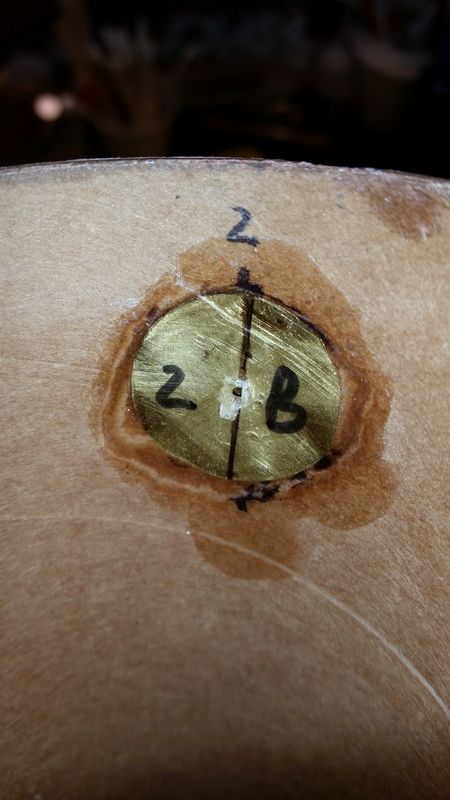
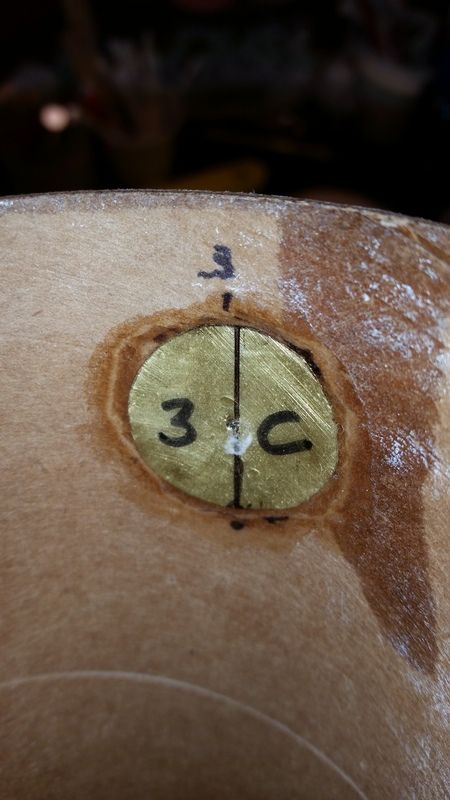
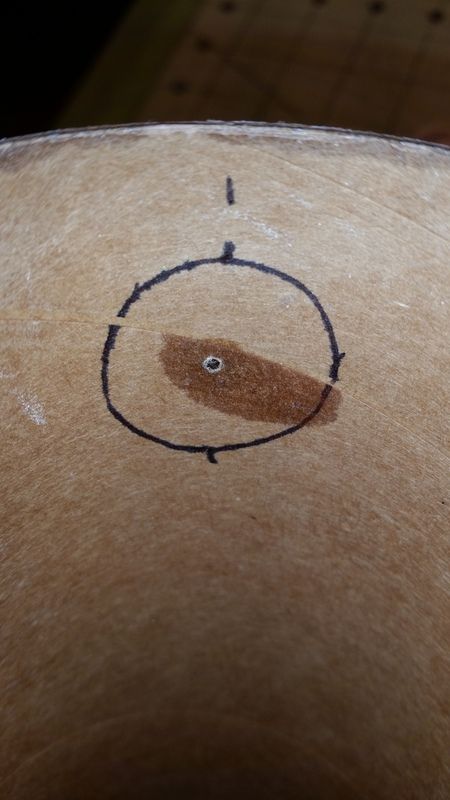
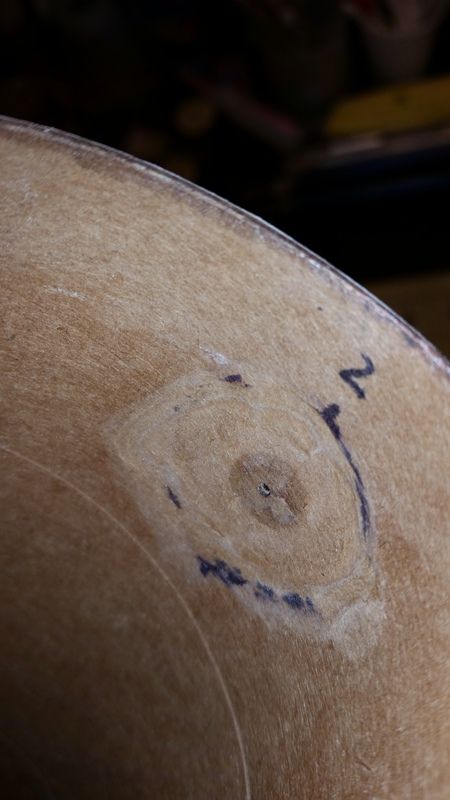
Here you see the initial results, and the circle remarked. I generally do a first pass, remark, and do a second pass to refine the size and depth of the hole before a final marking.
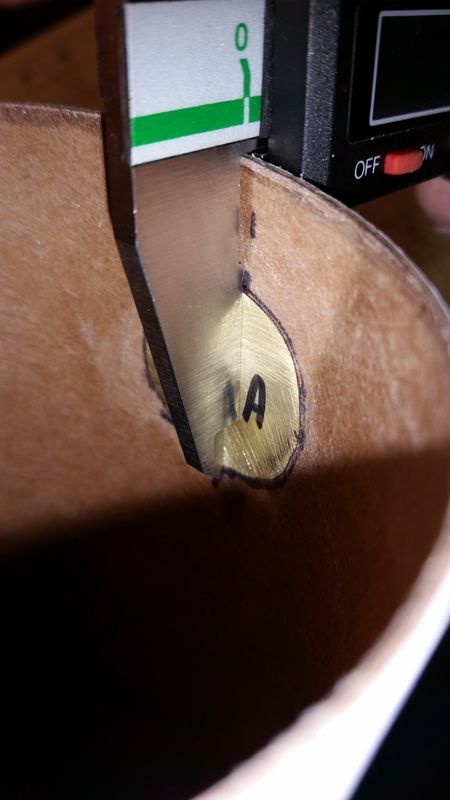
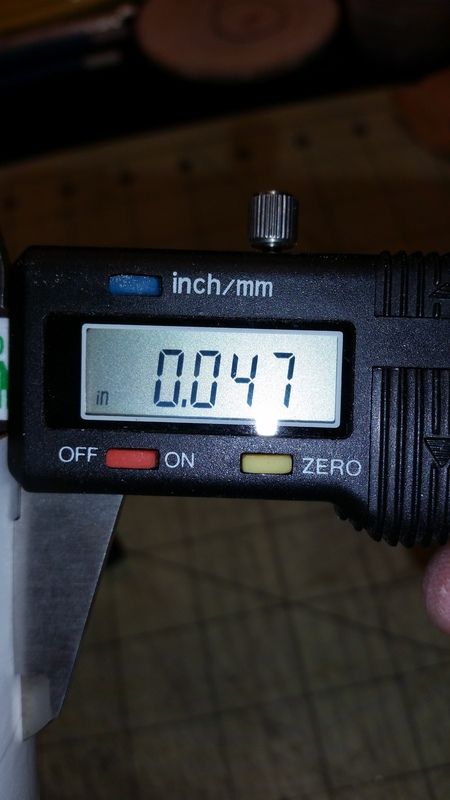
Now it’s time to measure with our shim in place. Here you see that I have a reading of .047. Our target thickness was .042 + .005 shim = .047. OK, so I’m right where I want to be.
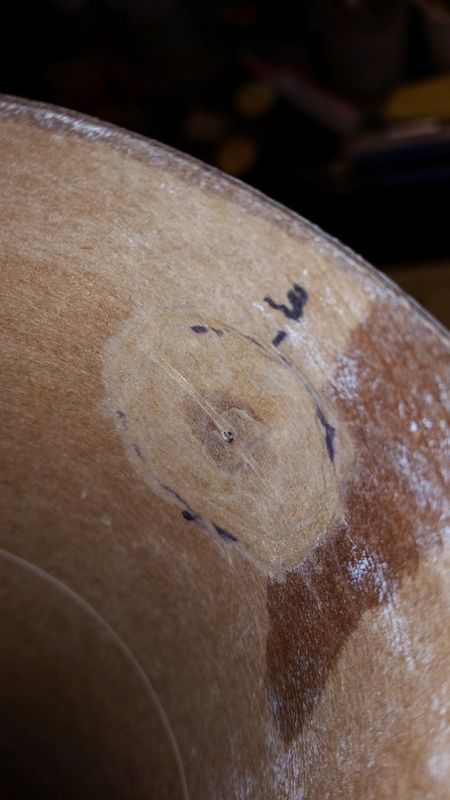
Time to smooth out the transition all 3 recesses and make sure that the vertical marks and labels are legible.
Pre-bend the shim to conform to the inside of the tube. It only takes just a little bit of force.
First I’m going to describe what we want, I’m going to show you what it looks like, then I’m going to show you how to do it. The pictures hop numbers because the 5 minute kicks quickly. That and having glue everywhere didn’t lend itself well to getting all the pictures that I wanted on a single hole!
We’ll be using 5 minute epoxy, so timing is important. I use BSI 5 minute, and the smallest amount that I can mix reliably is 8 grains of hardener and 8 grains of resin. YMMV based on your cups, sticks, epoxy, technique, whatever. That 16 grains of BSI is about 3X as much as I can actually use in this particular application.
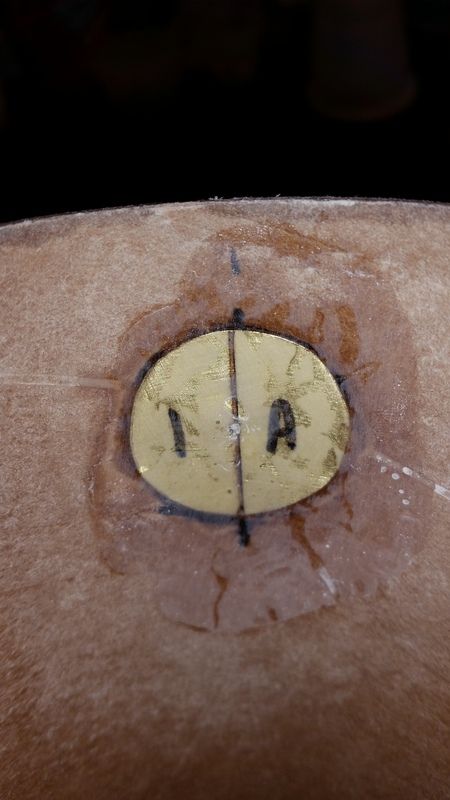
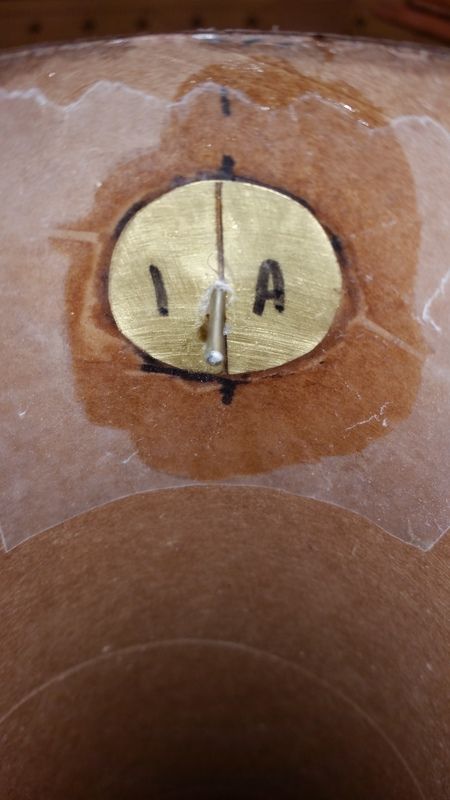
Here you see the completed layup with locater pin (spare drill bit). From outside to inside it’s a layer of tube-epoxy-shim-epoxy-wax paper.
This is how I do it:
a. Measure and mix epoxy
b. Lay a thin film of mixed epoxy into the round recess inside the tube, just enough to wet the surface

c. Insert the drill bit/pin from the outside of the tube
d. Hang the proper shim onto the pin
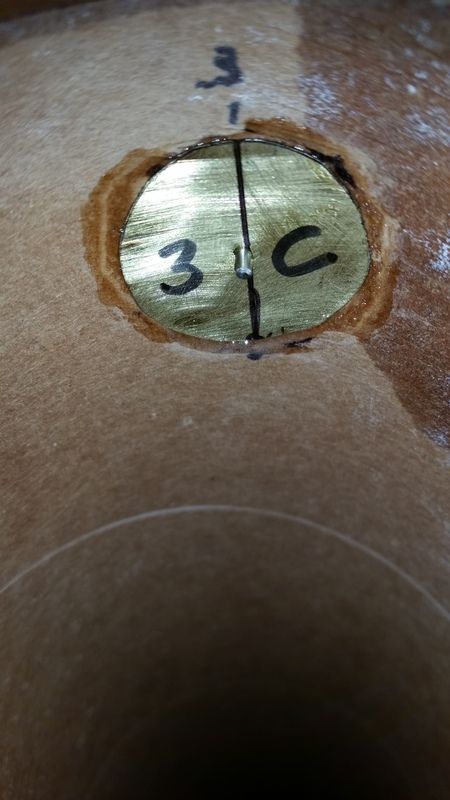
e. Press the shim into the recess
f. Coat the top surface of the shim with a thin film of epoxy
g. Cover the whole thing with a piece of wax paper
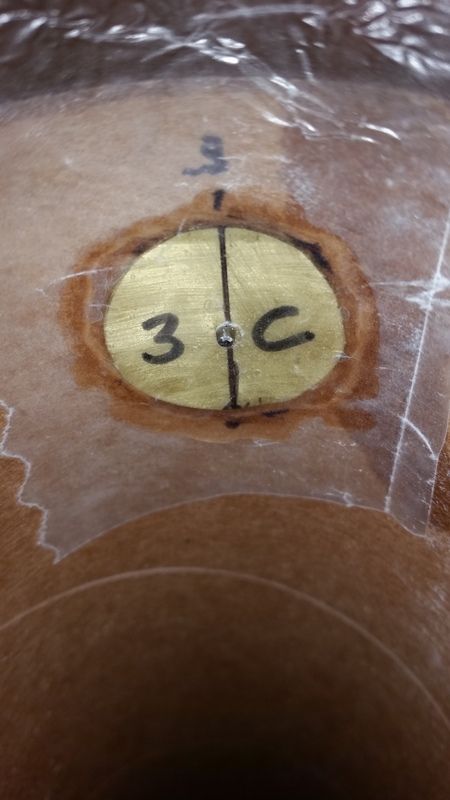
h. Press and hold the shim in place while removing the pin
i. Clean the pin with alcohol and a paper towel
j. You’re still holding the shim in place, right? Epoxy should be getting to the gel stage now. Gently massage any extra epoxy out around the shim. Remember, we want a .005 thickness of epoxy to return the tube to its original size
k. Once the epoxy gets warm and kicks off, you can let go. If the shim pops up, or the wax paper moves, it’s not ready for you to let go yet!
l. Carefully wipe any excess epoxy off of the outside of the tube where it might have squeezed out
m. Repeat for the other holes
Once the epoxy has hardened, probably 15-30 minutes, you can cleanly remove the wax paper. If the wax paper does not remove cleanly, the epoxy hasn’t cured enough yet. Patience, Grasshopper.
(MAX PICTURE LIMIT REACHED. SEE PART 2 BELOW)
I’ve mentioned several times that I use .005 brass plate/shim material to make shear plates in cardboard body tubes for nose cone shear pins, and I’ve been asked to do a tutorial more than once. I'm sure that there are other ways to do it, and I'm open to critique and useful conversation!
Not being one that documents things that I do well, this is my first attempt at a tutorial thread, so I’ll do the best that I can.
Determine how many and where you want your shear pins (there are many schools of thought on that, you decide what is best for your application). In this example I’m using 3 2-56 shear pins in a 3 inch LOC tube to secure a Pinnacle nose cone equipped with a MAC nose cone tracker bay. I’ve already marked the locations, so I drill my 1/16” holes in the three locations through the body tube and the nose cone. As I drill each hole, I leave a steel pin in the hole to ensure alignment. Remove nose cone. Treat holes with thin CA to harden the cardboard. I put a drop inside and out, blow the hole clear, and allow to cure.
Take your brass shim stock, in this case I used K&S .005 brass shim stock from Hobby Lobby, $3.49. I use a quarter as a template. Draw as many circles as you need for your rocket and cut out. I use standard hobby scissors.
I make another marking template out of paper (yellow circle), and fold it in half, then half again to find the center. I poke a hole in the center and use this to mark the center line of the brass circles. Drill out the center with a 1/16” drill bit. DO NOT PRESS HARD, you want a hole without a burr on the back side. In the event that you do get a burr, just hit it with a hammer gently to flatten it out, and run the drill bit through again. I then mark the circles to correspond to the hole that they will go into and a vertical line for alignment. Here you can see 1/A, 2/B, 3/C.
Poke the drill bit through the hole that you drilled into the airframe and on the inside, hang one of your brass circles. Press it flat against the inside of the tube and mark around the circle and the center line. Label accordingly so that you don’t get them all mixed up.
This is a Dremel #503 120grit 3/8” flap brush. We’re going to use this to excavate a recess in the tube for our shim. You can use a different tool if you like, but I find that this particular one gives the fastest, best controlled results.
Before we start, measure the thickness of your tube. DON’T trust the advertising hype….measure it! In this case we get .052”. I’m happy with the dry fit of the nose cone shoulder, so a little math is in order here. I want the brass shim, which is .005 thick, about .005 recessed into the cardboard. So .005 shim + .005 recess = .010 to remove from a .052 tube, leaving a thickness of about .042. A little DEEPER isn’t so bad, but a little SHALLOW can be bad and interfere with the fit of the nose cone. GO SLOW, measure twice, cut once.
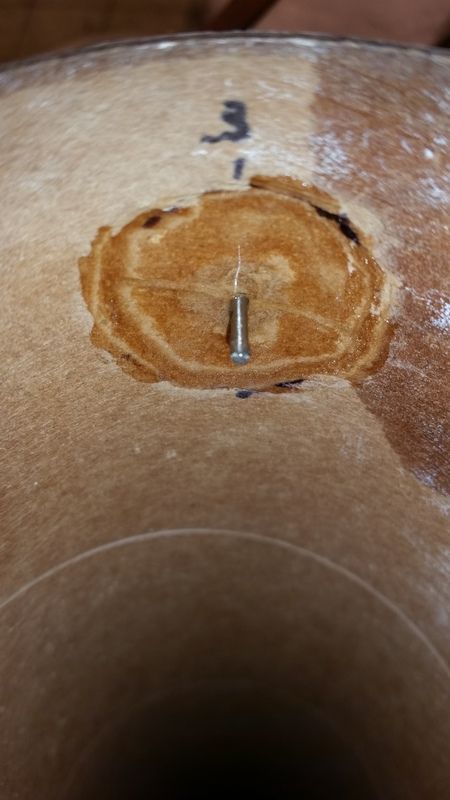
Use the flap brush to CAREFULLY excavate your recess. Go all the way out to the lines of the circle that you drew! You will see the layers of the cardboard peel away a little at a time, and the hardened center where your hole is will be a little tougher. GO SLOWLY and carefully.
Here you see the initial results, and the circle remarked. I generally do a first pass, remark, and do a second pass to refine the size and depth of the hole before a final marking.
Now it’s time to measure with our shim in place. Here you see that I have a reading of .047. Our target thickness was .042 + .005 shim = .047. OK, so I’m right where I want to be.
Time to smooth out the transition all 3 recesses and make sure that the vertical marks and labels are legible.
Pre-bend the shim to conform to the inside of the tube. It only takes just a little bit of force.
First I’m going to describe what we want, I’m going to show you what it looks like, then I’m going to show you how to do it. The pictures hop numbers because the 5 minute kicks quickly. That and having glue everywhere didn’t lend itself well to getting all the pictures that I wanted on a single hole!
We’ll be using 5 minute epoxy, so timing is important. I use BSI 5 minute, and the smallest amount that I can mix reliably is 8 grains of hardener and 8 grains of resin. YMMV based on your cups, sticks, epoxy, technique, whatever. That 16 grains of BSI is about 3X as much as I can actually use in this particular application.
Here you see the completed layup with locater pin (spare drill bit). From outside to inside it’s a layer of tube-epoxy-shim-epoxy-wax paper.
This is how I do it:
a. Measure and mix epoxy
b. Lay a thin film of mixed epoxy into the round recess inside the tube, just enough to wet the surface
c. Insert the drill bit/pin from the outside of the tube
d. Hang the proper shim onto the pin
e. Press the shim into the recess
f. Coat the top surface of the shim with a thin film of epoxy
g. Cover the whole thing with a piece of wax paper
h. Press and hold the shim in place while removing the pin
i. Clean the pin with alcohol and a paper towel
j. You’re still holding the shim in place, right? Epoxy should be getting to the gel stage now. Gently massage any extra epoxy out around the shim. Remember, we want a .005 thickness of epoxy to return the tube to its original size
k. Once the epoxy gets warm and kicks off, you can let go. If the shim pops up, or the wax paper moves, it’s not ready for you to let go yet!
l. Carefully wipe any excess epoxy off of the outside of the tube where it might have squeezed out
m. Repeat for the other holes
Once the epoxy has hardened, probably 15-30 minutes, you can cleanly remove the wax paper. If the wax paper does not remove cleanly, the epoxy hasn’t cured enough yet. Patience, Grasshopper.
(MAX PICTURE LIMIT REACHED. SEE PART 2 BELOW)
Last edited: