Hey everyone,
Haha I was a bit late on my build thread for my L2, as I am again for my L3.... Been busy with school and work so I haven't had much spare time, but we're coming up to my launch date, BALLS 25, and I was thinking I might as well write something up on TRF before I finalize the build.
As for that, when thinking about my L3, I wanted to push my envelope of experience and after considering my L2 with a Hyperloc 1600, I chose to do a 75mm MD bird. The idea is to fly it with a baby M to between 20-25k (I've flown to 18k on a J1000 at mach 3, so its a familiar process), and in a subsequent flight, stick 10,000 Ns motor and hope for the best to around 45k. The flight motor, an AeroTech M1350 DMS, is about 1/3 the length of the rocket, while the full sized motor is about 2/3 of the length.
But back to the cert flight. I consulted two TRA TAPS, and sent in a preliminary report detailing my plan, which they O.K'd several months ago. Since then, I have been slowly building, time permitting. The goals of the bird, named KNOOP MK III (L1 was MK I, etc) are as follows:
-Reach above 20,000' on baby M DMS cert. motor
-Integrate rapid prototyping
-Integrated Camera, separate of Av-Bay
-Vehicle for subsequent high altitude attempts
The rapid prototyping section involves 3D printing the electronics sled, camera mount, and tail-cone. I have access to several Form 2 SLA 3D printers at work, so the detail and accuracy on these parts is quite high. The sled integrated cuts that takes the shape of nuts. I decided to make the camera bay separate from the Av-bay because of the chance of engaging the flight computers early during mach transition. I will also be using surgical tubing as my charge container to practice for high altitude flights.
The following is a list of major components:
-RW (Madcow) FW 5.6:1 VK Nosecone
-60" Standard FW Airframe
-1/8" G10 fins w/ 4 layers of increasing and 0,30,45,90 direction 2x2 Twill carbon T2T utilizing Aeropoxy PR2032 w/ PH3660
-Cotronics 940SS Ceramic Adhesive on Leading Edge
-3D printed Tailcone
-Solidworks designed and 3D printed Sled and Camera Mount
-Nosecone coupler as Av-bay w/ the following: Beeline 100mW GPS, 2x Stratologger CF (Redundant), 1x Raven 3 (Accelerometer data acquisition), and related batteries
-25' 1" flat kevlar "drogue"
-Iris Ultra Fruity Chute w/ 20' Teddy Kevlar Cord Main
Now for pics and the build.

Here I am JB-Weld tacking the fins on using a laser cut acrylic jig that I made at TechShop. I then Used a micrometer to ensure the spacing between the sheets of acrylic were even to prevent distortion between plates. All surfaces were prepped properly during this build before adhesives were applied (I.E washed with soap and water, scuffed up with 100 grit sandpaper, soap and water again, and finally 2x acetone wipe using fiber free cloth).
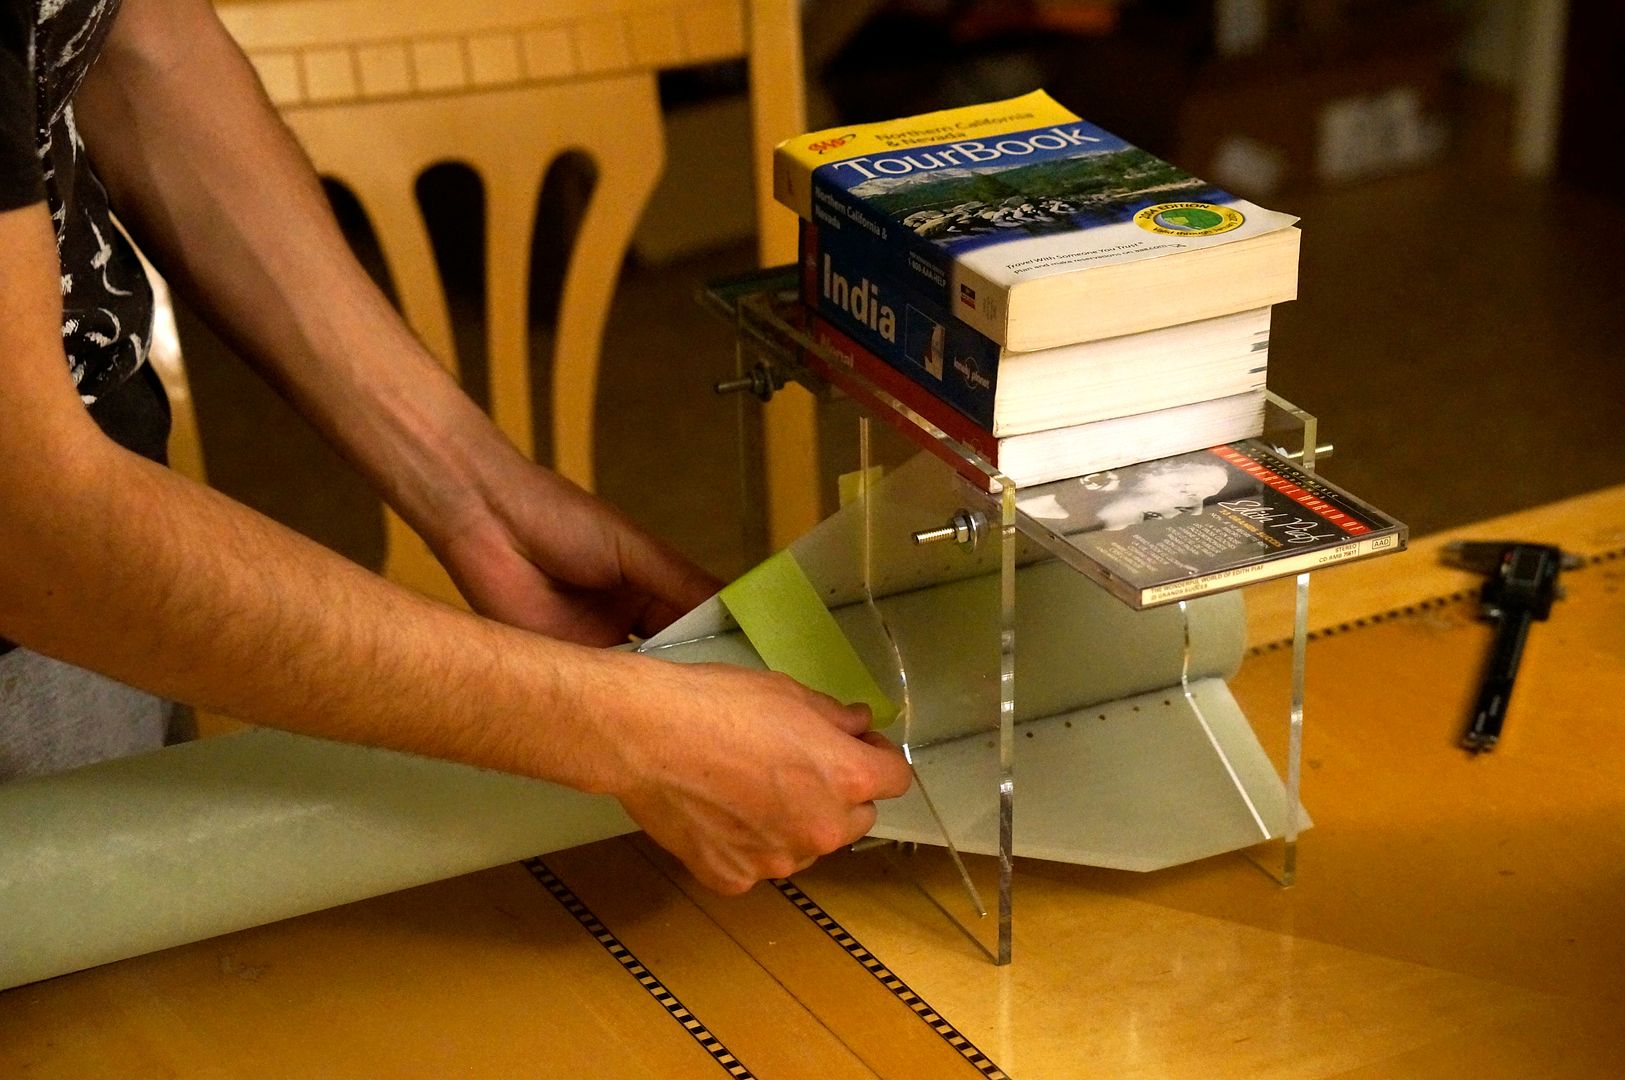
Once the fin was in place with the JB Weld, I used a few books and a piece of tape to ensure proper contact with the airframe's surface.
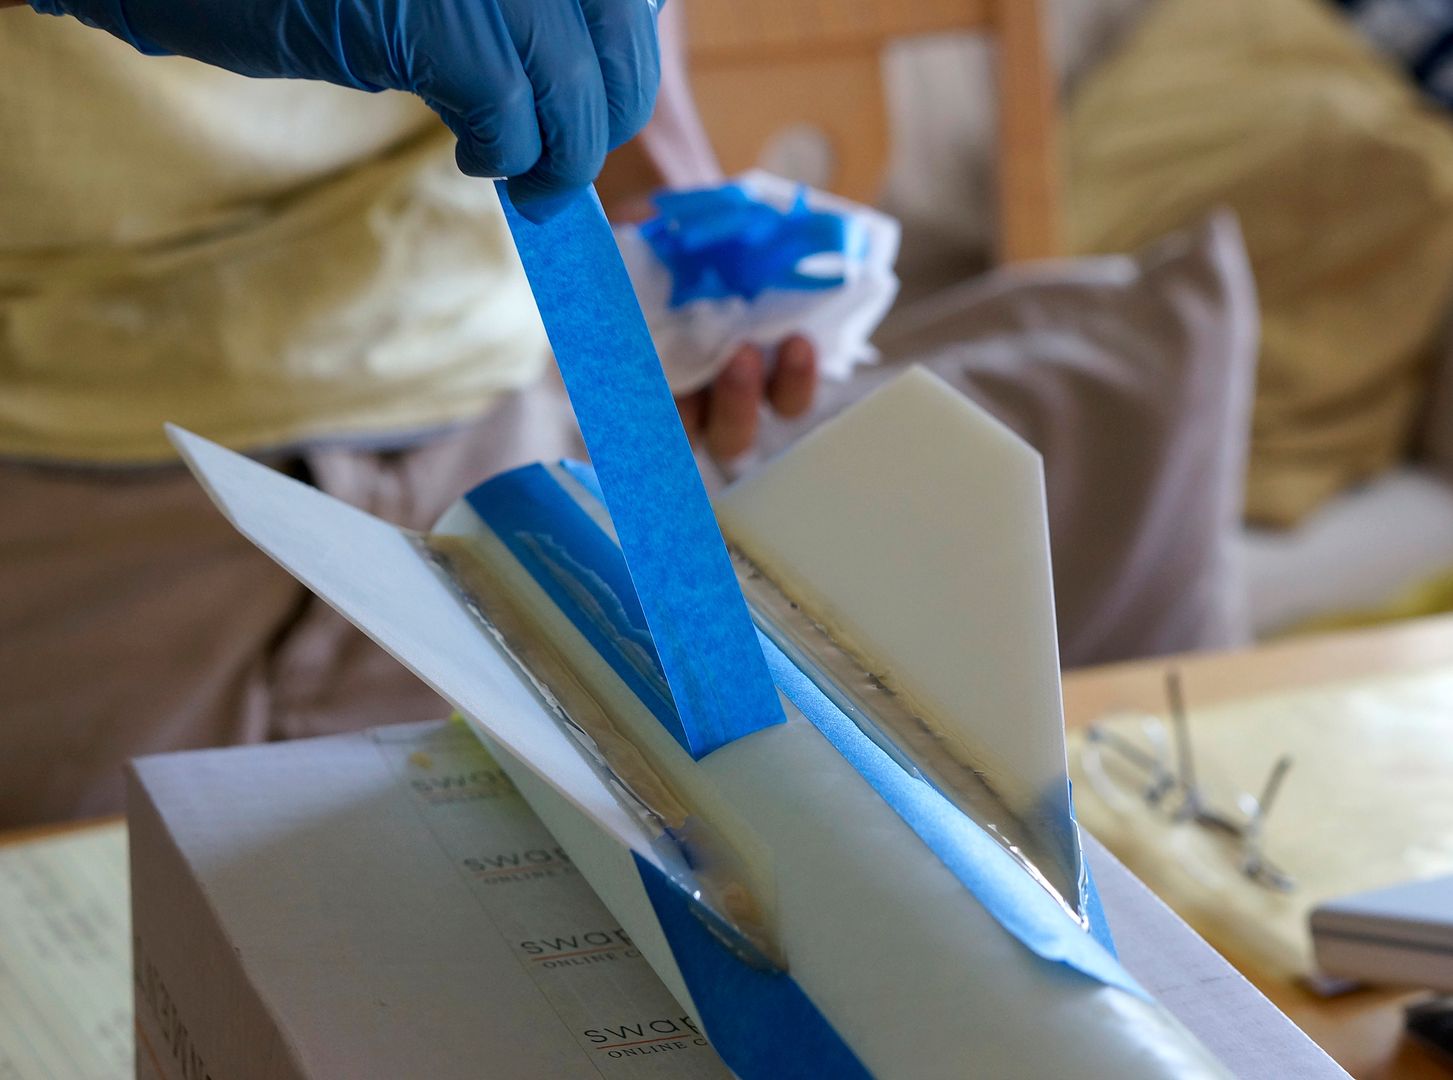
Here I am removing the tape from the fillets (Aeropoxy ES6209) which were done on-top of weaving carbon fiber tow between the holes seen.

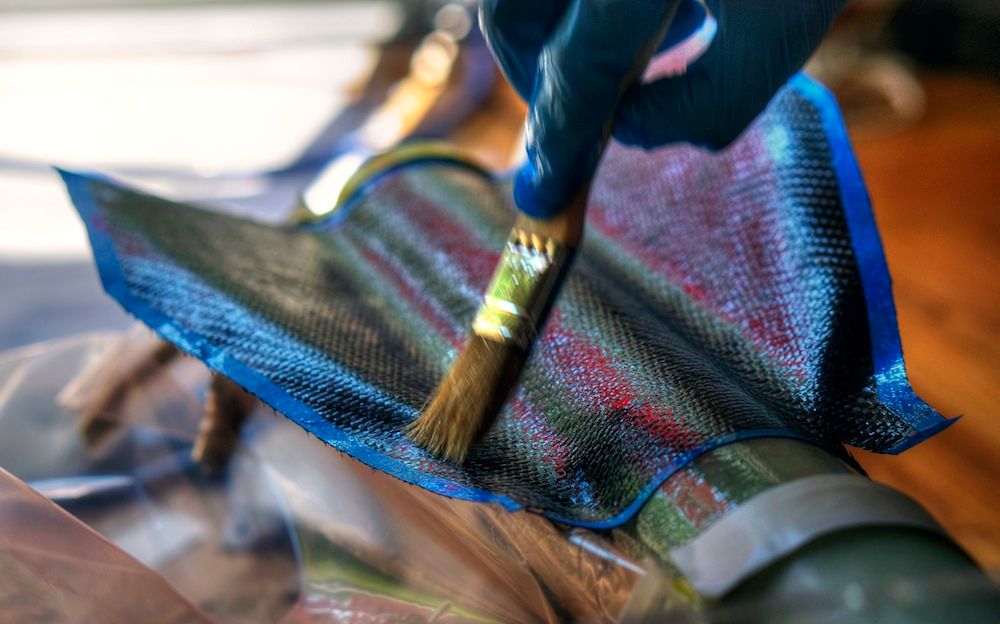
This is the final layer of one of the sides of the T2T being applied. I first wetted out each layer on Wax paper, which sat on a piece of glass and then cut it out to the right size and simply folded the wax paper w/ wet fabric over the fins.
Ensuring proper saturation on the top layer before vacuum bagging.
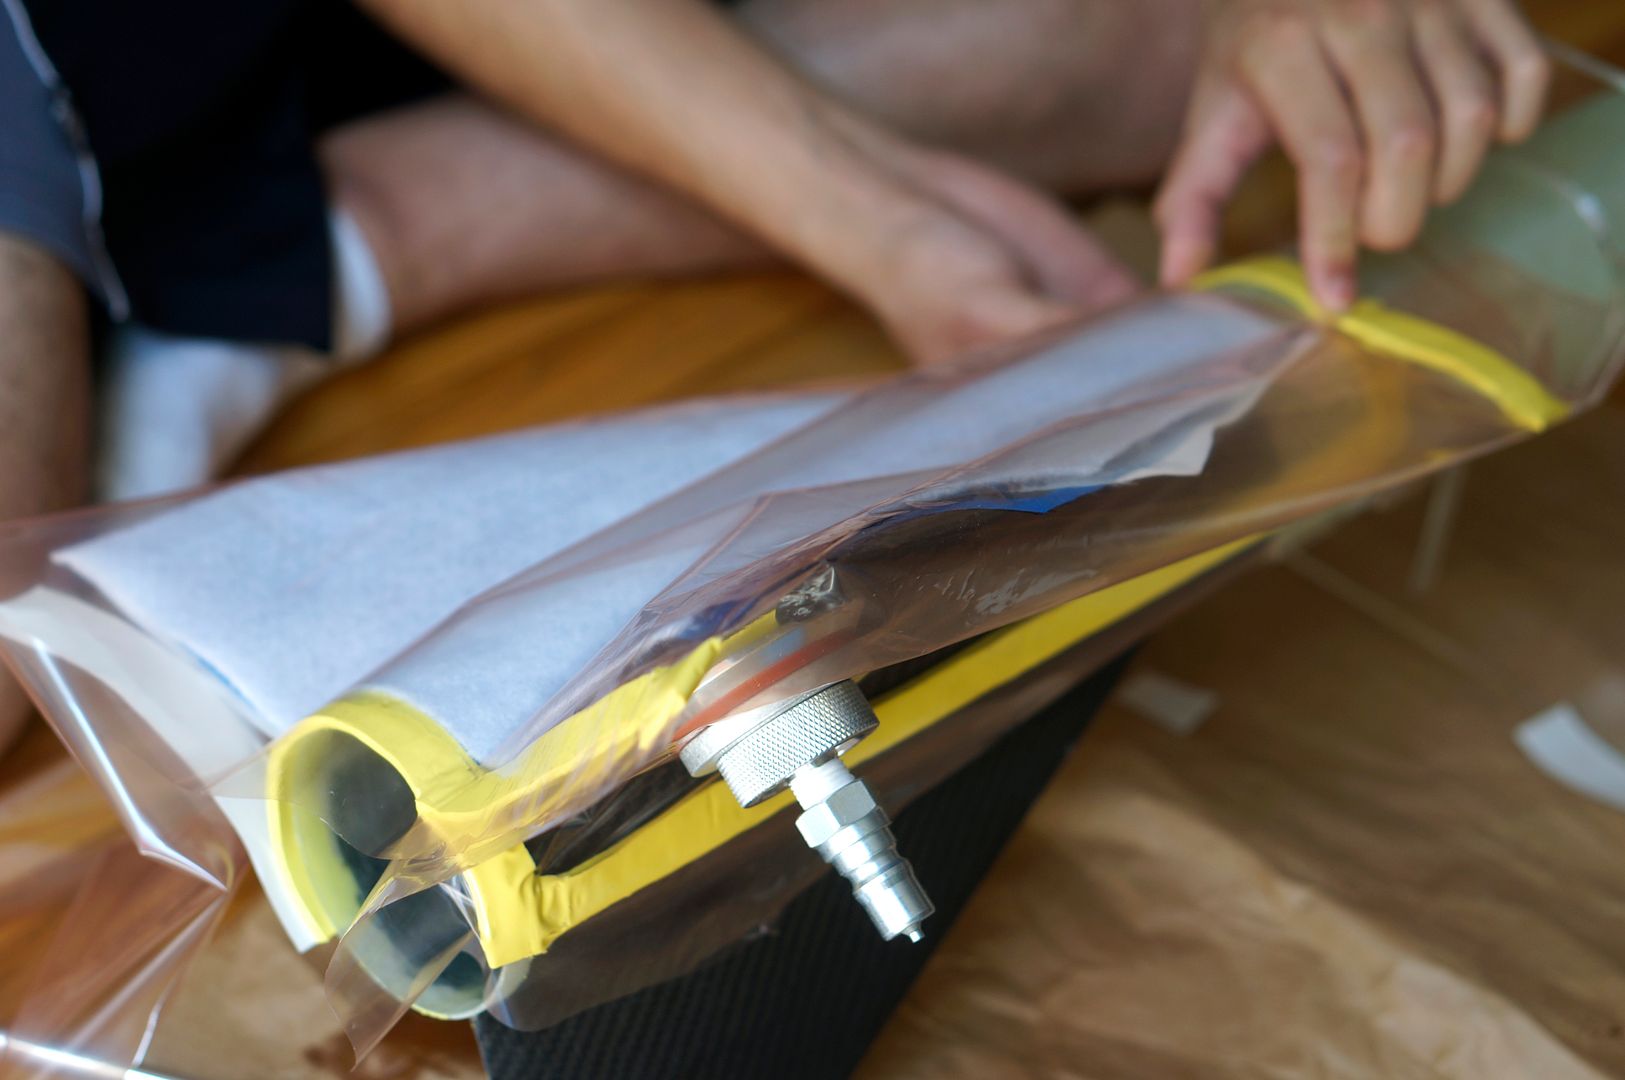
Wrapping vacuum bag around fin w/ proper pleats and seals.
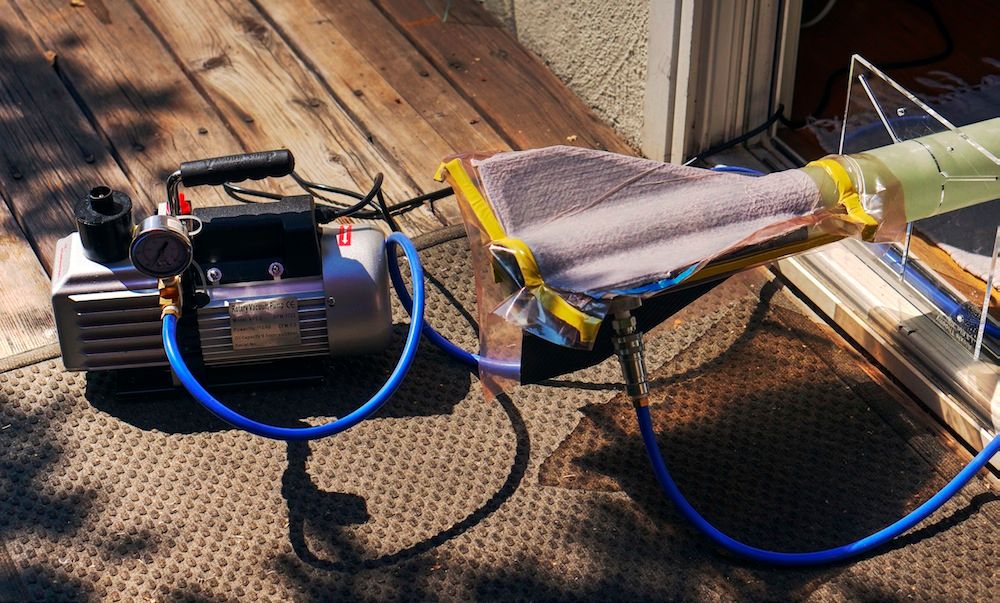
Pulled max vacuum using 2 stage rotary pump for 1.5 hours in the sun, and then shut off pump.
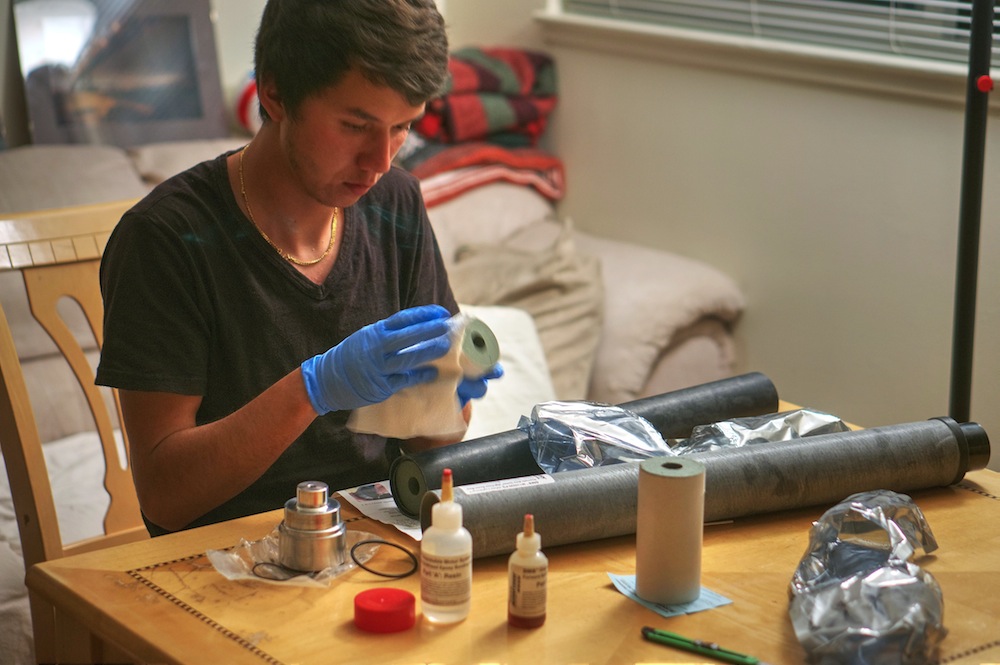
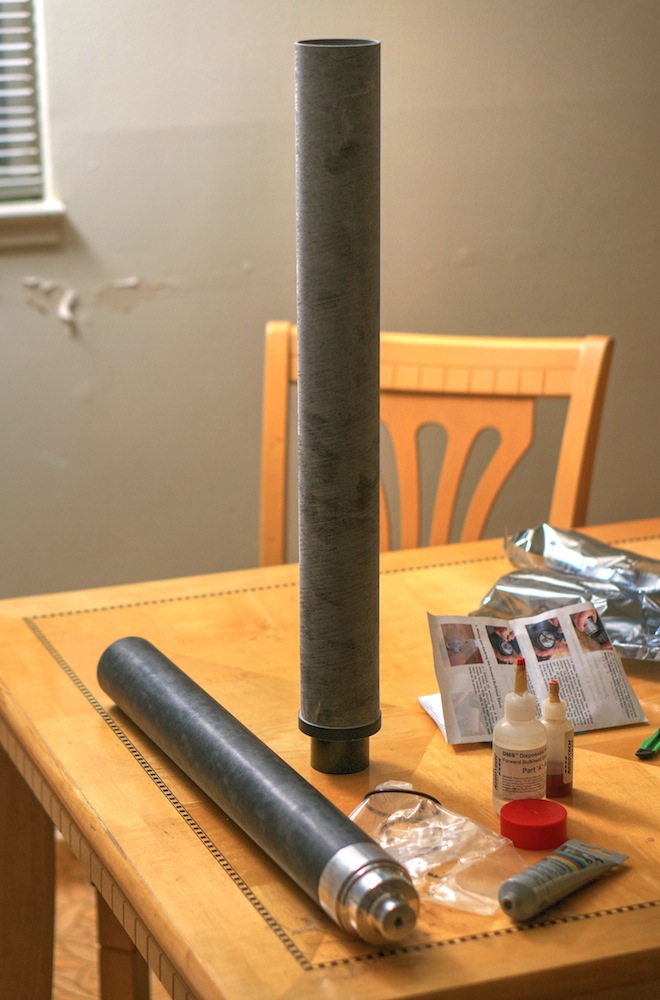
I decided to build the motor in advance because of wanting a full cure on the epoxy, so I began with wiping down the outsides of the grains that had slight smudges of propellant on them.
Here is the liner standing with all the oring spaces and grains inserted.

Filling Bulkhead/casing gap with the supplied epoxy. Followed each step precisely throughout the motor assembly process.

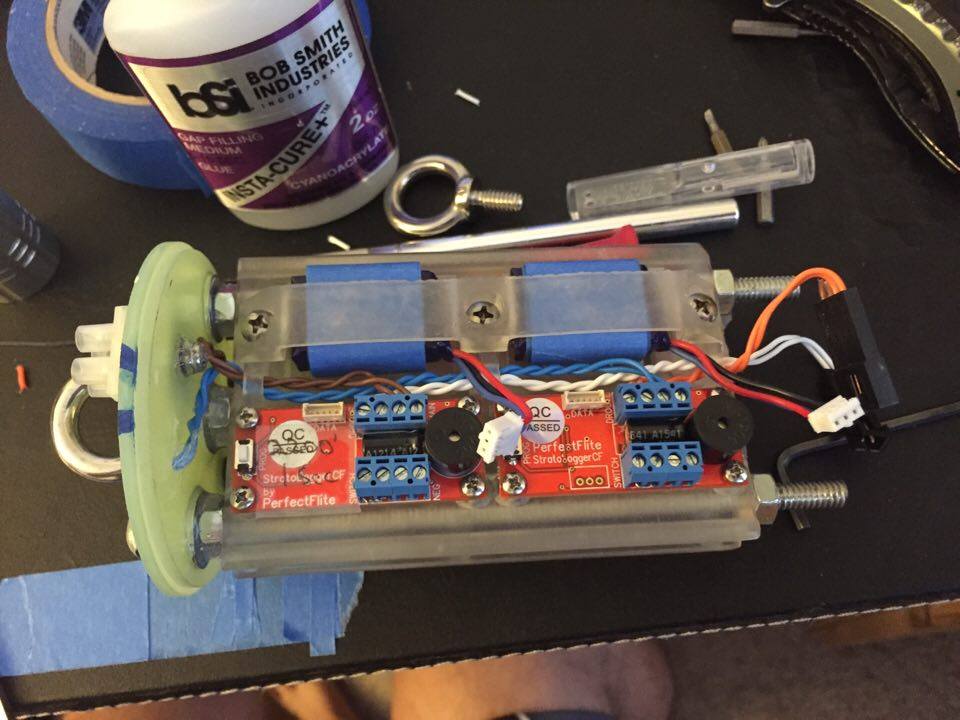
Here I am designing the sled w/ the 3 flight computers and GPS unit.
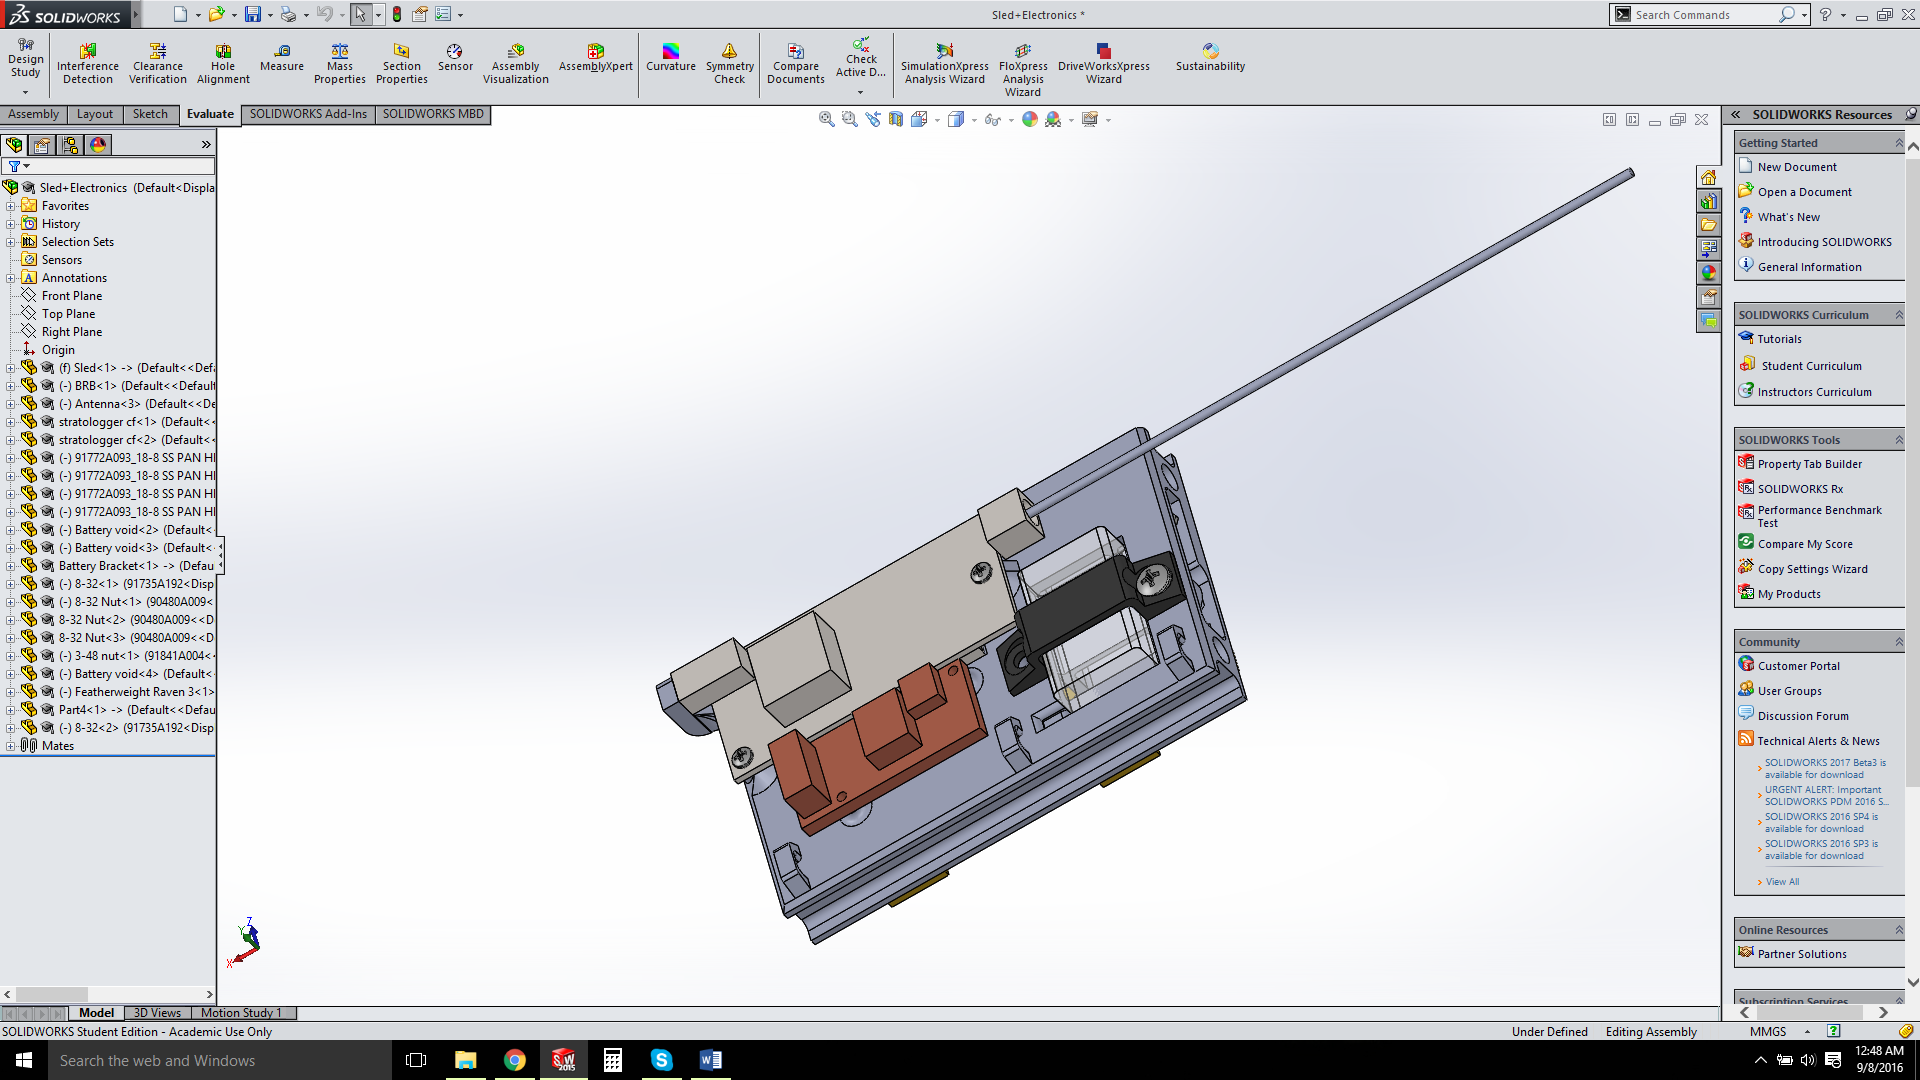
Beeline GPS and Raven 3 Flight Computer.
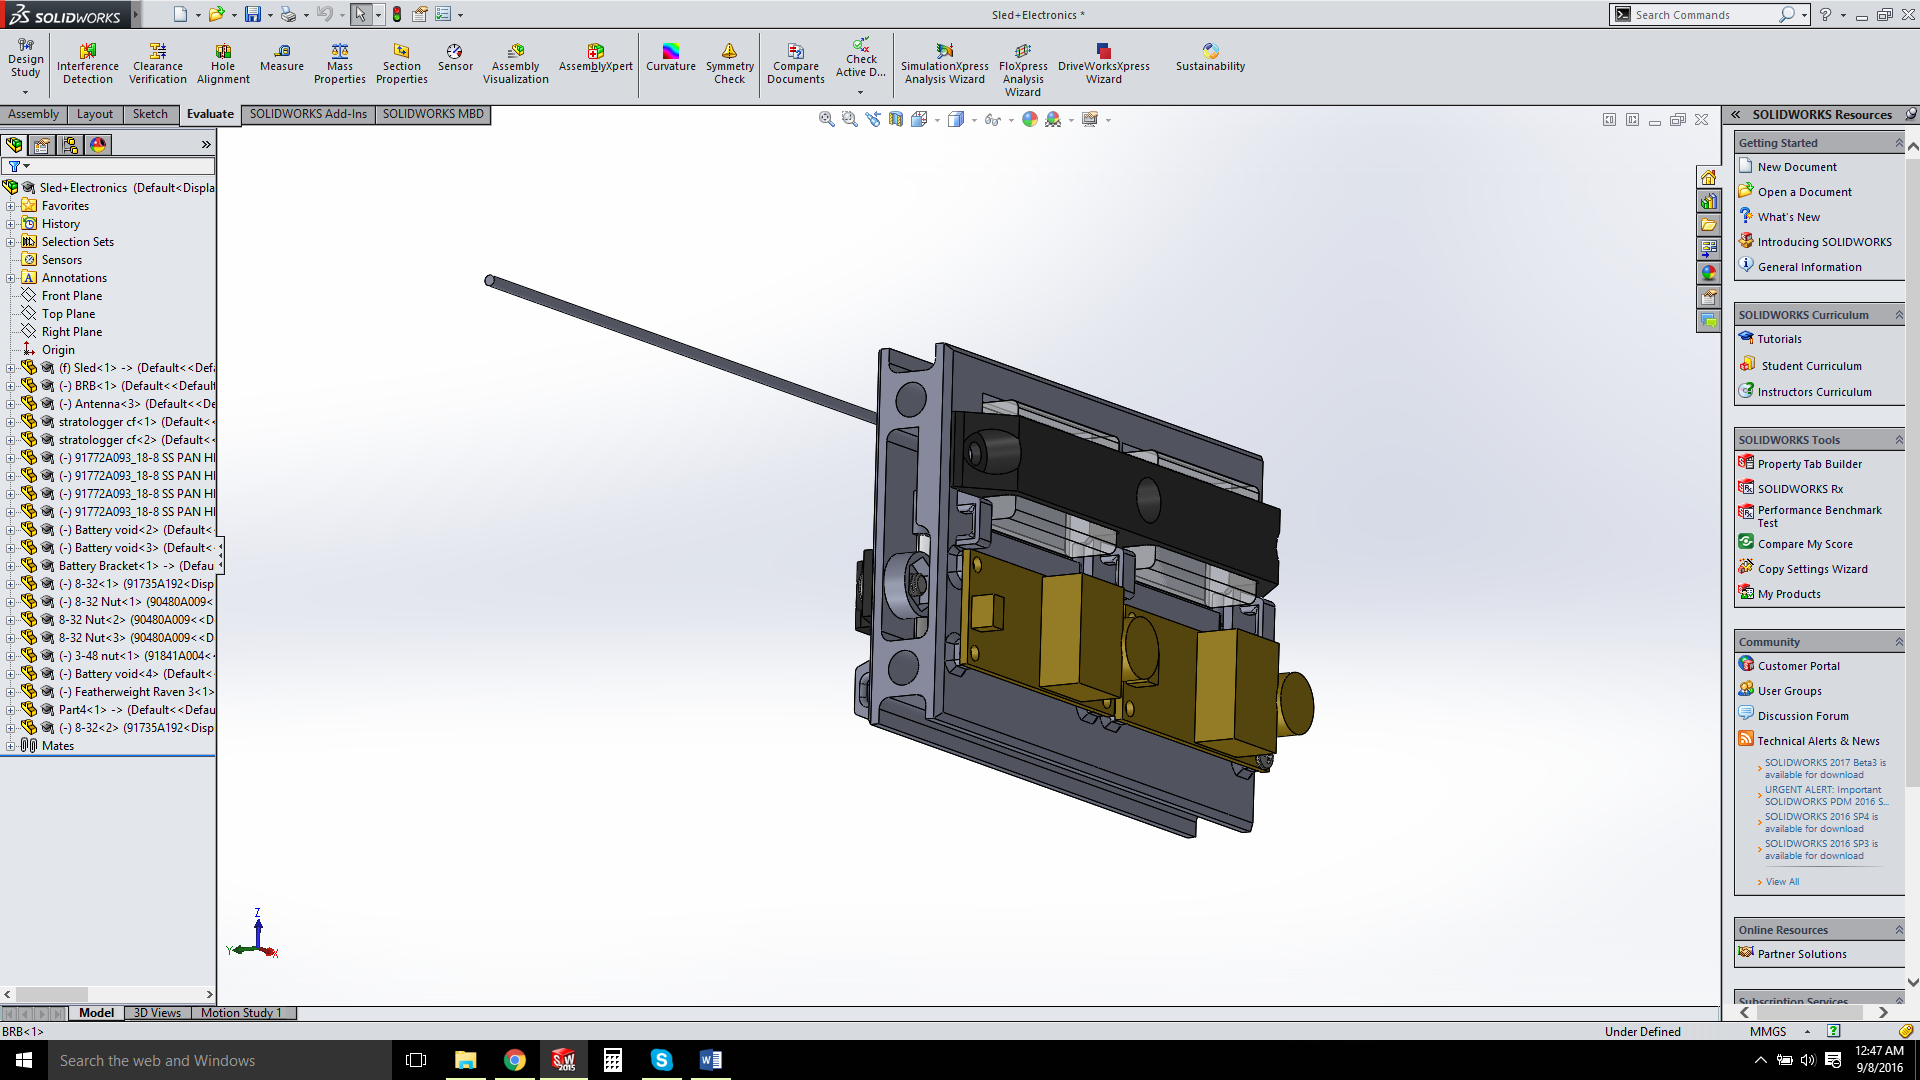
2x Stratologger CF
That about concludes what I have done to this point. At the moment I am printing said sled, and machining the motor retainer to accept 1/4 all threads that will pass through the camera mount.
Comments and suggestions are welcome!
Thanks!
Haha I was a bit late on my build thread for my L2, as I am again for my L3.... Been busy with school and work so I haven't had much spare time, but we're coming up to my launch date, BALLS 25, and I was thinking I might as well write something up on TRF before I finalize the build.
As for that, when thinking about my L3, I wanted to push my envelope of experience and after considering my L2 with a Hyperloc 1600, I chose to do a 75mm MD bird. The idea is to fly it with a baby M to between 20-25k (I've flown to 18k on a J1000 at mach 3, so its a familiar process), and in a subsequent flight, stick 10,000 Ns motor and hope for the best to around 45k. The flight motor, an AeroTech M1350 DMS, is about 1/3 the length of the rocket, while the full sized motor is about 2/3 of the length.
But back to the cert flight. I consulted two TRA TAPS, and sent in a preliminary report detailing my plan, which they O.K'd several months ago. Since then, I have been slowly building, time permitting. The goals of the bird, named KNOOP MK III (L1 was MK I, etc) are as follows:
-Reach above 20,000' on baby M DMS cert. motor
-Integrate rapid prototyping
-Integrated Camera, separate of Av-Bay
-Vehicle for subsequent high altitude attempts
The rapid prototyping section involves 3D printing the electronics sled, camera mount, and tail-cone. I have access to several Form 2 SLA 3D printers at work, so the detail and accuracy on these parts is quite high. The sled integrated cuts that takes the shape of nuts. I decided to make the camera bay separate from the Av-bay because of the chance of engaging the flight computers early during mach transition. I will also be using surgical tubing as my charge container to practice for high altitude flights.
The following is a list of major components:
-RW (Madcow) FW 5.6:1 VK Nosecone
-60" Standard FW Airframe
-1/8" G10 fins w/ 4 layers of increasing and 0,30,45,90 direction 2x2 Twill carbon T2T utilizing Aeropoxy PR2032 w/ PH3660
-Cotronics 940SS Ceramic Adhesive on Leading Edge
-3D printed Tailcone
-Solidworks designed and 3D printed Sled and Camera Mount
-Nosecone coupler as Av-bay w/ the following: Beeline 100mW GPS, 2x Stratologger CF (Redundant), 1x Raven 3 (Accelerometer data acquisition), and related batteries
-25' 1" flat kevlar "drogue"
-Iris Ultra Fruity Chute w/ 20' Teddy Kevlar Cord Main
Now for pics and the build.

Here I am JB-Weld tacking the fins on using a laser cut acrylic jig that I made at TechShop. I then Used a micrometer to ensure the spacing between the sheets of acrylic were even to prevent distortion between plates. All surfaces were prepped properly during this build before adhesives were applied (I.E washed with soap and water, scuffed up with 100 grit sandpaper, soap and water again, and finally 2x acetone wipe using fiber free cloth).

Once the fin was in place with the JB Weld, I used a few books and a piece of tape to ensure proper contact with the airframe's surface.

Here I am removing the tape from the fillets (Aeropoxy ES6209) which were done on-top of weaving carbon fiber tow between the holes seen.

This is the final layer of one of the sides of the T2T being applied. I first wetted out each layer on Wax paper, which sat on a piece of glass and then cut it out to the right size and simply folded the wax paper w/ wet fabric over the fins.

Ensuring proper saturation on the top layer before vacuum bagging.

Wrapping vacuum bag around fin w/ proper pleats and seals.

Pulled max vacuum using 2 stage rotary pump for 1.5 hours in the sun, and then shut off pump.
I decided to build the motor in advance because of wanting a full cure on the epoxy, so I began with wiping down the outsides of the grains that had slight smudges of propellant on them.
Here is the liner standing with all the oring spaces and grains inserted.
Filling Bulkhead/casing gap with the supplied epoxy. Followed each step precisely throughout the motor assembly process.
Here I am designing the sled w/ the 3 flight computers and GPS unit.
Beeline GPS and Raven 3 Flight Computer.
2x Stratologger CF
That about concludes what I have done to this point. At the moment I am printing said sled, and machining the motor retainer to accept 1/4 all threads that will pass through the camera mount.
Comments and suggestions are welcome!
Thanks!
Last edited:
") All have phones but not photographed. They prefer to come across as Mark Twain without having his talent
All have phones but not photographed. They prefer to come across as Mark Twain without having his talent