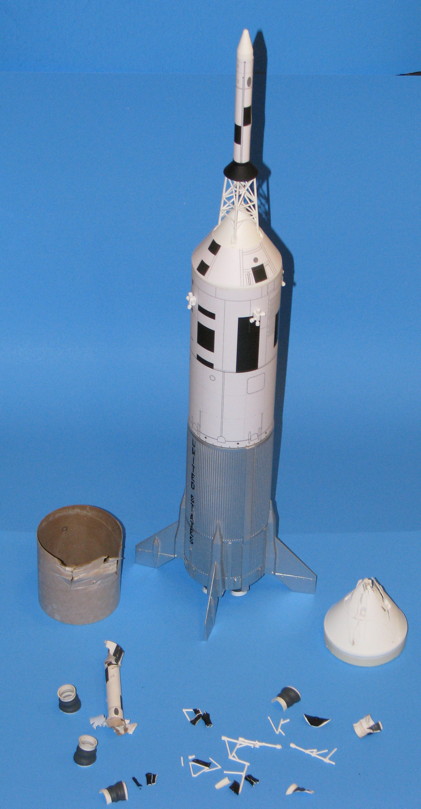
Fins:
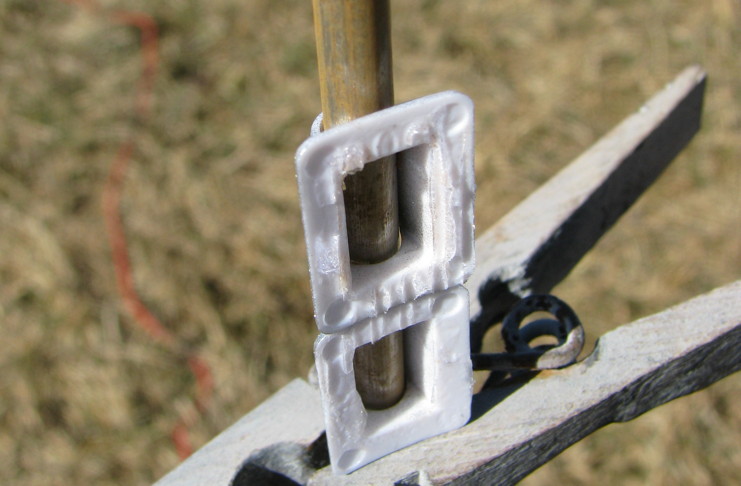
I have updated my "fin spars" from 1/4" dowel to 1/4" SQUARE hardwood. The main reason is the added circumference area that becomes available for gluing where the spar passes through the walls of the body tube (plus it's easier to hand-sand [though I have progressed beyond that] the tapers where the spar goes into the fin and it also gives a larger bonding area inside the fin). They also distribute any landing loads through both the engine mount and a significant portion of the body tube. If you manage to tear a fin off with this arrangement then you have had a REALLY serious recovery problem.
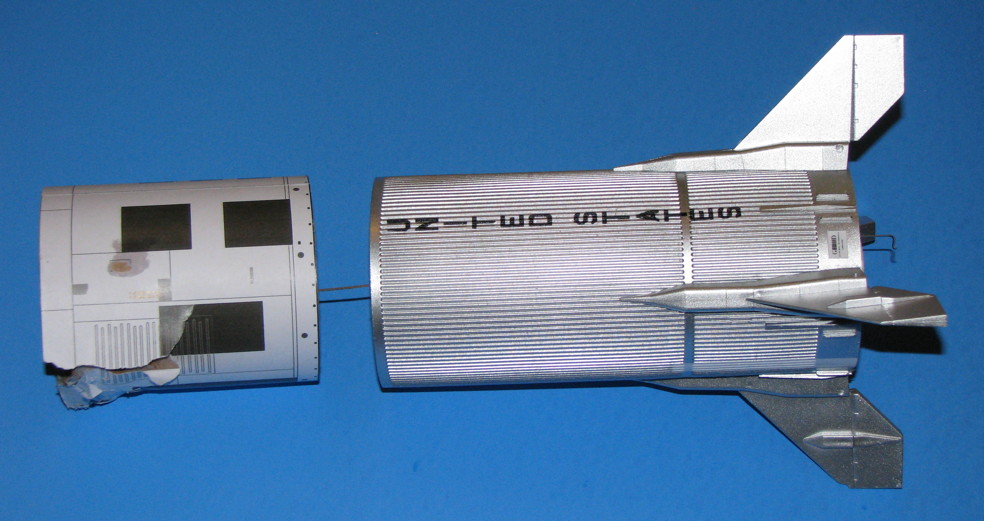
Additionally, having heard some reports of "sooting", launch blast back, and heat damage to the plastic nozzles, I figured it is an easy matter to make the whole rear bulkhead with the scale nozzle removable. The fin spars center and support the rear of the engine tube so the bulkhead is no longer needed for that. I use the bulkhead during construction to make sure the spars exactly center the engine tube. Other than that, the bulkhead becomes an "unattached" part of the model for display. Just paint one side of the bulkhead white, paint and glue the scale nozzles on the painted side of the bulkhead, test fit and sand for a snug but removable fit and, voila! You have a nice "display" nozzle assembly that won't get trashed in flight...and you save a half-ounce from the rear of the model for flight.
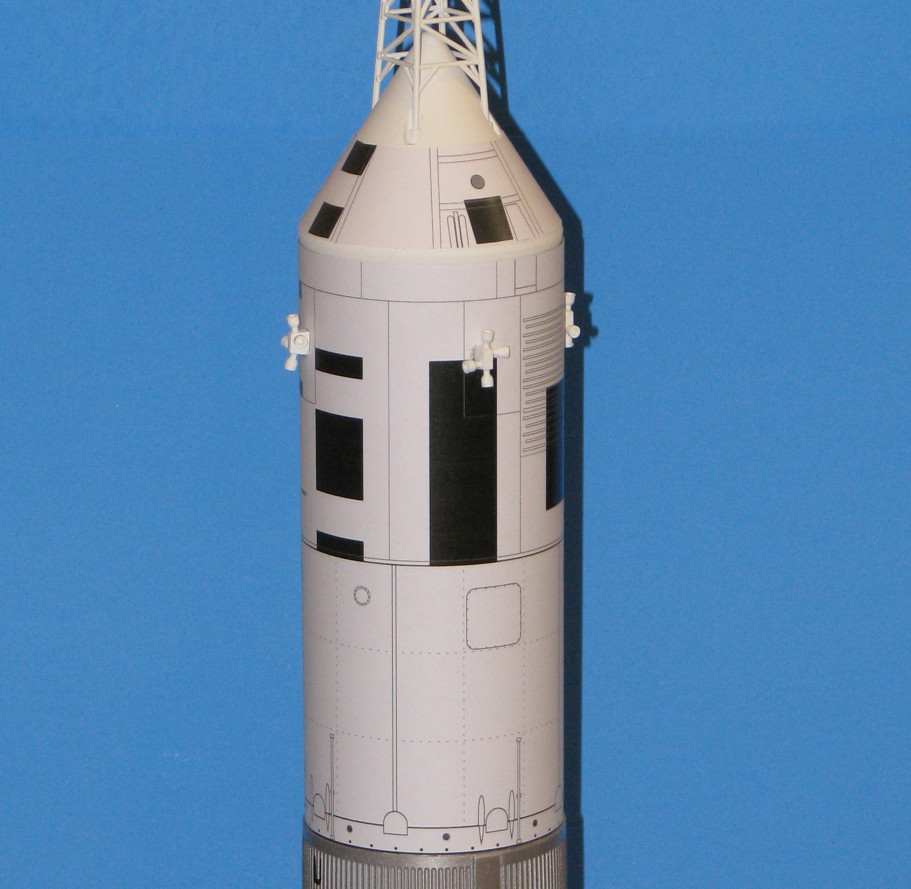
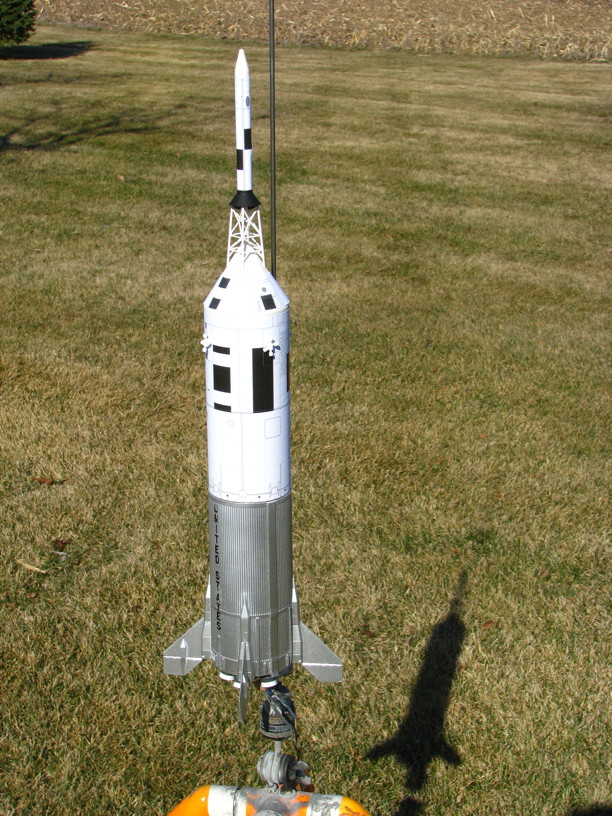
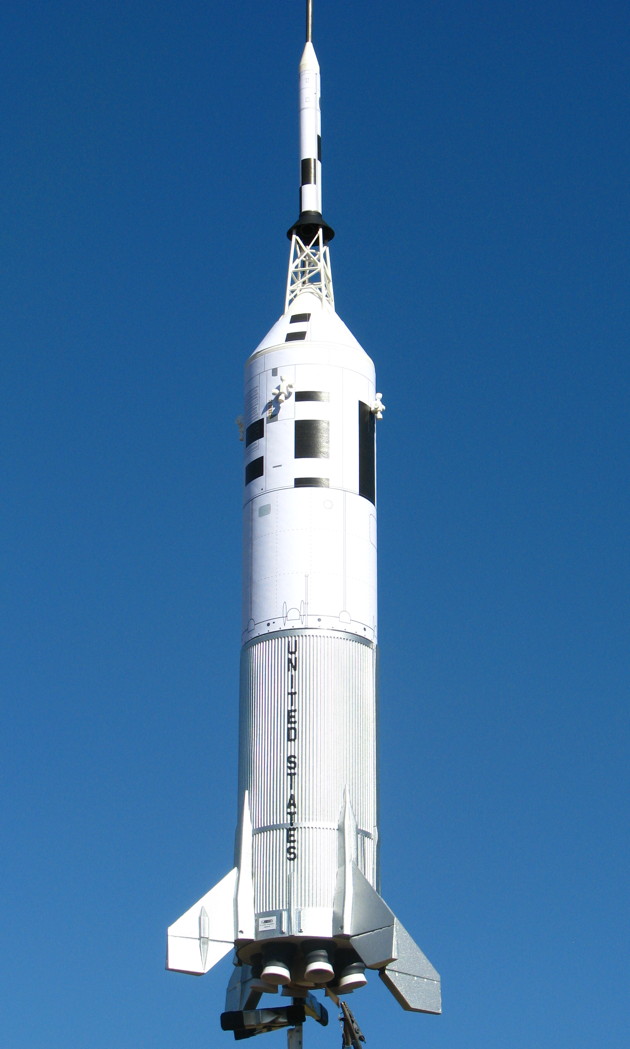
![WP_20160327_12_38_10_Pro[1].jpg](https://cdn.imagearchive.com/rocketryforum/data/attachments/206/206017-74c46fd31655f48d17c1380edf4bd8c9.jpg "WP_20160327_12_38_10_Pro[1].jpg") Those Decals:
Those Decals:
I've heard several modelers fretting over having to get the kit "UNITED STATES" decals to nestle down in the corrugations (most hadn't even tried it yet). During application (there's another tip following that you do before applying the decal) just soak the decal on its backing (which should be cut as close to the lettering as you can) in REALLY WARM water to make the decal soft and pliable. After about 15 seconds it "releases" from the backing. Position over the raised centerline of the stringer over which it is to apply and slide the whole decal along the long dimension so that about 1/4" of the "S" in "STATES" is positioned just ahead of the longeron. the bottom of the last "T" in "STATES" positions toward the aft edge of the splice ring. Now, holding the "S" in place with your finger, grasp the other end of the backing and in a straight motion, keeping all the letters centered over the centerline corrugation, slide the backing forward and out from under the decal. Using a very soft artists brush (I use a #00) and liberal amounts of VERY WARM water, "dab" the decal so that it nestles (or begins to) into the recessed corrugations. It goes a lot faster and easier than you think. The decal is fairly tough so you pretty much have to TRY to damage it.
While the decal is still wet, liberally apply a decal setting solution and DON'T DAB during or after applying the stuff. I use
Walthers Solvaset. It's very strong and as it evaporates it really softens the decals and "sucks" them down into the corrugations. It will completely evaporate and do its job in a few minutes. If on close inspection you feel it still hasn't pulled the decal down as you like, liberally apply more setting solution. BTW, support the model horizontally and do one side at a time, allowing full drying before attacking the other side.
The "Other Thing" Concerning Decals:
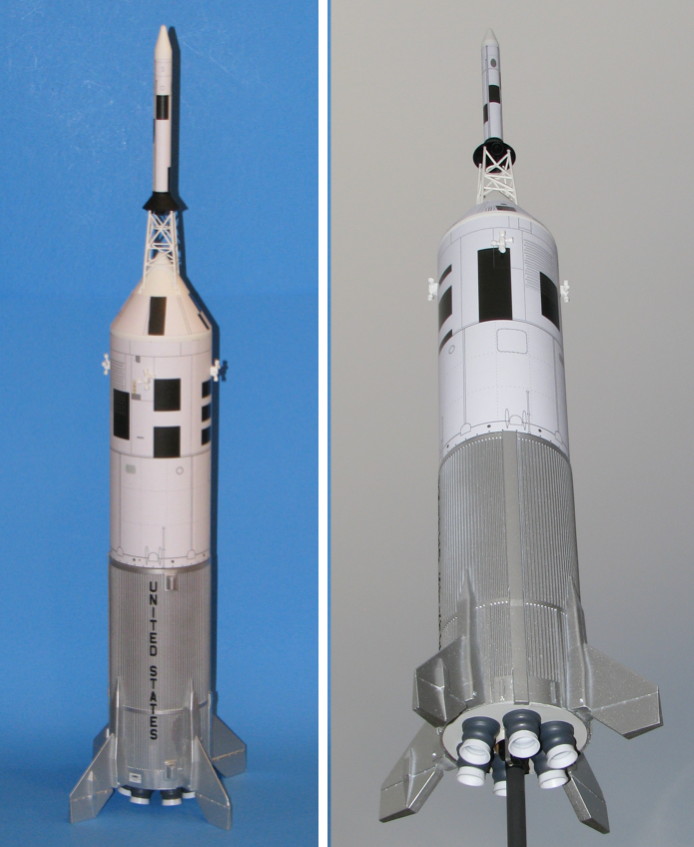
What ever clear you plan to use on the model as the first clear coat you apply OVER the decal, apply a coat of that same clear to the model BEFORE you apply the decals...especially over metallic paints. If you don't, the metallic paint will react a bit differently to the decal than to clear paint and you end up with a visible outline around the decals (but, it's not so serious with the Little Joe because the corrugations "camouflage" the outlines of the decal. Once the decals has dried, use the same clear over them as you used under them. Been doing this for almost 50 years and it's a rule I never break.
But WHAT Clear To Use?
I've played with several different "silver" and "aluminum" paints over the years and found there's nothing easier, better, and more "aluminum looking" than Testors Spray "Metallic Silver"...if you use it with the right clear coating. What do I use? I use Pledge Floor Care (it's the same as "Future Floor Polish" from a few years back...that EVERY plastic modeler knows about). When Pledge is applied over the Tesors "Metallic Silver" something almost magical happens right before your eyes. The sparkly "Metallic Silver" instantly takes on the appearance of honest to goodness ALUMINUM...and even if the bare "Metallic Silver" looks a bit un-uniform, once the Pledge hits it things are just perfect.
Most model rocketeers don't have airbrushes or airbrush skills, so...Don't laugh at this next tip...and it works exceeding well with the Little Joe because of the corrugations. I apply the Pledge straight out of the bottle (I just squirt a bit in the center of a saucer) and use a high quality 1" FOAM artists brush to apply. YUP. No airbrush. Apply in single, non-stop, linear, barely overlapping strokes starting at one end and stroking all the way to the other end on each pass. Don "brush over" previous passes. Don't use "back and forth" strokes. Just go all the way around the model (fins too) using this method, then let dry for about 15 minutes. Then go back and apply a second coat. Though the Pledge will deliver a very high gloss, when it goes over the Testors Metallic Silver it really doesn't look gloss (the way scale modelers like it).

After many frustrating experiments with applying clear over metallics over many years using various spray lacquer/enamel clears...Krylon, Rustoleum, store brands, others...I have found that they all can deliver "surprises" when sprayed over a metallic paint ranging from outright "attacking" it, to "fisheyes", uneven finishes. Never had the problem with Future/Pledge. The other nice thing about Future/Pledge as a clear coat is that it acts as a primer and a barrier between the metallic surface and other "spray clears" if you want to apply coat of matte or flat clear like Krylon and others, knowing that your metallic finish is safe and sound under the Future/Pledge (which BTW is a water-based air-cure acrylic). I've NEVER had it attack finishes over which it is applied...even other water-based acrylics or the older water-based polyurethanes. Also have never had it have any problems with "sticking" to other paints.
Escape Tower:
One last thing just occurred to me after communicating with a modeler a few minutes ago who was having problems assembling the escape tower. I assemble mine by installing the two legless sides of the kit parts to one legged side resting face up on a flat surface. I'm now using MicroMark "Same Stuff" (presumably same as Tenax) and it forms a very strong and almost instant bond. Anyway, the resulting "U shaped" structure misleadingly welcomes the quick installation of the ring that is "trapped" between the three side. Yeah, Right. Just TRY to "easily" position that ring so that the four little nibs line up...and just TRY to keep it in place while you glue it. Well, there's a simple solution. Just sand the nibs off the ring so that you have a nice, projection-free ring. It litterally just drops and STAYS in the proper place while you glue it.


That's it for now.
John Pursley


")