


So AM I the only person on this planet that has flown this New Little Joe II kit?
Tell us how it flies? I would love to hear your launch report!
Last edited:
So AM I the only person on this planet that has flown this New Little Joe II kit?
George, James,
Do you feel this Little Joe II would make a good sport scale model for a NARAM entry?
John Boren
I think it would make a good Sport Scale model for NARAM. There are areas where better builders could make the model more accurate, depending on which mission they model and what they do to try to make it more accurate (and how well they do so since poorly done extra detailing is worse than not having it. ). So in a scale room with say 6 of the kits entered, if they were all built to the same craftsmanship level, the judges would give more points for the ones that had enhanced accuracy.
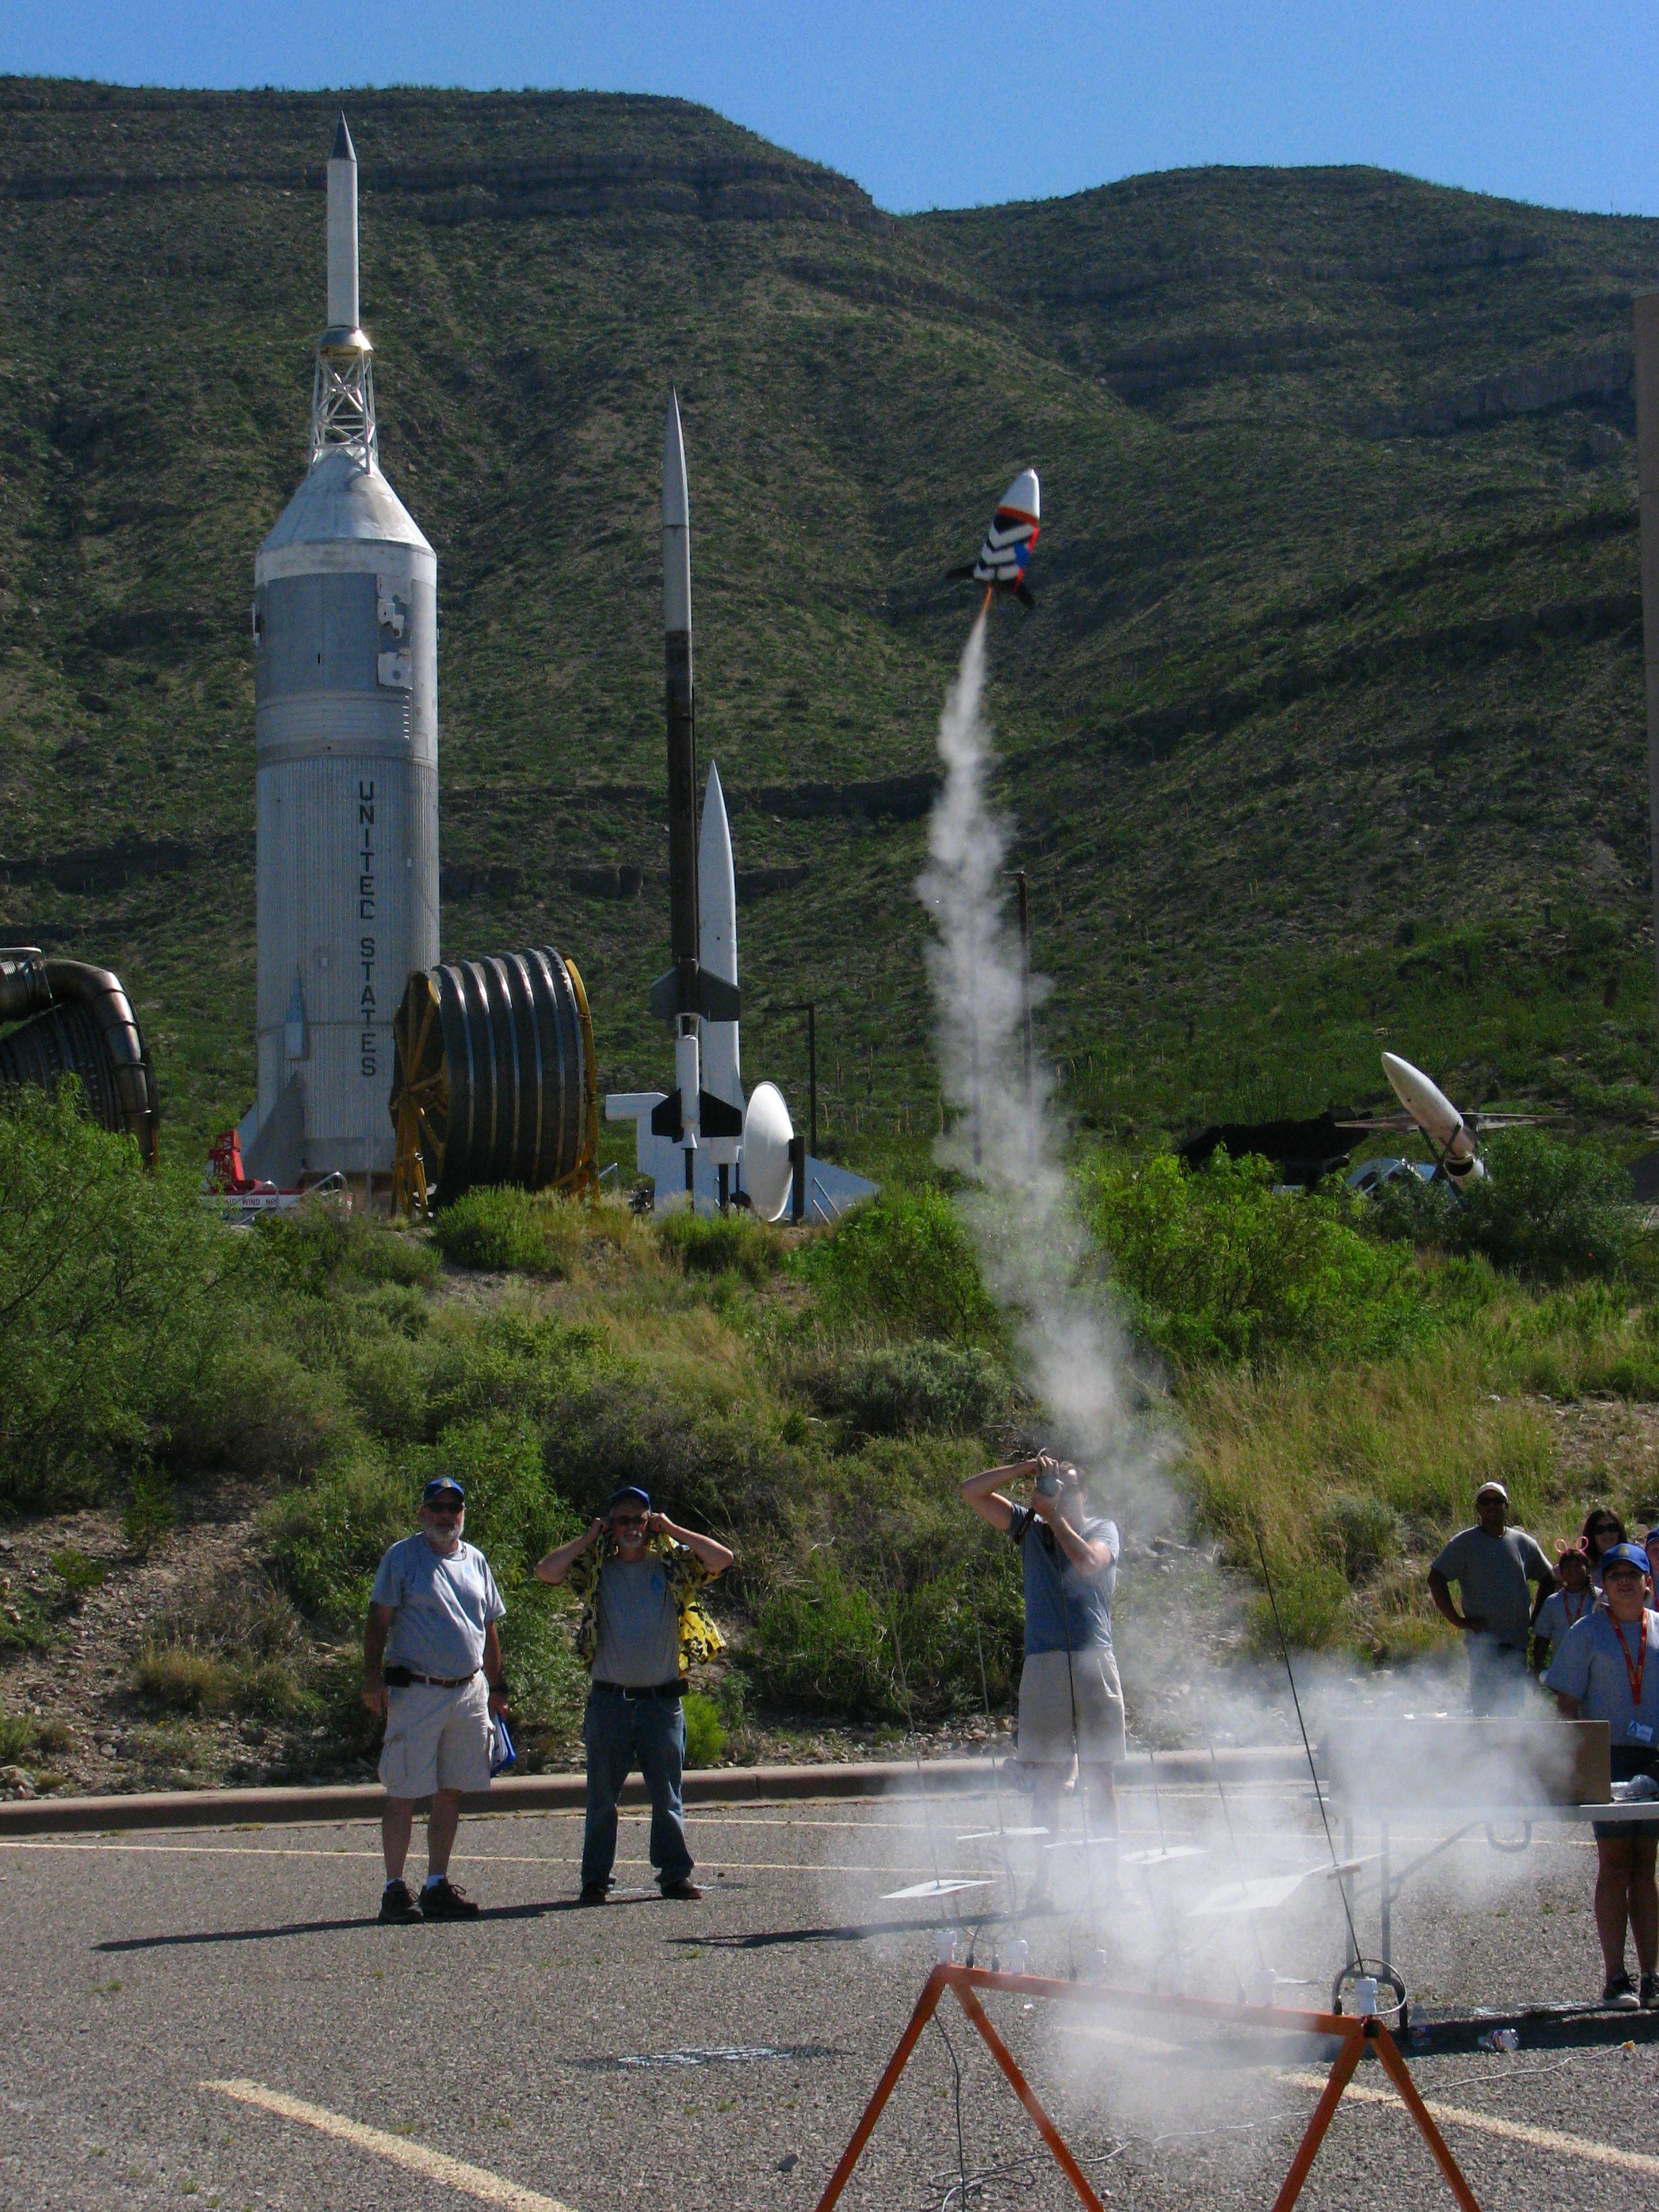
I'm going to be in Houston next week, and on Monday the 22nd I plan on spending an hour or so at the Saturn V display at Houston Space Center. If anyone wants pictures of anything specific from the Little Joe on display right outside that building send me a PM or an email, and I'll do my best to get it documented.


This would probably be a question for George Gassaway. Is the Little Joe II CM that is on display in New Mexico & Houston accurate for any of the actual missions flown? It seems like the Little Joe II on the displays have command modules with the Radiator panels in the wrong locations. The CM look closer to an actual Saturn CM and not a LJII CM. They don’t match the drawings or historical pictures of the vehicle on the launch pad.
53.4 Non-Flying Prototypes
Entries in Sport Scale Competition may model a non-flying or inert vehicle if its configuration is reasonably representative
of a historical vehicle configuration.
This would probably be a question for George Gassaway. Is the Little Joe II CM that is on display in New Mexico & Houston accurate for any of the actual missions flown? It seems like the Little Joe II on the displays have command modules with the Radiator panels in the wrong locations. The CM look closer to an actual Saturn CM and not a LJII CM. They don’t match the drawings or historical pictures of the vehicle on the launch pad.
Remaining Little Joe II Hardware
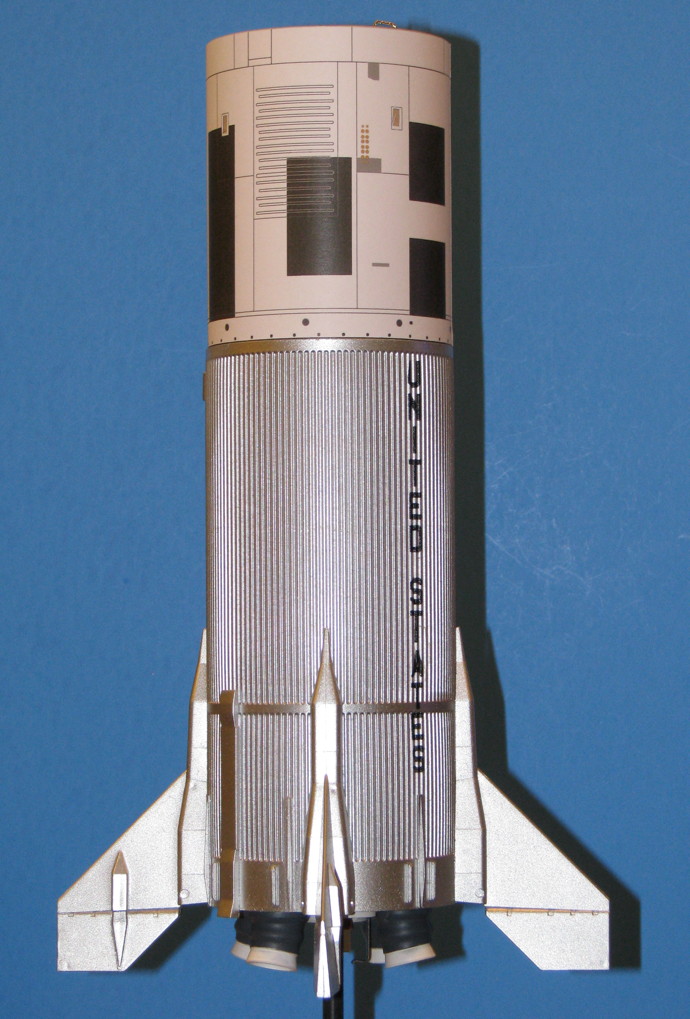
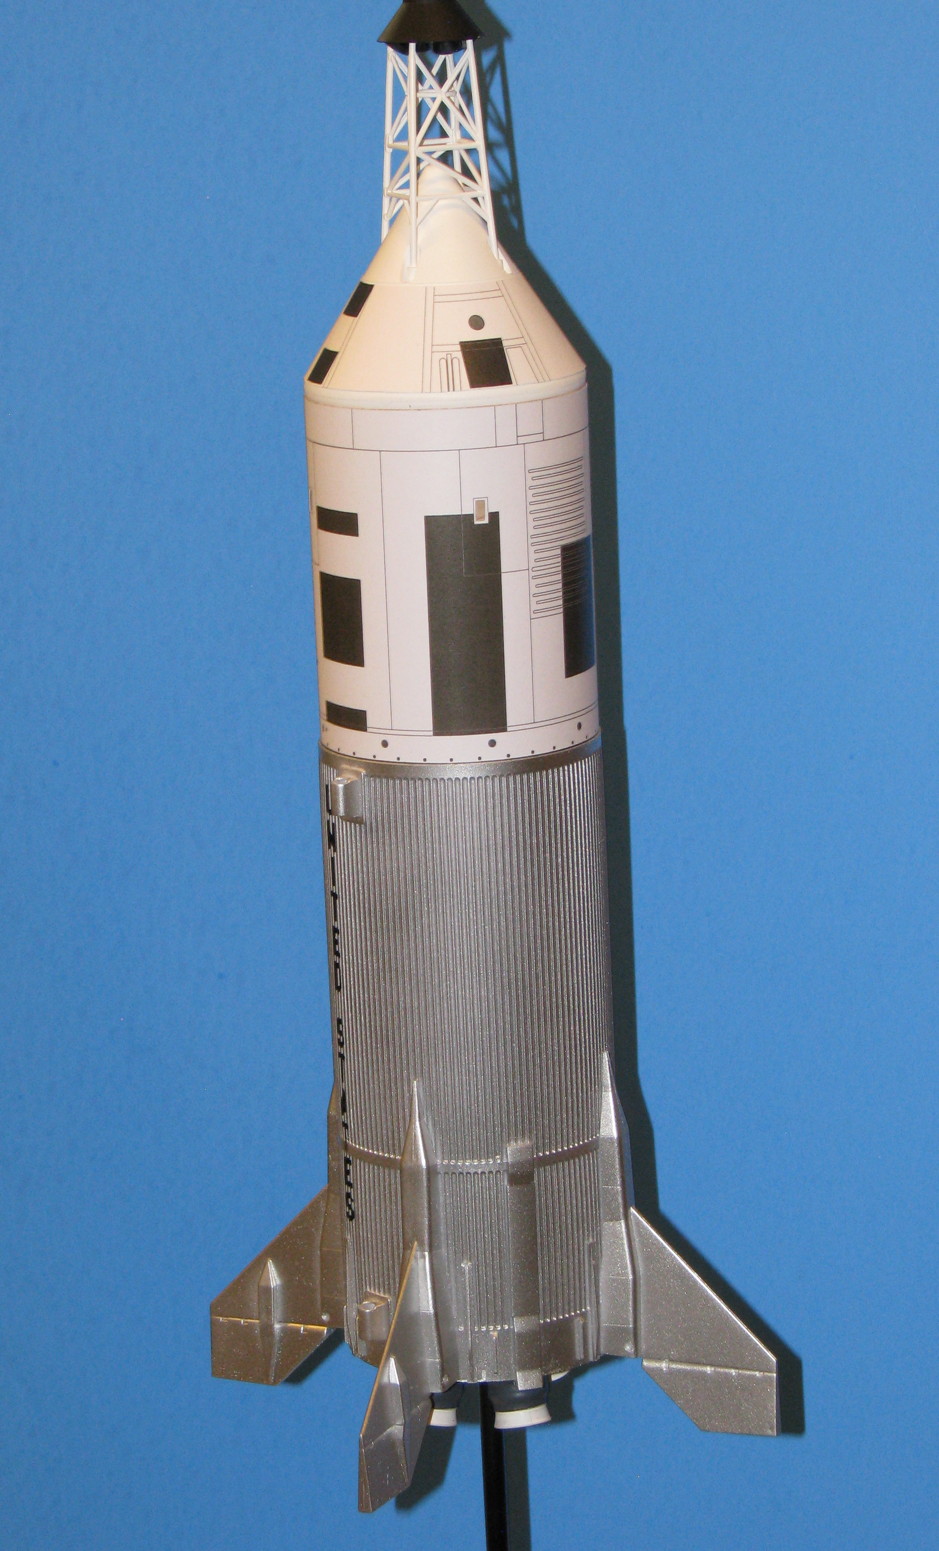
A total of eight Little Joe II vehicles were built by General Dynamics. Airframes 12-50-3, 12-50-4, and 12-51-4 were not flown and two of them still exist on display.
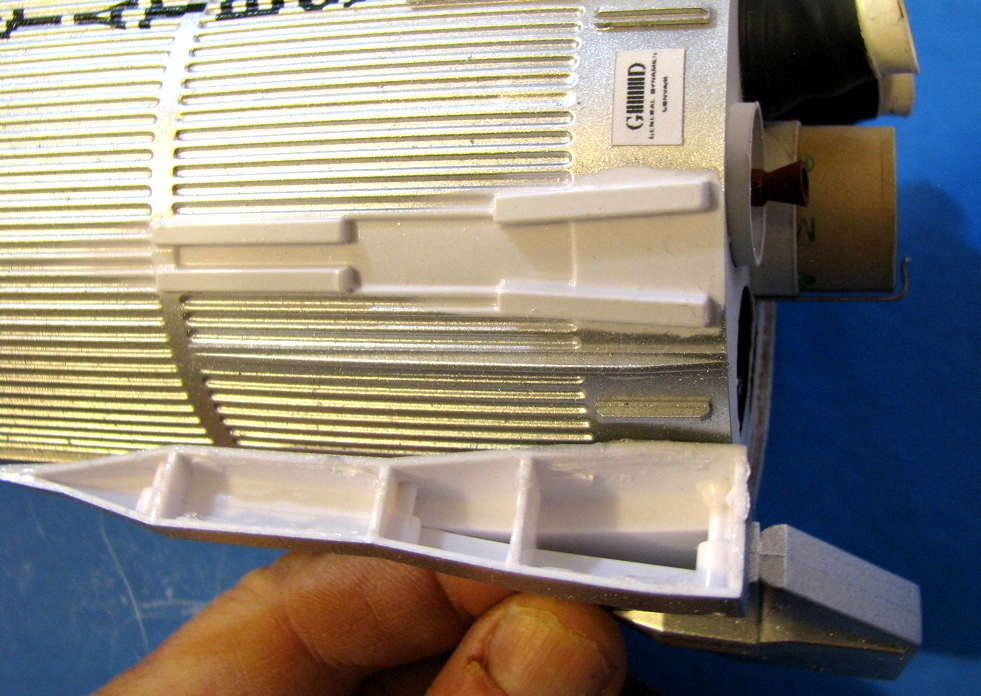
One of the 12-50 series vehicles is on display at the Lyndon B. Johnson Spaceflight Center near Houston, Texas. The vehicle is sitting on the Little Joe II launcher used in White Sands, and is mated with the Boilerplate capsule BP-22 (flown on A-003), a Launch Escape Tower, and a Block II Service Module. Strangely, the vehicle is not equipped with the fixed fins that would be expected on a 12-50 series model, but instead sports the movable-elevon fins and the lower part of the fin-root fairings that belong on vehicle 12-51-4. A bit confusing, but still an excellent opportunity for photographing details of the body, fins, and fairings (as long as you understand the situation). The short wiring tunnel cover plate is not on the aftbody. The roll patterns on the LES and SM are incorrect, and the CM lacks a Boost Protective Cover. Because the vehicle is sitting atop the launcher, modelers cannot reach it to make measurements.
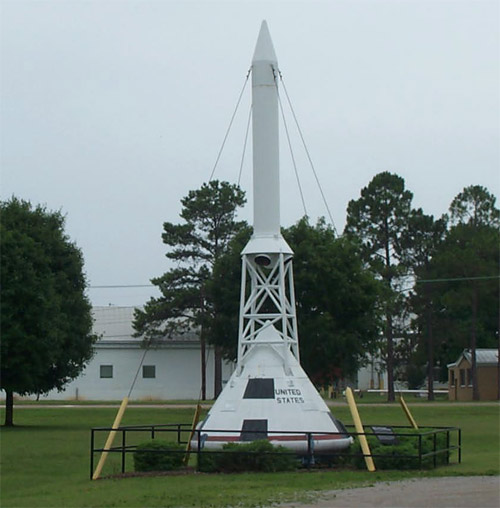
Little Joe II number 12-51-4 is on display at the International Space Hall of Fame Museum in Alamogordo, New Mexico, topped by a Block II SM, dummy capsule, and dummy escape motor. A set of fixed fins and just the tops of fin-root fairings (the bottoms of which are on the Houston Joe) are mounted on the vehicle. The display provides excellent photo opportunity for those interested in body details and fixed fins, and the vehicle is mounted low enough to allow measurements of the bottom sections.
The Boilerplate BP-23 Command Module (flown on A-002 and Pad Abort-2) is on display at Marshal Space Flight Center at Huntsville, Alabama. It lacks a BPC and has an incorrect paint pattern, but the LES tower framework and the lower part of the LES motor provide useful scale data.

John DeMar, you said you do a launch at the ISHoF once a month. When we drove to NARAM, we stopped there for a short visit (Friday before NARAM, July 24th). There was some sort of apparent student rocket contest going on. All flew the same design. Pic below. Wonder if you were there?
Very, Very nice looking model.
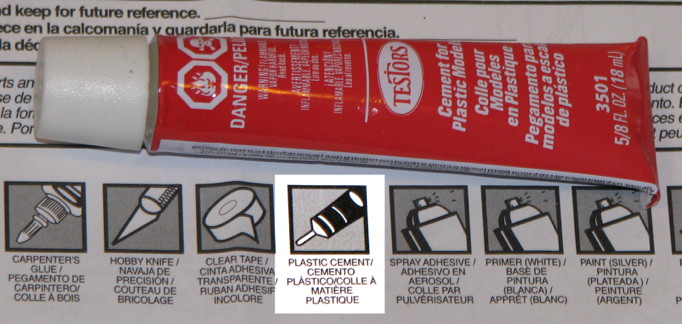
Not sure if the Testors tube glue I used to glue the fins on was old or what but while doing some light sanding on the primer a fin popped of rather easy. I checked them after originally after gluing and they seamed solid. I popped the other 3 off rather easily and am reattaching them with Rocketpoxy. We will see how they hold. I would have tried thick CA but I didn't have any.
Hmmm. I used the Testor's "red tube" glue and so far, so good. Barring a dumb accident like dropping it, I guess I'll find out when I fly it and it lands.
BTW - In general, epoxy does not bond to plastic very well. It "sticks" to plastic, but a lot of epoxies can literally peel off from a lot of plastics. For the times when that cannot be avoided, for the epoxy to get a better "bite", many builders will often sand or otherwise rough up or scratch the mating plastic surfaces.
Since you mentioned you were doing some sanding of the primer..... I assume you did not apply primer to the wrap before you glued the fins on? Because if the wrap was painted before gluing the fins, the fins are not glued to the wrap, the fins are glued to the paint, and paint does not bond to a surface as glue does. I'm pretty sure you did not do that.... but want to be sure.
The other thing though is that if you were say sanding primer on the Service Module part of the tube, why not put the primer on the tube and sand it smooth first, before applying the wrap? OK, the instructions didn't say to do it in that sequence. And that is not excusing fins that pop off too easily, but a building risk / complication / hassle to mess with primer after the fins are on if it could have been done to the body tube earlier before attaching the fins and other parts (if it was indeed the tube).
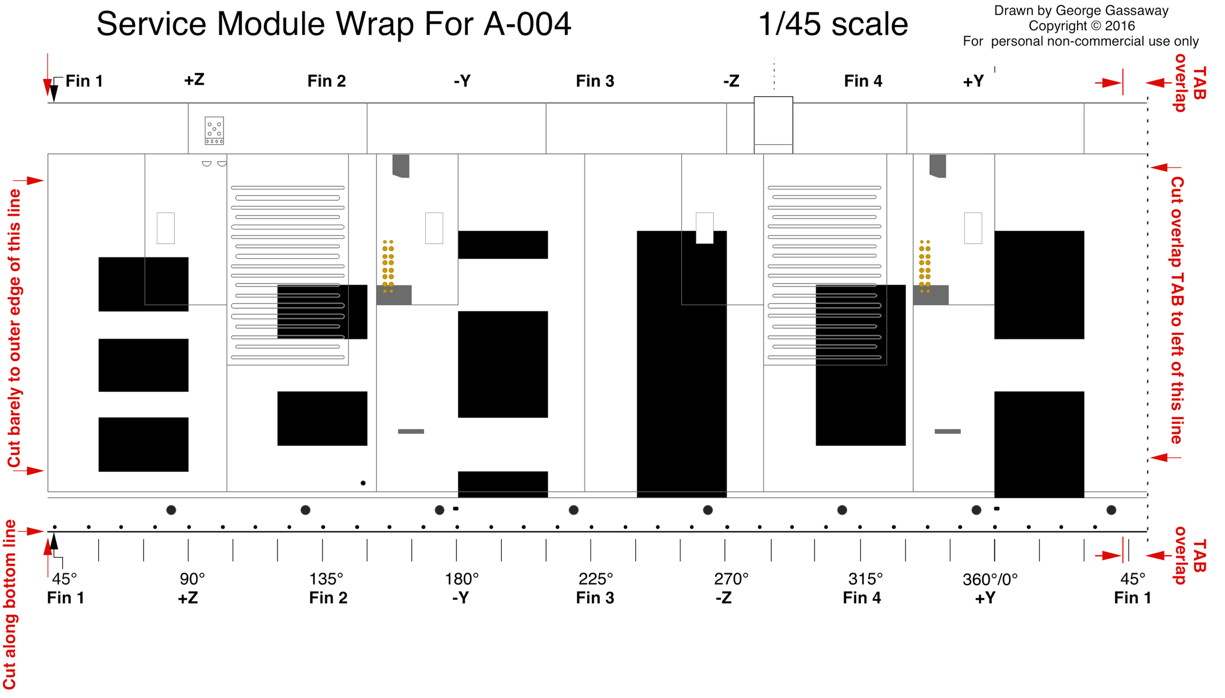
On my Joe, I may be ready to call it "done" by Saturday night. It's not that it's taking me a lot of time to finish it up, just juggling other things. And running into a few learning experiences with the wraps that I'll mention later (Had to go to OfficeMax to re-copy some wraps due to paper quality / brightness mismatch). I do have the SM Thruster Quads painted, so other than redoing the CM/BPC wrap and applying the Escape Motor wrap, gluing the thruster quads on will be the last of the "building". Though that's not including the recovery system being attached, and not including the little General Dynamics/Convair plaques (I have those drawn up, but do not have the clear decal paper to print them on and apply over chrome tape to get the correct look. So that may be awhile but in the meantime I might put some temporary ones in place, simply printed onto paper and applied with a low-tack adhesive. And man they print so tiny that....I could have used a Klingon font and some might not notice.)
And I'm starting a totally different project (glider, not scale) which I wanted to get a jump on so I could get it far enough along to see if I needed to go to a hobby shop across town to get any supplies Saturday or not. Otherwise I try to avoid simultaneous builds, prefer series builds. I had to spend some time researching it and making up templates.
- George Gassaway
Hmmm. I used the Testor's "red tube" glue and so far, so good. Barring a dumb accident like dropping it, I guess I'll find out when I fly it and it lands.

IPS Weld-On® 16™ (a clear multipurpose adhesive) is syrupy or bodied and fast drying. It works best for bonding dis-similar plastics together such as ABS and PVC, or ABS and Styrene, where the fit isn't perfect (such as flat surfaces, lap joints). Good in a pinch as well since we sell 1.5 oz. tubes.

Enter your email address to join: