


Indiana
Well-Known Member
- Joined
- Jan 17, 2009
- Messages
- 1,228
- Reaction score
- 1
Hi all, been a long time since I've posted.
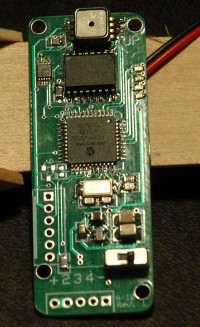
I needed a project to keep the ol' gray matter pliable, so I designed a data logging flight controller. It reads acceleration, absolute air pressure and temperature (haven't added the temp sensor yet). The circuit is built around a Microchip PIC18F4550.
I'm using a 15bit A2D converter to read the sensors. Currently I'm taking data at 50Hz, though I should be able to go up to 200Hz. Data is saved to an on-board 1Mbit eeprom. The data is transferred to the PC with USB using a pretty basic (so far) C# program.
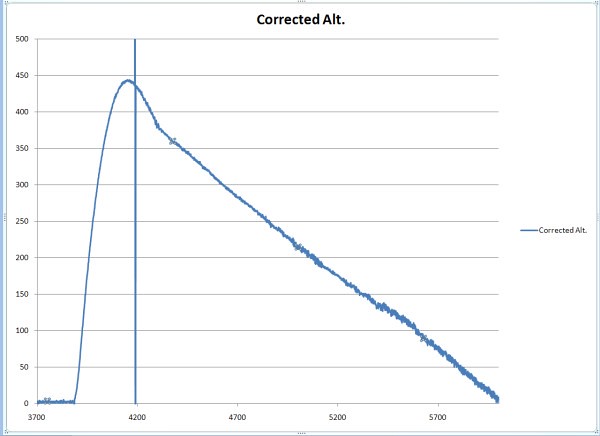
I'm currently using a very simple algorithm to detect apogee using the pressure sensor. I used a very conservative setting this flight to make absolutely certain that it had reached apogee. I don't have much test data yet, and I was uncertain how smooth the pressure curve would be during the flight. If I've done all my math right, it detected apogee at 443' and set the deployment charge at 441'.
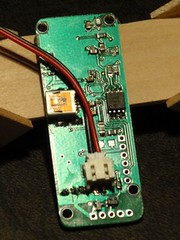
The blurry picture below shows the connection point for an external battery and two "high current" drivers used for air-starts and recovery charge.
I did it mostly for the fun of it and the mental exercise, lord knows I could have bought one cheaper!
Finally got to test launch today. Here are some pics. My video helper managed to miss most the flight.
The board:

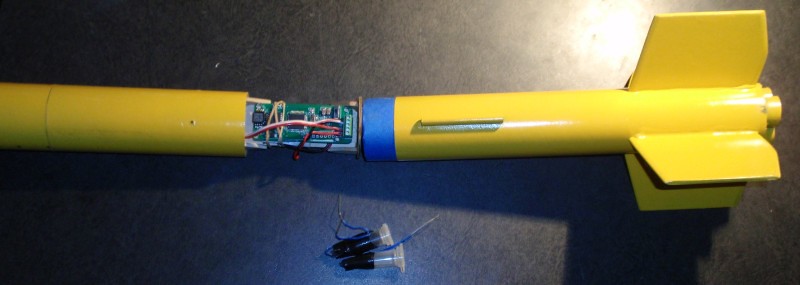
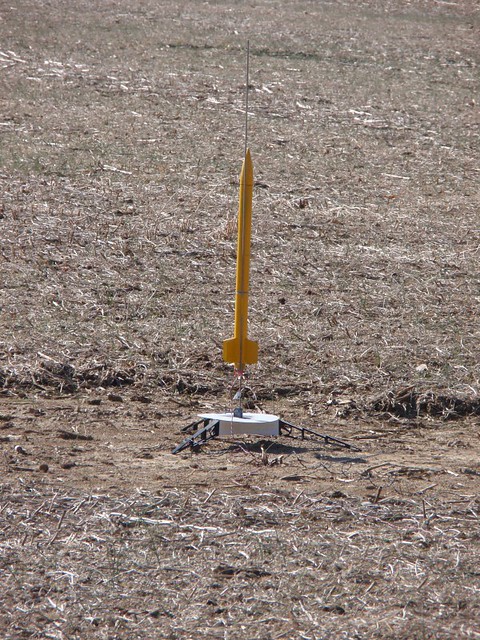
The rocket is a BT-60 of my own design:
The first flight data, 443' AGL:
Raw data:
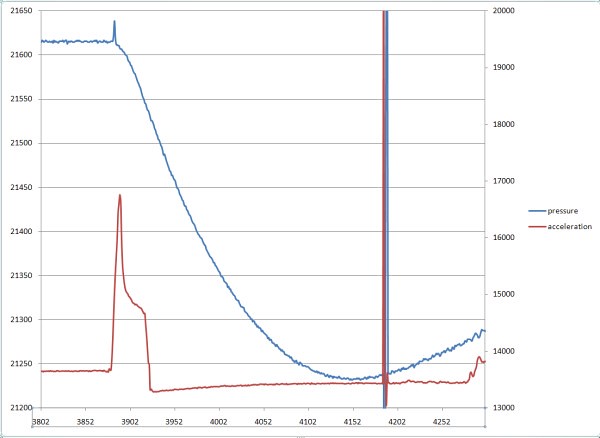
Alt plot. The ejection charge really wallops the air pressure sensor:
The scene of the crime. Wild success or epic failure is mere moments away!
I needed a project to keep the ol' gray matter pliable, so I designed a data logging flight controller. It reads acceleration, absolute air pressure and temperature (haven't added the temp sensor yet). The circuit is built around a Microchip PIC18F4550.
I'm using a 15bit A2D converter to read the sensors. Currently I'm taking data at 50Hz, though I should be able to go up to 200Hz. Data is saved to an on-board 1Mbit eeprom. The data is transferred to the PC with USB using a pretty basic (so far) C# program.
I'm currently using a very simple algorithm to detect apogee using the pressure sensor. I used a very conservative setting this flight to make absolutely certain that it had reached apogee. I don't have much test data yet, and I was uncertain how smooth the pressure curve would be during the flight. If I've done all my math right, it detected apogee at 443' and set the deployment charge at 441'.
The blurry picture below shows the connection point for an external battery and two "high current" drivers used for air-starts and recovery charge.
I did it mostly for the fun of it and the mental exercise, lord knows I could have bought one cheaper!
Finally got to test launch today. Here are some pics. My video helper managed to miss most the flight.
The board:
The rocket is a BT-60 of my own design:
The first flight data, 443' AGL:
Raw data:
Alt plot. The ejection charge really wallops the air pressure sensor:
The scene of the crime. Wild success or epic failure is mere moments away!
