Wildman 3" Punisher and Darkstar Jr. Build Thread

The Rocketry Forum

Help Support The Rocketry Forum:

This site may earn a commission from merchant affiliate links, including eBay, Amazon, and others.

rocketgeek101

Well-Known Member
Joined
Nov 27, 2011
Messages
2,526
Reaction score
504
Location
NB Canada
Ok, here we go... This is the build thread for both my Widman 3" Punisher and Darkstar Jr, both of which I purchased during the BSS sale last November. This will be a quick thread without too many details, as I no longer have the time to document my builds very thoroughly as I've done in the past.

I'll be using many of the techniques I developed and learned from my Shape Shifter Jr. CAR L1 and L2 Junior certification project. Now that I'm 18, the next thing to do is to redo my level 2, for senior status, which I hope to do this spring using my Shape Shifter Jr.
I might use my 3" Punisher for my CAR level 3, but I haven't decided that for sure.
I don't have any special plans for the Darkstar (certification wise that is... I'm just building as a nice sport rocket for H-I motors). :)


I've already done quite a bit on the Punisher. I've assembled and glued in the motor mount, tacked on the fins, foamed the fincan, and JB welded the Aero Pack retainer on. The next thing to do will be to do the external fillets. I'm using Rocketpoxy for the construction.

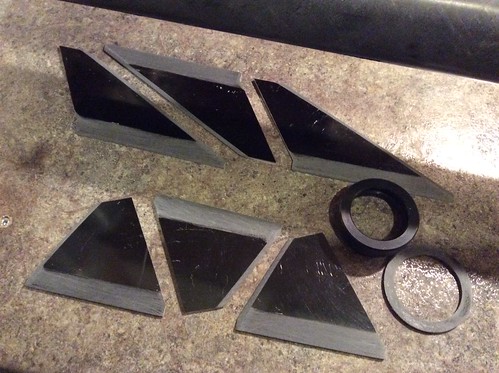
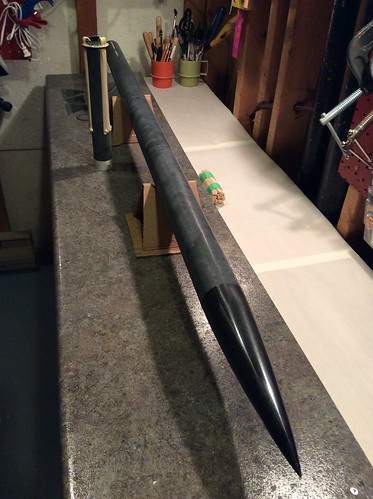
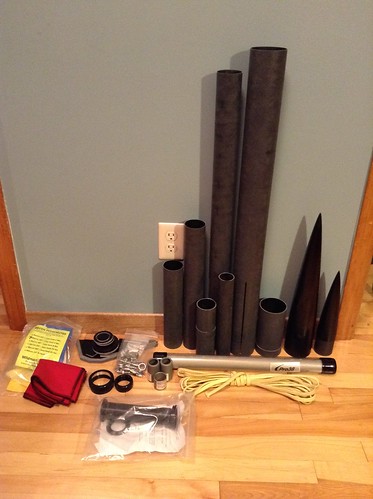
First off here is what was in my BSS order:
16386232806_14b855066f.jpg


Building the motor mount for the Punisher:
1) I cleaned and sanded the parts and then did a test fit of the MMT for the Punisher:
16410436461_214bec8880.jpg


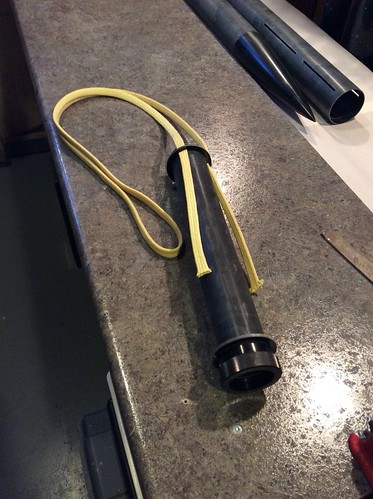
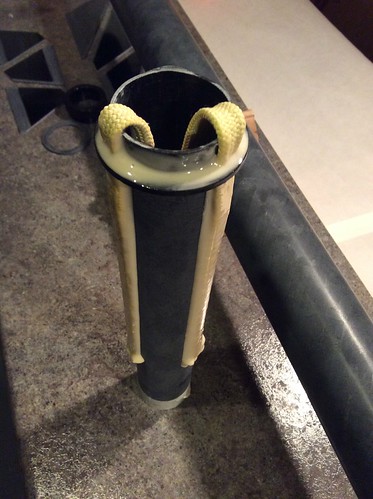
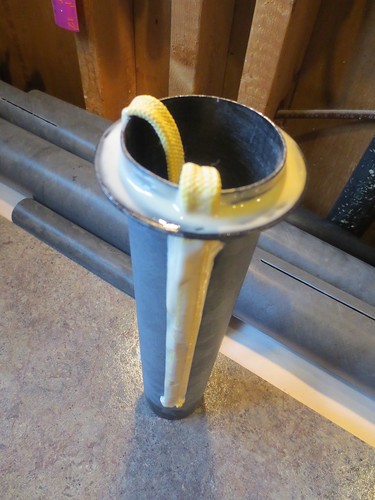
2) Then I epoxied on the forward CR and the Kevlar Y harness:
16386241486_5138c528d4.jpg


3) I then epoxied in the MMT:
16412185905_9133cf54b5.jpg


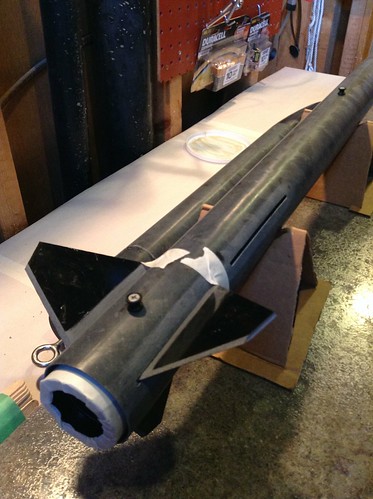
4) After that I tacked on the fins:
16226041549_f28fa24629.jpg


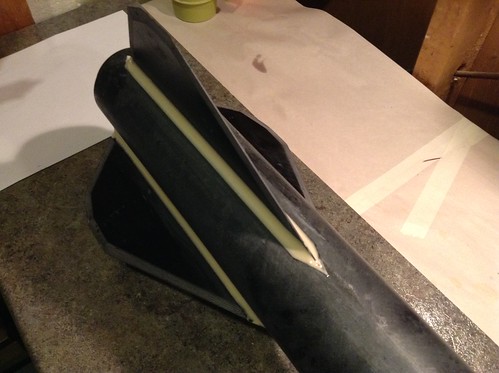
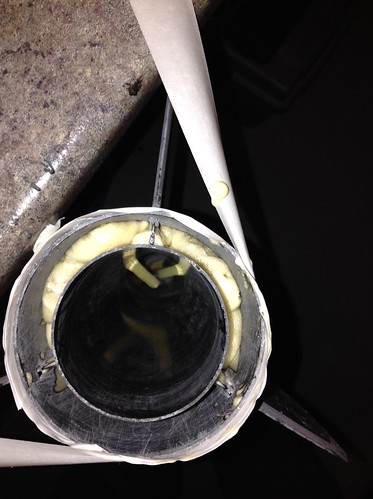
5) And then foamed the fincan using PML expanding foam:
16410422701_6c980278e4.jpg


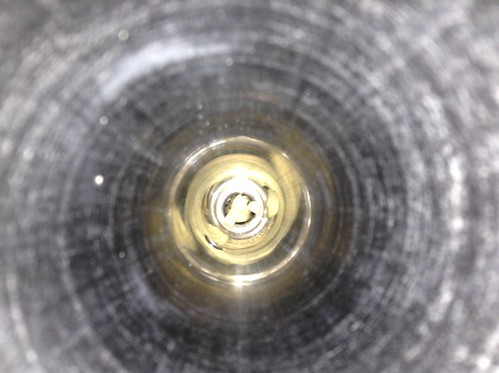
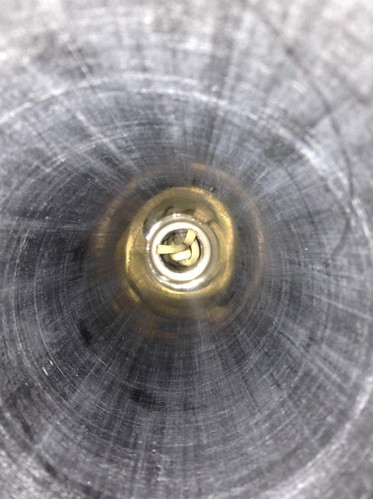
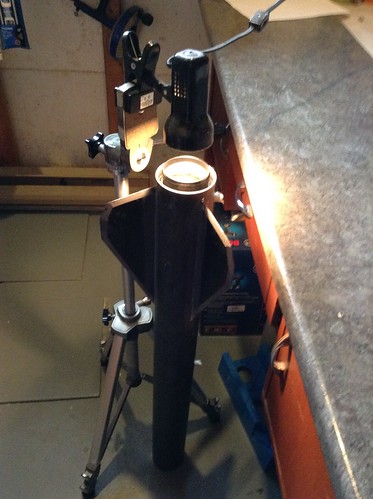
6) And then epoxied on the rear CR and Aero Pack using JB weld (I'm using the light as a heat source to speed up the curing for the JB Weld):
16411261412_3d34e669ce.jpg


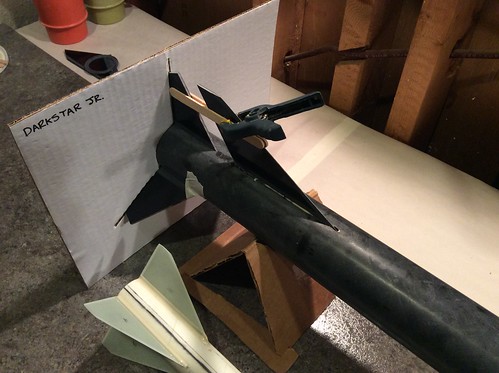
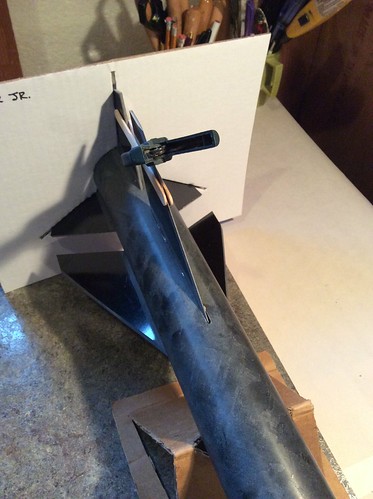
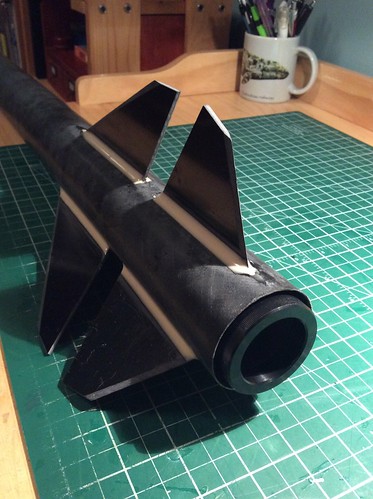
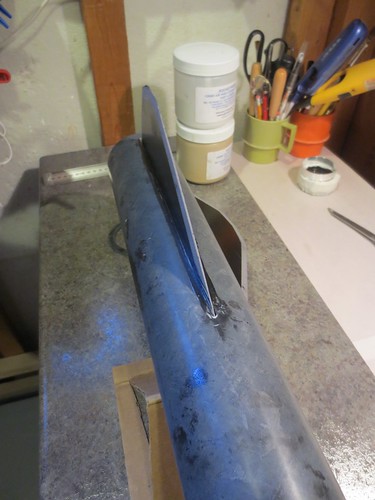
This is where I'm at. For the Darkstar Jr I've started bevelling the fins and epoxied on the vent band for the av-bay.
 
Last edited:
Applied external fillets to the Punisher. I used Rocketpoxy to do this, and let it sit a little before applying so It would flow less and I could do all six fillets at once.

16413092825_e1f1b413d0.jpg


I think they came out pretty good!:)
 
Alright, time for an update. I got more work done on the Darkstar today:)

1) I finished bevelling the fins, and also scuffed them up where the epoxy will be.
16466299161_6480c9abeb.jpg


2) I also did a dry fit of the MMT with the kevlar harness. The kit came with 4 CR's (two to put in-between the split fins) but I'm only using two as I plan to "double dip" the fins a la CJ, and then foam the fincan.
16280343828_a2ffb25de9.jpg


3) I then epoxied on the forward CR and the kevlar Y harness. This is the 3'rd time I've built a MMT identical in design to this one, and this is by far the neatest I've ever been with the epoxy! Third time's the charm I guess:)
16282152937_55f1e61925.jpg


So that's where I'm at. As you can see, The kit came with one of the new CTI nosecones. I quite like it. The 4:1 ratio suites the design of the Darkstar quite nicely.
16468040285_e11077187f.jpg
 
Last edited:
Here are the planed decal schemes for both rockets (Stickershock of course):
16442182306_b7e2d99ac1.jpg
 
Last edited:
Alright, time for an update. I got more work done on the Darkstar today:)

I finished bevelling the fins, and also scuffed them up where the epoxy will be.
16466299161_6480c9abeb.jpg


I also did a dry fit of the MMT with the kevlar harness. The kit came with 4 CR's (two to put in-between the split fins) but I'm only using two as I plan to "double dip" the fins a la CJ, and then foam the fincan.
16280343828_a2ffb25de9.jpg


I then epoxied on the forward CR and the kevlar Y harness. This is the 3'rd time I've built a MMT identical in design to this one, and this is by far the neatest I've ever been with the epoxy! Third time's the charm I guess:)
16282152937_55f1e61925.jpg


So that's where I'm at. As you can see, The kit came with one of the new CTI nosecones. I quite like it. The 4:1 ratio suites the design of the Darkstar quite nicely.
16468040285_e11077187f.jpg

Very nice! I'm trying to decide how to build my Vindicator Jr (same design with different fins). If you foam the fin can with only two CR's do you need to inject foam in one place (and it fills the entire space) or 3? I take it you put in the MMT to glue with only the front CR glued, then use tape to pull the back CR off once the epoxy is dry? Not sure I'm keen on injecting 12 fillets so I'll probably either do the "double dip" method with lots of epoxy and all 4 CRs to try the method you are using.
 
Good fillets nothing, those are great!

What kevlar are you using for the Y harness?
 
Very nice! I'm trying to decide how to build my Vindicator Jr (same design with different fins). If you foam the fin can with only two CR's do you need to inject foam in one place (and it fills the entire space) or 3?

I've always done it as a single pour as I always leave some space between the front of the fin tabs and the forward CR to let the foam flow and spread evenly. Even so, when I do the foam all in one pour I still try to distribute it as evenly around as possible.

I take it you put in the MMT to glue with only the front CR glued, then use tape to pull the back CR off once the epoxy is dry? Not sure I'm keen on injecting 12 fillets so I'll probably either do the "double dip" method with lots of epoxy and all 4 CRs to try the method you are using.

Yes that's what I did (as a matter of fact I glued it in this morning). I don't bother with tape on the rear CR, as I just use a popsicle stick through the fin slots to push it out. I always build my rockets to minimize the amount of stress on the epoxy joints, so when I glue in the MMT, to position it properly, I put on the Aero Pack and arrange it so that butts up against the rear CR, which in turns butts up against the fin tabs, and the fins are contacting the forward end of the slots (as Widman tend to make the slots a little too long), so all the stress of the motor is transferred to the airframe without relying on the epoxy joints.

Here is the motor mount glued it (pardon the slightly blurry pic):
16288186129_84b83a63b9.jpg


I put on the Aero Pack and the rear fins to make sure everything stays in place, and installed the rail buttons before glueing in the MMT:
16473486862_d975ec65e4.jpg
 
Thanks! I think I may try the expanding foam then. What foam are you using, and is there a way to find out how much you have to add to fill the fin can? I would think all the Jr kits require the same amount of foam.
 
Thanks! I think I may try the expanding foam then. What foam are you using, and is there a way to find out how much you have to add to fill the fin can? I would think all the Jr kits require the same amount of foam.

I'm using PML adjustable density expanding foam at it's highest density. I've always just eyeballed the amount and hoped for the best, but you can calculate how much you need with this handy online calculator: https://jcrocket.com/foam-fincan.shtml
 
I got the first set of fins on the Darkstar epoxied in and curing. I made a fin guide by glueing a template made from Payloadbay.com to a piece of cardboard. I've always just eyeballed the alignment before, with good results, but decided to give this a try. So far it seems to work well, though I'll only know for sure when all 6 fins are in.

15876232353_66dd07d546.jpg
 
Got the remaining 2 sets of fins tacked in place! It's now looking like a Darkstar:)
16328451229_d1c29632d3.jpg

This weekend I'm hoping to foam the fincan, attach the Aero Pack, and maybe if I have the time fillet the fins.:)
 
Here are the planed decal schemes for both rockets (Stickershock of course):
16442182306_b7e2d99ac1.jpg

Just placed the order for these with Mark today! Should ship sometime this weekend.
The Punisher decals are my own design (the contrast between the blue and black will be a lot better on the real thing). I'm ditching the the stock name, and calling it New Horizons after the probe nearing Pluto that was launched back in 2006.
The Darkstar decals are based on the BSD Thor (Thor-X variant to be specific), as I've always wanted a Thor, but unfortunately they're now OOP...:(
 
So this update is long overdue, but anyway...

Last weekend I got the fincan foamed, the Aero Pack epoxied on, and the fins filleted on the Darkstar. I had a bit of trouble foaming the fin can this time around for some reason (my hand was kinda shaky and I kind of miss-poured) so I ended up having to carve/sand away a fair amount of foam (including a bit in the MMT, though not too much thankfully:)). I also messed up installing the Aero Pack a little as its not quite straight. Not enough to affect the functionality, but the rocket reminds me a little of the Leaning Tower of Pisa when standing on it's end. Oh well... I'm probably just being a little OCD, It's not enough to bother trying to fix anyway.
16605625562_84cff78a5c.jpg


The next thing to do will be to fillet around the rear CR of both rockets with Black Rocketpoxy (mostly for cosmetic reasons).

I also placed a rather expensive order with Missile Works this evening for some stuff for the av-bays. I'll post more on that later.
 
Sebastian Next time you need to get some foam or epoxy into a tight space try this. Go down to your local feed store and get some of them syringes they use for livestock. This one is a 20ML. syringe. You can get one for less than a dollar. Then go to your local auto parts store and get you a length of vacuum hose to fit over the end of the syringe. Now you can see how it would work. Cleans up with lacquer thinner and would last you a long time. I just keep the thinner in a glass mason jar, And just use it to clean the syringe over and over.
 
I love those little syringes! I use them all the time when mixing epoxy to measure out the correct ratio.

Rocketgeek101 I've been lurking on your build since I almost got the same kit :) check out how I did my wildman Jr fillets. Worked out great with no hastle. I also had to really slam the retainer on to get it on perfectly straight
 
Sebastian Next time you need to get some foam or epoxy into a tight space try this. Go down to your local feed store and get some of them syringes they use for livestock. This one is a 20ML. syringe. You can get one for less than a dollar. Then go to your local auto parts store and get you a length of vacuum hose to fit over the end of the syringe. Now you can see how it would work. Cleans up with lacquer thinner and would last you a long time. I just keep the thinner in a glass mason jar, And just use it to clean the syringe over and over.

That's a nifty idea! I already have some tube lying around that would work well for that!

I love those little syringes! I use them all the time when mixing epoxy to measure out the correct ratio.

Rocketgeek101 I've been lurking on your build since I almost got the same kit :) check out how I did my wildman Jr fillets. Worked out great with no hastle. I also had to really slam the retainer on to get it on perfectly straight

I've been following your build. Very nice!

I've been trying to figure out what happened with the retainer, and my best conclusion is that I got a bit of epoxy on the back of the fin tabs causing the rear CR to not butt up against them properly. The retainer was a loose fit on the motor tube and I measuered very precisely, so it possible something as insignificant as a bit of excess epoxy would have caused this.
 
Well it's been over a month since I last posted on here. Guess I needed a break.

I kind of neglected this thread, but I'll revive it to post a couple pics of the finished rockets. I spent the weekend painting them.

17494691236_1842994565_c.jpg


17520878035_9c93a87a74_c.jpg


As you'll see In an earlier post, I originally planned to paint New Horizons blue but at the last minute I decided to go with white - so as to improve the contrast between the rocket and the decals. I like how it turned out!

In order to save on costs, the Darkstar Jr. (now Thor-X) uses the Av-bay and recovery system from my Shape Shifter Jr, which is basically the same rocket with a different set of fins. The Punisher (now New Horizons), has it's own separate recovery system. I'm hoping to fly these next weekend!

I'm planning to fly the Thor-X on a CTI H225 White Thunder, and New Horizons on a CTI I345 White Thunder which will act as a backup level 2 (as I'm going to be re-flying my level 2 with my Shape Shifter Jr on a CTI I236 Blue Streak to get senior status now that I'm an adult)

Unfortunately the buzzer on one of my 2 RRC2+ altimeters is damaged, so I only have one altimeter to share between my 3 DD rockets :( I'll have to email MissileWorks, as I suspect it's due to a defect (the altimeter in question was new and hadn't been flown).
 
Those look great!! The paint turned out really, really great- I like the white, and the yellow/black- seriously awesome.

Nate
 
Back
Top