Some Like It Hot - Motor Failure

The Rocketry Forum

Help Support The Rocketry Forum:

This site may earn a commission from merchant affiliate links, including eBay, Amazon, and others.

TZ250

Well-Known Member
Joined
Apr 15, 2010
Messages
300
Reaction score
2
Everyone,
My Aerotech G77 did not work well today. I believe that I am at fault, but I don't know the mistake that I made.

I followed the directions explicitly. (or think that I did)

When I launched my Dark Star Lite, it got off the rail, popped the chute and landed 30 ft. away. I didn't see everything because it happened so quickly.

Since a picture is worth a thousand words, I snapped a few in hopes that the friendly and knowledgeable members on TRF would diagnose the problem.
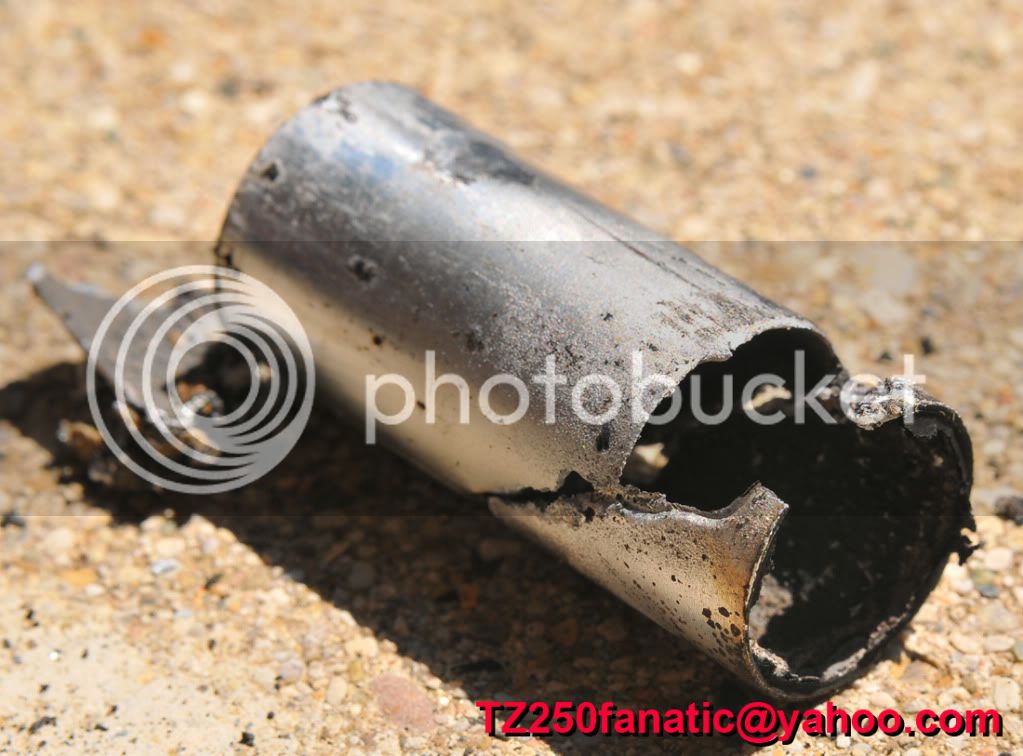
Spacer
DSC_8537_B.jpg


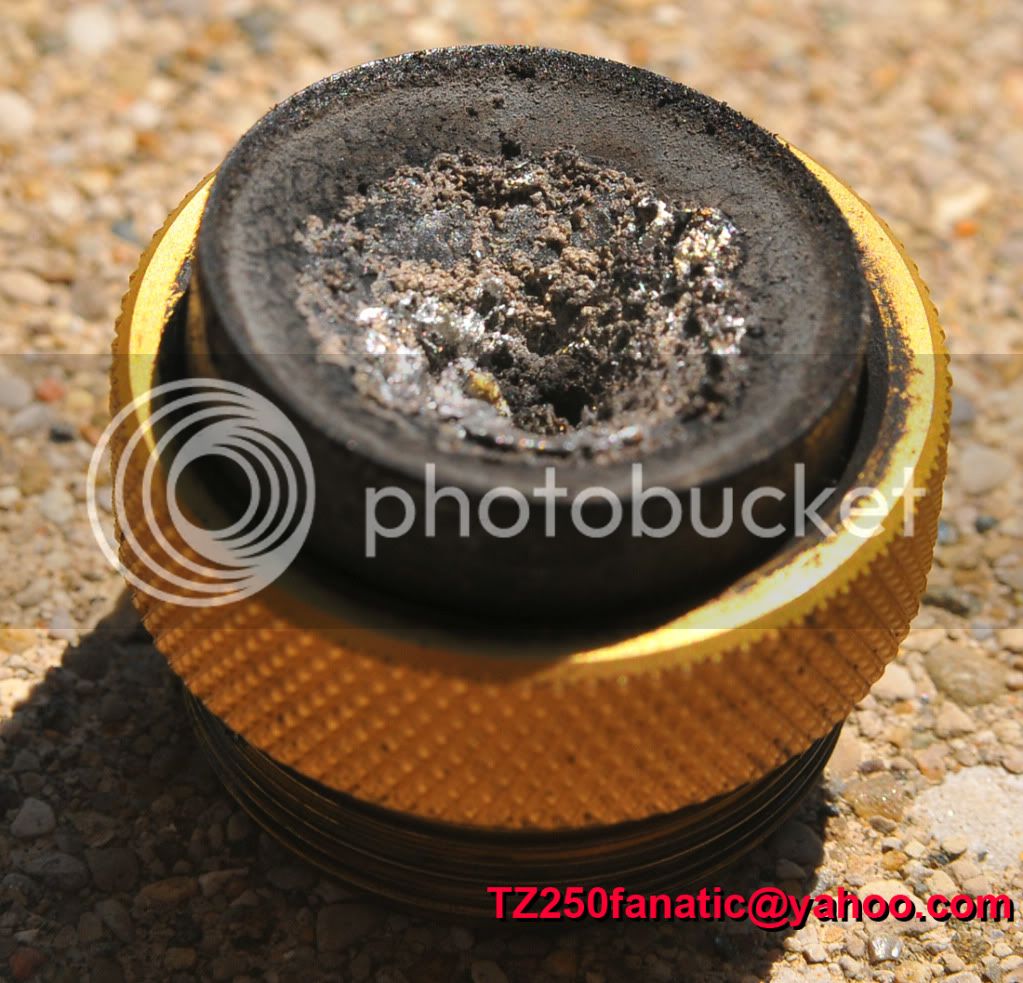
Aluminum droplets in the nozzle
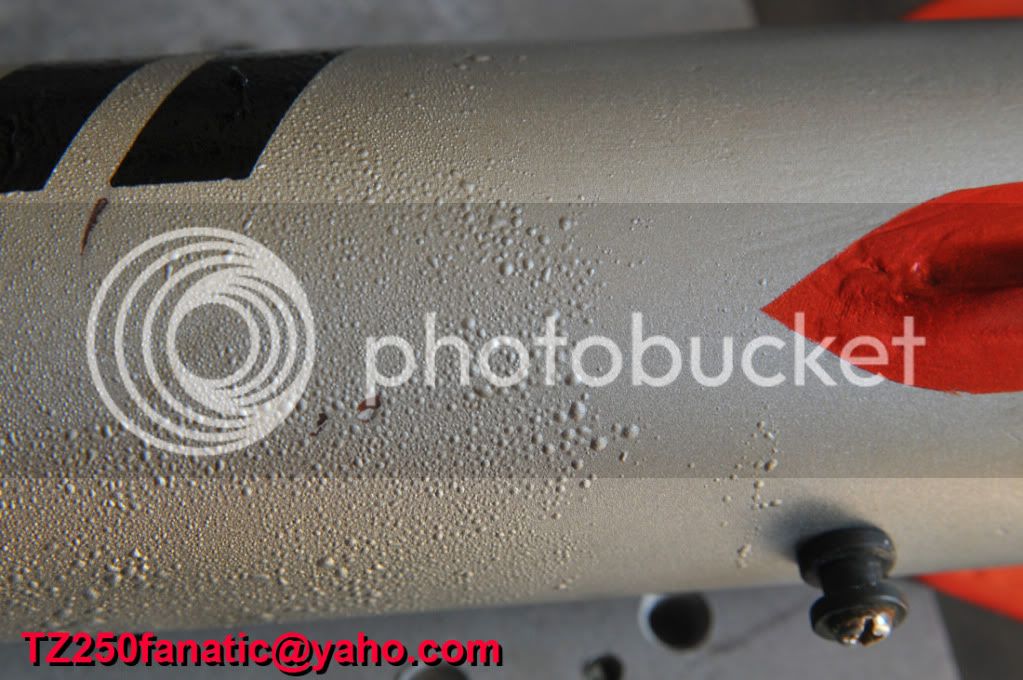
DSC_8568_B.jpg


Blistered Paint
DSC_8603_B.jpg
 
Well Rob,

If that picture of the closure is the way you found it after flying....

...... the nozzles in backwards.
 
but jim, if it were in backwards, then one of two things would happen.

1) if it was inserted in the side with the threads, then it just wouldn't be able to be tightened as the nozzle end would keep too far away

2) if it were inserted on the gnurled end, it would've just fallen out, or if not, the thrust would've pushed it out?

but insterting the nozzle backwards is one for the history books :O
 
Was that a RAS spacer that was all gunked up in the first picture?

If so, I think I know what happened.

You assembled the forward section of the motor out of order.

The correct order from forward closure back is:

Retainer ring
Spacer(s)
Floating forward closure (which contains the ejection charge and delay grain)
Propellant grain(s)
Nozzle
Aft closure

What you did was:

Retainer ring
Floating forward closure (with ejection charge and delay grain)
Spacer
Propellant grain(s)
Nozzle
Aft closure

The burning propellant cooked the spacer until it melted and the aluminum got spit out of the nozzle, eventually clogging the nozzle and restricting thrust.

You will need to replace the spacer, aft closure (maybe), case (maybe), floating forward closure (maybe), and motor mount (probably)

Good luck!

G.D.
 
Thanks guys.

The nozzle was flipped around to show the mess of aluminum, but was installed correctly in the motor case.


GDiscenza, I think that you are correct. I did place the spacers underneath the grains, next to the nozzle.

I won't do that again! :D
 
Last edited:
Thanks guys.

The nozzle was flipped around to show the mess of aluminum, but was installed correctly in the motor case.


GDiscenza, I think that you are correct. I did place the spacers underneath the grains, next to the nozzle.

I won't do that again! :D

Yikes. This could be a problem that Aerotech should address. Maybe put a disclaimer on the front of the instructions of the spacer set stating "go to www.xyz.com to see a video clip of how to assemble a motor with these spacers."
 
Yikes. This could be a problem that Aerotech should address. Maybe put a disclaimer on the front of the instructions of the spacer set stating "go to www.xyz.com to see a video clip of how to assemble a motor with these spacers."

Yeah, their instructions are not very clear at all. I prefer their old, step-by-step with pictures instructions. The new ones with just a few cutaway drawings are pretty bad.
 
Is the case ok?

Yes, the case is fine. It will live to fly again!

However, the next time it flies the spacers will be above the grains. :D

I just looked on Wildman's site. A new 29/120 Aerotech isn't much more expensive than buying new spacers. I'd like to have both because I have a 29/240 and 29/360 case. That would give me a lot of versatility for the Dark Star Lite.
 
Yeah, their instructions are not very clear at all. I prefer their old, step-by-step with pictures instructions. The new ones with just a few cutaway drawings are pretty bad.

I agree! The old instructions were great. They were very clear and easy to follow with dozens of very clear drawings. However, for a number of years a limited number of people complained--I could never figure out their problem. The instructions were so clear and easy--my boys could follow them without a problem. But alas, Aerotech gave in to the complainers--and changed the instructions. Now, they are not clear and hard to understand--but that's what people wanted--therefore, I will go with the flow. After 19 years I really don't need instructions--but they were nice to have as a check on my work. I loved all of the detailed drawings showing all the threads--Reminded me of my high school drafting class.
 
Last edited:
TZ250, just to be sure, the spacers don't just go forward of the grains, they go forward of the floating forward closure, and are held in place by the retaining ring. So that they are completely outside of the combustion chamber.

Thank you Mr. Reynolds! I had not thought that far, but that picture REALLY helped. :cheers:
 
Thank you Mr. Reynolds! I had not thought that far, but that picture REALLY helped. :cheers:

Glad to help.

You know what they say; Experience is that thing that lets you recognize a mistake when you make it again. :D
 
Yeah, their instructions are not very clear at all. I prefer their old, step-by-step with pictures instructions. The new ones with just a few cutaway drawings are pretty bad.
Actually, I think their instructions, and the accompanying illustrations, are pretty clear about this. I was uncertain myself about how they went together until I saw the instructions. Just looking at the RAS components and thinking through how they would need to go together ought to make it clearer, too. As in, if the spacer went inside the motor with the propellant grains, then there would be no need for a retaining ring and a floating forward closure, since a regular forward closure would work. Also, since the spacer is just thin aluminum, there is no way that it would survive in the environment inside the firing motor. A little reasoning helps.

I'm not coming down on you, TZ; after all, you've been punished enough. ;) We all pull good ones every now and then; I've done a few myself.
 
That style of instruction is decent for the RAS; it gives a good sanity check of how things go together. However, their new reloads are coming with that same style of instruction, and I prefer a more step-by-step guide.

I think the cutaway would be a good addition to the more traditional instructions.
 
Yes, manufacturers of all sorts, please give us a cutaway or exploded view of anything you make that needs to be assembled. To my engineers mind, its the only way to be sure the assembly is correct.
 
Instructions...just another mans opinion, quoted from Chick McGhee,The Bob and Tom show. All kidding aside, it dont hurt to read the instructions. Even after almost 20 years, I find my self looking at them to figure out which orings go where.
 
Instructions...just another mans opinion, quoted from Chick McGhee,The Bob and Tom show. All kidding aside, it dont hurt to read the instructions. Even after almost 20 years, I find my self looking at them to figure out which orings go where.

mee to... 3 similar O.D. o-rings, with 3 noticable different diameters.

Reading instructions doesnt hurt... escpecialy if there is a shorter grain that needs to go up top, wider core diameter at the bottom. Glueing grains.... ect... some of this, people wouldnt read if they just looked at the picture.

after a few of the same reloads, i build from memory mostly.

the drawing shown, comes with the RAS and 29mm special.
 
Back
Top