Fred's Frog a Swift & Hawk class BG

The Rocketry Forum

Help Support The Rocketry Forum:

This site may earn a commission from merchant affiliate links, including eBay, Amazon, and others.

kjohnson

mox nix
Joined
Jan 19, 2009
Messages
1,367
Reaction score
68
A few years ago I found an old plan in the archives of my club's newsletter and reprinted it. I built it back then and flew it in B BG and it did fairly well. The club decided to do a build session on B BG this coming year, so I'm going to dust off the plans and use it as the basis for the club build.

Some folks asked about the option of RC, and I think this model can definitely use the modern micro gear as found in the Parkzone micro planes.

I've attached the plans here, and will be starting a build log soon.

kj

View attachment FredsFrog BG.PDF
 
Here is the first part I'm working on, the fuselage.

This is a 3/16" x 1" x 24" hunk of basswood. You could use spruce for this if you have it. I've marked out the outline from the plans, and notes to myself on which places to sand, and where the wing and tail leading edges are going to go.

kj

frogfusesm.jpg
 
I have the fuselage cut out and sanded round where it needs to be. Next up is to start on the wings.

Since I'm building this with an eye towards adding RC, here is a couple of links for gear that can be used on a model of this size (note- I have a transmitter with a Spektrum 2.4ghz module, so this list is built with that in mind. You could get one of the inexpensive Dx5 radios, or buy one of the small RTF Parkzone planes like the Champ and get a basic radio to get started) :

The venerable "Vapor brick" with RX and board mounted linear servos-
https://www.horizonhobby.com/products/receiver-esc-dsm2-vapor-ember-2-champ-PKZ3351

Hobby King Orange 4 channel micro reciever-
https://www.hobbyking.com/hobbyking...M2_Compatible_4Ch_Micro_2_4Ghz_Receiver_.html

Hobby King Ultra micro servos-
https://www.hobbyking.com/hobbyking...Micro_Digital_Servo_1_7g_0_05sec_0_075kg.html

You'll need some sort of battery along these lines:
https://www.hobbyking.com/hobbyking...0C_Lipo_Pack_Kyosho_Eflite_Parkzone_Etc_.html

https://www.horizonhobby.com/products/150mah-1s-3-7v-25c-lipo-battery-EFLB1501S25

kj
 
One of the topics I'm gonna hit at the NARHAMS meeting this weekend is shaping glider wings. For most small gliders, you can get them to fly fine without doing much to the wings. I've seen gliders with square edges fly fine, and simply rounding the leading and trailing edges can get you a glider that will perform ok for sport flying. For contest flying, or if you want to get the best flights that you can, you need to step up and put an airfoil on your wing.

Here is one method for taking that square slab of balsa and turning it into a nice airfoil. This technique relies on an essential tool- the razor plane.

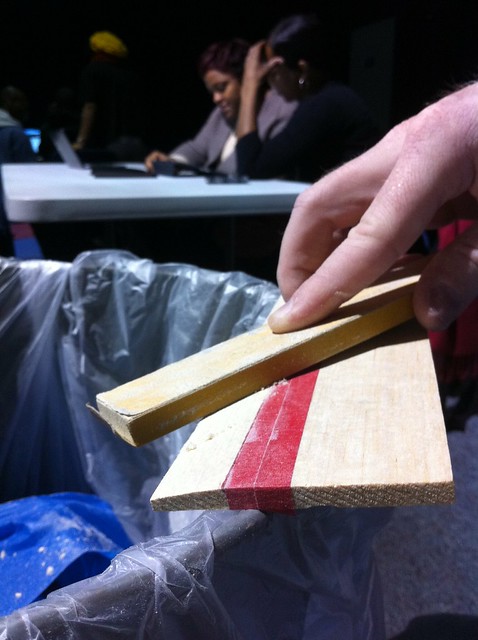
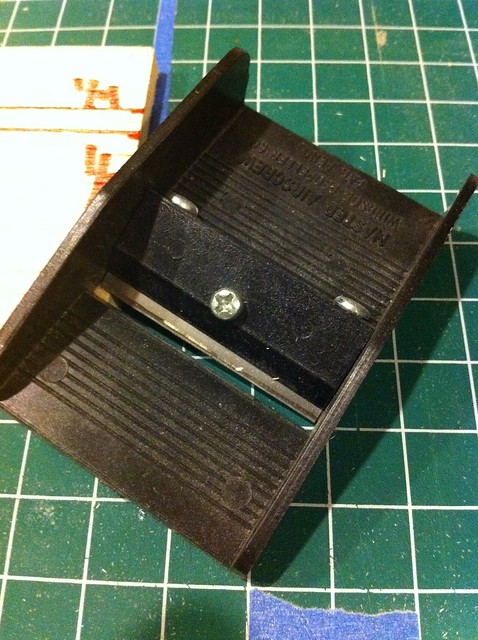
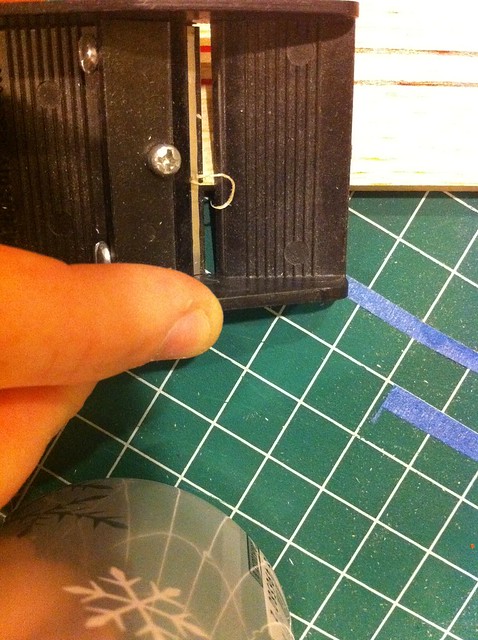
Here is my plane from Master Airscrew:
6806419581_2fede7dd6d_z.jpg


Basically it's a small hand planer with a razor blade that sticks out of a slot on the bottom of the tool. You slide it along the surface of your wood and it takes off a sliver.

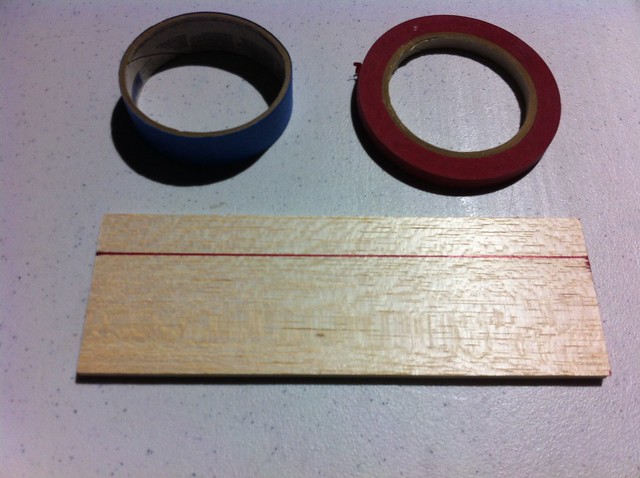
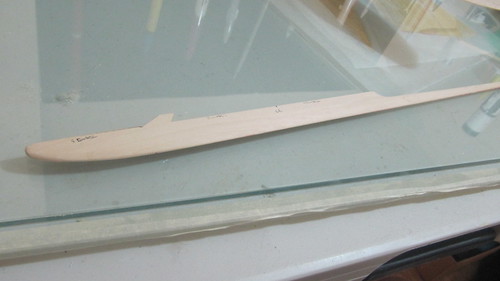
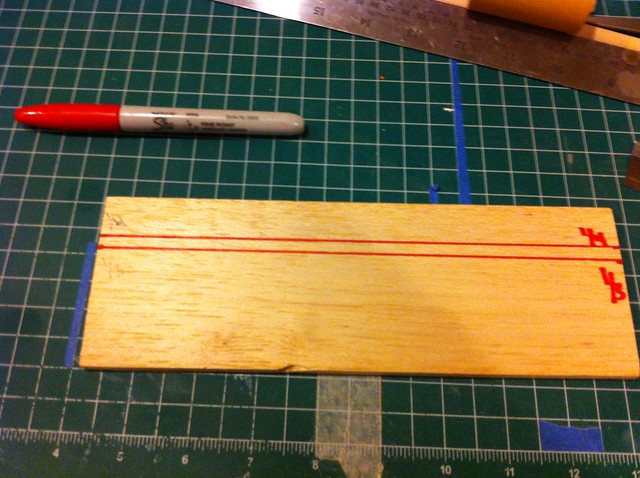
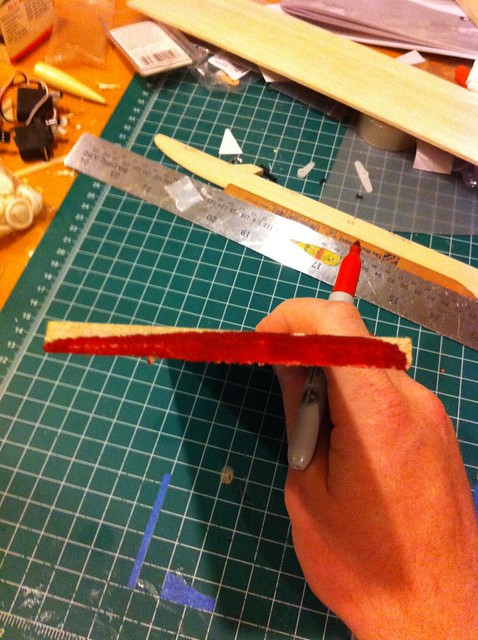
I'm not making anything fancy for this model, just a flat bottom airfoil that looks about right. The general rule is that you want the high point of your airfoil (maximum thickness) about 1/4 to 1/3 of the way back from the leading edge of your wing. In my examples I'm using a 3"x9" piece of 1/4" thick balsa. Here I've measured out the 1/4 and 1/3 chord lines on the blank:
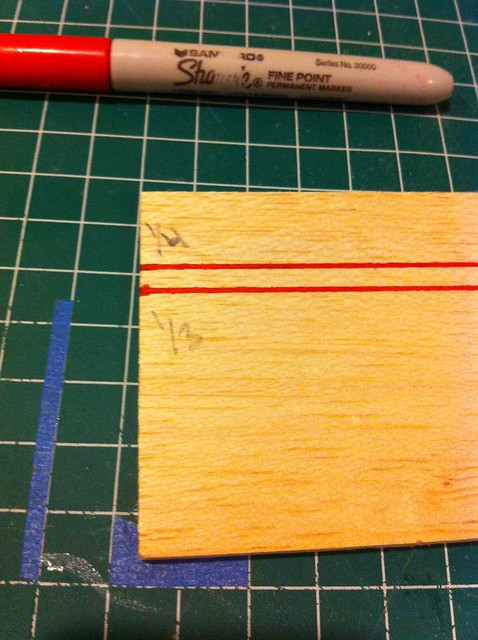
6806418981_1c2412bbed_z.jpg


And a close up:
6806418551_380ee3c0f5_z.jpg


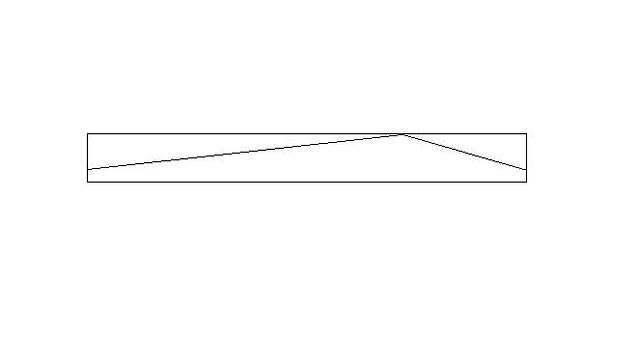
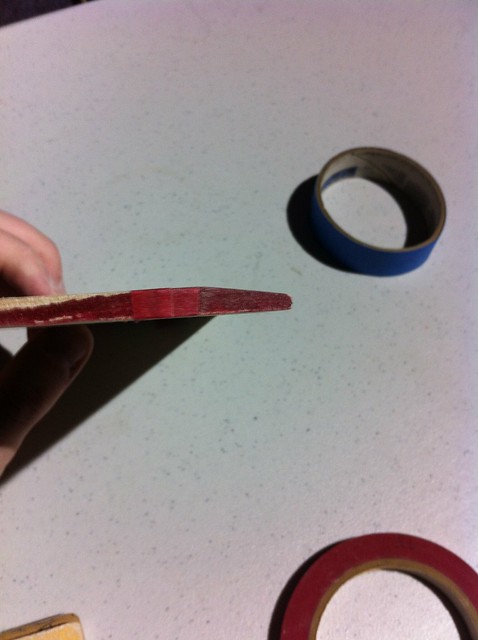
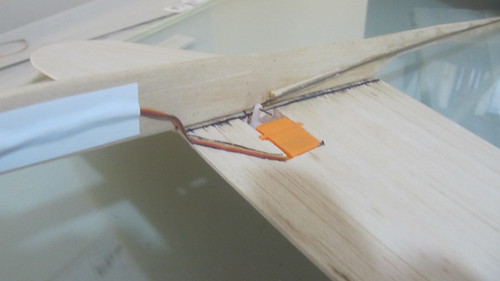
So the max thickness of my airfoil is going to be somewhere between those lines, and the leading edge will curve down pretty quickly while the trailing edge will taper back to a narrow thickness. Here's what I'll be shooting for, so you can see how much wood needs to be removed:
6806420027_8e8cf49310_z.jpg


I like to start with the leading edge, so put your blank on a flat surface, and with the razor plane at an angle, start to shave away the wood that you don't want. I'm just knocking off the corners at this point:
6806420467_0bb27523fe_z.jpg


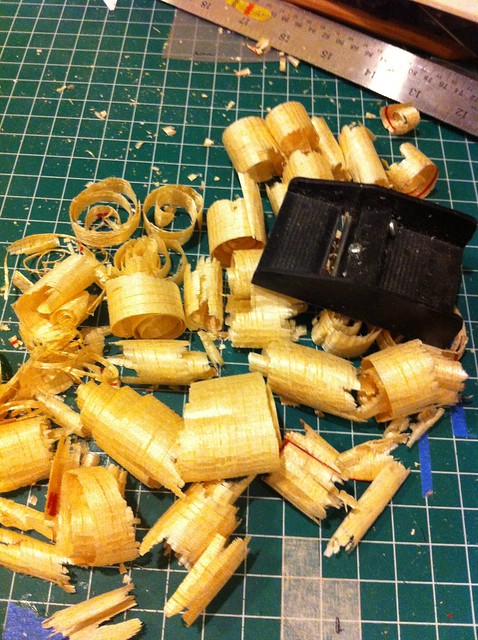
Soon you'll start to gather a little pile of shavings:
6806420863_0e025e6961_z.jpg


To do the trailing edge, flip your blank around and repeat. You'll end up with a bigger pile of shavings:
6806421295_61daeba212_z.jpg


I can't say enough how much easier it is to work with a razor plane that has a nice sharp blade. You will end up changing it often, and if you're into this sort of thing, using a sharpening stone to keep the edge nice.

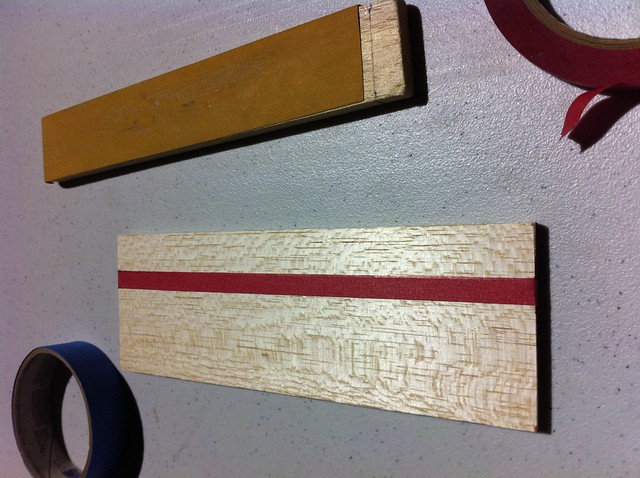
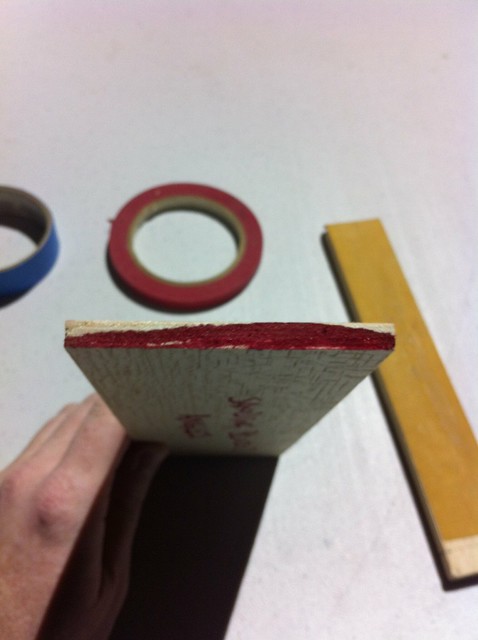
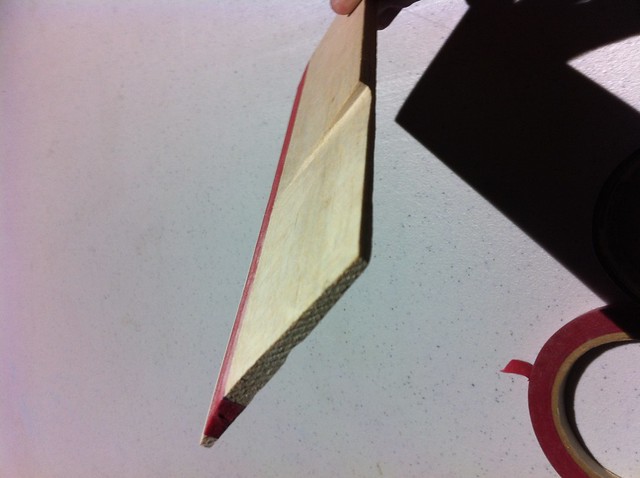
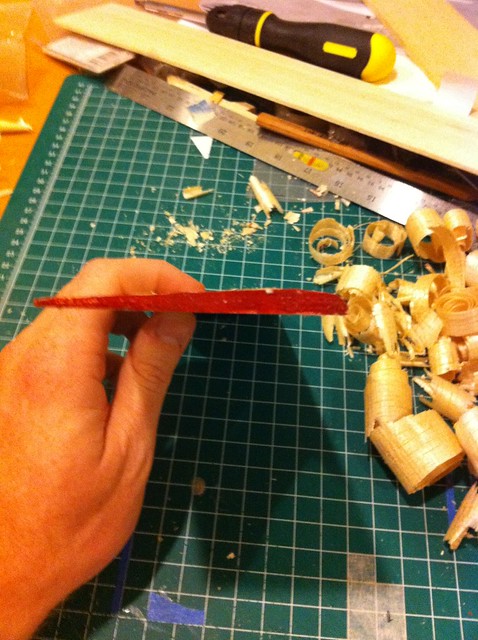
After getting rid of all that excess wood, you'll end up with an airfoil:
6806418021_8eaeb07c04_z.jpg


I have a little finish sanding to do, mainly dressing up the leading edge and thinning the trailing edge a little bit, but most of the work was done by the plane.

kj
 
I hope you'll keep up this thread. I'm reading with keen interest.
 
I'm going to do two more examples of how to shape the airfoils, then start working on my wing. I may have more photos tonight.

kj
 
If you don't have a razor plane, you can still make airfoils for your glider wings. Here is one method for using a block that's been around for a while. This is the method intended on the plan for the Fred's Frog glider.

A word about sanding blocks- you want to have a nice long block. In my photos below I'm using a block of balsa with some sandpaper glued to it. I also use an aluminum T bar sander from Great Planes https://www3.towerhobbies.com/cgi-bin/wti0001p?&I=LXK315&P=0 I'm also using the block the short way- chord wise instead of span wise. This was because of where I was working and the need to keep it clean. With a long block you can sand span wise and keep your angles consistent across the wing.

Instead of trying to sand in all the curves for your airfoil while you are taking the unwanted wood away, this method has you sand angles to rough out the shape, and then go back and round things out. Here is a side view that shows the angles involved.

6824444047_8f137e03c3_z.jpg


You still find your high point as described above (1/4 to 1/3 of the way back from the leading edge), and then I like to apply tape behind that point to protect the surface as I work on the leading edge.

6824444863_45b8623375_z.jpg

6824446241_2a26e85ff8_z.jpg


Here I've colored in the shape that I'm going for, just straight angles from the high point to the leading and training edges.

6824445281_1348a45740_z.jpg


Now the elbow grease comes into play. Take your block, and with your wood flat on your surface, sand down the leading edge angle all the way across the front of the wood. (note I was trying to keep the area I was working clean and drop the dust right into the trash can. You really want to do this with the wood supported on your table).

6824447797_fdb962b6db_z.jpg
6824447291_7fb6a73f78_z.jpg

6824446863_ed6def49ab_z.jpg


Once you've finished the leading edge, remove the tape and lay a new strip on the front side of the high point line. Then flip the wood around and start attacking the trailing edge. This is a work in progress shot of the trailing edge. It's a lot of wood getting turned into dust.

6824444431_5cf4d58772_z.jpg


Keep on working on the trailing edge until you have it sanded down to the thickness you want.

Now the next step is to round out the leading edge and also round over the sharp angle at the high point.

kj
 
Last edited:
Using a razor plane, I built a set of wings a few days ago, and just now finished off the glider part. It flies great. I'll have to build a booster for it in time for our next launch.

Now I'm motivated to build one for R/C as well. This was fun.
 
Awesome! I'd love to see a photo of your glider.

My build time is getting eaten up by TARC mentoring on the weekends, so I've slowed down a little on my own build. Should get my wing started this week.

kj
 
I'm going to get some photos up of one of my club mate's glider as he's gotten further ahead than I have over the last couple of months. I should be back on building this project now that I can have some weekends back to myslef again.

kj
 
I finished the whole thing, and will try to get a photo up at some point (yeah, I know, it's old by now). Still haven't flown, because it has been windy all spring so far.

The larger R/C one is mostly done too, but I still have to get a receiver/servos for it, and with this wind, it's not exactly on the frontburner.
 
(A month later) Finally got some photos to show:

Freds Frog in flight.jpgFreds Frog in flight 2.jpg

There haven't been too many days with low enough wind to even test fly her, but here were a couple of hand-launches. She flies straight and level - perhaps too straight, and I should add a little clay to get a shallow turn.
 
(A month later) Finally got some photos to show:

View attachment 83573View attachment 83574

There haven't been too many days with low enough wind to even test fly her, but here were a couple of hand-launches. She flies straight and level - perhaps too straight, and I should add a little clay to get a shallow turn.

This is what happens when build a glider too well! Hehe, I've had more than my share of RGs that pointed themselves into the wind and soared off in a straight line into the distance. Clay is ok as long as it stays put, sanding a bit on one of the wings also works but it is a trial and error kind of process that needs to be done a little at a time to get just right, I've recently taken to forming a shallow pocket in one wing tip and glueing in a small bit of lead.

Great build! Very informative.
 
Here is a glider with modifications for RC control:

First up is a shot of my stock fuselage all shaped and ready:

7226508758_99590cd50f.jpg


Photos in the rest of this post are of a model built by Zog139-
The mods started with making a place to mount the Orange micro receiver from Hobby King and the battery by cutting away the bottom half of the front of the boom and gluing in a thin plywood base.
Jim also added a Gassaway glider hook instead of the stock spruce/bass hook.

Side view
7226508552_5f5edfc67c.jpg


Bottom view
7226508346_7063fb4d0e.jpg


The servos (see post 3) also from Hobby King were set into cutouts made into the wings on either side of the fuselage.

Bottom
7226508054_8843eaf1ac.jpg


Top
7226507412_62f5ca9452.jpg


This side view shows the push rods that connect the servos to the control surfaces. They were made of stainless steel fishing leader from Bass Pro Shops in a bondable teflon sheath that was glued to the fuselage.
You can get bondable teflon online from RC suppliers. The ends of the push rods are just bent and slipped into the holes on the servo horns.

7226507588_d46a4ef822.jpg


The tails were modified by cutting free an elevon from each one, sanding a bevel in the leading edge of the elevons, and taping them (on the top surface) to the stabs with Tyvek tape.
Control horns were cut from thin G10 fiberglass and glued on. The control rods were attached with a Z bend.

7226507748_5948658bbb.jpg


Next up for this particular glider is some dope and tissue work. Jim has a fun color theme planned.

kj
 
Last edited:

Latest posts

Back
Top