The Flying Pumpkin

The Rocketry Forum

Help Support The Rocketry Forum:

This site may earn a commission from merchant affiliate links, including eBay, Amazon, and others.

GaryT

Well-Known Member
Joined
Jan 19, 2009
Messages
2,122
Reaction score
168
Location
Guilford CT
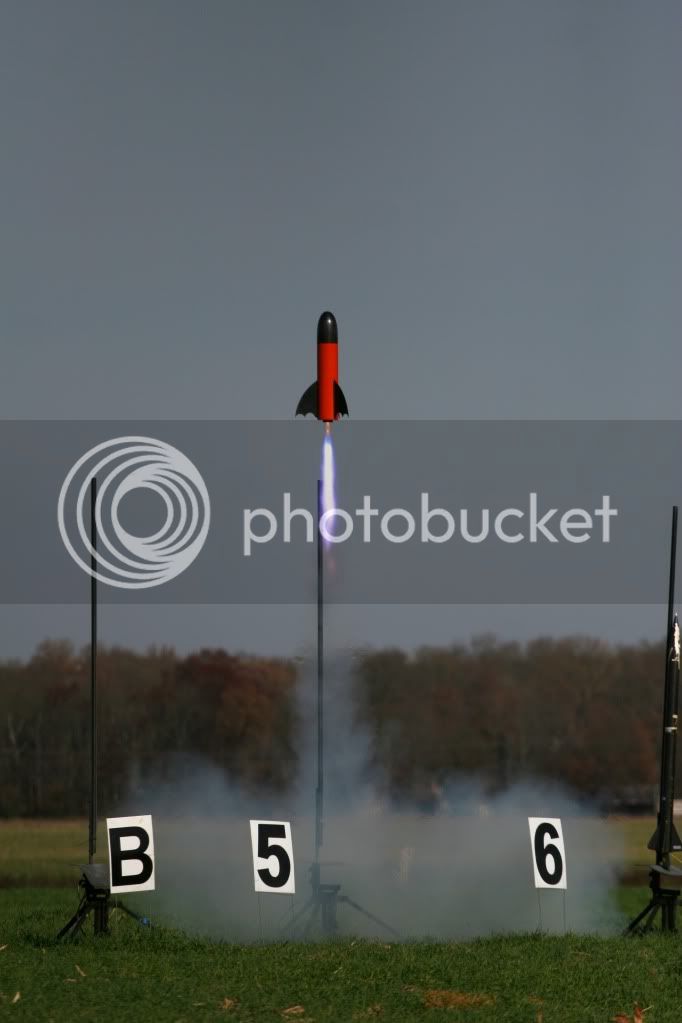
The Flying Pumpkin from Rocketry Warehouse is one of the newest kits in the "Fly Naked" Series. What that means is all the parts are already colored! There NOT painted rather the G12 and G10 fiberglass is colored all the way through.

The best part about the "Fly Naked" series kits is they require NO PAINT! you can paint them if you choose but there's no need with all the pre colored parts. All you have to do is give the kit a light WET sanding with 400 grit then another with either 800 or 1000 grit, Let it dry and you can either wax or Armor all the entire kit, The pre colored parts will come to life, The black nose cone almost looks like a solid piece of graphite.

Kit Specs:

1. Over 28 Inches Tall
2. Built Weight Just Over 4 Lbs
3. CNC Precision Cut Parts
4. CNC Precision Slotted
5. Flies on everything from H to K
6. Perfect for Level 1 and Level 2


Parts List:

A. Black Fiberglass Elliptical Nosecone
B. Black G10 Fiberglass 5.5 Inch Nosecone Bulkplate
C. Orange G12 Fiberglass 5.5 Inch Fiberglass Tube 20” Length
D. Orange G12 Fiberglass 54mm Motor Tube 11” Length
E. Black G10 Fiberglass 1/8” Centering Rings (2)
F. Black G10 Fiberglass 1/8 Fins
G. Vinyl decal


image-001-2jpg-600-092211215623110.jpgimage-010jpg-600-092011214223367.jpgimage-011-2jpg-600-092211210323131.jpgimage-the-flying-pumkin-kit-600-092011184522934.jpgView attachment flyingpumpkin.pdf

Review and Rocksim file available at ROCKETREVIEWS
 
Looks very cool...almost pulled the trigger and bought one, but I really can't justify another 54mm rocket, especially one that would take some work to put DD in.

Looks like a good product!
 
Do they just call you and say they've got a rocket for you to buy Gary?


Sweet build, I saw your EMRR review...

nice flight too!

Braden
 
Do they just call you and say they've got a rocket for you to buy Gary?


Sweet build, I saw your EMRR review...

nice flight too!

Braden

B.
I work with Performance Rocketry on designing and building, I designed the
X-Celerator and have a few more designs coming out soon! Lots more news to come.
 
Hey Gary,

Mine finally came,, so tell me,,, how did you do the fins as far as glueing and fillets to keep it looking good?

The drill and inject method would seem to make it ugly.
Thanks,
Tom
 
Tom:
For the internal epoxy I use west but for the external fillets I use the Black Proline epoxy, Its a little more expensive but its really the only way to have the kit come out nice, With the colored tubes and black fins its the way to go.

Just got done with a Formula 75, Lime Green kit with Black fins so the Proline worked great.

If you factor in the cost of paint its not really anymore money, Not to mention the Proline Epoxy is incredible stuff.

From rocketry warehouse? I see Pro-line but the color is not specified?????

So you use the drill and inject, and make sure the fillets cover the holes?

Thanks
Tom
 
Ok I see Tim carries it, BUT his qt set,,, is that 1qt of resin and 1qt hardener, or a pint of each adding up to a qt? How thick is thick? If I use micro silica to thicken it more will it hide the ms?
 
Last edited:
From rocketry warehouse? I see Pro-line but the color is not specified?????

So you use the drill and inject, and make sure the fillets cover the holes?

Thanks
Tom

Yup thats it.

No I never do the drill and inject method, There is nothing wrong with it and it obviously works! its just not MY preferred method.

Basically I built it from the inside out, First I CA the top CR to the MM, I then position it in the rocket so the CR will rest on top of the fins root cord, I then put on the rear CR to center it (NO CA) With the rocket facing NC down tack the top CR with CA through the open fin slots, Remove the rear CR, Slide the Fins in and tack inplace with CA, Do your internal fillets and add rail button attachment points.

On the aft CR I add thickened epoxy so when you put it in the epoxy molds around the fin locking it in, Now you can do the external fillets.
 
Last edited:
Anyone else have pictures of their Flying Pumkins? Got to be more of them flying out there...
 
@GaryT Any idea how much nose weight you used? In OR the CP seems to be right around the front of the fins, and getting to a reasonable stability margin seems like it's going to require multiple kilos of nose weight. Even with the base drag cone added in OR, I still need 2000g to get a caliber of stability. It looks great though, and I'm looking forward to the finishing steps for once. Is this the kind of armor all product you were referring to?
https://www.armorall.com/product/ultra-shine-wash-and-wax/
Yes, I know this thread is over ten years old. It's an old kit that I bought second-hand.


Start a build thread for all the new people who have never seen the pumpkin before .
 
Back
Top