Dangerous Dave 11.5" V-2 Build

The Rocketry Forum

Help Support The Rocketry Forum:

This site may earn a commission from merchant affiliate links, including eBay, Amazon, and others.

ECayemberg

Well-Known Member
Joined
Jan 21, 2009
Messages
2,877
Reaction score
850
Please enjoy this abbreviated build thread of our Dangerous Dave 11.5" V-2 (who here remembers Dangerous Dave Gawlik?). This is not intended to be a full build thread, just cover a few highlights before it hits the pad.

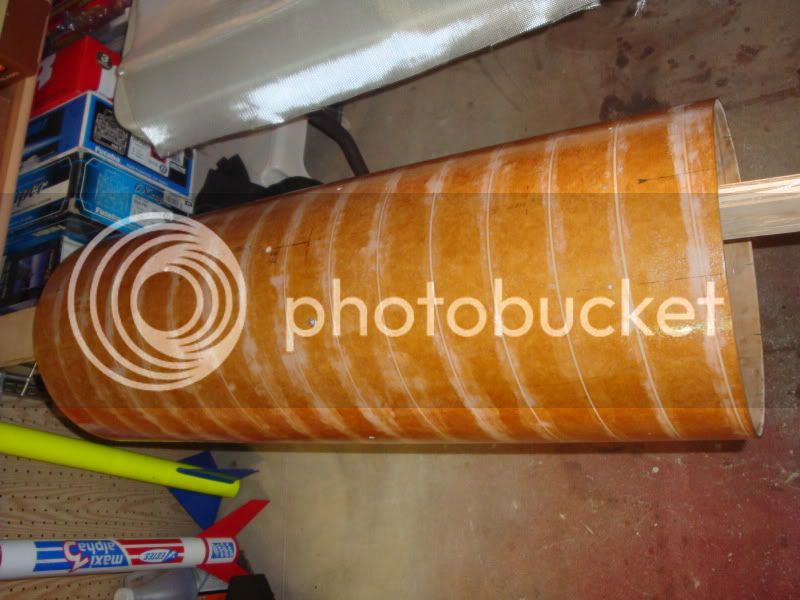
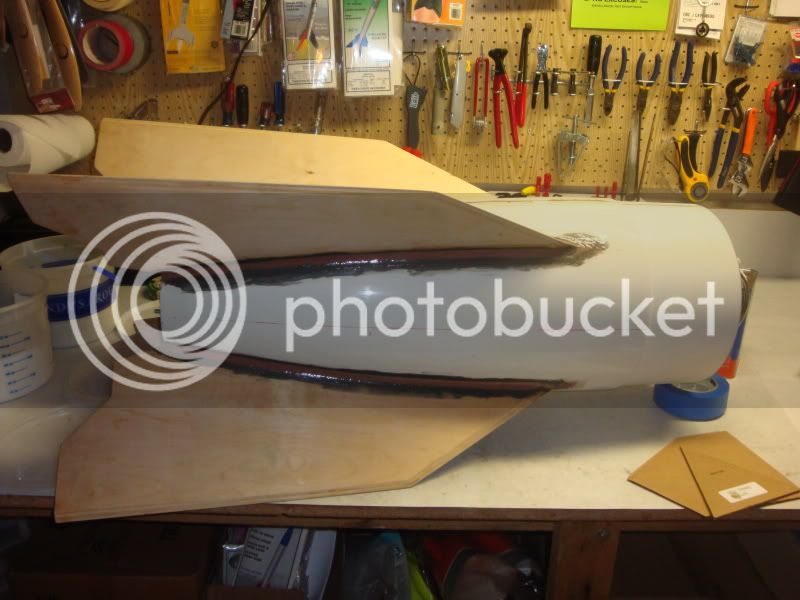
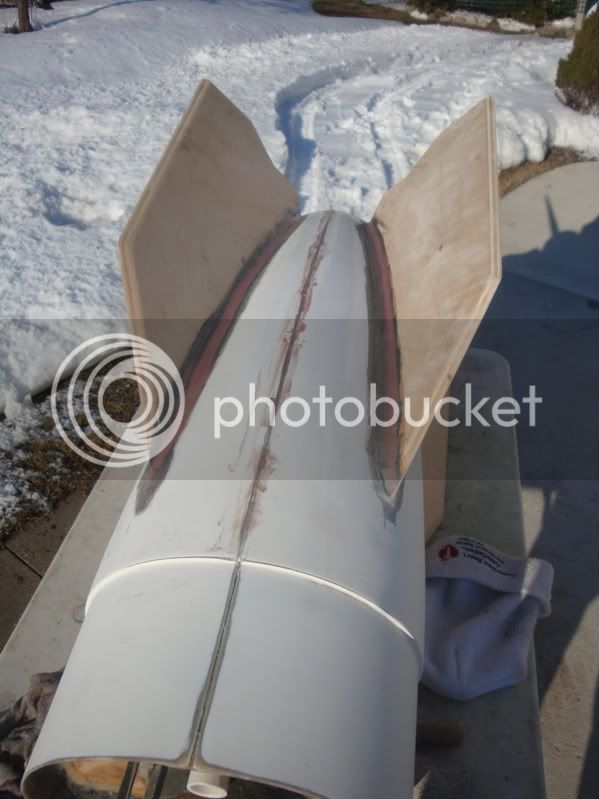
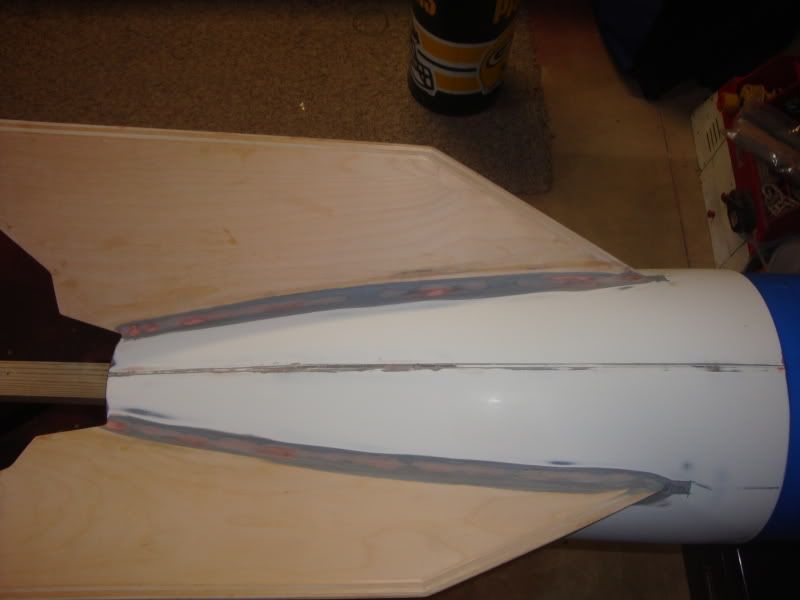
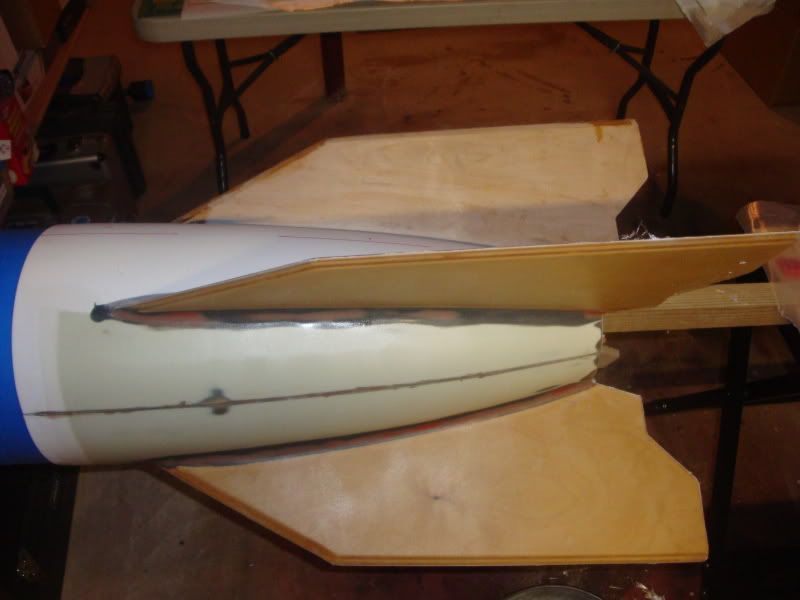
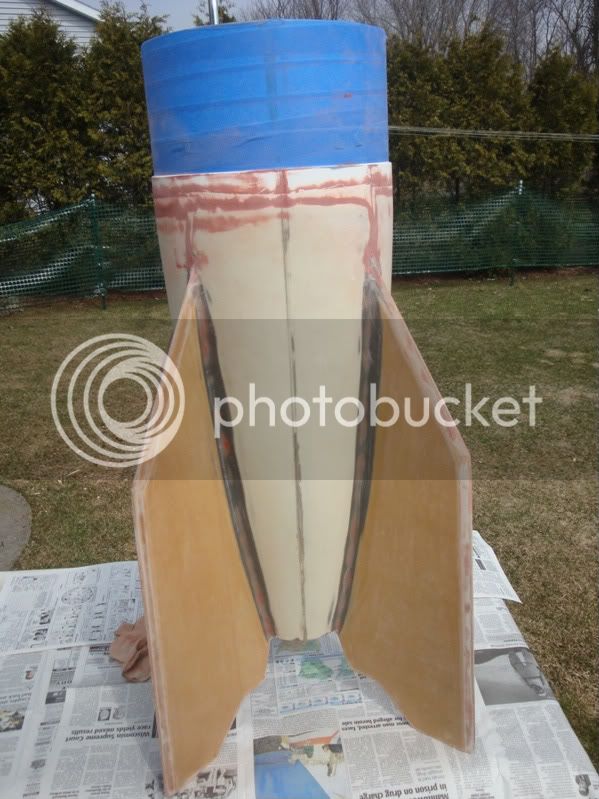
The Kit was originally available from Dangerous Dave in the early 90's; we purchased it second hand last year. The kit consists of a gray gelcoated 3:1 ogive glass nosecone, 3:1 ogive tailcone, ply fins, PML phenolic airframe, and a 4" carpet tube style motor mount.

The Plan is to complete the project and fly at Tripoli Wisconsin's July 23rd launch at the infamous Bong Recreation Area in Southeastern Wisconsin. Motor will be the Aerotech M1939W.

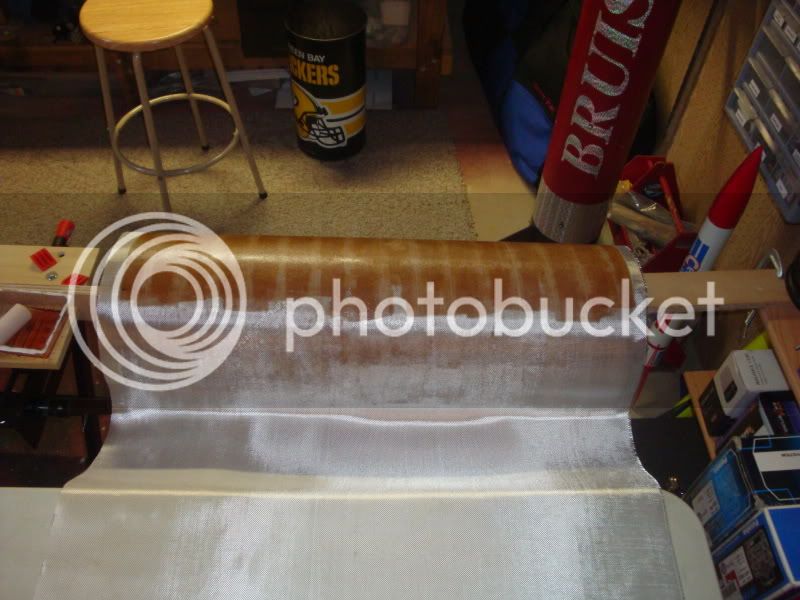
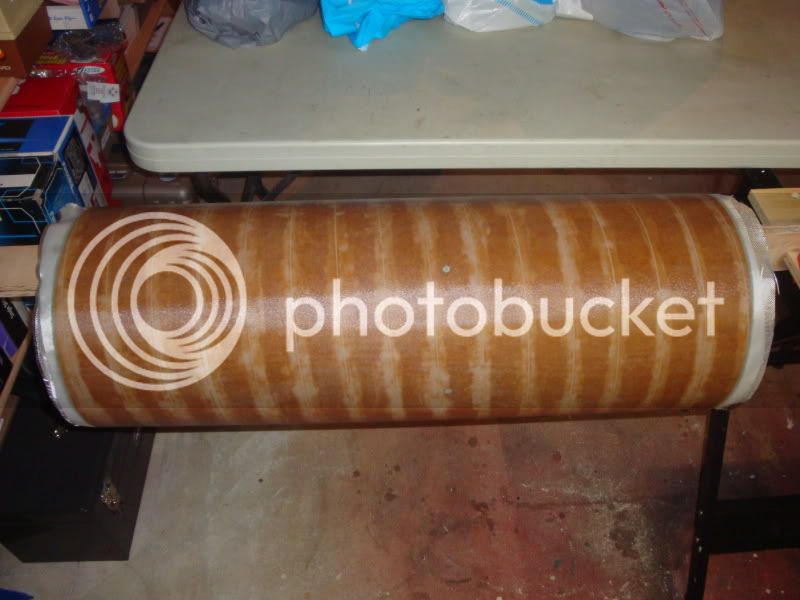
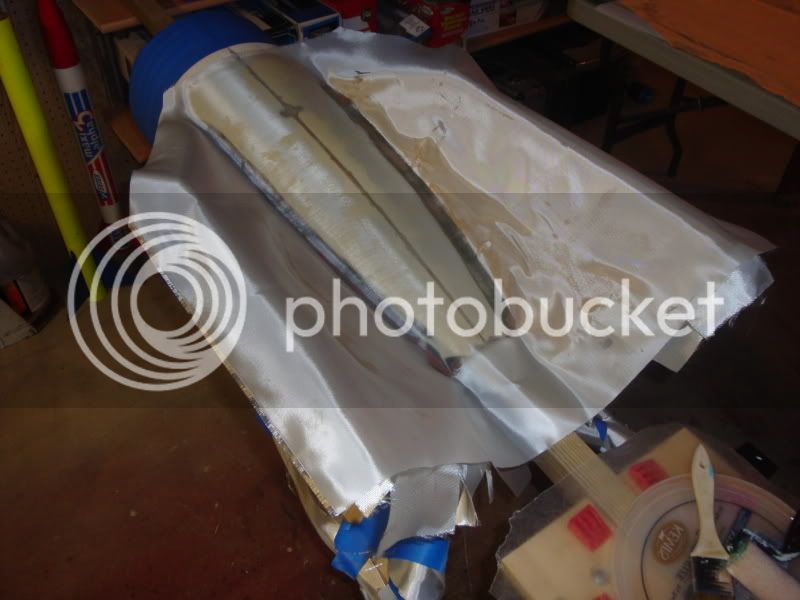
The Team consists of Tom, Kevin, Brandon, and Eric Cayemberg. Tom (my Dad) is responsible for general deconstruction and construction, electronics, transport, and painting. Kevin (my uncle, Tom's brother) is in charge of recovery gear for the big turd. Brandon (my 2 year old son) is in charge of reminding me to work fast as I don't have much free time with him around and another munchkin on the way in a few weeks. Eric (me) is in charge of filling, sanding, glassing, priming, and propulsion.

On to construction!
 
Fillet Work

Prior to its arrival at my house, the original owner had constructed the can by installing the motor mount and fins. Fillets were layed using Epoxy clay.

Tom did additional work to the booster including, but not limited to:
-Sanding the shoulder of the cone to fit the phenolic airframe properly
-Removing (non-forged) eyebolt in the forward Centering Ring and replacing it with a 5" U-Bolt
-Reaming out the aft end of the carpet tube motor mount and sleeving it with a couple inches of 98mm phenolic.
-Apply a few alignment marks for alignment with airframe section and rail guide installation.

Upon delivery to my place, the first step was to work on the fin fillets. I'm a bit picky on nice looking fillets, so I had to add some epoxy to the existing gray clay stuff to get a consistent radius. Here we are on the bench adding fillets of Proline Epoxy, Cabosil, and milled glass fibers.

10-29-10043.jpg


Next, the can was moved outside for some hefty sanding. Here's the bird outside ready for some sanding fun. This was a little over a week ago, still plenty of snow on the ground.

d-2.jpg


40 grit sandpaper wrapped around a 3/4" or 7/8" dowel helped chew down the edges of the gray clay and blend it with the newly added fillets. Each fillet took an average of 30 minutes to sand to my satisfaction. Minor imperfections were filled with glaze putty and blended with the epoxy fillets. Here's the section all sanded and ready for glass.

10-29-10068.jpg
 
Last edited:
With all the sanding done for now, it was time for some glass.

A pattern was made with paper for tip-to-tip glassing. The 7.5oz primary layer and 3oz sanding veil were cut slightly oversized using the trusty Olfa roller and mat.

The fincan was supported by running a 2x2 from a portable work stand to a shelf at the edge of my shop. The V-2 was skewered through the motor mount.

Proline Epoxy was mixed and applied to the surface using a mini roller I had on hand from painting the baby's room a few weeks back. A single layer of 7.5 oz cloth was layed in place and fully wet out. The 3oz tight weave veil was put in place over the heavier cloth.
10-29-10069.jpg


Two opposing sides were done simultaneously. Once the epoxy was "green", the edges were trimmed flush with the edges of the fins. I am not concerned with delamination as this bird will be slow!
10-29-10070.jpg


The remaining two sides were glassed in the same fashion.
 
Glazing putty was added where the glass ended, overlapped, etc. The putty was sanded, the glass veil was sanded lightly to remove high spots. Thanks to the large amount of sanding performed prior to glassing, minimal filling and sanding was required.

The fincan can ready for primer!
c-1.jpg


One quick coat of primer before it heads back to Tom's house for Paint Prep. It'll probably receive another coat or two of primer and a bit of spot putty prior to paint.
a-1.jpg


...And that's all for now. Glassing of the airframe should occur this weekend; pictures to follow!
 
Last edited:
That is a great fin can. Can't wait to see the progress and flight. The V2 is my second favoride rocket behind the Nike Smoke.
 
Nice. I wouldn't even guess the amount of nose weight you're going to need.
 
Chuck, we have an 11.5" Nike Smoke too! The molded fincan on the big Nike took a horrendous amount of work to get flyable. I'm normally a fan of Performance Rocketry items...but that fincan was nearly the death of me!

Nike Fincan of death:
10-26-09116.jpg


Poised for flight:
MWP7010.jpg


I'm going to try to resize some of the photos in the original posts to make their horizontal/vertical orientation correct.

-Eric-
 
El Cheapo,

I believe we have about 20 lbs of ballast in the nose right now. We'll verify CP/CG relationship before flight to make sure it flies straight. I have a love/hate relationship with the V-2...love how they look, hate how they require tons of noseweight AND how unpredictably they fly if their owners don't install sufficient ballast.

-Eric-
 
You are absolutely correct. A friend of mine was commissioned to build a 10" Pole Cat V-2. I believe he modified the fins to be scale. It required 16lbs of nose weight. It was a scary amount but flew great.

He posted it in the Dec Best Rocket competition: https://www.rocketryforum.com/showthread.php?t=16987
 
Last edited:
:y: Wow! the first one I ever saw! How many people were cheated out of this kit? He took money but never delivered as I recall.....


JD
 
Thanks Justin!!!

Jeff, I remember reading in an HPR mag from the early 90's that Dave sought 10 or 12 preorders in order to make the run of V-2's worthwhile. I don't know how many orders he actually filled; but I've heard several accounts of money paid, product not received. They had some nice products if you could get your hands on them!

I don't know what happened to the molds, if anything. I used to have a Performance Rocketry 11.5" 3:1 ogive cone, which was definitely different from the Dangerous Dave cone.

-Eric-
 
Wow Eric,

I didn't know you guys had one of these. Like Justin, can't wait to see her fly.
 
You are absolutely correct. A friend of mine was commissioned to build a 10" Pole Cat V-2. I believe he modified the fins to be scale. It required 16lbs of nose weight. It was a scary amount but flew great.

He posted it in the Dec Best Rocket competition: https://www.rocketryforum.com/showthread.php?t=16987

I saw this kit in it's earliest form... The guy that first built that kit lived about 2 blocks from me. His name is Andy Weorner. They built I believe 4 of them for the first ever Plaster Blaster in Plaster city, Ca.

I think there are some videos of some of andy's projects out there, the most memorable is the ill-fated X-wing disaster.

Chris.
 
Please enjoy this abbreviated build thread of our Dangerous Dave 11.5" V-2 (who here remembers Dangerous Dave Gawlik?)

Sure do...I still have his catalog.

IIRC he had to get out of the fiberglassed rocket kit business due to epoxy sensitivity...

IMHO the only rocket design prettier than his Mad Dog series, is he current Giant Leap Talon series, and maybe the Dynacom Python (loved the fin can with the FG boat tail and metal motor ring - elegant).

Clean lines, very sexy, looks fast just sitting there.


Congratulations on your find and it's great to see you building this relic.
 
Last edited:
Just in from Tom's Rocket Dungeon; the nosecone is ready for primer. The mold seam was filled with USComposites Epoxy and West 410 Fairing Filler. The seam was sanded smooth.

Here's the nose ready for primer alonside the primed fin can.
V2_C.jpg


A 5.5" cardboard tube is sunk in the nosecone for additional payload or nose ballast capability. For now, it will be capped by another 3/4" ply bulkplate with integrated U-Bolt for attachment to the recovery harness. Total nosecone weight at present is 32 pounds!
V2_A.jpg


As mentioned earlier, I'll be glassing the airframe this weekend. In the meantime, here's the functionally ready nose and tail sections alongside the smaller version. A 1/2 scale version of the 11.5" Brute, Tom's V-2 scratch build made of Loc components. Paint scheme on the 11.5" V-2 will be the same.
V2_E.jpg
 
Nice Eric. Your nike and V2 are awesome....

I think i may have to get me that performance 8.5" nike some day....
 
If I'm reading the photos right the second picture in post #2 shows apvc ejection canister.

That being the case he has some electronics in the tailcone assy.

I'd love to see some pictures of how it is setup as that to me is the most difficult part.
 
Jason & Clay: Thanks!:)

MaxQ: The Mad Dog 40/40 was a sweet ride; albeit a rare breed as well.

Dave: If, and only if all goes well in July, then Yes it will probably see the skies at MWP. I won't assume it will go perfect, especially considering the mass, Bong conditions, etc. It will likely become a RX motor holder if all goes well!

Claude: At this time, the plan is to recover the nose with the rest of the rocket; using lots of tubular nylon length. We've gone back and forth on recovering separately or together, so this may change.

Brent & Bandman: No electronics in the tail. Electronics are held in a partially hacked 4" diameter avionics compartment on one side of the airframe a la picture. This is looking forward from the tail end of the airframe.

10-29-10100.jpg
 
Last edited:
Nothing earth shattering here, but next up is glassing of the main airframe: PML 11.5" phenolic; a little over 32" long.

Rough up the airframe with course grit paper to provide some extra surface area for a good bite, mix up a generous amount of Proline Epoxy, and apply to the airframe using a mini roller.

10-29-10103.jpg


The airframe received 2 wraps of 6 oz E and 1 wrap of 3 oz E. The glass was cut 2" wider than the airframe and "staged" on a work table adjacent to the airframe. Here's the 6oz getting layed:wink:

10-29-10105.jpg


Before Brandon woke from his nap, the three wraps of glass were in place awaiting time to cure.

10-29-10107.jpg


Before anyone asks, the spiral seam was filled and sanded by original owner Jim before there were plans to glass the airframe.

We're looking at a cold, wet, potentially snowy :eyeroll: week, so priming of the airframe may be on hiatus for a few days.

-Eric-
 
nice glassing. do you use anything to crimp it down to prevent delamination or do you just pull tight and hope the epoxy is worth it? hehe

great build! and wait...what is the total weight you're looking at under chute? i remember seeing a V2 at the november ROCstock in cali, possibly the same type, that came in under a drogue, and then the main deployed for the body/tail, and the nose came in separately. huge chutes lol
 
It was the rumor at the time he disappeared that the Law was hunting him and that his activites took down MRED(MicroBrick, Rocket Flight, Energon, And Dangerous Dave's) just as their new building was being finished.

Anyway, Dave was gone and the other 3 businesses never recovered:(
 
Brent & Bandman: No electronics in the tail. Electronics are held in a partially hacked 4" diameter avionics compartment on one side of the airframe a la picture. This is looking forward from the tail end of the airframe.

Eric, nice project! Are the electronics accessed via hatch on the outside of the airframe? How is the main secured (then deployed)?
 
Ed, No crimping necessary to keep the fabric down, just enough epoxy to fully wet out the cloth. You have to be conscious of the wet out of the fabric to prevent things such as bubbles and wrinkles, but on a uniform surface like the airframe, it is not difficult.

More complex shapes where the cloth has to bend around curves sometimes calls for additional measures such as relief cuts in the fabric, application of peel ply or mylar film (often coupled with a dense conforming media such as sand). In these cases, Harness satin weave is preferred over plain weave fabric.

The only time I've encountered delamination is with high mach flights where the fabric layers cease at the leading edge of the fins. I make it a habit to apply a small piece of lightweight (~1oz) cloth covering the leading edge and beveled area of composite layup high performance birds. With the V2, the cloth simply ceases at the leading edge; but it will be slow, so no worries there!

Dave, I remember the Energon L1100 and MRED. I didn't realize Rocket Flite was a part of that group...the Dyben's have/had been talking about re-releasing their Silver Streaks for a while, but that doesn't seem to be happening. Microbrick has some nice kits for a while too; always liked the look of the Maxon!

Tim, Thanks! The electronics are accessed through the inside of the airframe. Think of it as a standard 4" ebay, simply housed within a larger airframe. The large 11.5" bulkhead segregates the drogue and main chute compartments. It's location in the airframe is noteable by the philips head screws that are visible in the airframe glassing photos. This bulkhead serves as the forward bulkhead for the E-Bay. The aft bulkhead of the E-Bay is simply a 4" bulkplate (cut to fit the main airframe on the outboard side). It's held together using allthread. The electronics sled is the same as used in a 4" bird, making it "universal".

The main (actually mains) are housed in the main airframe forward of the bulkhead. The nose is shearpinned in place using (6) 4-40 nylon bolts. There is room in the nose for chutes or payloads should we ever decide to place electronics in the nose and deploy a chute out of there.

-Eric-
 
Tim, Thanks! The electronics are accessed through the inside of the airframe. Think of it as a standard 4" ebay, simply housed within a larger airframe. The large 11.5" bulkhead segregates the drogue and main chute compartments. It's location in the airframe is noteable by the philips head screws that are visible in the airframe glassing photos. This bulkhead serves as the forward bulkhead for the E-Bay. The aft bulkhead of the E-Bay is simply a 4" bulkplate (cut to fit the main airframe on the outboard side). It's held together using allthread. The electronics sled is the same as used in a 4" bird, making it "universal".

Oh, I get it. I thought I was looking at the NC bulkplate versus an intermediate bulkhead. Thanks.
 
The only DD V-2 I have ever seen in person had fiberglass fins and a much more detailed tail cone. If Tim E. or Tom B. are here, maybe they can refresh my memory. Might have had a fiberglass body tube as well.
 
I don't know how many orders he actually filled; but I've heard several accounts of money paid, product not received. They had some nice products if you could get your hands on them!

I had a buddy of mine order one at LDRS27 and paid $700 (or something to that effect) in advance. As of this past summer when I last talked to him, he never got it. <Insert colorful adjective here>

-Dave
 

Latest posts

Back
Top