Mercury Transport Prototype

The Rocketry Forum

Help Support The Rocketry Forum:

This site may earn a commission from merchant affiliate links, including eBay, Amazon, and others.

EMRR

Well-Known Member
Joined
Jan 19, 2009
Messages
1,788
Reaction score
2
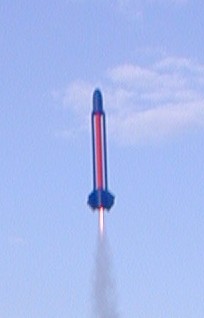
I took a break from my Lamba and built up a prototype of my Mercury Transport, or at least that is what I think she'll be called.

Pic #1
Pic #2

This prototype is build from a Big Bertha kit just to get the large body tube, nose cone and motor mount. Add a 24mm tube (Apogee), cut some additional centering rings and transitions, add some 3/32" balsa and volia' . . . a prototype.

A prototype implies a grandeur project and yep that is the case. I have already build the body for a 4" to 2.6" to 4" version with a 29mm + 3x24mm Cluster motor mount. I build the prototype just to check out flight stability, because rocksim can't handle the fins.

What RockSim does is put the fins touching the body tube all the way up. My project has the fins suspended over the smaller inner tube (what I am calling my Proton Rod Reactor Core). The fins are for interstellar cooling. In fact, 95% of the entire ship is a reactor to allow the ship to travel the distance needed.

Any how, it is supposed to clear up a bit here on Sat, so I'm going to get it a try I hope.

Regards,
Nick

P.S. As a prototype, it was slapped together and painted (as opposed to finished). Sorry about the color. My camera decided to make it a much lighter blue. It is a deep Navy blue....really!
 
When do you work?

Just kidding. Man, you have some really good projects going. I can imagine when you find time to breath. I can't wait to see the finished Transport.
 
Nick, the gap in the fins and the paint job are great! Do I smell a photo contest entry? I look forward to the flight results.
 
The big one was supposed to be ready for that, but it won't and I didn't do enough finish work to make this little one worth the photo contest, so, nope.

Usually I try to participate in the contests but....

Nick
 
Nick, that design is cool. Can't wait to read the test flight report. Keep us up to date when you build the bigger one, too.
 
Here is the 18mm Mercury Transport RockSim. From this you'll see how the fins are forced to meet the center tube.

Notice how RockSim says "Over Stable" and Barrowman says "UNSTABLE"?

If all goes as planned today, it should go up on a B6-2, then a C6-3.

- Nick

Mercury_Transport_18mm.RKT

Note to Admin: Could we add the "Attach File" extension to include ".rkt" and ".vcp" and ".eng" to accomondate our rocketry hobby? I know I could have just zipped it, but food for thought.
 
Originally posted by EMRR
P.S. As a prototype, it was slapped together and painted (as opposed to finished). Sorry about the color. My camera decided to make it a much lighter blue. It is a deep Navy blue....really!

Navy blue and orange -- I like it!

GO BRONCOS ...
 
After finishing my domestic duties of filling in water drain trenches and mowing the lawn, I'm now sitting here waiting to see if the wind will die down so I can go fly.

In the mean time I have discovered that you CAN make RockSim have the fins separated from the inner body tube. I has to do with the bottom line in the free form not being on "0.0". I set some points up so that it was "0.001" between the two larger sections of tube. Boy, did THAT change my CP. Now both RockSim and Barrowman's is OVER STABLE.

Mercury_Transport_18mm.jpg


I have re-uploaded the RockSim file (above) if you want to look at it.

Yee Haw!

Nick
 
Good job! Hope you get a change to fly today. (Hey, I even got a chance to fly the 2 Applewhite kits! Reviews are submitted.)
 
Bitter - Sweet.

I flew her. (3) flights:

Flight #1: B6-4, perfect, straight, apogee, NC down, ejection, full deployment, success

Flight #2: C6-5, straight, higher, apogee, NC up, ejection, 85% deployment at 1 panel stuck to itself (melted from ejection gas)

Flight #3: B6-4, straight, apogee, NC down, ejection, chute stuck on heat shield, fell fast, no damage

Crack fin in carrying box on way back to car. Easy repair as it was clean.

(3) Perfect Launch photos (my son and I have a great system).

(3) Launch photos lost in cyberspace from my camera to my computer with no errors and me deleting them from the camera before confirming they we on the PC.

Arg! and Yeah! Bitter - Sweet.

Nick
 
Nick,
I've been following this thread with much interest. Any of the guys here in NC will tell you that I'm a sucker for interesting fin designs. I love the custom fin job you did with the Mercury Transport. I can't wait to see the upscale version. Congratulations on the successful flights.
 
Better to lose the photos than the rocket :D Glad the flights went well...was there any doubt?

You gonna tell us your photo secret, huh, huh?
 
We use an Estes Command Controller (the one with 2 7.2V RC Batteries). I sit with my son in front of me. I push the yellow (ARM) button because my son doesn't have the strenght in his fingers. This makes a solid tone. I aim the camera with the other hand. My son counts down and presses the red (Launch) button. When this is pressed the solid tone stops. I click. We get it every time. Based on the sound loss. That is what works. Every time, I'm not kidding.

I'll get a couple other shots taking of here soon.

Nick
 
Thanks for the description, sounds a lot easier than trying to look for an initial whiff of smoke.
 
Talked my son (who will be 5 in a few weeks) into going out for "just 1 flight" to get a picture of the Mercury Transport 18mm. He wanted to do something else, but finally conceded to go.

Here's the larger version LINK and below is the close up.

This was on a B6-4 and another perfect flight.

mercury_transport_sml_04.jpg


- Nick
 
Thats a great shot. The gap between the fins and the smaller tube is clearly visible. Very neat!
 
Ahhhhh. Large open field, Mountains (okay, large hills) in the background, clear blue sky, and a sweet lookin rocket!

Only thing missing is a bigger flame outta the back end of that bird! :D


Nick, that Mercury Transport is looking awesome! Very, very cool. I'm glad you convinced your 5 year old on what is really important in life (pleasing your fellow TRF members with pics). ;)

Excellent job!

Jason
 
TRF Preview Exclusive:

Thus closed this thread as I have created an article for on EMRR. This is a preview so if you see any errors please let me know. The RockSim will be updated a day or so to better represent the final model (all the centering rings and more descriptive text).

In the meantime you can enjoy THIS

I hope someone else tries to build it!

Nick
 
Hey, guess what? Someone decided to build my Mercury Transport themselves and they wrote me:

Hi Nick,

I found an article of yours in a recent newsletter from Apogee Components, describing how you built your Mercury Transport, and I thought it was a very intriguing design. After reading your detailed description on the EMRR website, I thought I'd give it a go, completely from scratch, and write to you to let you know about my attempt.

I live in Australia, and getting specific parts or model rocket kits can be tedious, and the motor situation is even worse. For some strange reason, we can't buy anything larger than a D blackpowder motor, which is very disappointing.

I started building model rockets in high school, but gave it up when motors became hard to get. Last year I started it again, roughly 10 years after my first attempts at building rockets. After making some basic designs, I moved to harder techniques, like transitions and clusters, and then I found your Mercury Transport design.

After analysing and measuring tube diameters from the RockSim file, I found two cardboard tubes, one of which was from a roll of paper towel, and the other was from a roll of garbage bags. The garbage bag roll was about twice as thick as I needed, so I peeled about 3 layers of cardboard from it, then gave it a light sand.

Then it was just a matter of cutting two lengths of cardboard to act as the top and bottom body tubes, and to make transitions and centering rings to align all three tubes correctly.

The nosecone was hand made from 7 strips of balsa wood glued together with white wood glue, sanded to shape with a Dremel, and then hand sanded until it was the right shape.

The rest of the construction was the same as your instructions, but was finished off using a water soluble wood putty to fill in the grain for a smoother finish, then coated with an Australian made brand of paint, and finished with a clear coat to increase gloss.

The rocket hasn't flown yet, but I look forward to launching it soon.

Thank you for sharing a unique rocket design with the rocketing community. I look forward to seeing more interesting designs on the EMRR website.

Yours sincerely,

Shane Tunkin.


rocket9 tricky.jpg
 
And now for a quick look at the 4" version:

It is now primed and will get it's coat of blue paint this morning. Then I need to add rails.

It will fly on (1) 29mm + (3) 24mm motors, but I have not got it all simmed to actual yet.

Notice in the picture that I used Walmart Yard sticks for the long fin strakes. They were $0.50 each verses the $$$$ for plywood.

You can also see that I used Apogee's Fix-It Epoxy Putty (for the first time) on the fillets. I love this stuff!!!!!

- Enjoy.

Nick
 
That 29mm Mercury Transport looks really sweet!

I'm quite impressed with the Australian version of the kit also.

Well done, Nick.
 
Very cool Nick!

What did you use for the transitions on the orange tube?

I think the yardsticks add some interesting detail. :D
 
Originally posted by Jase
What did you use for the transitions on the orange tube?

These are balsa transitions that are from a Fat Cats' Centuraus kit.

I bought (2) of the 4" tubes, (2) transitions, and (1) 2.6" tube from the Centuraus kit straight from Fat Cats.

Nick
 
The upscale looks great! I even think the raw yard stick markings look cool...but I can have weird tastes. I imagined that Wal-Mart-2065 leased this one. Maybe it's the equivalent of a galactical 18-wheeler? (sorry, I haven't fully shaken out the cobwebs this AM!)

And it's just so cool that someone out there decided to build a copy of the prototype. :)
 
I mean, technically, it could be called "4th Down, 6 Yards to Go" (hint: 4th is for the 4" diameter).

Or "Weighed and Measured" and hopefully not "found wanting".

Hee, hee, but alas it is my Mercury Transport. And it is now painted fully (although the humidity is so high that it dulled it some, but I want to fly it on Thursday so tough cookies).

- Nick
 
With great pride, ya-da, ya-da, I'm pleased to present:

Mercury Transport "The Grandeur", standing next to the Prototype Mercury Transport.

See Attachment

She should fly and NYPower this week.

- Nick
 
suh-weeet!

What's the plan for power for the maiden flight? With 4 mmt, I hope theres *lots* of fire and smoke....

-Nathan
 
Okay, I just finished my Sim. Determined parachute (48") and looked at what motors I have left.

So, this will fly twice (planned) on an H165R + 3 x F24's and then on an H238 + 3 x F39's.

Hope it works!

- Nick
 
And this kit will be available when??


:D


It really looks awesome dude!
 
Back
Top