"The Last Defender": BaddAzz Defender build thread

The Rocketry Forum

Help Support The Rocketry Forum:

This site may earn a commission from merchant affiliate links, including eBay, Amazon, and others.
They are still available on his site, but page says $34, but when you go to cart it says $40, plus S&H???
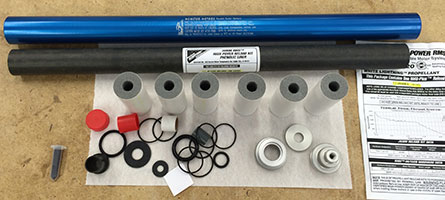
They aren't available at any price. Besides, you are looking at the MKII, The MKIII in the thread was $150ish. That tail cone retainer alone would be worth $40.
 
That is one cool nose cone. Is it made out of plastic?
UHMW, which means it's really hard to get paint to stick.

It is plastic. It looks like it was turned from a plastic tube on a lathe. I'll sand it with 200-grit sandpaper and apply two layers of thick primer, then paint will stick and stay on it.

Unless I push it to mach speeds, especially with irregular shape of the nose cone, pieces of paint might come off anyway.
 
They are still available on his site, but page says $34, but when you go to cart it says $40, plus S&H???

If you read the front page, these kits are out of stock and no longer made by the manufacturer. Website and shopping cart are not connected to actual inventory which is indeed confusing.

This kit must be the last kit - while cwbullet claims to have another one, he's not going to build it :wink:
 
Making AV-bay takes another five minutes. I'm not putting any electronics just yet.

BA9_AV1_Small.JPG

Screwed two rods into a lid and aluminum canisters. Canisters are already threaded.

BA9_AV2_Small.JPG

Put it into the coupler, attached the lid and screwed two other canisters.

BA9_AV3_Small.JPG

And that's all !

BA9_AV4_Small.JPG

One of the lids, coupler and forward body tube come with four pre-drilled holes. Aligned the holes and used four small supplied screws to connect the airframe to the AV-bay.
 
Since there are only a few opportunities left to fly this year, I'm going to fly the rocket the way it is (single deployment, no paint), and get back to the build thread after. Assuming tree and frostbite conditions are in my favor ;)

I wanted to sew the loops of the shock cords, but for now I simply tied double bowline knots, with a turn of electrical tape to hold the ends.

BA10_Finish1_Small.JPG

Connected all the parts together:

BA10_Finish2_Small.JPG

And it's ready to fly!

BA10_Finish3_Small.JPG
 
Last edited:
Wicked


Alexander Solis

TRA - Level 1
Mariah 54 - CTI RedLightning- I-100 - 6,345 Feet
 
Can you tell me how far up the loop is tied for the chute between the aft end and the av-bay? Also, is that loop for the main chute or the drogue?
 
Can you tell me how far up the loop is tied for the chute between the aft end and the av-bay?

I usually attach the chute about a foot, foot an half from av-bay. The goal is to avoid booster and forward section hitting each other on descent. Another side effect of attaching the chute close to av-bay is that if chute does not come out at event, there is still a chance for forward section to drag it out of booster sooner or later.

Also, is that loop for the main chute or the drogue?

It depends :) Today it was for main; once I finish avionics, it will be for drogue.
 
It flies!

BA11_Flight1_Small.JPG

Gorgeous day at CMASS launch today - sunny and pretty low winds. I flew "The Last Defender" on CTI H143 "Smoky Sam". Motor deployment with 8-sec delay. The rocket went right up, popped the chute at apogee, and drifted ~1,000 feet from the launch pad.

BA11_Flight2_Small.JPG

Nice!

BA11_Flight3_Small.JPG

I forgot to mention that standard 36" chute is a tight fit in 2" airframe (to my taste). Top Flight Recovery was very kind to sew me a custom 36" chute from thin-mill fabric, which fits loosely and easily slides in and out. Even though I was not sure whether thin-mill fabric of this size was strong enough, it held perfectly, chute came back like new.

Now I'll start making the setup a little more complicated...
 
Awesome and great work on the rocket.


Alexander Solis

TRA - Level 1
Mariah 54 - CTI RedLightning- I-100 - 6,345 Feet
 
Awesome! Congrats on a great build and flight. You inspired me to get a little done on mine today. Once I round up some epoxy it will be ready to fly. What kind of altitude did you get on that motor?
 
What kind of altitude did you get on that motor?
You can also "fill 'er up":

j510parts.jpg


This is indeed a very cool little rocket.
 
It flies!

I forgot to mention that standard 36" chute is a tight fit in 2" airframe (to my taste). Top Flight Recovery was very kind to sew me a custom 36" chute from thin-mill fabric, which fits loosely and easily slides in and out. Even though I was not sure whether thin-mill fabric of this size was strong enough, it held perfectly, chute came back like new.

Now I'll start making the setup a little more complicated...

When you say "thin-mill" fabric, are you talking about 3/4 oz rip-stop instead of the 1.5 oz most rocketry chutes are made from? The 3/4 oz material is what man rated chutes are made from. It is plenty strong if the chute is designed right. It also costs two times as much, $12 per yard vs. $6 a yard for the heavier stuff you get a the fabric store.

Glad it worked for you.
 
Nice work, it brings a tear to my eye to see my previously owned rocket in the air, truly amazing, I'm happy to see you got use out of it, unlike I did.

-Mike
 
I miss that field in Amesbury! Nice flight! I have a MKIII in my build pile. Thanks for the heads up on the plastic thingies. Wouldn't have known what to do with them.
 
Back
Top