Altitude record attempt using the O3400 in minimum diameter style.

The Rocketry Forum

Help Support The Rocketry Forum:

This site may earn a commission from merchant affiliate links, including eBay, Amazon, and others.

Who thinks I am crazy for this project?

  • Yes

  • No


Results are only viewable after voting.
I have a rocket painted with Flat Black and Bronze Cerakote finish. BIG advantage is it adds almost no weight to rocket, unlike the mass standard paint adds. I did not bake it. It does dry like ordinary paint. It needs the heat to be at its hardest. I figured I would let friction do the heating.... One word of caution- before its heated it can be dissolved with alcohol- big mistake... I was cleaning surface and that rag started to go black. It is easy to apply- I use a harbor freight large airbrush. No big deal. Purchase it from https://www.midwayusa.com . This stuff is tough as iron: I refinished my Benelli target pistol in Gold Cerakote. It has taken thousands of rounds to begin wearing through the meta-to-metal slide surfaces!!!!

If I was to create another rocket that must withstand high heat at mach I would begin by using higher heat epoxies rolling my own tubes, high heat epoxies on everything... then I would be confident on baking that rocket. It would be tough. Add ablatives and I believe we are really on to something.
 
Just because the paint can withstand the temperature doesn't mean the rocket underneath will survive. The paint or ceramic coating isn't actually insulating the structure from the heat.

Then what the Hell is the point of painting it with heat paint. I have heard from tons of folks if it is possible to get the rocket painted with heat resistant paint then do it.

From what I understand of the process of applying Cerakote you have to use a blasting media to prep the surface. Similar to sand blasting a car but obviously not as intense. Yes, there is Cerakote that you bake on in a post cure. I dont want to risk the rocket itself by baking it because those post cure temps are 250 + for hr or more. The stuff I am interested in is the stuff that cures in a cabinet at ambient temperature for 5 days. Once cured the paint is rated up to 1200 degrees Fahrenheit. Yea in a perfect world I would choose the bake on if it was let say a gun part or and car engine part.

It does not actually insulate the underlying structure per se, or at least enough to mention(?). From my opinion and as aforementioned, it will possibly absorb some of the valuable energy that could otherwise be more damaging to the underlying structure. Your flight will most likely be in the high M2's (speculation) and you will not be there for long; so I see the paint "absorbing," some of the energy as it "melts off," during the short time spent at higher Mach. This could possibly allow the vehicle to get out of the "danger zone," before there is enough energy to damage the underlying structure. Maybe… maybe not...

I think it is a wise choice to not post cure at 250F+ (in regards to the paint), your parts seem to be stock PR FWFG which I believe has a service temperature or Tg of under 250F. I use to know which and what value but i cannot remember. In either account I have seem some not hold up to the elevated temps for prolonged times. I have used VHT 550F paint which requires a hour at 250F (post cure) with no problems, but that was on parts where the epoxy used was good to 600F. Anyways it would be very interesting to see how the ceramic stuff you mentioned holds up.
 
Last edited:
It does not actually insulate the underlying structure per se, or at least enough to mention(?). From my opinion and as aforementioned, it will possibly absorb some of the valuable energy that could otherwise be more damaging to the underlying structure. Your flight will most likely be in the high M2's (speculation) and you will not be there for long; so I see the paint "absorbing," some of the energy as it "melts off," during the short time spent at higher Mach. This could possibly allow the vehicle to get out of the "danger zone," before there is enough energy to damage the underlying structure. Maybe… maybe not...

I think it is a wise choice to not post cure at 250F+ (in regards to the paint), your parts seem to be stock PR FWFG which I believe has a service temperature or Tg of under 250F. I use to know which and what value but i cannot remember. In either account I have seem some not hold up to the elevated temps for prolonged times. I have used VHT 550F paint which requires a hour at 250F (post cure) with no problems, but that was on parts where the epoxy used was good to 600F. Anyways it would be very interesting to see how the ceramic stuff you mentioned holds up.

I'll have to say thumbs up to that.


Alexander Solis

TRA - Level 1
Mariah 54 - CTI RedLightning- I-100 - 6,345 Feet
 
Then what the Hell is the point of painting it with heat paint.

I am saying there is zero point to painting a rocket with high temp paint. Rockets that have used it survived for other reasons, Mad Max especially. They just came back with nicer looking paint jobs than had they used something else.

Search "ablative" on the forum and pay attention to the heated arguments (pun intended) about it versus heat resistant paint.

I would hate to see you spend a large sum of money on the coating when it's not going to help.
 
I am saying there is zero point to painting a rocket with high temp paint. Rockets that have used it survived for other reasons, Mad Max especially. They just came back with nicer looking paint jobs than had they used something else.

Search "ablative" on the forum and pay attention to the heated arguments (pun intended) about it versus heat resistant paint.

Then why am I hearing from people to paint the rocket with heat resistant paint? Are these people just not knowledgeable? Isn't the idea to paint used to protect surfaces? And if the surface is involved with heat, then heat paint is more resilient.
 
Then why am I hearing from people to paint the rocket with heat resistant paint? Are these people just not knowledgeable? Isn't the idea to paint used to protect surfaces? And if the surface is involved with heat, then heat paint is more resilient.

It doesn't do much in the Mach 3+ range, even for VERY brief durations: Bare Necessities went from Mach 0 to Mach 3.7 in as many seconds, and then very rapidly slowed down, and all of the paint on the upstream side (it coned pretty badly, hence why it slowed down) was gone completely.

It may be okay-ish on the sides of the rocket, but it'll be gone on forward-facing surfaces.
 
It is not just heating but also the "breeze," that also plays a part in the type of composite delamination we experience? The weaves and fiber bundles cannot come undone if the paint is still on? I am not sure how some can conclusively state that it does zero? Comparing ablatives to heat paint are two different things, perhaps deciding when to use one or the other is maybe more appropriate. But I don't think that paint alone is a huge defense against the heat but maybe a secondary line of slight short lived defense against the "breeze.". You do not need an ablative for a flight like this (IMO-others have survived fine without), I feel it introduces more problems than needed, i.e. calculating ablation rates to determine a necessary thickness for your design and flight profile, finding the right mixture, smooth application, post flight work and repeats if desired to be flown again. If you were going greater than low mach 3 then I would completely agree that it is time to at least look into ablatives. For your flight, you could also only use "true," high temp epoxy on the fin area. I have seen that work before.


It doesn't do much in the Mach 3+ range, even for VERY brief durations: Bare Necessities went from Mach 0 to Mach 3.7 in as many seconds, and then very rapidly slowed down, and all of the paint on the upstream side (it coned pretty badly, hence why it slowed down) was gone completely.

It may be okay-ish on the sides of the rocket, but it'll be gone on forward-facing surfaces.

Didn't you only have paint on something like 3/4th of the nose cone? Perhaps your results had something to do with the type of paint you used (which was what btw?) and the fact that your flight was not exactly straight? The reason I bring this up is others who had similar flight profiles still had most of the paint left.


I understand that things online can be read out of context so I will just state, I am not trying to start arguments and I mean no disrespect in my post. I am just interested in hearing more in this subject.
 
Then why am I hearing from people to paint the rocket with heat resistant paint? Are these people just not knowledgeable? Isn't the idea to paint used to protect surfaces? And if the surface is involved with heat, then heat paint is more resilient.

Imagine you could paint a chunk of styrofoam with the most heat resistant paint you could find. Now blast it with a heat gun from Harbor Freight. You'd have a styrofoam puddle in a sack of heat resistant paint.

Thermodynamics!
 
Didn't you only have paint on something like 3/4th of the nose cone? Perhaps your results had something to do with the type of paint you used (which was what btw?) and the fact that your flight was not exactly straight? The reason I bring this up is others who had similar flight profiles still had most of the paint left.

The paint was on all of the composite; it wasn't on the metal tip. When we found it, exactly half of the paint was completely gone, and the other half of the paint was half worn through.

We used 500-F engine paint, post-cured to 300 F.

One reason it could have come off is that it was atop "ablative" (technically, just insulation but it does wear away) but the paint clearly was melted at "sunset" (where the flow was parallel to the surface).
 
Is not the purpose of the paint to provide a smooth surface, which in turn creates less friction? I believe this is where the advantage lies in using paint. If you think about it, less friction equals less heat.

I dont know what difference it would make, but I think this is where paint will allow for a more fluid air flow.


Alexander Solis

TRA - Level 1
Mariah 54 - CTI RedLightning- I-100 - 6,345 Feet
 
Is not the purpose of the paint to provide a smooth surface, which in turn creates less friction? I believe this is where the advantage lies in using paint. If you think about it, less friction equals less heat.

I don't know what difference it would make, but I think this is where paint will allow for a more fluid air flow.

A good amount of the heat experienced on a high mach flight is from adiabatic compression. In other words, the rocket compresses the air in front of it before it has a chance to get out of the way since it is compressed without increasing much in volume the temperature of the air increases. This will happen no matter how smooth your rocket is. So if you really polish your paint well you can reduce some of the heating can be mitigated. However, if the paint gets overheated, or the forces on it is stronger than the adhesion of the paint; all of your gains will go away rather quickly. This could be a problem if you were solely relying on the smoothness of your paint to save you.

There is a nifty physics demo that you can do related to this. If you take a large syringe with the end plugged and put a piece of lint or paper in the bottom. Push the plunger in as fast as you can and you can sometimes make the paper catch on fire.

Then why am I hearing from people to paint the rocket with heat resistant paint? Are these people just not knowledgeable? Isn't the idea to paint used to protect surfaces? And if the surface is involved with heat, then heat paint is more resilient.

It depends on what your goal is. If you goal is to make sure your rocket continues looking good, and you are not worried about the heat compromising the structure of your rocket. It might makes sense to use heat resistant paint, since it will be less likely to discolor or boil. So your rocket will continue to look good.

However, if you are to the point where you are aiming for high mach levels I don't know of any paint that will survive a high mach flight untouched. Your ceramic coating has a chance to actually survive the high mach flights there is a problem though. The sub-straight underneath your paint likely wont. If it's fiberglass the epoxy will likely boil or outgas from the heat, this will create an air pocket under your paint which will force out the paint into a bubble shape. The protrusion will then get stripped off by the friction forces and you now have a good sized hole in your paint job.

Now that scenario is a bit hypothetical since I haven't actually tried that coating, but that is a possible failure path.

It's easier to think of the heating problem like this. The entire issue of heating on your rocket is impacted by two things. The total amount of heat that will be generated, and in what space of time it will happen in. You approach things differently if you are going to get a large amount of heat over a long period of time versus a large amount of heat over a short amount of time. In our case, we get a ton of heat over a pretty short amount of time, coupled with a pretty large amount of force acting on the surface.

There are a few ways you can deal with it, in general terms they are:
-Insulation (stopping the heat at the surface)
-Absorption (absorbing it into the structure)
-Removal (getting rid of the heat in some fashion)

These aren't the technical terms that you would find in a text book, but they mostly describe what is happening well enough.

The method that you are currently attempting with your ceramic coating is Insulation. The problem is I don't believe that your ceramic coating is insulating enough, for how thick the coating is, to keep the heat away from the structure. If you made the coating thicker (ie MUCH thicker ~.25" or more) you stand a pretty good chance of keeping the heat on the outer surface of the rocket. This would probibly wiegh a ton if you used a coating this thick. The only materials that I know of that are suitable for this application is Aerogel, Carbon Carbon ceramics, and a few other exotic ceramics. Most of which are horrendously expensive or at least horrendously expensive to process into a nosecone shape, and in the case of Aerogel has kinda poor properties with regards to friction. So for the most part in amateur rocketry no one really goes for the insulation method, or at least successfully.

For absorption, it's the opposite of insulation. In this case you use the nosecone as a heat sink, and build from a conductive material. You rely on the high temperature handling properties and the thermal mass of the material to evenly spread out the heat throughout the whole structure. This gets a little complicated because everything connected to it needs to be able to withstand the temperatures as well, but it is a valid approach. Making your nosecone out of aluminum would be an example. The heat spreads out through the aluminum, slowing the temperature rise enough to generally get out of the atmosphere before any critical temperatures are reached. Making your nosecone out of inconel would also work. This approach tends to be a bit heavier than some, since most conductive, high temperature materials tend to be heavy.

The last approach in my list is removal, where you are trying to remove the heat from the structure entirely. There are many ways to do this as well. You could spread a film over the surface of the rocket to boil away and remove heat from the rocket. You could have cooling channels in the nosecone and circulate coolant through it to pull heat away. Or you can put a coating on the surface that will ablate away, meaning solid -> liquid -> gas -> sometimes plasma. This usually happens almost instantaneously, and since it undergoes 3-4 phase changes it removes a considerable amount of heat in the process. You also want this ablative to be insulating since you only want the outer surface to ablate, and not the whole coating at once.

Most rockets that I have seen either use materials that can absorb the heat and handle the temperatures reached, or the put an ablative coating on to protect the nosecone underneath. Ablatives can be much lighter overall, however they usually require more work since you have to reapply the coating each time you use it. Aluminum is kinda nice since you just to do it once and your done. But it is heavier and has its own problems.


Here is the ablative that I am planning on using.


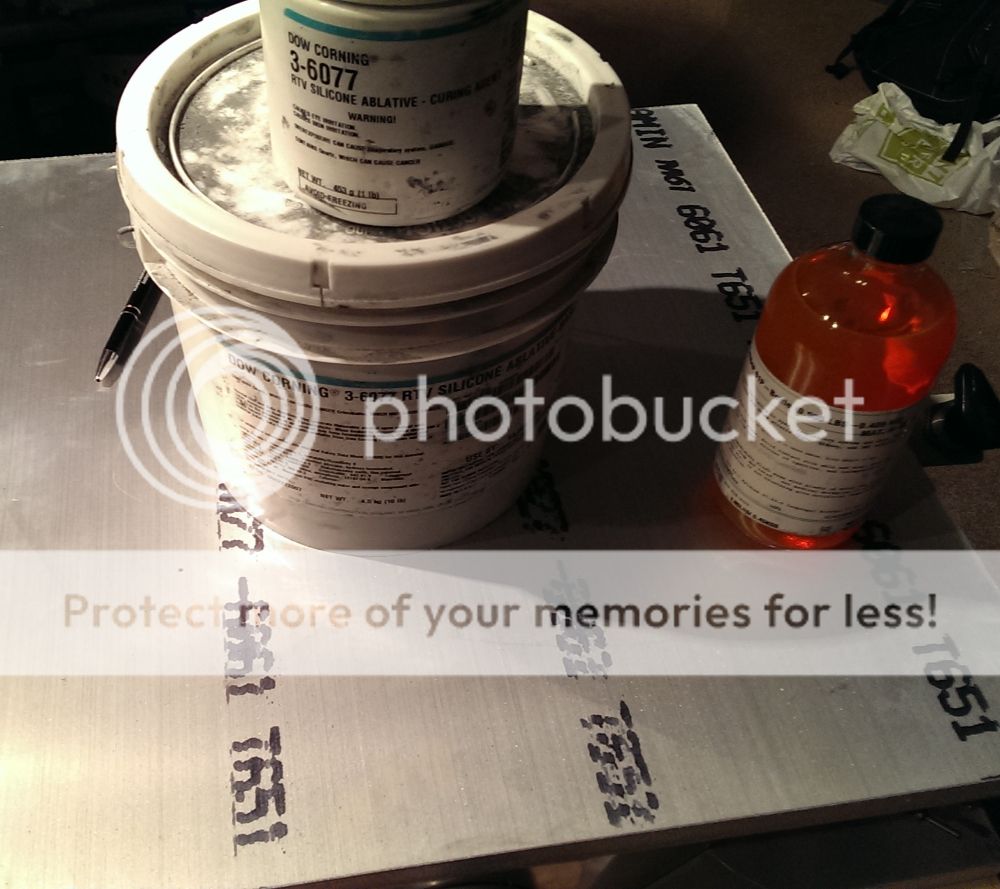
It is very expensive, and a little bit hard to obtain (Its aerospace related so sometimes extra paperwork is required). So I don't know how much use it is to you. I have seen some expired stuff on ebay pretty cheap (mine expired in 2006), but new from corning it is about $350 for a kit; though a 5lb kit will probably go a long ways for a 4" nosecone you could probably paint it a hundred times. But its good for about 6000° F and can still go down to -40°F which is a bit important for where I launch. I am still not quite sure it is the right stuff to use, it's pretty thick. We typically use it for coating launch stools for orbital launches to protect it from the rocket exhaust. We do have to re-coat the stool before each launch. But it definitely does it's job well, I'll just have to see if I can apply it well enough.

Don't take this to mean this is the only stuff in the world that will work. Not even close, there are countless ablatives out there, I just happen to have this one.
 
Xrain, Have you played with your Dow Corning much? I find it to be pretty soft and not much adhesive quality to it. I thinned some down and it seemed better, but still soft. I'm curious how well it will stay on a nose cone.

Tony
 
Xrain, Have you played with your Dow Corning much? I find it to be pretty soft and not much adhesive quality to it. I thinned some down and it seemed better, but still soft. I'm curious how well it will stay on a nose cone.

Tony

I haven't had much of a chance to play with it too much. I have the primer for it as well which is supposed to improve adhesion. The primer seemed to be mostly isopropyl and acetone but I'll see how well it works. I know the ablative adheres reasonably well to the launch stool which is mild steel at least.

There is another ablative that was used on a fiberglass nosecone for an improved Orion sounding rocket. I looked through the documentation a bit on it and think I remember seeing it. I'll see if I can figure out what they used incase my corning stuff didn't work.

"Its primary use is in the protection of launch structures exposed to direct rocket blast, and is easily removable after charring, for recoating." That might suggest that its adhesion properties are low to allow for easy removability and replacement? They list a wide range of materials that this product can adhere to… glass and epoxy are included; they also mention that the use with their primer substantially increases adhesion. If Tony did not use the primer that might be interesting to see how your results differ, if at all. I am sure you already have the data sheet/instructions but if not here it is -> https://www.specialtyadhesives.com/dow_sealants/3_6077_RTV.pdf… might help.

Have any of you ever tried the use of phenolic resin, chopped fibers, and phenolic microballons as an ablative? Looks promising.
 
Awesome finish, what is that big whitish spot on the fillet?


Alexander Solis

TRA - Level 1
Mariah 54 - CTI RedLightning- I-100 - 6,345 Feet
 
I am glad you noticed that! I dont know. I dont know if it is a pool of epoxy under the fabric, it was vacuumed bagged. So IDK the fillet is smooth no bumps
 
I am glad you noticed that! I dont know. I dont know if it is a pool of epoxy under the fabric, it was vacuumed bagged. So IDK the fillet is smooth no bumps

It could be possible that it may be a pool of epoxy. I'm not one to say much since I have no experience with vacumm bagging, but off the top of my head I assume that, because you pulled vacumm from one side of the fin it may have pulled epoxy downwards on the fillet.

I'd advice pulling vacumm on either side of the airframe. Add like a coupled to aid you on that. Fingers crossed that isnt a pool of epoxy.


Alexander Solis

TRA - Level 1
Mariah 54 - CTI RedLightning- I-100 - 6,345 Feet
 
I am glad you noticed that! I dont know. I dont know if it is a pool of epoxy under the fabric, it was vacuumed bagged. So IDK the fillet is smooth no bumps

That's pretty odd. Is it residue from peel ply? Abrasion?
 
Is it possible you had a slight shelf at the edge of the fillet from pulling the tape? If it was to small for the glass to flex into there may be a tiny gap between the glass and the tube cause a discoloration. It would explain why it's a straight line down the fillet. This is just a guess though.
 
Is it possible you had a slight shelf at the edge of the fillet from pulling the tape? If it was to small for the glass to flex into there may be a tiny gap between the glass and the tube cause a discoloration. It would explain why it's a straight line down the fillet. This is just a guess though.

No I did not. I sanded the fillets on the same on all sides. Every fillet was eyeballed the same. Looked and felt the same a the touch of a finger. The washer I used of the fillets was 1 1/2 inch fender washer.

That's pretty odd. Is it residue from peel ply? Abrasion?

Nope clean. No leftover stuff.

The other two sides came out clean. No odd discoloring. So whatever happened on the first side, it did not occur on the other 2 sides. I used the same amount of epoxy weighed out equal for all three sides.
 
It could also be the light reflecting off of the shiny fillets and not an actual problem if it appears to your eye to not exist in reality. Online we are seeing a poor reproduction of the true image no matter how good the camera is, it is an approximation for now at least.
 
I got my motor ordered from Tim at Wildman. Just waiting for it to come in. I have been taking a break from Rockets this holiday season. I look forward to continuing this project in January!!
 
My motor will be delivered tomorrow Wednesday Jan 7th. Thanks Tim the Wildman. Well I have taken a break since before Christmas. Gonna start the construction again.
 
Back
Top