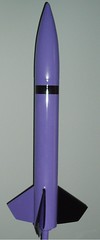
I like the purple, but there are some things to know about it. The important things are all there, the color is good, covers well, gives a glossy finish without requiring a coat that risks serious runs, so all in all good performance. Except, the initial adhesion is less than I would have though. On a color coat I usually wait about 20 minutes then carefully remove the masking, I've found some paints can flake if you let them cure too much. In this case you HAVE to pull the tape back at a sharp angle, go with a shallow angle and you can lift some of the edge. As a result there are a few spots I'd like to redo, but they may get left on the basis of risk versus reward. The second fin can pic shows the worse lift, on the strake near the coupler end. Anyhow, the pic of the NC in the sun is a good representation of the color.
View attachment 252189 View attachment 252190 View attachment 252191
This is Rustoleum 2X Purple Gloss over Rustoleum 2X White Gloss over Rustoleum Automotive Grey Primer. Compatibility isn't the issue.