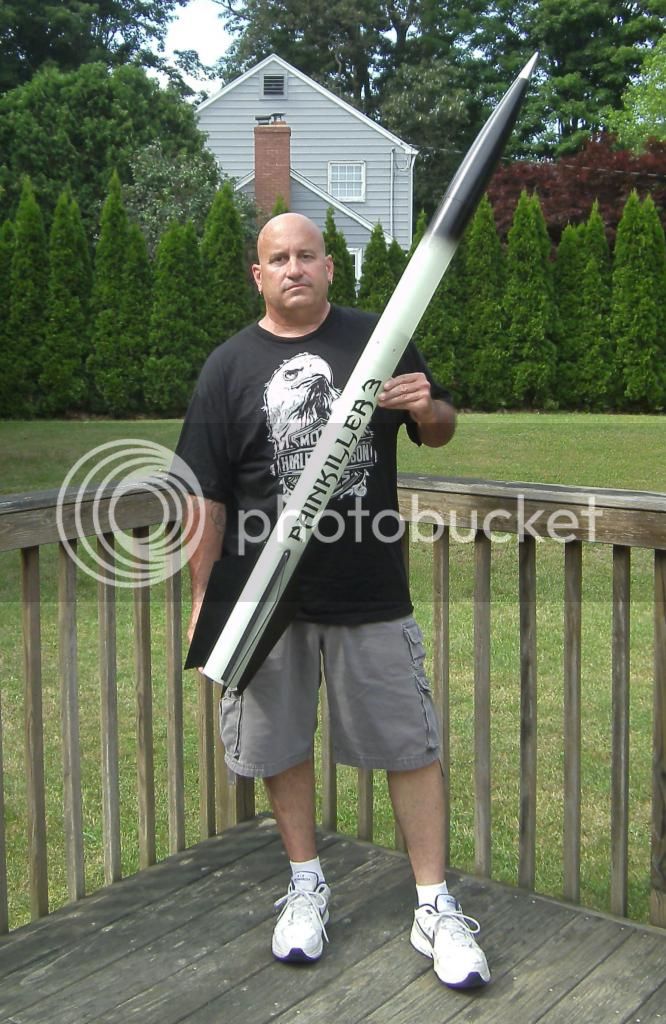
The PainKiller 3 rocket thread

The Rocketry Forum

Help Support The Rocketry Forum:

This site may earn a commission from merchant affiliate links, including eBay, Amazon, and others.

Kehoes23

Well-Known Member
Joined
Jan 8, 2013
Messages
966
Reaction score
49
ImageUploadedByRocketry Forum1402858403.836920.jpg
The unpacking parts count photo
ImageUploadedByRocketry Forum1402858461.539001.jpg
First things first, giving all parts a bath, why? To get the mold release residue off for better glue adhesion and painting.
ImageUploadedByRocketry Forum1402858573.258891.jpg
Parts list: one lower body section, slotted, one upper body section, one nose cone with aluminum tip, one ave bay/ coupler section, one nose cone shoulder tube. I think that's what it's called. One 54mm motor tube.
ImageUploadedByRocketry Forum1402858804.930989.jpg
One decal sticker, two centering rings, four bulk plates for av bay two inner two outer, one bulk plate for nose cone and three fins.
 
ImageUploadedByRocketry Forum1402859122.907896.jpg
ImageUploadedByRocketry Forum1402859147.740877.jpg
The Aeropack motor retainer with the flange does fit the centering ring and inside the body tube. I don't have to buy a motor retainer, but not sure about the shock cord attachment yet. I have 60' of 1/8" Kevlar, not sure if I want to epoxy it to the motor mount or attach to the motor it self with a plugged threaded closure.
 
I'm going to be epoxying the cord straight to the MMT. I'm following the instructions for the 3" Darkstar thread that blackjack did.
 
ImageUploadedByRocketry Forum1403199537.576200.jpg
Sanded each bulk plate with 80 grit
ImageUploadedByRocketry Forum1403199602.345374.jpg
Attached a inner and outer plate on a piece of 1/4" all thread so the plates are centered
ImageUploadedByRocketry Forum1403199713.549904.jpg
Got the nose cone bulk plate CA in place with a 1/4" U bolt
ImageUploadedByRocketry Forum1403199798.537084.jpg
Aft CR drilled, waiting to get taped
ImageUploadedByRocketry Forum1403199853.603281.jpg
Using a thread tool to give the holes threads, since the CR is fiberglass there is no need for thread inserts
ImageUploadedByRocketry Forum1403199962.625583.jpg
All the holes are threaded with bolts inserted
ImageUploadedByRocketry Forum1403200012.685524.jpg
ImageUploadedByRocketry Forum1403200026.768613.jpg
Got the retainer bolted on the Aft CR
 
ImageUploadedByRocketry Forum1403200734.454745.jpgImageUploadedByRocketry Forum1403200343.296364.jpgImageUploadedByRocketry Forum1403200159.944928.jpgImageUploadedByRocketry Forum1403200746.860372.jpgImageUploadedByRocketry Forum1403200592.721306.jpgImageUploadedByRocketry Forum1403200269.169176.jpgImageUploadedByRocketry Forum1403200769.150680.jpgImageUploadedByRocketry Forum1403200674.570431.jpgImageUploadedByRocketry Forum1403200332.648933.jpgImageUploadedByRocketry Forum1403200159.944928.jpg
Sanded the motor mount with 80 grit and drew a line on the side to aid In shock cord placement
ImageUploadedByRocketry Forum1403200269.169176.jpg
Shock cord attached using CA glue
ImageUploadedByRocketry Forum1403200332.648933.jpg
ImageUploadedByRocketry Forum1403200343.296364.jpg
I use tape on the forward CR to keep the ring level while the CA sets then remove tape. I normally don't glue the Aft CR on, this time I did and later will drill holes next to the fins so I can inject internal fillets, there is not much room to do it with the aft CR off
ImageUploadedByRocketry Forum1403200592.721306.jpg
Got some of the av bay done, still need to cut down the 1/4" all thread
ImageUploadedByRocketry Forum1403200674.570431.jpg
I inserted the av bay in the aft end of the body to Mark my linesImageUploadedByRocketry Forum1403200734.454745.jpgImageUploadedByRocketry Forum1403200746.860372.jpg
ImageUploadedByRocketry Forum1403200769.150680.jpg
I did the same with the forward end of the lower section and upper section of the body tube and marked each line with an SP and VH, SP: shear pin, VH: vent hole
 
Last edited:
Everything that has been glued using CA will get a generous dose of Aeropoxy ES6209 epoxy fillets.
 
Well under way now. Hey you having trouble getting your pics to show up?? same thing happened to me when I added the Av-Bay pics??
 
ImageUploadedByRocketry Forum1403203151.861326.jpg
The fin slots are sanded and test fit the fins, love the fin design on this rocket
ImageUploadedByRocketry Forum1403203213.763666.jpg
The marks by the fins are there to tell me which fin goes to what slot, the fins got marks on them as well
 
For some reason the pics are over sized, I've posted pics from my I phone before with no problems. I'll see if I can figure this out.
 
image.jpg
Ok, let's try this pic.
I'm drilling and taping the upper body section and av bay, I'm using 6-32 screws
 
ImageUploadedByRocketry Forum1403211399.962993.jpg
I have used this in another build, seems to work very well, it's fiberglass mesh used for drywall seems. After the epoxy cures I'll put another coat of epoxy on
 
Last edited:
Sean, here's some inspiration.

PK3-1_zpsdfebd88d.jpg


PS this pic is from a URL
 
I have no idea why the photos are not coming up, and I can't figure it out, I'll keep taking photos of the build but not post them till I can figure this out.ill try reposting an earlier photo to see if it does the same thing.
 
Nope still not working. Would some one else have any ideas on how to fix this or what is causing this to happen?
 
I can see all of the photos just fine:):) looking great!


Sent from my iPod touch using Rocketry Forum
 
Back
Top