Parts for Arduino based Oven

The Rocketry Forum

Help Support The Rocketry Forum:

This site may earn a commission from merchant affiliate links, including eBay, Amazon, and others.

blackbrandt

That Darn College Student
Joined
Mar 18, 2012
Messages
9,281
Reaction score
60
I have done a ton of searching online, but only 1 came up with what I want, and I had some trouble understanding it.


I am trying to build an oven (for fiberglassing) that has the following features:
  1. It is temperature controlled by an arduino.
  2. I can adjust the temperature while the oven is on (this might have an easy way to get around it)
  3. It displays the current temperature on an LCD screen.

This oven will have to be at temperatures ranging from 70F to 190F. It is an aluminum lined blue foam oven.

I already have an Arduino and a breadboard. What parts would you say that I need? (Of course, I know I need a thermometer. Does anyone have any suggestions on where to get one?) Also, has anyone out there done something comparable?


Thanks!
 
What I was planning on having was a fan running at a constant speed, with an adjustable heat source. Or, would it be easier to have an adjustable fan speed, with a constant temperature?
 
What I was planning on having was a fan running at a constant speed, with an adjustable heat source. Or, would it be easier to have an adjustable fan speed, with a constant temperature?

A fan running at constant speed would be fine.

I'd say you need some sort of switching device that can handle a hefty amount of current, that (obviously) can be controlled by the signals the Arduino can output.

And then you need a thermistor, which you'd hook up to the Arduino to provide some feedback.
 
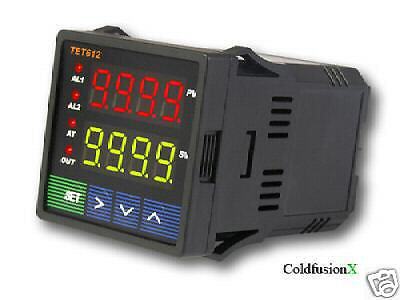
Honestly you are probably better off buying something like this:

0c9e_1.JPG


https://www.ebay.com/itm/New-PID-SS...406?pt=LH_DefaultDomain_0&hash=item35aeb1bc86

(not an endorsement for the above item or seller - just the first example I found)

Arduinos are fun to play with, but if this is your first project and you need something reliable, stick with what is known to work.

But by all means please buy an arduino and play with it. they are a great learning tool.
 
This is more just something I am playing around with. I just want to try my hand at a more advanced arduino project (I already have done a few of the basic light up a lightbulb, spin a motor, etc.). I know basically what I need and what I need to do with them, but I just wanted to get some opinions.
 
You will need a

  • Temperature probe - a type K thermocouple will work in this temperature range. You will have the challenge of coding for the inherent non linearity. I've not worked with the Arduino, so I'm not sure if you will need to create an A/D interface as well. Digi-Key had some, however most were in the $50 range.
  • Some way to turn the heat source on and off. A simple relay stack will work. I doubt the SBC has the necessary current sink to control a large enough relay so you may need one to control another. Again, Digi-key would be a good source.
  • Controlling a fan is kind of academic unless you want to allow for hot spots.
 
Well if you are going to copy that instructable, then you need a solid state relay and some type of temperature sensor. For these temps, a thermistor is probably fine and will be much easier to use.

If you want to accurately control the temp, then you should start reading up on control loops and pid filters. If you don't need it to be super accurate, then a simple loop will be all you need.

I agree that leaving the fan on all the time and just cycling the lamp would be the easiest solution. Less knobs to turn...

Have fun and keep us posted!
 
Do you plan on using that for the arduino to measure the temperature? It doesn't appear that it would be possible to do that without modifying the temp display.

If you have an arduino in the loop, you should be driving a display with that. But using the temp sensor you posted would be a good way to double check your work...
 
adafruit is a great company to work with. There's lots of stuff online about interfacing it with LCDs, user input, and switching high-current relays. The code on the actual control logic will be really simple :)
 
It sounds like you are new to this. Please consider using a device like this, to handle anything related to mains voltage:
https://www.powerswitchtail.com/Pages/default.aspx

It can be used to conveniently interface your heaters to the Arduino and - most importantly - prevents you from making a bunch of safety related beginner errors.

Another thing: If this thing is fully under software control, never let it run unattended. Depending on the heat source, insulation material etc., a software bug might result in a fire hazard.

Reinhard
 
Here's some pics of a "hot box" I made for accelerating the cure time of vac-bagged glider wings. Its 4 feet long and 2 feet across, 18" deep

Made of 3/4" blue foam, with aluminum foil inside (foil sprayed with 3M77 adhesive).

Uses a 4" cooling fan that runs constantly, no speed control.

The heat source is simply two light bulbs.

I found that with 100 watt incandescent bulbs, it got as hot as 147 degrees. That was too hot for the vac-bagged wings, risking the foam core getting melted. So, I changed to two 60 watt bulbs which brought the heat down to 120-125 degrees.

Therefore, mine is a "dumb" hot box. It is on constantly and simply tops out at about 125 degrees because that is as hot as the two 60 watt bulbs make it get. Which is perfectly fine for my needs.

So, I would guesstimate that if you used four 100 watt bulbs, that might be enough to reach the 190 degree max temp you want. If not, then 5 or 6 bulbs.

Way less dangerous than using an actual heating element.

I leave it to you to work out how to get the Arduino to safely interface with a relay or whatever to turn the lights on and off. The simple way would be to turn all on or all off. But a more consistent way would be to control each bulb so that once it has reached the desired temperature, it would turn one bulb off when it got a bit too warm then when it got a bit cool turn that one bulb back on, while the rest stayed on (well, if you wanted 170 degrees, the rest would probably need to be on. For say 120 degrees you'd need several to be off. The idea here being that you arrange the programming so one bulb is the one that actively goes on and off to hold the desired temperature, not all of them). Set it for off when 1 degree above the set temperature and to turn back on when 1 degree below the set temperature, or whatever works best once it's running and you tweak it. It would involve a bit of programming tinkering to work out how to make the other bulbs be on, or off, thru the whole temperature range you want it to operate.

As for the temperature probe, just get a thermistor to create a proportional voltage change, a thermocouple is overkill for this.

Here is a link on how to use a thermistor with Arduino:

https://learn.adafruit.com/thermistor/overview

if I was doing it, I'd have the thermistor and the temperature lead from an indoor/outdoor thermometer at the same place, and take note of what number the thermistor was reading when the digital thermometer reads 90 degrees, 100 degrees, 110 degrees, and so on up to 190, and extrapolate the numbers in between. Or if I did not have the patience for that (could set up a video camera to record both), I'd just use the thermistor data sheet to help to fill in most of the data points, and just take the low end and high end of the thermistor and thermometer readings to set the calibrated endpoints. I assume for your needs it would not matter if say when you set it for 140 degrees, if it was 138 or 142.

Now, having said all of that, if you really did want calibrated accuracy within a degree, then you could get a digital temperature sensor. The output for those can be read in a manner that is already calibrated in degrees Celsuis (For Farenheit, you'd program the Arduino to convert).

Here's one link on using those:

https://learn.adafruit.com/tmp36-temperature-sensor/using-a-temp-sensor

- George Gassaway

IMG_3336.jpg

IMG_3337.jpg

IMG_3340.jpg
 
Last edited:

It's a very neat thing for displaying the temperature. I might get one for my hot box if I did not already have an indoor/outdoor thermometer to do the same thing.

[Edit, whoops, no, I'd not get it. It reads in Celsius, not Farenheit. I'd make up my own with a $5 Arduino micro knock-off, LED display, and temperature sensor before I'd use one that displayed in C. ]

But that is all it does, display temperature. it cannot hook up to an Arduino to act as a sensor. Maybe it could be hacked, but it is not too likely it could be hacked and work the same (short of just stealing the thermistor, then hoping that the LED readout could be rewired for the Arduino to drive it to display temperature or do something useful later.).

As for pics, yeah, I forgot to attach them at first, then put them in.

Edit - I should also mention that the Arduino forum is VERY useful in getting help to figure out ways to do your project, and more specifics when you nail down exactly how you are going to do it. I've only been doing Arduino for about 6 weeks, and the forum was useful in figuring out some things in general, and also in helping me to find errors in the programming.

But try searching the forum first, you won't be the first person who wants to turn light bulbs on and off with an Arduino. Do not limit that search to just the forum, there are a lot of other places to get good Arduino info. But when you need personal help with a project, the Arduino Forum is one of the best.

- George Gassaway
 
Last edited:
I like that arduino low temp oven website......how it say's

"Warning.....Use a GFI outlet."

and the schematic hook up leaves out the Ground wire/connection for the GFI to work....
 
You will need a

  • Temperature probe - a type K thermocouple will work in this temperature range. You will have the challenge of coding for the inherent non linearity. I've not worked with the Arduino, so I'm not sure if you will need to create an A/D interface as well. Digi-Key had some, however most were in the $50 range.
  • Some way to turn the heat source on and off. A simple relay stack will work. I doubt the SBC has the necessary current sink to control a large enough relay so you may need one to control another. Again, Digi-key would be a good source.
  • Controlling a fan is kind of academic unless you want to allow for hot spots.


Arduino has 6, 10bit A/D ports so thats not a problem.
DS18B20 output is linear, not even analog, it output the right temp (in C), from 1-wire protocol right out of the box. No need to calibrate.

The instructables scheme looks like the more simple/effective way of doing it. SO SAD it doesnt contain a proper electronic scheme but just the drawing (attached below). Be aware of reading all datasheet specs of the solid state relay, for proper wiring and to avoid trouble.

Mains is trouble. It's considered high voltage, safety wise. It really kill people as it happens every day, unfortunately. If you are not used to mains best advise is replacing all the SSR + Mains part of the scheme for something like https://www.powerswitchtail.com/Pages/default.aspx , pointed out already in this thread. Its a cool device because you can control it directly from arduino digital port. You can use the DS18B20 + this powerswitchtail stuff to get the oven going.

For a power supply: DC Current will be only needed for arduino digital work. Thats low current and any used cellphone adapter is suitable for the task.

Good luck!

FS2SOS4GJ289ZC5.MEDIUM.jpg
 
Sorry,

For the LCD display, the easy going is to get some serial LCD, 2 wires, easy to manage using the existing arduino libraries.
https://playground.arduino.cc/Learning/SerialLCD

EDITED:

... also, about the instructables "scheme": I cant see any fuse for mains wires on the part list or the draw, that's plain wrong.
You can drive the S202S02 SSR directly from arduino. S202S02 is internally insulated (4kV). You need to hook a 120ohm resistor (1/4W), between arduino outpup and the S202S02 signal input. Its just a LED inside package that control the switch, so small current.
 
Last edited:
If you want an LCD display, then be sure to get one that has a serial "backpack" module with it. That makes it work with Serial signals so that it only needs 4 wires (2 wires, plus +5 volt wire and ground wire).

So, avoid buying one that does not have a serial module, or you'll have to deal with a lot more wires.

I recently got this one for $10.99 on eBay, free shipping:

https://www.ebay.com/itm/Green-Back...h-Serial-I2C-Module-for-Arduino-/300987214523

Works great. I like it better than a white text on blue background LCD display I had gotten at first, this one is readable in daylight with the backlight off, drawing only about 5 milliamps. I am doing a project where a ground based system needs to run for hours on a battery. Also, the blue LCD display I got was damaged, it only showed the left 8 characters, not the right 8 characters (the right side got hot when I first used it, then the characters on the right side quit displaying). So I had to get another LCD display anyway (the defective one was not from the above seller on eBay).

Now if I was doing what you are, then I might want to use a white on blue LCD screen, with backlight in any case, since it'll be indoors and the extra millimaps wont matter.

The green one I got on eBay, the backpack module was included, but separate, so I had to solder it on. But it wasn't bad, 5 to 10 minutes for 16 pins (I think). If you are not comfortable with soldering to a PC board at 0.10" spacing, then you can get them with the serial module already installed.

- George Gassaway
 
Back
Top