Here's My Scratch Build Thread.

The Rocketry Forum

Help Support The Rocketry Forum:

This site may earn a commission from merchant affiliate links, including eBay, Amazon, and others.

TopRamen

SA-5
Joined
Aug 9, 2013
Messages
9,955
Reaction score
111
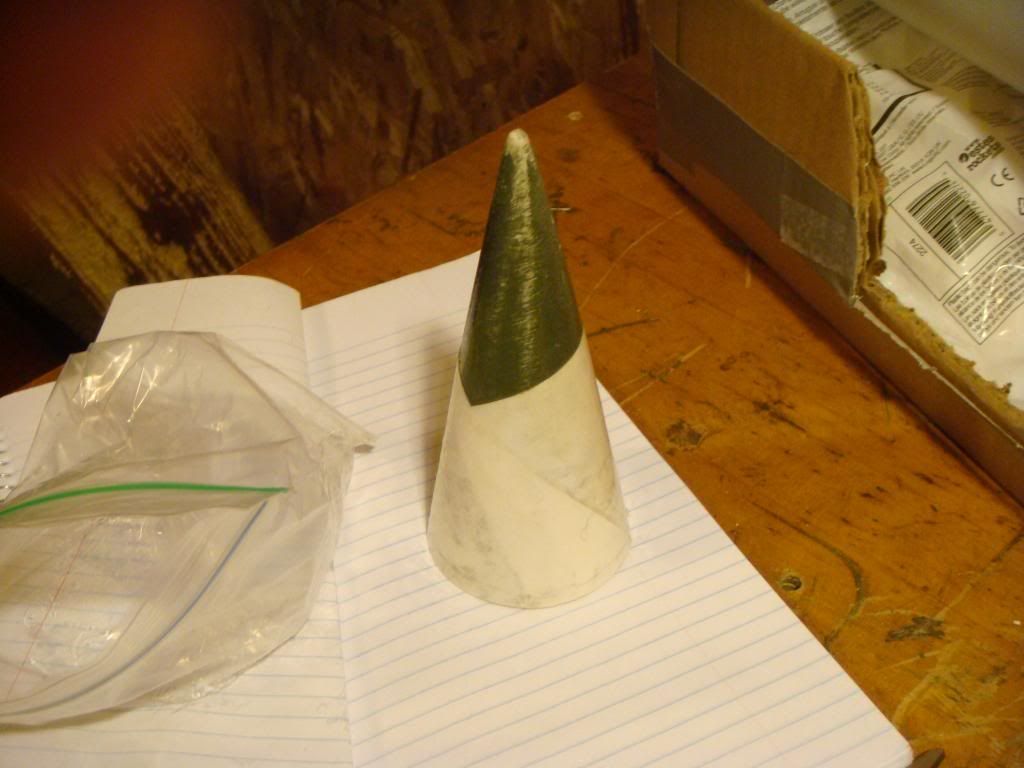
It starts with me being bored and trying my hand at making a Nose Cone out of the left over Tip of a Cone I Chopped up awhile back for a different Project. I was going to give up on it, but decided to throw caution to the Wind and go for it.


ETA: I likely will sim this now that it is taking shape.

Well, here we go!:

Started out with the tip of the old chopped up Cone. Rolled some 80lb. Card Stock around it and held it in place with some Tape to get the general Shape. I took the Cone out and tacked it in a few spots along the Seam with CA. I put a ring of CA around the Base of the small plastic Cone and slid the Paper Part on. Now, I slathered CA all over it, inside and out. When this dried, I trimmed the majority of the obvious excess. I then slathered it inside and out with 5 minute Epoxy. When that was dry, I added clippings of Paper to the inside with Titebond II Wood Glue to stiffen it. I had tried using a Cruciform of Balsa, but that warped it. The next Morning, I sanded the inside to even out the odd shapes of Paper I had fitted. Everything was stiff, so I trimmed some more, and sanded the Base til' it was even and concentric.:


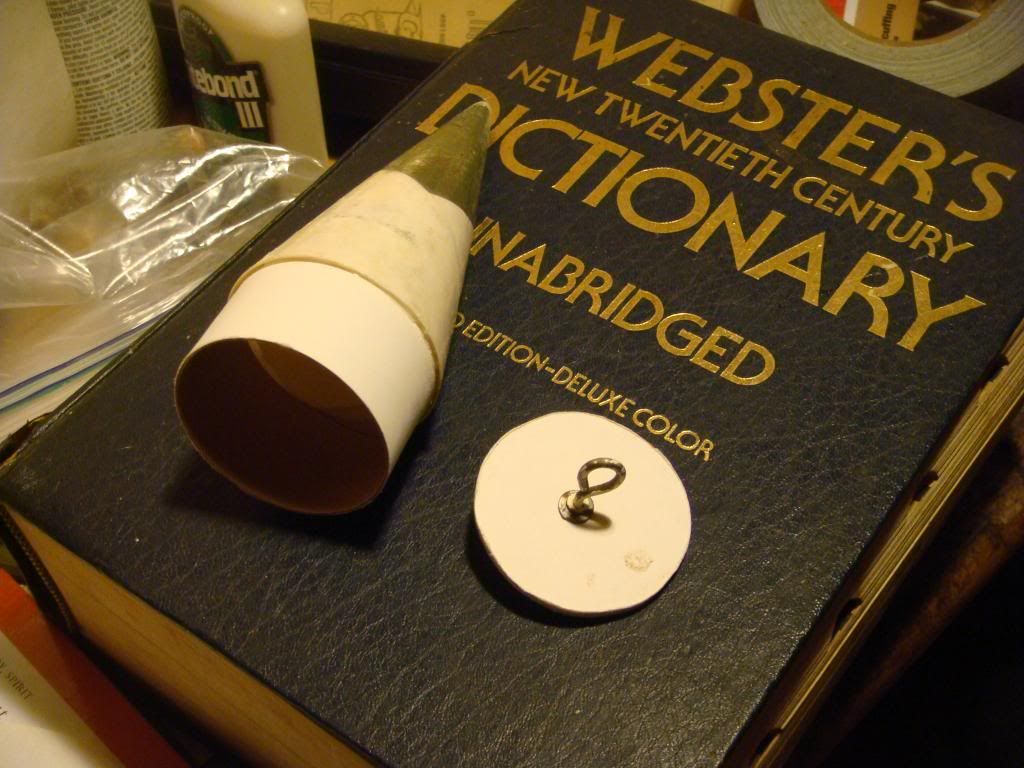
Next, I matched it up to the Body Tube, and did my final trimming of the Base. I then fitted a Coupler to it to allow it to fit into the Body Tube. This was done with 5min Epoxy too. I checked it for fit, and things were looking good, so I set to work making a Bulkhead with a Screw Eye Hook that I bent into a Screw Eye. The Bulkhead itself was fashioned out of 1/8" Balsa, Papered on both sides with the Wood Glue and 80# Paper. I epoxied the Screw Eye on both sides and on the Threads. It would have gone beyond the end of the Threads when I screwed it in, so I added a small washer on the Eye side. This was ofcourse then epoxied into the Coupler.:


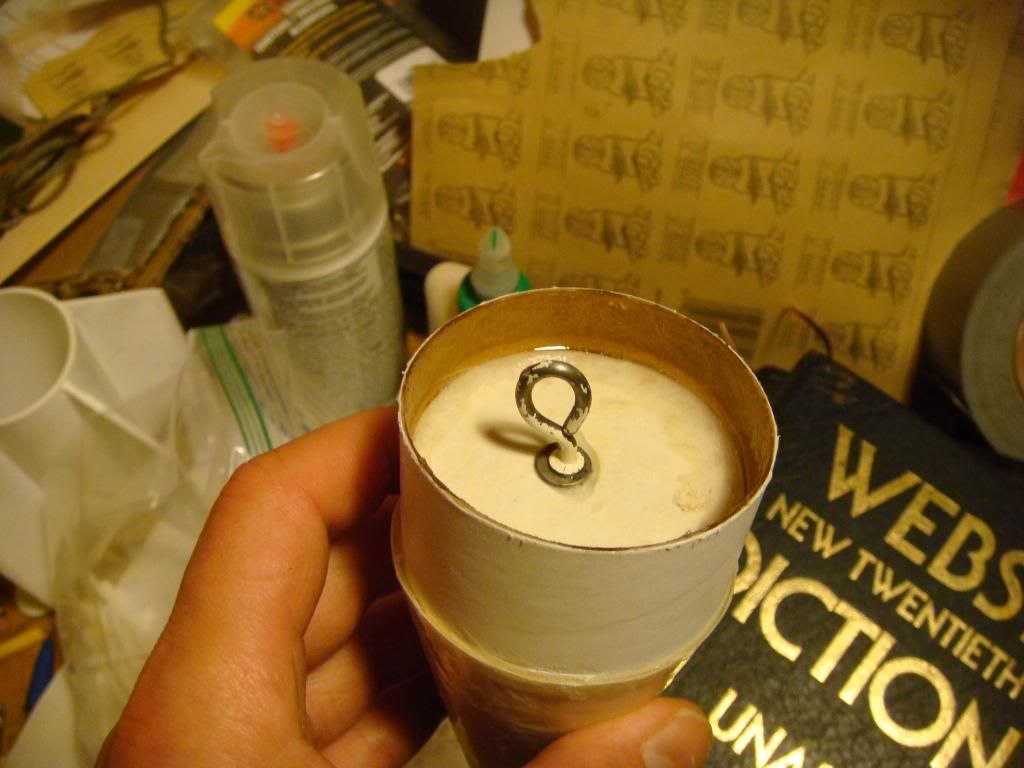
This part was not "Finished", but structurally it was done.
 
Last edited:
So, now to employ my Fin Can that I made from a Lazy Susan. It turns out that a standard Series 225 Coupler would only fit about half way down the hole in the center, so I had to make a custom Coupler by using a section of Series 225 Body Tube. I got it fitted so that inside the Fin Can it is concentric, thus I will be able to make a proper Motor Mount fit. On the exposed portion of the "Coupler", I will have to build it up ever so slightly to get it to fit the Series 225 BT that the Fin Can/MMT Assembly will be mated to.


I got it roughed up, inside and out, so as to form a good Bond of Paper and Plastic, then slathered the Surfaces with Titebond II. I sanded the Coupler real good, then used a Hacksaw Blade sans Hacksaw to score transverse gouges into the inner wall of the Fin Can. This will allow a strong Mechanical Bond. Due to the Surface Area, and my wanting to have a maximum Worktime, I opted to use Glue instead of Epoxy.
After wiping away the excess, I made sure the Coupler was concentric and used some Hacksaw bades to hold it centered while it dries.


I'll let this Part cure for two days before I fill the gap on top with some Epoxy to finish it off. Then I can slide my Motor Mount in. That gives me plenty of Time to make a Motor Mount.

ETA: Upon inspecting it, I realized that I should have the Coupler in its "Compressed Position", as it would be once inside the BT. I found that Toothpicks allowed me to center it and make it uniform. Glad I thought of this before the Glue dried.


We'll be ok now. That was a close Call!!!
 
Last edited:
I'm gonna' go 29mm on this one, but I'll ditch this Nose Cone in favor of a nice Semroc Balsa Cone eventually and long before its first Flight.
 
Here's the MMT I'll be using. I made it about a month ago out of a Tube from a Roll of Aluminum Foil, as shown on top in this Photo.:


A 29mm would just barely fit, so I cut the Tube in half, cut slits down the sides of each Tube, then slid them together in juxtaposition. I masked off a 29mm Estes G80 with a layer of painters Tape, then put the ol' Titebond right to it, making the two tubes become one, careful not to get any Glue on the Inner Walls, so as not to glue my Motor into it. The Motor with 1 layer of Tape was only there to get the fit right, and hold it til' the Glue Set. After it did, I slid the Masked Motor out, and coated the entire thing in 2 more layers of Glue. The Tubes proved to be very dry, and absorbed the Glue readily. Finally, when the assembly had cured, I gently sanded the inside to remove any excess Glue. Now, it is very rigid, and the Motor, without the Tape, slides in easily, but not entirely without effort. I wanted it to be just so, as I have read that some 29mm Single Use Motors require you to remove the Label. I figure a little loose was better than too tight, as I can always add Tape if a Motor is too loose, but too tight, forget about it. Here's a comparison of the before and after thickness.:

 
Time for a quick Mock up to get an Idea of what she'll look like. Can't wait to order a new Nose Cone. She takes up a lot of Space.


I'm all excited now! Thinking ahead to a cool Paint Scheme! I'm going to get an 8ft. Rail for this one.

ETA: I'm going to shorten it.
 
Last edited:
Tried out a few things on Rocksim back when this Rocket was just an Idea.


Seems I need to shorten my BT.
 
Last edited:
Is it just me or does this look like a giant #2 pencil?

I saw that too, and it's what finally drove me to decide to just get a nice Balsa Nose Cone from Semroc. The Nose Cone got me started on this Build, but she won't be there at the end. I'll use her on a small D-power Scratch in the future.
 
I do have to say, although this Build is presenting new challenges, I am so glad I don't have to deal with Fins. Everytime I build a Rocket, I am so OCD about the Fins. I don't even trust the Estes Fin Alignment Guide. Even after the Fins are on a Rocket, I keep looking at them and trying to convince myself that they are not quite right, even when they are just fine. Atleast this time it's a homemade Fin Can, which used to be a Lazy Susan, but I know they are aligned perfectly. What a relief. The only Line I have to draw on the Body Tube will be for the Rail Buttons, which in this case will feature a 1-2mm Riser, to accomodate the width of the Fin Can. That's no Problem. I have Apogee Rail Buttons with the Weld Nuts, and even if I want more of a Riser/Standoff, I can just go to the Hardware Store and get longer Screws.
 
I'm out of Materials to continue any further. I'll get back to this Thread in a couple of Weeks.
 
A couple of Weeks turned into a couple of Months. Anyhow, I'm almost done with this Build. Having the Fin Can really takes a lot of work out of it.
So much for a Build Thread.


This Rocket is going to get a Camo Paint Job when the Weather gets nice. I want it to sort of resemble an Artillery Rocket.

All it needs is a Chute Shelf and a Chute'. Oh, and a little Nose Weight. And Details and Paint ofcourse.
 
Oh, and that Goofy lookin' Nose Cone I made,... I threw it into the Fire Pit out back. What a silly Beer inspired Idea that thing was.:blush:
This Semroc Balsa Nose Cone is where it's at!!!:wink:
 
Oh, and that Goofy lookin' Nose Cone I made,... I threw it into the Fire Pit out back. What a silly Beer inspired Idea that thing was.:blush:
This Semroc Balsa Nose Cone is where it's at!!!:wink:

Oh no! I thought it was a nice nose cone. Not everything has to look like something out a catalog.

That said, your newest looks great.
 
Thanks.
So far it only weighs 13.5oz. I'm going to try to keep the Weight down on this one.
 
Here's some detail I added. The screws are from a broken RC Micro-Helicopter, and don't weigh enough to register on my Scale. They look cool though.

 
Looking good dude!
I like the looks of a 6 fin too, or is that 5 fins?

JP
 
Looking good dude!
I like the looks of a 6 fin too, or is that 5 fins?

JP

Thanks.
5 Fins. The Fin Can was a Desk Top Lazy Suzan Organizer like you would use to hold a bunch of Pens in. I found it at a Garage Sale for Free, so I took it home and cut it into the shape of a Fin Can. It's working out nicely.
How it used to look when I found it:

 
That's too cool! You knew what you had when you saw it! Rockets on the brain...

JP
 
It was finally time to Epoxy the Propulsion Section into the Body of the Rocket. With it in place, I can use up the rest of my miniature Screws around the Cardstock Band at the Base of the Body Tube. Bob Smith 15 Minute Epoxy was used, and between that and the Miniature Screws, the Tail Section will be secured quite nicely. Overkill infact, just the way I like it.:bangbang:


Very nice. How long are the screws? I'd be concerned that one of the screws could potentially snag the parachute at ejection and prevent it from coming out.
 
The Screws are only a couple of Milimeters long, but even if they were longer, it would not matter because they are all way below where the Chute' Shelf is going to go.
I'm not going to put any Screws above the Chute' Shelf.
 
The Screws are only a couple of Milimeters long, but even if they were longer, it would not matter because they are all way below where the Chute' Shelf is going to go.
I'm not going to put any Screws above the Chute' Shelf.

Ok that makes sense. you're becoming quite the detailer. Looks really good.

:)

-S
 
Thanks.
I think it will look cool once I get the Camo Paint on it. I'll spray lightly from a distance so as to try not to fill in the Screws entirely with the Paint.
 
After getting a couple sprays of Paint on the thing, I found that the Paint is easy to brush off of the Screws with some 320 Grit Sandpaper.:)

 
I'm just waiting til' my Super Thin CA gets here to finish the Nose Cone, but the Body is getting its first Coats of Paint.

 
Last edited:
Here's what it looks like on Openrocket so far.


The Mass Object in the Tail is to account for the Weight of my Fin Can, as Openrocket does not have a Fin Can Option, they just think the Fins are applied individually.
 
Back
Top