Anyone Build The Launch Pad Rocket ALARM?(Modified)

The Rocketry Forum

Help Support The Rocketry Forum:

This site may earn a commission from merchant affiliate links, including eBay, Amazon, and others.

TopRamen

SA-5
Joined
Aug 9, 2013
Messages
9,955
Reaction score
111
I just ordered this Kit. Wonder if anyone else here had a Completed one with Pics?:

https://redarrowhobbies.com/kits/the_launch_pad_model_rockets/alarm.htm

https://www.the-launch-pad.com/#!blank/c9l1

I know it does'nt come with Decals, but I think I'm gonna' do something entirely different for Paint anyhow. I ordered some Estes 24mm Motor Retainers, and I'll be using a Nylon Chute' over the Mylar. Also, I've heard the Fins are flimsy Balsa, so that will be dealt with too when I get my hands on the Kit.
Looking forward to this Kit as I am trying to challenge myself a bit, and these Launch Pad Kits apparently take more effort to build right than ones where everything is already cut out and sized. It'll be nice to have a decent size Rocket that I can loft on F Motors. I was going to get a G-Force, but I've already had one, and this looks like I'll have to work on it more.
Also, can I build it with a 29mm, then use an Adapter to fly it on 24mm? I think I heard someone here say they could do that.

I tried the Search Function but got nothing.
 
Last edited:
I gleaned from the Reviews, that the Motor Mount Tube is on the weak side, so I went and ordered a 24mm LOC MMT for it, and also liked the looks of their 24mm Retainer Assembly, so grabbed that too. I'll save the 2 Pack of Estes for something else. I'm getting all excited for this Build now. It's cool to see what has worked best for others before I start building so that I can customize and plan my Components List before I even get into it. I did a Scratch Built Mid-Power back in 2000, but it was when I worked in a Hardware Store, so I had all sorts of Component availability. It flew 4 times on G-40 and G-80 before it flew away to the Trees. This Build will definitly be exciting and hopefully time consuming. I also ordered Rail Buttons from Apogee, as I intend to do my MPR from a 6' 10 Series Rail that's on it's way to me. My old Scratch Built MP and my Aerotch G-Force, also a Tree Victim, were likely not properly stabilized by the Rod that I used to have. From now on, any Mid-Power I do will be from a Rail.

I thought I was getting a good deal on this Rocket for $34.99. Now I find myself ordering all these upgrades.... I'll keep a tally on this Project and when I'm done I'll figure out what the Total turns out to be. Oh, and I almost forgot, many Folks recommend replacing the Fins with a stronger Material, so that will likely be on my list too, but I want to build their Fins according to their Instructions just for the Experience, and as practice for the heavier duty replacements.
 
Last edited:
Also did'nt like to hear what folks had to say about the Paper Tail Cone, so I'm going to track down a Conical Nose Cone 2.6" and cut it to fit if possible. Maybe I'll then use the front end of the cut Cone to make the "Pointy Paper Tip" for the Nose that other builders left out, since it too is Paper.
 
Last edited:
Don't forget the TRF Archive button. Since this kit has been around a while you'll probably have better luck there- Like this:
https://www.rocketryforumarchive.com/attachment.php?attachmentid=34718&d=1161024768

I built one years and years ago, don't know if I have any photos.

kj

I found a great Thread on this build in the Archive. Lots of info helpful to me, Thanks. Never went to the Archive Section before, but it's full of great Threads. So far I'm into this Build for $77.88. That includes all Shipping and Handling.
 
Well, after reading more Threads in the "Archive", it appears that I made the right choice with this Kit, as I'm looking for something that requires more effort to get right. I recently built some Estes LPR just to jump back into the Hobby, but I'm bored to Tears. I miss my Scratch Built and my G-Force. Atleast this ALARM Kit will make me feel like I've accomplished something if I take my time and get it right.
After reading some of the Posts in the Archive, I have decided I may keep my Mouth shut about some of my Methods I plan to employ as far as Building Techniques go, for fear of unwanted Criticism. This Rocket is going to be for me to try new things. Sink or Swim. The Proof of whether I did right or wrong can be judged by its Maiden Flight. Some folks have good luck with the CA Filled Balsa, others say it's as worthless as Toast for Fin Material. I'm going to the Hobby Shop for some Plywood, not even going to waste my time with the Balsa. Atleast I'm doing my Research before I've even got the Kit, so I know from others Experience what will fly and what won't. Time will tell.
 
Last edited:
Also did'nt like to hear what folks had to say about the Paper Tail Cone, so I'm going to track down a Conical Nose Cone 2.6" and cut it to fit if possible. Maybe I'll then use the front end of the cut Cone to make the "Pointy Paper Tip" for the Nose that other builders left out, since it too is Paper.


You`ll have no problems with the cardstock tailcones when treated properly ,this applies to the cardstock pointy "hat" added to the nosecone.

Fear not the cardstock parts LOL

If you need help along the way ,just ask me :wink:


I look forward to your build !!


Paul T
 
You`ll have no problems with the cardstock tailcones when treated properly ,this applies to the cardstock pointy "hat" added to the nosecone.

Fear not the cardstock parts LOL

If you need help along the way ,just ask me :wink:


I look forward to your build !!


Paul T

Thank You kindly! I may well take you up on that offer, but I do really like Plastic. Maybe we try the Cardstock first? We'll see, but either way, thanks for offering Guidance.
I guess I just have a hard time understanding how the Cardstock could become as durable as Plastic. After all, the Tail Cone is likely going to be the first part to touch down I would think, and the Tail of a Rocket usually comes in spinning... That said, I have a 4" 1to4 Ogive Plastic Cone which looks like it could be cut to make a Tail Cone.
 
Wellll- built per the instructions there's no reason why the paper tailcone with its ring and reinforced with CA glue won't last as long as the rocket. Sounds like you aren't planning on building per the instruction though, so if you're gonna make the rocket weigh a lot more, then a plastic tailcone might be what you need. Just keep in mind that it will change your CG/CP relationship on a model that can be sensitive to changes.

I'm pretty much in the don't overbuild it camp- so the paper cones were fine for me.
kj
 
I just finished building this kit and flew it for the first three times at Freedom Launch. I found the materials in the kit to be of good quality but after researching it here and Rocketreview.com I decided to make some upgrades. The first upgrade I did was change out the balsa for basswood. I also papered the basswood fins and used wood epoxy for the fillets. I was concerned about the motor mount being recessed to deep so I cut up a coke can and applied the aluminum on the inside of the tail cone. Worked like a charm but don’t count on this protecting it from a hard landing (see picture). I also replaced the shock cork and put rail buttons on it.

Now for how it flew. I flew it all three times on F24-4 motors. Took off nicely but all three times shortly after takeoff it angled over and ended up deploying while traveling horizontally at a high rate of speed. First flight landed softly in grass with only damage being the front of the tube appearing to have contacted the nose cone after ejections and cracked a 1” section of paint. Second flight it zippered the tube 1” and landed on very hard packed dirt and crinkled up the tail cone. Third flight no damage. All damage appears to be easily repairable.

While I was out retrieving it the last time someone who was talking to my wife suggested the horizontal flight issue could be lack of nose weight. I am putting together another kit (nike ajax) by the same manufacturer and it included clay to add weight to the nose cone. My ALARM kit did not say any weight was to be installed so I thought nothing of it. I’m very new to rocketry and will have to look into how to figure out how much if any is needed. I’ll let you know what I come up with.


Tail Damage.JPGFinished Alarm.jpgZipper.jpgTailcone damage.jpg
 
I just finished building this kit and flew it for the first three times at Freedom Launch. I found the materials in the kit to be of good quality but after researching it here and Rocketreview.com I decided to make some upgrades. The first upgrade I did was change out the balsa for basswood. I also papered the basswood fins and used wood epoxy for the fillets. I was concerned about the motor mount being recessed to deep so I cut up a coke can and applied the aluminum on the inside of the tail cone. Worked like a charm but don’t count on this protecting it from a hard landing (see picture). I also replaced the shock cork and put rail buttons on it.

Now for how it flew. I flew it all three times on F24-4 motors. Took off nicely but all three times shortly after takeoff it angled over and ended up deploying while traveling horizontally at a high rate of speed. First flight landed softly in grass with only damage being the front of the tube appearing to have contacted the nose cone after ejections and cracked a 1” section of paint. Second flight it zippered the tube 1” and landed on very hard packed dirt and crinkled up the tail cone. Third flight no damage. All damage appears to be easily repairable.

While I was out retrieving it the last time someone who was talking to my wife suggested the horizontal flight issue could be lack of nose weight. I am putting together another kit (nike ajax) by the same manufacturer and it included clay to add weight to the nose cone. My ALARM kit did not say any weight was to be installed so I thought nothing of it. I’m very new to rocketry and will have to look into how to figure out how much if any is needed. I’ll let you know what I come up with.


View attachment 144507View attachment 144505View attachment 144503View attachment 144504

Ouch! Atleast it looks repairable. Thanks for the Reply, your info is useful. In the Threads in "The Archives", they had similar stability issues. They too added weight to the Nose to fix it.
 
Wellll- built per the instructions there's no reason why the paper tailcone with its ring and reinforced with CA glue won't last as long as the rocket. Sounds like you aren't planning on building per the instruction though, so if you're gonna make the rocket weigh a lot more, then a plastic tailcone might be what you need. Just keep in mind that it will change your CG/CP relationship on a model that can be sensitive to changes.

I'm pretty much in the don't overbuild it camp- so the paper cones were fine for me.
kj

Yeah, after reading the Horror Stories I'm definitly not going to follow the Instructions. If I'm going to spend as much time building this as I think I am, I'm not letting it be underbuilt. After seeing that last Posters Paper Tail Cone,.....How do you fix that? Bondo????
Plastic it is. Then I can reinforce it, or build it removable so that it can be replaced or trashed easily.
 
With all the sim programs out there, stick it in Rocksim or OpenRocket to get an idea of what all your upgrades are doing to the stability. This will give you a pretty good idea of how much weight you will need to add to the nose and what motors you will be able to use or now not use. Learning to use a good sim program will greatly accelerate your rocketry learning curve!


Jerome :)

Thanks for the Tip. I will look into that. I tried to download Rocksim or the other one once, but something is going on with my Computer and it will not allow me to download anything at all. I am not Computer Literate at all, but I will get a Friend to look at it and change my Security Settings or whatever.
 
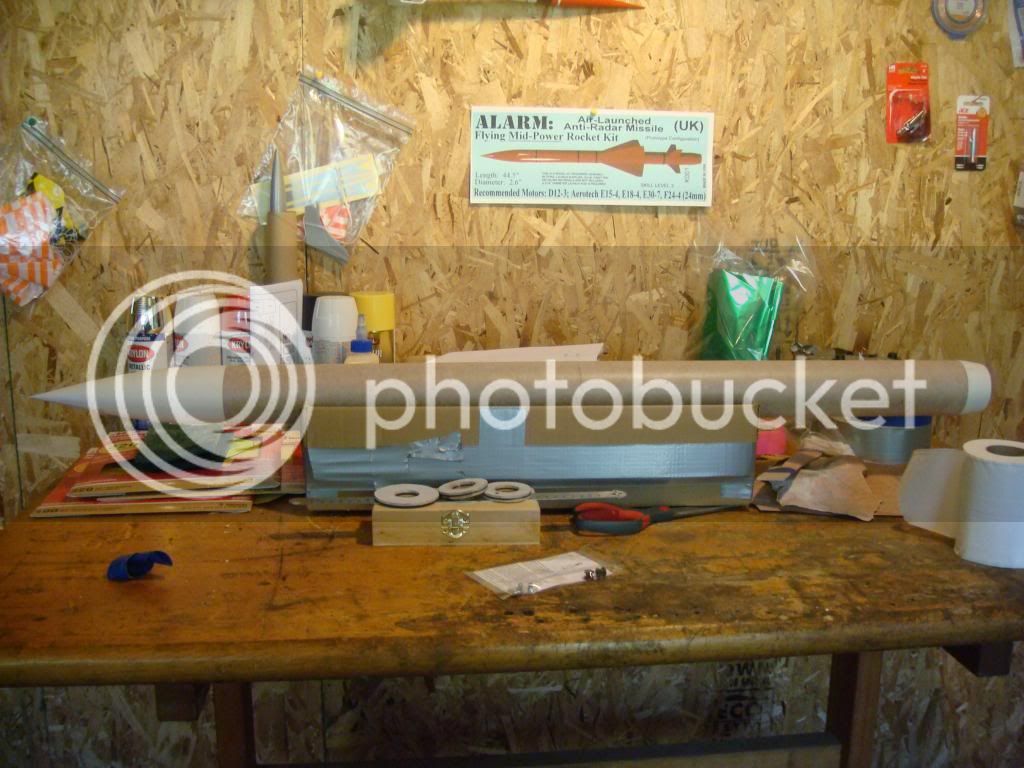
I just got the Kit today in the Mail. After all the things I had read in the reviews of this and similar Launch Pad Models, I was slightly intimidated by this Build. Now that I have my Hands on it, and have examined the Components, I am confident that it will be an enjoyable Build, and I may not need to "Overbuild" some of the Components. I do have a 4" Nose cone which I'm going to chop up to make the pointy Nose Cone, and also the Tail Cone. The kit did'nt come with any Clay for adding Ballast to the NC, but a Person on this site suggested using Lead Shot and Gorilla Glue, poured into the Nose Cone, and I like that Idea. I suppose I'll need to go get a Scale to weigh the mix. That's if it even needs it. I'm definitly going to get Basswood/Plywood to replace the Fins.
Overall, even though I'm gonna' be upgrading a few of the Components, I'm very impressed with what I got for what I paid, and as has been noted before, these are "Builders Kits" so making these small enhancements to the Rocket will be what makes it such a great Build. I'm looking forward to it.
I'de post Pictures, but my Son has my Camera for his School Feild Trip until tomorrow. That's ok, because I've not recieved LOC MMT and Retainer, so if I do anything, it might just be working on the Nose and Tail Cones. I post Pics' throughout the Build for those that like Build Threads. It's always good to share Experience.
 
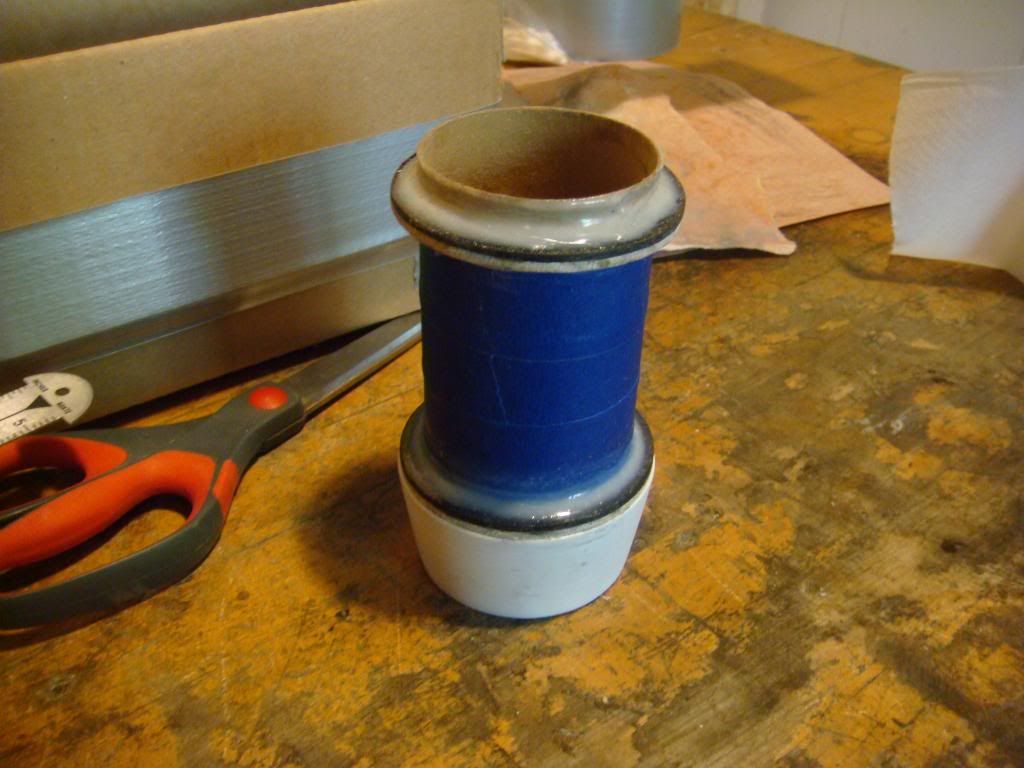
And tonight I completed the Tail Cone Assembly. Pics' to follow later. The Plastic Idea turned out perfectly.
 
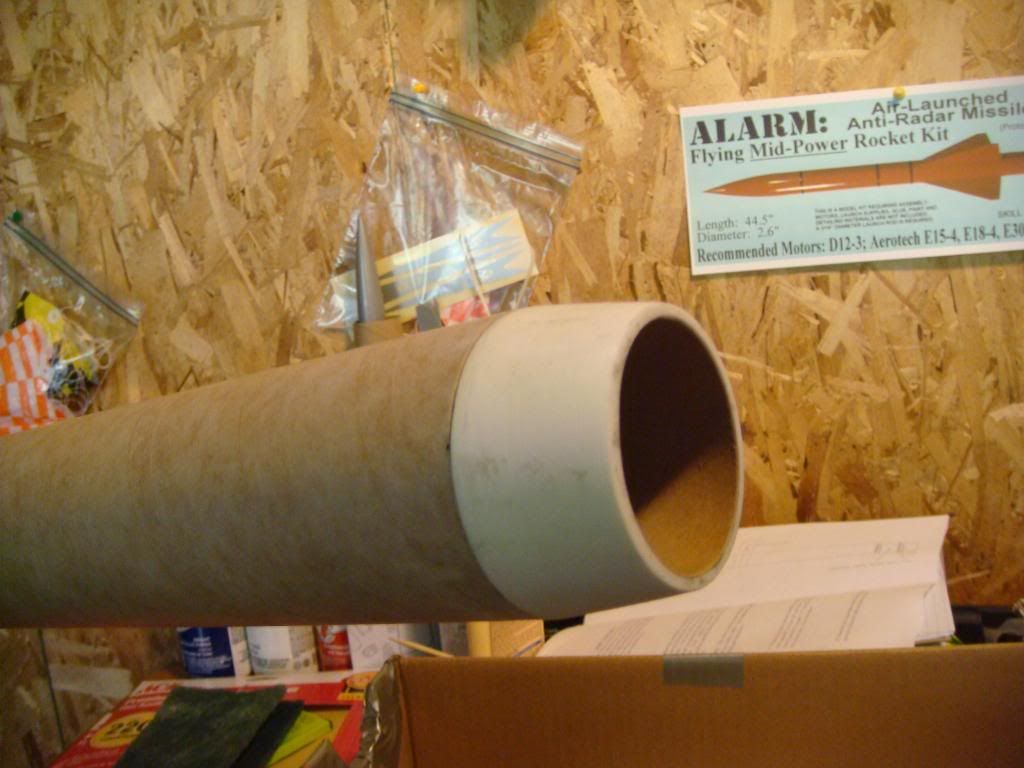
Just a Note, the Body Tubes are nearly perfect. They do have a Spiral, but it can not be felt by running your Finger over it.
 
Here we go:


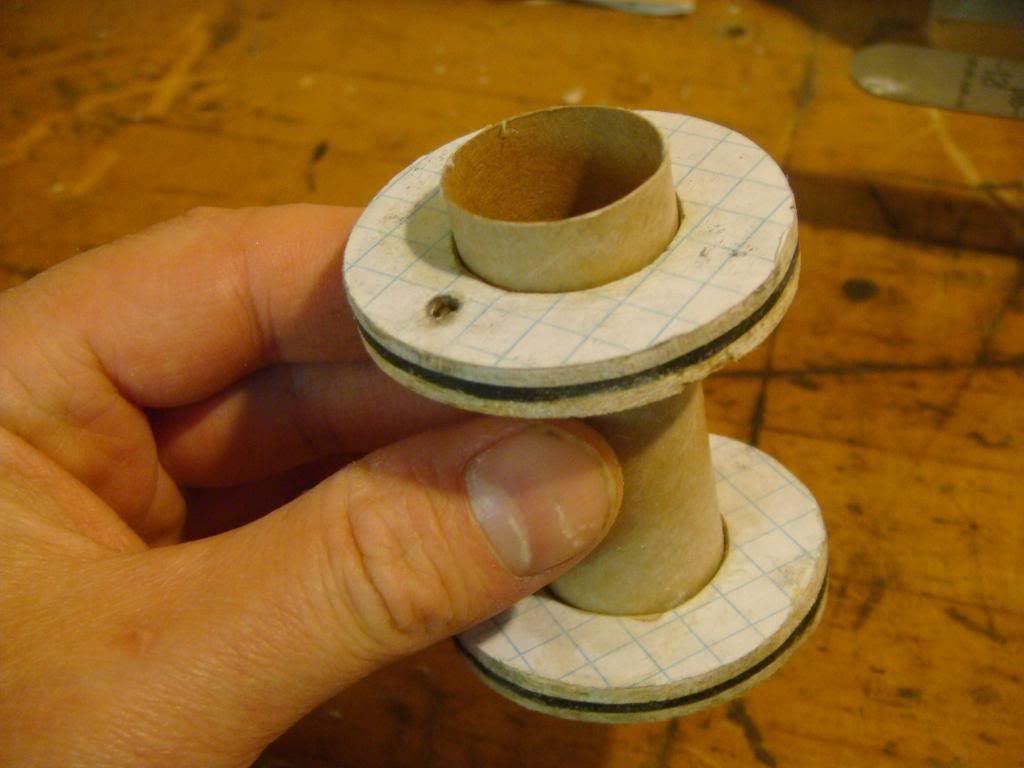
Here's how I reinforced the Fiberboard Centering Rings for the MMT. I'm not using the supplied Tube, I have one on its way to me from LOC Precision.:


So, now I wait for my MMT and Retainer, then I can start working on it again.
 
Last edited:
Great job on the tail cone!

The ALARM looks a lot like my Mini Eagle Claw...
image-1126406835.jpg
I'm actually quite surprised at just how similar they look! It's like I built a sport scale model without knowing it! (Okay okay not quite, but still...)
 
Last edited:
For the Tail Cone Assembly, once I had it sized right, I inserted the tube into the Cone, as one would do with the Paper TC per the Instructions. I then laid in about 1/4" Bead of 5 Minute Epoxy. Ontop of the Epoxy, I used a Toothpick to tuck a few sheets of Tissue in to pack the Epoxy down into the crease, where the Plastic meets the Paper. This, to ensure that the Epoxy was entirely in contact with the full circumference of the mated Surfaces. The Lower Centering Ring came next, and this too was secured with the 5 Min. Stuff. Later, I came back to the Assembly and finished it off with PC Superpoxy, for a nicely overbuilt Tail Cone.
 
I am enjoying your build. I have the ALARM also, mine is a few years old. It was built stock, except for basswood foward fins. No motor hook, just a small threadrod on the motor tube, out the back. It has gone up several times on F39s(aero).Great flights, but I wanted more so this last winter we tried out the Pro24-3gr. F30 Long Burn and a F79SmokieSam. Now we are talking! SOOOOO we added a little nose weight and popped in a Pro 6gr. G65 White Long Burn. What a flight! Point being, the kit is on the large size and can handle 'G' motors with no problem. Just make sure your CG is good to go... Now where did I put that G150 Blue Streak?? Have Fun, nice build so far.... Tim Thomas L3
 
I am enjoying your build. I have the ALARM also, mine is a few years old. It was built stock, except for basswood foward fins. No motor hook, just a small threadrod on the motor tube, out the back. It has gone up several times on F39s(aero).Great flights, but I wanted more so this last winter we tried out the Pro24-3gr. F30 Long Burn and a F79SmokieSam. Now we are talking! SOOOOO we added a little nose weight and popped in a Pro 6gr. G65 White Long Burn. What a flight! Point being, the kit is on the large size and can handle 'G' motors with no problem. Just make sure your CG is good to go... Now where did I put that G150 Blue Streak?? Have Fun, nice build so far.... Tim Thomas L3

Thanks. That's good to hear about the bigger Motors. That's partially why I'm making the MMT so rugged. I figure on eventually getting into Reloadables for my first time with this Rocket. I'm aware that my Mods are going to change my CG, so that will all have to get worked out when it's complete.
 
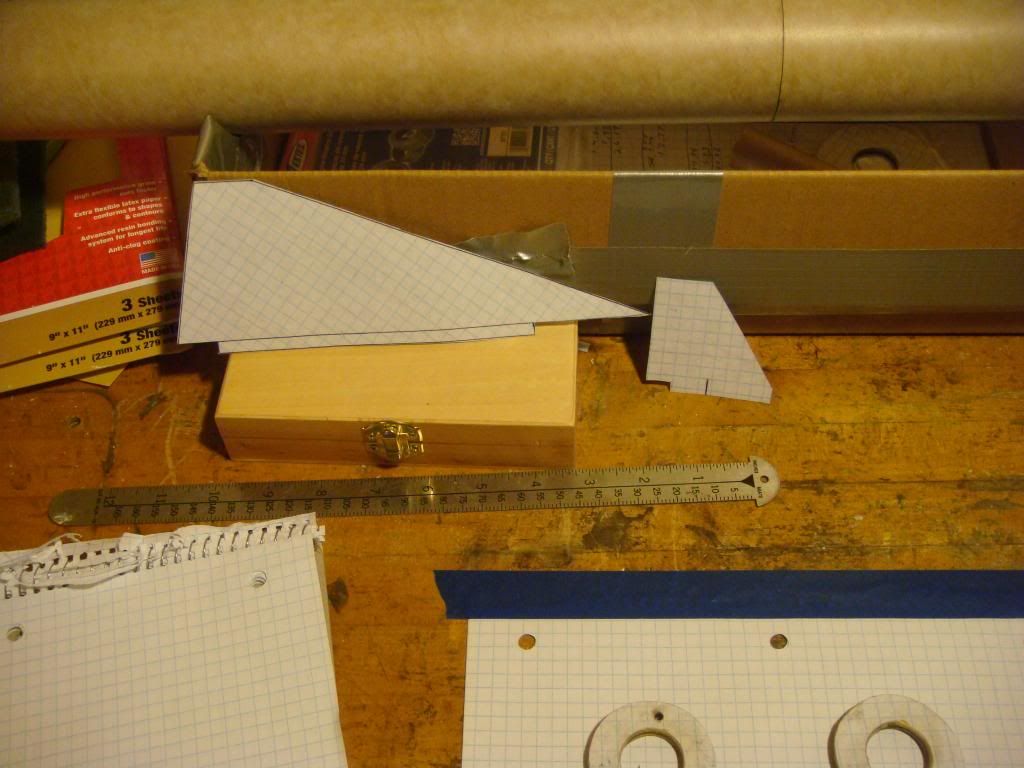
Cut out my modified Fin Templates and laminated them using clear Packing Tape so that I'll always have them. I've never done my own TTW Fins. Only TTWs I've done have had the Slits Pre-Cut from the Factory. This will be a challenge for me, but I'm doing research on how to do it right, so I'm not even gonna' think about it until' I feel confident that I can make perfect cuts. If anyone has any advice to this TTW Newb, it would be greatly appreciated. Does anyone have a Marking Template that can be Printed? That would make life easy. If not, and I do it a different way, I'll try to make a Template before I install my Fins. Then I'll scan it, and have it for future use and to share. I do have the Estes Fin Alingment Guide inbound to me as I type this, so I'll might use that, since I have not glued the Coupler into the lower Tube yet.

 
I've shared this before on TRF...

I used to work for an old guy back when I was just a kid.. He had a saying, "Beat it to fit... paint it to match". I have always remembered this and try to incorporate it when I am building my rockets. You don't have to be perfect.. it just has to work. You can always "put lipstick on a pig!". we have all kinds of putty, fillers, spackle and paint to pretty it up!

As for cutting fin slots, mark your lines first, then you can use a sharp hobby knife or my favorite, a Dremel! As long as you can glue the fins straight, you are good to go. Fillets will cover any imperfections nicely.

The finished product is what really counts. Your skills and techniques will improve the more you build!

Jerome
 
Everyone makes their own way through the hobby. That is as it should be.

I just don't believe, most of the time, these things go cruise missile by accident. People over build for what the designer meant and ignore the due diligence required to check the CP / CG relationship. Then bitch about how the rocket flies. Build it as you will. But if its a tail heavy lead sled that flies like junk, don't blame TLP. And I am not addressing this to the thread starter. I mean it's for those who have overbuilt a TLP rocket then complains about its flight characteristics.
 
I've shared this before on TRF...

I used to work for an old guy back when I was just a kid.. He had a saying, "Beat it to fit... paint it to match". I have always remembered this and try to incorporate it when I am building my rockets. You don't have to be perfect.. it just has to work. You can always "put lipstick on a pig!". we have all kinds of putty, fillers, spackle and paint to pretty it up!

As for cutting fin slots, mark your lines first, then you can use a sharp hobby knife or my favorite, a Dremel! As long as you can glue the fins straight, you are good to go. Fillets will cover any imperfections nicely.

The finished product is what really counts. Your skills and techniques will improve the more you build!

Jerome

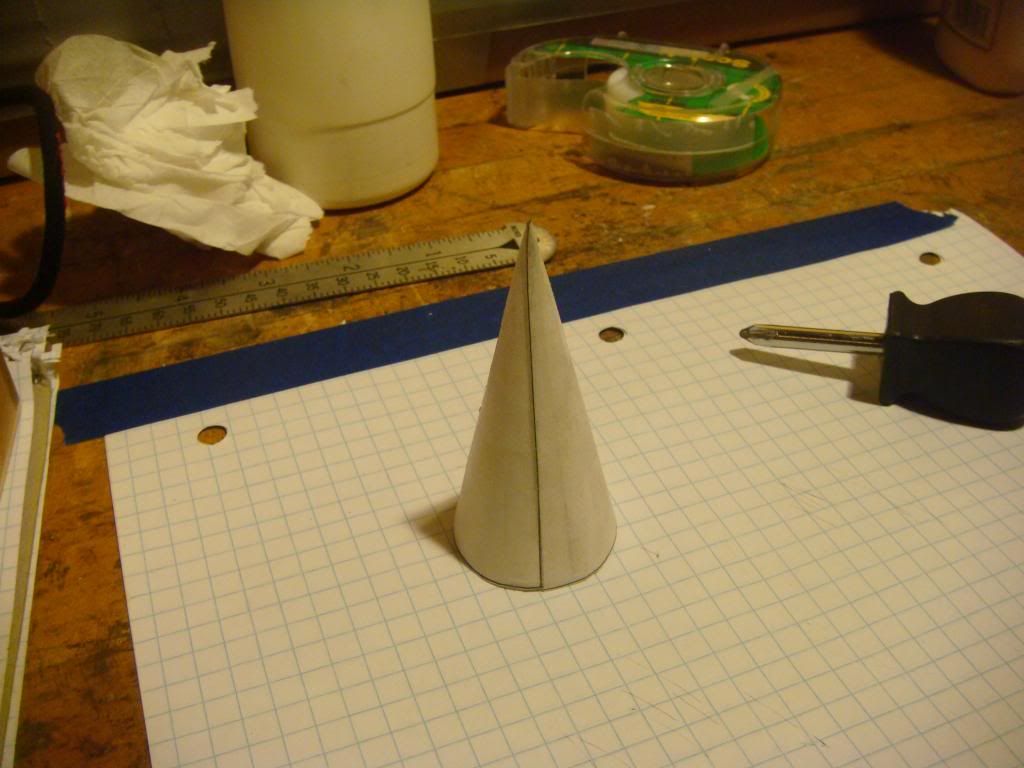
Thanks. I decided to take on the dreaded "Paper Pointy Nose Cone Hat". It's filled and curing now, and will be ready to sand in two days.:


Glad I did, as it was'nt as hard as it seemed. I cheated and used Scotch tape to hold the general shape and let it sit on the back of my Desk overnight. When I picked it up before, it had conformed to the right degree, so I put a few Drops of CA on the Seam, then painted it with the CA.
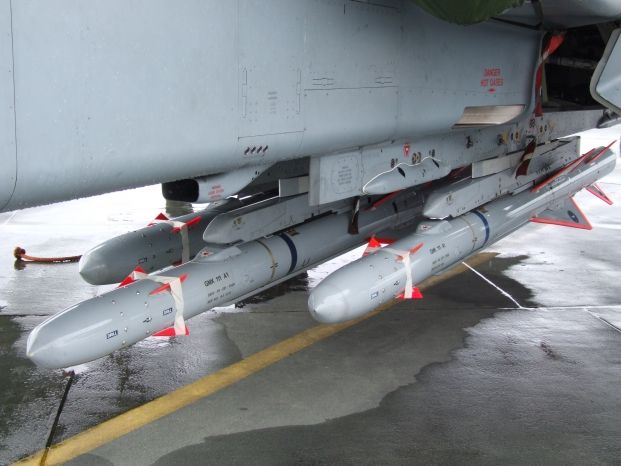
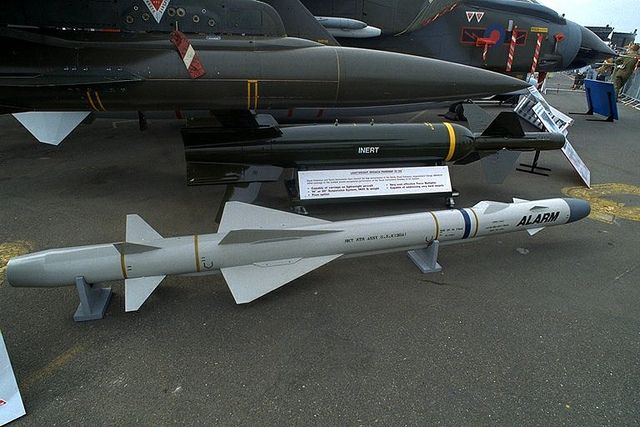
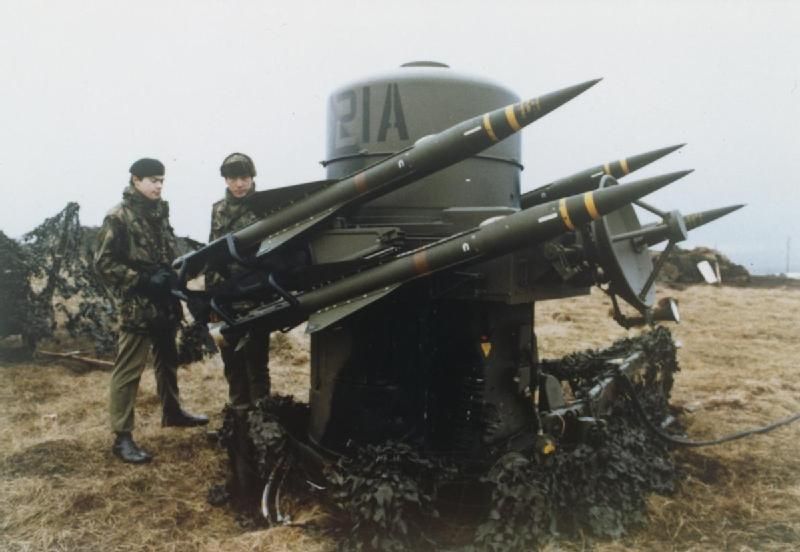
To my surprise, it became quite stiff. It ended up turning out nice enough for me to go Drill a Hole in the Tip of the Nose Cone. Filled it up with just the right amout of PC Superpoxy, and pressed it into place. I'll let it sit for a couple of days, then I'll chuck the Nose Cone Assembly back in the Drill Press like I did to Prep Sand it, and I'll sand the tip to blend it as well as possible. I'll fill it in and build it up if it needs it. I'm glad I took it on instead of passing it up. The Rockets do look much better with the authentic Pointy Tip. This Rocket is a "Faux Scale" Model anyway, which resembles the Rapier more than the ALARM that it is supposed to be. The real ALARM has a Blunt, Dual Ogive Nose Cone. I may even give it a Rapier Like Paint Job. I know, the Model is supposed to be the "Prototype Configuration" of the Missile, but I want it to look a little more Militant, or else I might just paint it something totally different, like Patriot Colors or Desert Tan.:

ALARM:


Rapier:


Last edited:
Back
Top