Welp guys, Ive repaired both rockets!
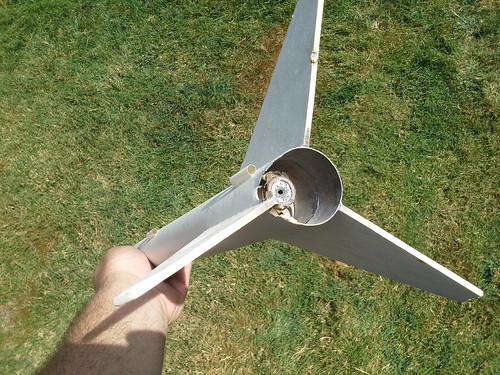
The falcon looks a bit different then it used to on the inside and on the bottom but it should fly fine.
Ive repaired the engine mount just by using another kits engine mount pieces (I got a really cheap baby bertha from hobby lobby for this. 6$)
I glued the chunks back to the broke engine mount casing using plastic cement, and since my baffle was screwed I made one of those trifolds for the shock cord attachment.
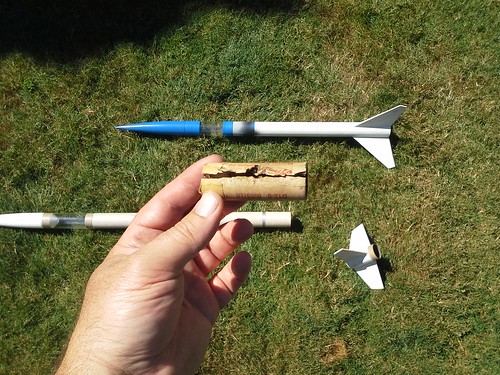
I cleaned all of the dirt off the top with disinfectant wipes and released Jimmy back into the wild, Ive also used some of your engine mount tips for this, so it shouldnt come free!
Ive gotten a new chute for the bertha (A trash bag chute from my SLS, since Im using a difference chute for the SLS) and both are looking alright!
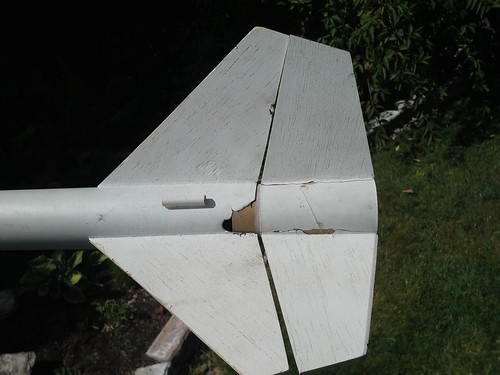
There is very minor burning on the bottom of both rocket tubes but they are fine structurally wise. I pretty much didnt even attempt to fix the baffle of the Falcon since it wasnt a needed component, the trifold will do fine. We also luckily had all the clear fins, so I went ahead and snapped those on with a thin coat of glue on them, so that should help keep them from falling out.
Now I can get back to working on my Saturn V :blush:
Good work...
You can always make your own trash bag chutes, or if you want to get really creative, grab an old helium party balloon (or a new one if you want) and make your own chute from that... I have some pretty cool chutes I've made from party balloons and regular heavy thread from Walmart, along with some locking fishing snap swivels.
All you have to do is take the balloon, cut the "filler neck" off the bottom with a pair of scissors, and lay the balloon out as flat as you can get it on a table, mushing out any remaining helium from it as you smooth it out flat. Then take you scissors and simply cut off the edge of the balloon about 1/4 to 1/2 inch in from the edge, where the two halves of the balloon material is welded together when it's made. This will separate the front and back halves of the balloon skin, and then you can simply mark out evenly spaced spots for the shroud lines, measuring them out into a hexagon or octagon arrangement. I usually prefer 8. If you want a smaller chute, you can trace around a coffee can or cut a circle pattern out of posterboard or cardboard whatever size you want and trace around it with a magic marker, and then carefully cut the balloon material down to the size you want.
The main thing to remember when making a mylar balloon parachute is, mylar is a tough plastic, but it can rip easily at corners or at the points of ragged edges. SO, cut the balloon VERY CAREFULLY so that there are NO ragged edges around the periphery of the chute... and personally I cut them ROUND, and then use a hexagonal or octagonal pattern for the shroud lines-- cutting the actual chute canopy to a hex or octagon shape introduces "pressure points" at the corners which can tear the chute in a hard deployment and cause it to rip. A round chute distributes the forces more equally out into the canopy material. If you get a ragged edge when cutting, go back and simply cut off a little bit back around the jagged edge, so that it's smoothed out... it won't hurt it if it's not PERFECTLY round-- a little "out of round" is okay...
Once you have your chute shroud line locations marked evenly around the edge of the chute, I cut little 1/2 inch squares of duct tape and attach them to the chute where the shroud lines will go... this reinforces the material around the shroud lines so they don't rip out, much like the "tape dots" on Estes chutes, or the "binder rings" on Dr. Zooch chutes. If you don't want to mess with cutting duct tape into little squares, you can always pick up a pack of binder rings at Walmart or the office supply store next time you go-- they're cheap enough. Besides, you'll need the heavy carpet thread (heaviest thread you can get in the sewing section) and a package of small "coast-lock" snap swivels (usually a burnished dark gray/black in color, versus the "non-locking" brass and steel wire snap swivels, which I don't recommend-- they can pop open or be straightened out and separate in a hard deployment of the parachute). I use duct tape because 1) its cheap, and 2) it's STRONG-- with the reinforcing "strings" in the material, and the strong, "permanent" adhesive... I move in about 1/8 to 1/4 inch from the edge of the chute and attach a small square of duct tape where the shroud line will go. Do this all the way around.
Use a hole punch to knock a smooth-edged hole through the duct tape and balloon chute material where each shroud line will go... don't just use the point of your hobby knife to cut a slit for the shroud line-- a "cut slit" can easily rip in mylar if the chute pops open hard, and duct tape CAN tear-- a smooth edged hole punched in the material is much stronger because the force is distributed around the edge of the hole and into the material in a hard deployment.
The rest of the chute construction is just like that done in a Dr. Zooch kit when building the trash-bag chute in all his kits... the shroud lines should be 1.5 to 2 times the diameter of the chute canopy, and since each string will be two shroud lines joined at the center, that means each string should be cut 3-4 times the chute diameter. Tie them off at ADJOINING or PARALLEL holes as you build the chute-- this avoids "crossed shroudlines" later on. (start with the first string at two adjoining side-by-side shroud line holes, tie one end through each of the two holes. The NEXT string should have one end tied to the NEXT hole on ONE SIDE of the first string, and the other end tied to the NEXT HOLE on the OTHER SIDE of the first string... keep tying shroud line strings to the NEXT HOLES on EITHER SIDE of the previous ones, working your way around the chute, until the last string is tied between the LAST TWO HOLES that are RIGHT NEXT TO EACH OTHER... now all the shroud lines will lay SIDE BY SIDE when gathered up and looped through the snap swivel, without them crossing over each other.)
Once the chute is completed, even up the shroud lines and slip the snap swivel in through the looped shrouds, and pull them snug, and rub a drop of white glue into the loop to "lock them in place" and keep them from slipping.
Finally, I recommend dusting the chute with talcum powder and rubbing it around the tape spots, so that any stickiness is eliminated by the powder... that way the chute cannot "stick together" when it's packed into the rocket.
What's cool about these chutes are, that they can be pretty much any "pattern" you want... my daughter Keira has a "Disney Princess" parachute for her Fatboy that we made, and I have some "anodized green" and black parachutes made from balloons my wife brought home from graduation at the high school she teaches at, with a cool "Hightower Hurricanes" emblem on them... You can even flip them "inside out" and have CHROME parachutes, or aluminum looking ones, since the inside of a helium balloon is coated with aluminum vapor, which gives the back of most balloons a "chrome" appearance, unless they're printed on both sides... and the inside of the balloon is always a flat "aluminum foil" looking surface finish...
What's best of all-- they're FREE-- I grab spare party balloons when they go flat after the helium leaks out... I even have some cool red anodized ones from Valentine's day balloons that drifted down and caught on my fence after Valentine's day... I cut the "heart" shapes to round and made slightly smaller chutes. Works great!
Later! OL JR
")


 :wink: