As a teacher in training, I felt that it would be a lot more useful to my students to have an upscaled version of the Phantom than the tiny thing that Estes produced "back in the day".
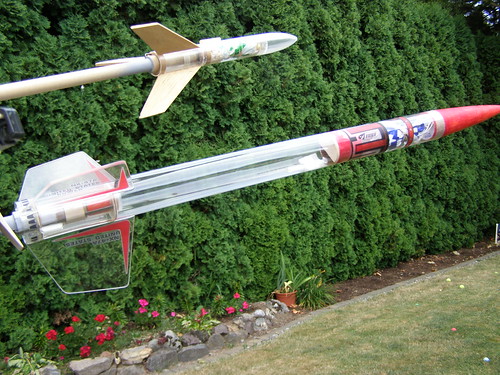
I hope that this will inspire more people to build demonstration rockets like this and present them to their local school district's science teachers.
To make it I used:
BNC-60AC (Semroc)
Red Sharpie Pen (for the nosecone)
Aerogloss Sanding Sealer
Photocopy on clear adhesive film of the Cherokee-D's decals, upscaled to BT-60 (plus an extra 2%).
Estes 18" parachute
1/4" wide flat elastic
an unused 4" payload section from an Estes Magician
Centering rings for BT-50 to BT-60 (Semroc)
Centering ring for BT-20 to BT-50 (thrust ring)(Estes?)
Bob Smith Industries 30 minute epoxy
Bob Smith Industries Gap Filling Insta-Cure CA Glue (and kicker)
Elmer's Glue-All
Estes E Engine Hook
Estes 1/8" launch lugs
Estes D/E engine spacer
Masking Tape
1" 3M Micropore paper tape
1/8" sheet acrylic.
Xacto knife
Dremel Scroll Saw
Metal Ruler
Sandpaper
Sanding block
1 sheet of red photocopy paper
Contact Adhesive (rubber cement)
Avery Glue stick
And...
ACME Clear Spraypaint

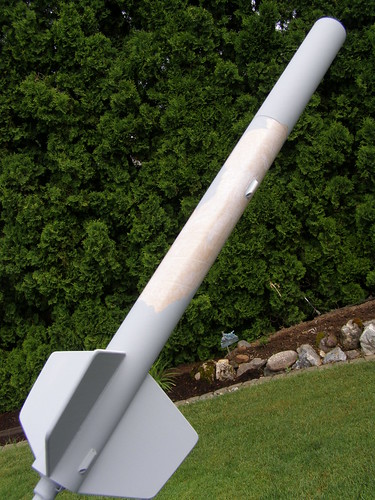
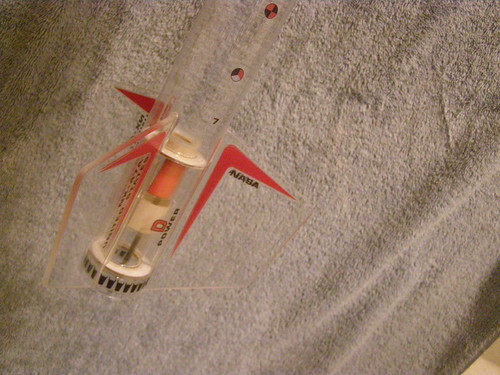
I based this on my upscale of the Cherokee D (long version) @ 123% (BT-55 to BT-60), and used the
dimensions I posted over on YORF. It is a zipperless design, and the break point is just below the bottom of the large body wrap.
I cut the clear tube and sanded the edges, then I cut sections of scrap BT-60 to fit inside of them for the coupler and to keep the nosecone stable as the tube is slightly larger than a real BT-60.
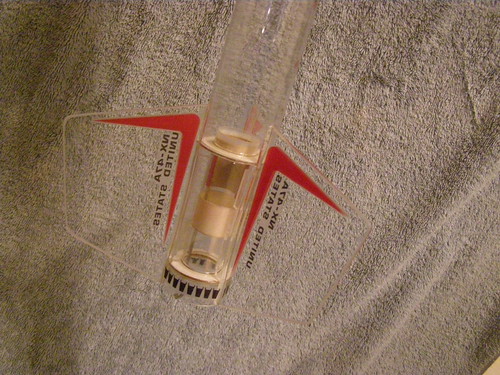
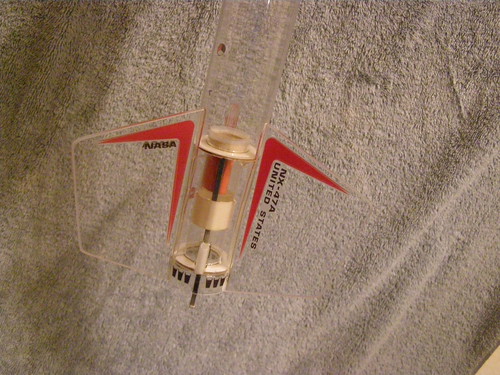
I made the engine mount as I normally would (using the epoxy for the fillets), except I substituted the unused payload section of an Estes Magician for the 4" motor tube. To get the mount to fit inside the body tubes, I cut two 2mm sections of the clear tube, then tacked them to the centering rings. I cut it, then overlapped the ends to find out how much I needed to remove. Removed the excess, then glued it down with some CA glue, and used kicker to prevent it from fogging. This slides into the bodytube quite nicely. I didn't glue it in until after the fins were done, since it won't be used for flight, this isn't a problem.
Using a photocopy of the Cherokee D's fins (upscaled 123%), I used the Avery glue stick to glue the pattern for the fins onto the (still protected by blue film) 1/8" acrylic stock I had. I used the Dremel scroll saw to cut the fins out, then sanded them to their final shape.
Using a metal ruler, I slotted the tube for the fins, then glued the fins in with CA glue (again with the kicker). Using BSI's Epoxy, I then filleted the fins, and glued the rear of the engine mount in.
I used the medical tape (micropore) to give the launch lugs something to be glued to (used CA), then gave them Epoxy fillets for strength.
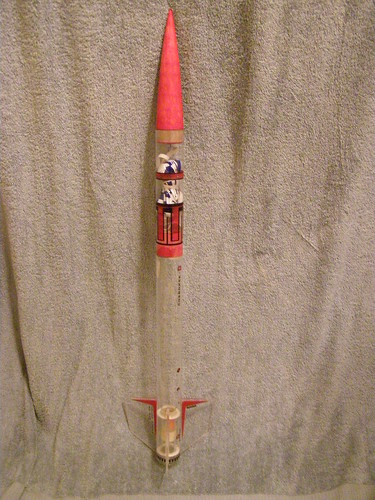
The red color of the coupler was faked using rubber cement and a sheet of red photocopy paper. To this, I made a 1/2 moon baffle (with a guard to prevent the bulk of the shock cord from falling down into the motor portion of the tube). I cut a small notch out of the baffle to allow the shock cord to pass through it, and used a tri-fold mount that was glued to the micropore first, then epoxied down. I tied a knot in the shock cord, in the event that mount ever fails, it won't pull out. Next, I epoxied the baffle/coupler to the inside of the lower body tube, then epoxied the cord to the inside of it for further strength.
I used a red sharpie pen to give the balsa nosecone some color, then used Aerogloss to protect it. [EDIT] Later, I swapped out the nosecone with another one that I used thin CA to seal and protect, then painted with Rustoleum's Sunrise Red. [/EDIT] I used swivels to attach the parachute and eyebolt to the shock cord, and assembly is complete. I cut down a D/E spacer, then sealed the edges with CA, and gave it some red paint on the cut edges. To get the spacer to stay inside the engine mount, I created a ring of clear plastic, and pushed it up inside the motor tube.
Using some BT-60 sized upscale decals for the Cherokee D, I went to FedEX/Kinkos and photocopied the decals on clear, self adhesive, paper at 102%. These decals were easily able to be cut and positioned over and over without losing any adhesive, nor leaving any residue. FWIW...The clear portions of the decals are a little frosty.
If I were to do it again:
I'd photocopy the decals at 101% just to get the extra circumference needed for the body tube
I'd cut out part of the masking tape wrapping the engine hook, and give it red edges to allow the engine (yet to be made) to remain visible.
Use 3/16" Launch Lugs rather than 1/8" LL's
We all owe our teachers a lot...
Let's pay it forward, and make one of these for our future members.
All The Best!
Jim


")