Estes Venus Probe... How tall are the standoff's?

The Rocketry Forum

Help Support The Rocketry Forum:

This site may earn a commission from merchant affiliate links, including eBay, Amazon, and others.

K'Tesh

.....OpenRocket's ..... "Chuck Norris"
TRF Supporter
Joined
Mar 27, 2013
Messages
22,536
Reaction score
14,946
My Venus Probe's fins sheets have been lost, and I don't have a printer to print out new ones (mine's getting different fins anyways)... does anybody know how tall the launch lug standoff's are?

I also know how underpowered the VP was, so I modded it to include a "D" engine.

Thanks
Jim
.
 
I stuck a ruler next to the standoff glued to mine and it looks to be a hair shy of 15/16".

OT - Have you glued the alien in yet, and if so what adhesive? I'm having no luck getting him to stay put.
 
Thanks for the answer...

After asking the question, I figured out that if I can place the engine and trailing edge of the main body tube on a stack of something of a known thickness, I could figure it out for myself (It turned out to be 16 US Quarter Dollars (or 1 1/16"(ish). I'm going to go with 1 1/16" stand offs to give myself a little margin of error.

To answer your question about the alien:
I used Gap Filling CA glue (then used kicker to set it) to hold my pilot, Zane (Full name: Zane E. Gray), in place. If I had to do it again, I'd probably drill a hole through the top (bottom when landed) of the pod, and use a length of shock cord to secure the pod to the parachute and remove some of the stress on Zane.

I'll post pics soon. Full Build Report is found on YORF...

All The Best!
Jim
.
 
Last edited:
That`s a neat looking rocket ,I saw your build on YORF and like the way you painted your little "non-green" friend !

Are these kits hard to get ,I wouldn`t mind getting myself one ,looks like a fun build.


Cheers

Paul t
 
Thanks Jim. I like the idea of anchoring the the shock cord to the pod.

alien.jpg

Not glued on yet, he's just dangling there. I like how the alien won't separate from the pod. No gap filling CA on hand, so I'll have to swing by the LHS tomorrow.

Cheers!
Aaron
 
Are these kits hard to get ,I wouldn`t mind getting myself one ,looks like a fun build.

Hi Paul,

I've seen a few on Ebay, for around $20-30USD. If I had the $$ I wouldn't be against picking up another. But I'd keep all the mods I built into it, and make sure that it has enough power to get off the ground and recover safely before returning. Oh, and if you do get one, please video it... There are only 3 videos I've found on YouTube for launches of this kit... One does a lawn dart, another nearly plows into the ground before the ejection deploys (successfully) (maybe 20 feet off the ground), the last was of a D powered mod that flew well. None of the videos show a clean shot of before the launch, and after though. I like to see recovered (intact preferred) rockets, and this one just begs to show the landed pod.

Thanks Jim. I like the idea of anchoring the the shock cord to the pod.

View attachment 129134

Not glued on yet, he's just dangling there. I like how the alien won't separate from the pod. No gap filling CA on hand, so I'll have to swing by the LHS tomorrow.

Aaron,

Glad to help...

Nice Job on your alien! What's his name? As far as Green's go, that's a great shade (what is it?). The main reason I didn't do a green was I couldn't find a green I liked, and the suggested color was awful (I settled on Rustoleum Automotive Primer Gray). One detail I added (barely visible) is a couple of dots for nostrils with a extra fine point Sharpie.


Please post pics of the rest of your build, 'cause you've got some nice work that I can see from your pod.

All The Best!
Jim
.
 
Last edited:
Jim, the green is Rustoleum fluorescent green using blackjack2564's method for fluorescent paint, which I've had pretty good luck with.

Too late for a build thread, just finishing up paint now. Not sure if I'm going to use the stickers. I'm not a fan of peel-n-stick, and I'm using flat paint. I'll try to post pics and a video. I modified it to take D/E engines as well.

Paul, I found mine in a thrift store in Pine River, MN pop. 938. Five bucks! I almost didn't buy it because I have too many in the build pile.

Aaron
 
24mm mod is great and the best flights are with C11-3. D12 goes a bit too high to catch all of the excitement at deployment. C11-3 goes straight up and pretty high, yet you can see the action!
 
https://ashasta-sadie.com/FArchive1.html

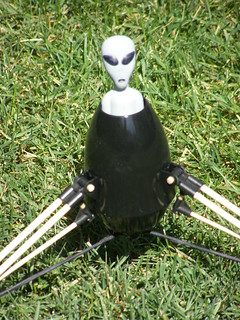
One of the things I don't like about the Venus Probe is the wooden parts for the legs. Mind you, I'm not against wood, but the dowels seem a little too rough for a nice finish. In step 2 of the leg assembly of the instructions (step "H") it says that "You may wish to paint the leg assembly dowels with silver bottle paint at this time and allow the legs to dry".

I don't know about you folks, but I've never had much luck with my brush work. I prefer spray paint. I've attempted to paint the dowels with a silver Sharpie pen, but I'm not thrilled with the results so far. Part of the problem is the irregular surface. The best results might be had from using AeroGloss filler, sanding, and painting, but that's a lot of work, and I'm worried that it may cause further fit problems (I know, easy to solve, but I don't want them anyway).

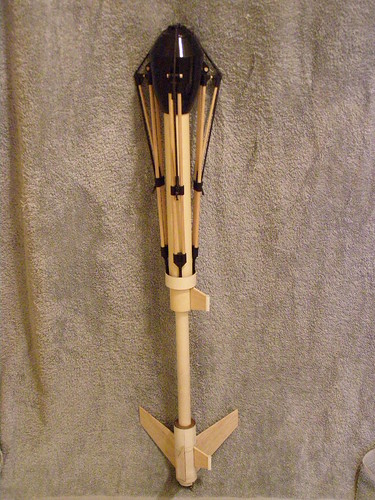
Now my lander's legs haven't been glued together yet (I was more worried about breakage over they years than loss, so I have yet to glue the legs together for the final assembly (I did however, use tape to thicken the ends of the legs to get them to hold tight (friction fit) for the time being).

I've thought about adding aluminum tubing from the LHS to slide over the legs, but I'm reluctant to add that due to strength/weight/cost issues (that was before I upped it to a 22mm powered version).

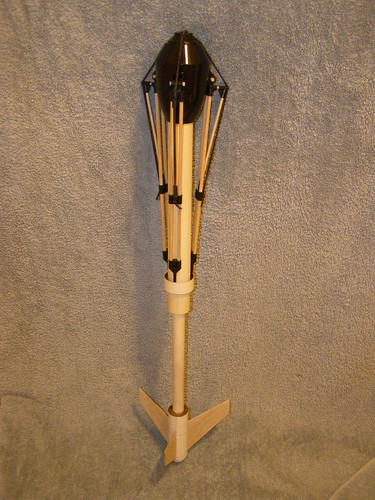
Now I have a new idea, one that might not suck... I'm looking for straws that are the right diameter to slide over the existing dowels. I could paint them silver, aluminum, or chrome (preferred), let them dry, then re-build the legs with the straws covering the wood. So far, I haven't found the right straws, but I'm keeping my eyes open. The smaller diameter dowels may need a 'stir' stick straw (so far my campus' Starbucks seems the best candidate). If I can find a straw that is just a smidge too large, perhaps I can use some tape to thicken it, if not, I may split the straw lengthwise and snap it over the dowel. I am a little worried about the paint not adhering well, so I'll keep you all posted. Who knows I may even just wrap them with paper, then paint.

Now I just need to locate the best source of straws (McDonalds, and Subway are already out of contention).

<EDIT>johnnwwa over at YORF suggested carbon fiber tubes... Hmmm.... I see possibilities here.... </EDIT>

Thanks for looking... TBC
Jim
.
 
Last edited:
24mm mod is great and the best flights are with C11-3. D12 goes a bit too high to catch all of the excitement at deployment. C11-3 goes straight up and pretty high, yet you can see the action!

Thanks for the Engine suggestions... I'll probably go with the C11-3 like you say, but I'll never use the 18mm engines Estes recommended (I don't like lawn darts).
 
Hey Arron,

Did you switch out the wooden parts for carbon fiber or just paint yours black(ish)?

I'm midway through the process of converting all of mine into CF (I didn't buy two 4' lengths of tubing, and only had enough to do 4 of the 6 leg parts). Today I picked up some more tubing, but the LHS didn't have enough to cover the 2nd rocket (I ordered a 2nd Venus Probe yesterday from Ebay).

It had a $24.99 (plus shipping <$7.00 USD) Buy it now price or Best offer. I made an offer for $15, they countered with $19.25, I countered with $17.50 (plus shipping <$7.00 USD) and got it .

I'll probably make exactly the same modifications I did with the first one, except that I'll have that shock cord penetrate the bottom of the pod, and this time I'll keep a photo journal of the process.

All The Best!
Jim
 

Latest posts

Back
Top