Fliskits Tumble Weed Build

The Rocketry Forum

Help Support The Rocketry Forum:

This site may earn a commission from merchant affiliate links, including eBay, Amazon, and others.

krusty

Rocket Powered Kangaroo
Joined
Apr 26, 2009
Messages
1,396
Reaction score
34
Location
Melbourne, Australia
The Fliskits Tumble Weed is an itty bitty little kit, designed to fly on 13mm motors.

Opening the bag reveals the contents -
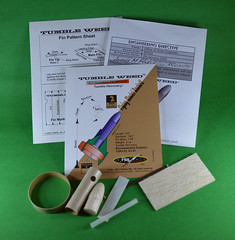
Nose cone, body tube (with vent holes), engine hook, balsa, launch lug etc.

The first thing that you need to do is to trim the nose cone shoulder down to 1/4"
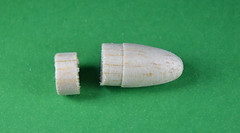
A few seconds on the bandsaw made quick work of the balsa.

The kit comes with a piece of balsa and a template for cutting the fins. Now, I've tried cutting fins before - mostly they work out ok, but the Tumble Weed has these tiny little caps that go on the outside of the ring fin - there's no way I was going to cut those. So instead, I drafted the fins up in CorelDRAW and laser cut them from 1.5mm ply.
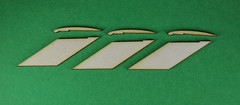

With the nose cone trimmed and the fins cut, marking the body tube comes next.
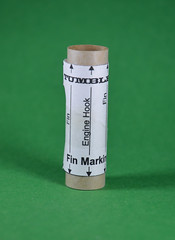
Marking guide wrapped around body tube and all marked up!

With the body tube marked, I started gluing on the fins, nose cone and then made a slit for the engine hook.
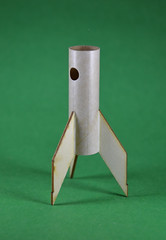
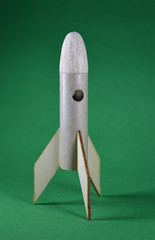
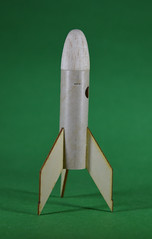
Once the glue was dry, I moved onto the engine hook which is held in place with a piece of gauze and the launch lug.
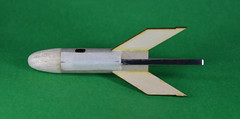
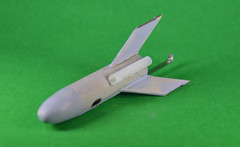
I started by painting the body and the tube fin separately.
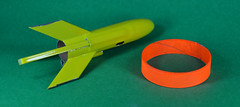

And finally assembled with the little fin bits added on the outside of the tube fin.
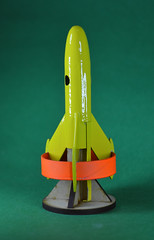

I made up some "Tumble Weed" decals & placed these around the ring fin. The final step was to clear-coat the whole rocket.
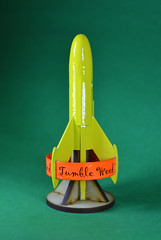

And we're done!!

Krusty
 
Nice finish on the Tumbleweed. They are hard to follow in flight. Both time I launched mine on a 1/2A, I almost lost them, so now I stick to the 1/4 A motors. If they kick the motor, they come down straight, not tumbling, which make it hard to see.
 
Cool build :)

A couple of things...

One, you must have had a very old kit..... We've have been kitting the Tumbleweed with laser cut basswood fins for over 7 years now... LOL

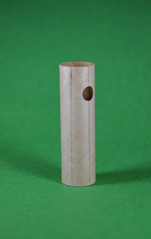
also, since that is such and old kit, there is another change you need to be aware of. I designed that model over 25 years ago, when ejection. Charges were much more "moderate", for want of a better word... With the hotter ejection charges found today we determined that you're better off with TWO vent holes cut, 180 degrees apart. The current kit comes with both cut.

Lastly, to further increase the probability that the hook will grab and retain the motor, I've found that bending the end of the hook UP slightly really helps to keep the motor from kicking out.

Hope this helps! :)
 
Nice finish on the Tumbleweed. They are hard to follow in flight. Both time I launched mine on a 1/2A, I almost lost them, so now I stick to the 1/4 A motors. If they kick the motor, they come down straight, not tumbling, which make it hard to see.

Sounds like the Estes Quark! When I got back into rocketry a few years ago, my kids wanted to have a go so I bought them each a Quark. You don't see 'em go up and they don't tumble down :y: We flew them twice and managed to find them after each flight, but only by luck!


Cool build :)

A couple of things...

One, you must have had a very old kit..... We've have been kitting the Tumbleweed with laser cut basswood fins for over 7 years now... LOL

also, since that is such and old kit, there is another change you need to be aware of. I designed that model over 25 years ago, when ejection. Charges were much more "moderate", for want of a better word... With the hotter ejection charges found today we determined that you're better off with TWO vent holes cut, 180 degrees apart. The current kit comes with both cut.

Lastly, to further increase the probability that the hook will grab and retain the motor, I've found that bending the end of the hook UP slightly really helps to keep the motor from kicking out.

Hope this helps! :)

The Tumble Weed kit came from Excelsior Rocketry and I guess was part of the stock they purchased from Commonwealth Display. At the same time I picked up an Over Drive - that's marked as production #46 and doesn't have laser cut fins either !! I think I have a collectors item right there ;)

The body tube on the Tumble Weed came with two vent holes, so that's ok & thanks for the tip on bending up the engine hook :)

I'll be able to fly it soon (the summer's all but finished here now) and will post a launch report !!

Krusty
 
OK, cool kit! I do have a question for you, though. If you will see my attachment, I, too just completed a new fliskit with ring fins, mine is the dead ringer. I, too, painted the ring fins, and indeed, the body also before assembling them. The colors are shot out by the green T-shirt in the background. It is green and purple with chrome monokote on the fins. I simply used white elmer's to glue it all together after the fact. I know it's wrong building etiquette, but it's a micro maxx, so I believe it'll hold anyways. SO, how should it be done, when it is painted before assembly? dead ringer.jpg
 
OK, cool kit! I do have a question for you, though. If you will see my attachment, I, too just completed a new fliskit with ring fins, mine is the dead ringer. I, too, painted the ring fins, and indeed, the body also before assembling them. The colors are shot out by the green T-shirt in the background. It is green and purple with chrome monokote on the fins. I simply used white elmer's to glue it all together after the fact. I know it's wrong building etiquette, but it's a micro maxx, so I believe it'll hold anyways. SO, how should it be done, when it is painted before assembly? View attachment 123999

That's cool !! Jim comes up with the coolest designs and your build looks great :)

I don't know if there's a right way or wrong way, but this is how I assembled mine -

I put a thin strip of tape along the edges of the fins that needed glue, so after painting I still had raw wood. I did this for both the inner fins and the end caps. The paint I used on the ring was matt, so I didn't worry about trying to mask out bits (and I would have only given the paint a bit of a sanding if it was gloss)

I used yellow wood glue to stick everything together.

when the glue was dry, there were some gaps where the caps joined the fins, so I filled and sanded those, masked everything off and re-painted those bits. Much easier than trying to mask and paint the whole thing once assembled.

Hope that helps!

Krusty
 
Yep, pre-masking and sanding down the specific areas after the fact. More or less what I did, have done, and will continue to do in the future...
 
I've put up a tumble weed on an A3-4T, multiple times! Just don't take your eyes off of it...
 
Nice Tumblewwed.. I have had one 90% done on my desk forever.. Guess I'd better get on it.. Cool little rocket..
 
Apparently these things have a reputation.
Only thing which would make it more visible than that paint is a 500 candlepower strobe.
 
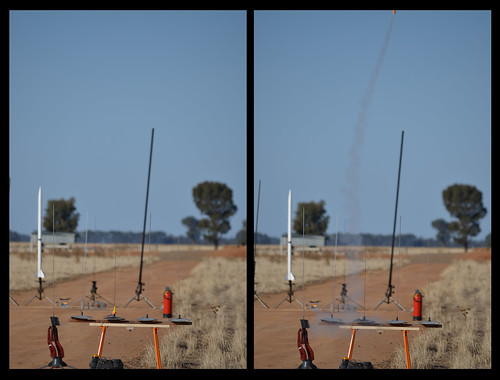
The first launch of the season was this weekend just gone and I dropped the 'weed on the RSO's table.

"We have a size limit here you know"

"Bah, sign me off!"

and it was done.

With a A3-4 loaded, I slid it onto the rod and waited in line....


I have no idea what happened!

There was a count-down....

The button was pushed....

and boom! It was screaming towards the sky.

Everyone loved it. Recovery was perfect with the motor being caught by the engine hook.

The only damage was the glue let go on one fin where it met the ring - easy fix :)

Krusty
 
Nice liftoff shot, I can just see the tail end! Mine was launched this last weekend also, the theme of our launch being "Fliskits Parade", but this time, only on a 1/2A3-4T.
 
Very cool! :). Thanx for the update

Thanks for designing the kit!!

Nice liftoff shot, I can just see the tail end! Mine was launched this last weekend also, the theme of our launch being "Fliskits Parade", but this time, only on a 1/2A3-4T.

That would have been fun! I've never seen a 1/2A3 ! Here in Australia, the only 13mm motors we can get (as far as I've found) are the A3 and A10's

Krusty
 
3d launch 017.jpg2in Scratch Sprite.jpg
2" Dia. Scratch upscale! Flew great at MWP 9. Cracked a fin on landing though.
 
Nice liftoff shot, I can just see the tail end! Mine was launched this last weekend also, the theme of our launch being "Fliskits Parade", but this time, only on a 1/2A3-4T.

Cool theme :D. More folks should have launches like that!
 
Nice launch photos, love the paint scheme, that would make the little ones easier to see! Quick question, for the tumble recovery, does the ejection shove the engine back out of the rocket?
 
The motor shifts to the rear at ejection, changing the CP/CG relationship, and causes the rocket to tumble down end over end. Note that the motor hook is a bit longer than the motor case.
 
Here's where the motor sits on the way up -
tumbleweed-up.jpg

and when the eject charge blows, it moves back into this position -
tumbleweed-down.jpg
And tumbles down!

The engine hook catches the motor before it completely leaves the rocket.

Krusty
 
Back
Top