Latest from UpscaleCNC

The Rocketry Forum

Help Support The Rocketry Forum:

This site may earn a commission from merchant affiliate links, including eBay, Amazon, and others.
A previous customer contacted us to make some rings and plates to mount in 4" FWFG nose cones. The rings are designed to take #10 pem nuts pressed in as threaded inserts. That ring will go on top of the coupler (it's OD is essentially the OD of the coupler) and thus be trapped above the coupler that makes the cone shoulder. The bulkheads are small for the ID of the coupler so they are an easy fit. Drilled with 4 clearance holes for #10 machine screws and also a 1/4-20 ubolt in the middle. There is enough space on the back to mount a board for a tracker, an altimeter... all depends what he wants to fly.

These are 1/8" G10.

View attachment 247180

Nat Kinsey
UpscaleCNC

Very nice. Your design or his?
 
Last edited:
First off, I'd like to wish a Happy Thanksgiving to everyone. Enjoy the time with your family and friends.

Thanks for posting the pictures of the parts "in position", it's great to see how they'll get used. This design is easy to do, Pemnuts are available from McMaster in dozens of sizes. The filament wound nosecones are just asking for this- the insert ring sits on top of the coupler that gets glued in and the bulkhead is designed to rattle fit in the coupler so putting it in and out is easy.

Shop Update: My router is temporarily broken and waiting on a part to arrive. A component of the Z axis drive assembly is worn/damaged and chatters. This isn't that bad, as it doesn't lose position... however, sometimes it skips. A skip puts the Z 1/2" lower than the computer thinks and that would result in a nasty crash if it happened mid-cut and I wasn't quick with the E-stop. I'm not going to take the risk of that, so we'll wait 'till sometime next week for that part to arrive!

Gobble gobble...

Nat Kinsey
UpscaleCNC
 
Very nice. Your design or his?

He asked for "a removable bulk plate for 4 inch rockets for the inside couple of the nosecone, the first would be a ring with 4 holes drilled for number 10 pem nuts, the bulk plate would be held to this ring with #10 screws, so you can access the nose cone for gps or tracker."

We did some back and forth via email (like I do with many of my customers so as to get things right) to make sure the design was going to work for him. The #10 pemnuts are quite large and to get some material around them the peninsulas in the ring were required. I'd say it was a collaborative effort. This design can be scaled to other sizes of the FWFG cones (that haven't been built yet, it gets its strength by having the ring trapped above the coupler) using pemnuts and cap screws.

Nat Kinsey
UpscaleCNC
 
Nat is the poo! Here the tracker bay centering ring he made. Thanks Nat for helping me build my dream rocket.

DSC_0021-L.jpg


DSC_0027-L.jpg


DSC_0025-L.jpg
 
Just want to say a massive thanks to Nat for top class service. I'm planning an 54mm MMT Estes Big Daddy so went to the man to make the news bits too fit. I also wanted some custom couplers for my PML Spitfire. I happened to have a friend from the UK states side. In the lead up to this Nat had advised me his machine needed a new part and he wasn't willing to risk anything running. Nat got back up to speed and my parts got made. He even got them to my friend in Austin TX within 24 hours. They are now on there way to the UK. I could spend my life savings with this guy and already putting a list of bits I want for my new order. Top service, top guy, 110% honesty, 100% product support. I'll post photos once items are in my hands.
 
Ok, time for an update- The router has been repaired, rebuilt, and since we had the time.. MOVED. It was in a smaller room in "the shop" which was never intended to house a router taking up something like a 6' x 6' area. So, it's in the new larger shop room and much better. We're also back in business, here's a couple projects that carried over because they were waiting on the repair work to be done.

First is the one that pyropete referenced, a stock size big daddy that has a large motor mount in it. Fins and rings with awfully small little fin tabs..... :grin:

Second is a couple views of a 38mm FatBoy done with the interlocking design for a repeat customer.

There's a couple neat rocket related projects that are almost done, will have pictures of them soon. Also been working on some projects on the tablesaw- a set of 4 2' x 30" high upper cabinets to install over a workbench. I cut most of the parts for those tonight and will start assembly tomorrow with pocket screws. Gotta have STORAGE or all your crap is out and in the way!

Nat Kinsey
UpscaleCNC

ImageUploadedByRocketry Forum1418615495.157801.jpg ImageUploadedByRocketry Forum1418615516.628215.jpg ImageUploadedByRocketry Forum1418615532.772120.jpg
 
Last edited:
Did some foam work last night and this morning. This, when stacked up on a tube, will be a HERMES nosecone. Not the later model HERMES, but the first one that was a "big bore solid motor concept" rocket. Unfortunately for the customer there IS some foam to be sanded and fiberglass to be laid. However, at the end of it all he'll have a high accuracy custom one off nose cone!

Do you like foam dust everywhere?


View attachment 160312

Nat Kinsey
UpscaleCNC

Nat,

Here is what I did with all of the parts. just repainted her in red and just have to do the black fins and the striping again. Turned out great, enjoy.

View attachment 248969 View attachment 248970
 
Doc-

The HERMES looks great! I think there's a second (this can't be a very common model!) one out there in the world, too-- I see Python Rocketry made a nosecone for one, also 7.5", I think.

Nat
 
A customer asked for a pair of jigs similar to one that John Coker built for his tip-to-tip laminating efforts. We designed these to try to take a large range of tubing- they'll go from 4" down to 29mm! That took quite a bit of trial and error in the computer drawings and a couple false starts. One fixture does 4 fins, the other 3. The angle change to the 3 fin really set off a lot of complications in the design. The 4 fin was easier and built first, the 3 fin started to get frustrating for a while because I wanted the same range of tube size AND keep the same 14" square ends for efficient use of materials. Speaking of materials- all 1/2" birch ply. The sides and bottom are strip built to allow the user to reach into the middle and adjust the tube supports.

We've been waaaay too long creating these but they're finally done. If there is demand (and this customer finds they work without issue....) these could be available on a special order basis. They're complex and require some hand assembly and a few setups on the router AND some tablesaw work.


ImageUploadedByRocketry Forum1418950953.739893.jpg ImageUploadedByRocketry Forum1418950968.907627.jpg ImageUploadedByRocketry Forum1418950985.114410.jpg ImageUploadedByRocketry Forum1418951006.560871.jpg ImageUploadedByRocketry Forum1418951019.990925.jpg ImageUploadedByRocketry Forum1418951037.096990.jpg

Nat Kinsey
UpscaleCNC
 
Last edited:
That jig looks cool! How big of a body tube will it hold? How much? When available? Is that two separate jigs or is it convertible?
 
Ya caught me, Roanoke, between pictures and text. I do the pictures from my phone app and then edit the post on the computer.

So- it's two jigs, not convertible. Holds slightly larger than 4" down to 29mm. I can make another one right away, they'll be in the $120-$150 +ship range, I think... I need to sort out how much material actually gets used. Time is the bigger factor in these.

They arent any good for putting fins on, only for doing tip-to-tip fabric reinforcement over fins that have already been attached.

Nat
 
A customer asked for a pair of jigs similar to one that John Coker built for his tip-to-tip laminating efforts. We designed these to try to take a large range of tubing- they'll go from 4" down to 29mm! That took quite a bit of trial and error in the computer drawings and a couple false starts. One fixture does 4 fins, the other 3. The angle change to the 3 fin really set off a lot of complications in the design. The 4 fin was easier and built first, the 3 fin started to get frustrating for a while because I wanted the same range of tube size AND keep the same 14" square ends for efficient use of materials. Speaking of materials- all 1/2" birch ply. The sides and bottom are strip built to allow the user to reach into the middle and adjust the tube supports.

We've been waaaay too long creating these but they're finally done. If there is demand (and this customer finds they work without issue....) these could be available on a special order basis. They're complex and require some hand assembly and a few setups on the router AND some tablesaw work.


View attachment 249215 View attachment 249216 View attachment 249217 View attachment 249218 View attachment 249219 View attachment 249220

Nat Kinsey
UpscaleCNC

Hi Nat,

I appreciate all of the work you put into these.

Once I receive them I have three builds all set to run through the 3 fin jig. I will try to remember to take some pics and post back during the process, or at the very least post some result pics along with how the process of using the jigs. Seeing as we copied the design from John Coker, I will likely end up trying to solicit some advice from him on how to best use them.

As usual the workmanship looks your typical high quality.
 
Last edited:
Hi Nat,

I appreciate all of the work you put into these.

Once I receive them I have three builds all set to run through the 3 fin jig. I will try to remember to takes some pics and post back during the process or at the very least post some result pics along with how the process of using the jigs. Seeing as we copied the design from John Coker, I will likely end up trying to solicit some advice from him on how to best use them.

As usual the workmanship looks your typical high quality.

WOW!! That looks great.


Nat how much would one of these run for?
 
Zipped out a couple plates for a customer today. These aren't rocket parts exactly but they'll be put to use to make rocket parts... soon.... more rocket parts... woooo. :D

1 free internet to whoever figures out what these are for!

Happy New Year!

Nat Kinsey
UpscaleCNC

ImageUploadedByRocketry Forum1420237973.303884.jpg
 
Last edited:
Congrats, Dan! You can pick up your prize on the way out. :flyingpig:

They're the indexer plates for a tube slotter.

Nat Kinsey
UpscaleCNC
 
Hope everyone had a good New Years, I did- flying rockets with the MARS club in sunny Geneseo. It WAS sunny... was also 25 degrees and really windy... :facepalm:

A couple projects to start 2015 off, and they both involve .0625" G10 glass. The first was the creation of quite a lot of fins and all for one rocket too! Granted it's a two stage model... the customer had these made to replace fins from a kit. He plans to add re-inforcement and end up with stiffer, thinner fins in the end. Thats a lot of fillets, sir...

The second project is a small 4 fin custom design 38mm rocket and fin aligment jig pair to match. The customer had the slots in the jig made to 2" long to allow for future use with larger span fins.

Both of these projects supplied us with Rocksim files for the fin size. Our software can import directly from the fin templates that Rocksim creates. This makes the drawing part of the project go faster and helps minimize mistakes in translation. Send an OR or Rocksim file over for a quote!

Nat Kinsey
UpscaleCNC


ImageUploadedByRocketry Forum1420428385.855396.jpg ImageUploadedByRocketry Forum1420428399.475531.jpg
 
Last edited:
These parts will be for a 5" rocket that takes a custom research motor that's 4.5" diameter. THAT.......makes for thin rings! The customer supplied a cut list of parts- some in 3/16 G10, the rest of it is 1/2" birch ply. Thick ply has an advantage-- with the wider bearing surface, it's MUCH easier to get rings straight in a tube, or lined up square around a tube. I believe the fins will be sunk through the body tube to come near the motor (the motor is held only by rings) and be held in with some strips of G10 and beefy internal fillets.

Skinny-Minny!

ImageUploadedByRocketry Forum1420519053.443487.jpg

Nat Kinsey
UpscaleCNC
 
Last edited:
Seeing as we copied the design from John Coker, I will likely end up trying to solicit some advice from him on how to best use them.
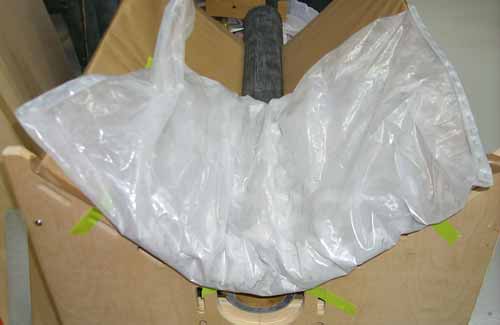
The original idea was to use the platform for a traditional vacuum bag setup with sealing tape and plastic sheeting. But, I never got a good enough seal along the edge of the body tube, so I tried bags of water and finally mortar mix.

 
A couple projects to start 2015 off, and they both involve .0625" G10 glass. The first was the creation of quite a lot of fins and all for one rocket too! Granted it's a two stage model... the customer had these made to replace fins from a kit. He plans to add re-inforcement and end up with stiffer, thinner fins in the end. Thats a lot of fillets, sir...

Very satisfied with quality and price. Customer service is also A+
 
Back
Top