Atlas Mercury 1/12 scale

The Rocketry Forum

Help Support The Rocketry Forum:

This site may earn a commission from merchant affiliate links, including eBay, Amazon, and others.
I think white for the lox would be neat, I was thinking maybe spraying my version with some xmas tree flocking when it comes xmas time..:)

I may very well go this route using flat white paint. Especially, since I had a lot of back yard fence damage last night due to high canyon winds and now I need to allot time to that repair.

I have changed part of my plan for the electronic parachute ejection at apogee. The electronics compartment is several diameters back from the front of the Atlas in order to measure local static pressure. However, I am placing the Public Missiles Limited charge holder on the aft side of the piston. I have done this once before on a 3" diameter rocket and it worked fine. The electric wire to the piston will have a plug disconnection. I checked my inventory of plugs and found one that could pull apart easily. After wiring the plugs I am filling them with epoxy so that they will be reasonably robust for pulling apart.

IMG_3706.jpg IMG_3710.jpg IMG_3712.jpg
IMG_3714.jpg IMG_3719.jpg IMG_3722.jpg
 
I mounted the black plug in a wooden dowel and secured it with Aeropoxy. The shock cord is shown placed back in the piston. The wire connections between an e-match and the leads from the black plug will be made on the opposite side of piston plate from the shock cord. My wife likes to wrap up the Atlas like a mummy to protect it from the dust. I saw a thrush jay walking around the top of the Atlas today looking for a place to hide a peanut. I was on the back porch just a few feet away on the other end. I yelled, "Thrush jay, what are you doing?" It just ignored me. Can you imagine how brash these things are?

IMG_3737.jpg IMG_3740.jpg

IMG_3742.jpg IMG_3744.jpg
 
she is looking awesome Aerostadt! She is coming back to life!!

So much excellent work here not to get it back in flying shape.
Keep up the good work.

Thanks, NJ and MaxQ.

I built a contraption to get an idea of where the cg is on this model. I slid a piece of rail guide over the rail buttons and then attached a wood stake with nuts on bolts, etc. to two chains and suspended the model from one of the patio ceiling rafters. I remember Bob Krech reporting a different method of using two saw horses and balancing a large model on two wood boards and taking the cg to be in the mid-point of the board gap. I mention that method, because it might be simpler and less work. I had this method etched in my mind, so I went this route. This method worked pretty good, once it was set up, but the set-up took time.

IMG_3749.jpg IMG_3751.jpg IMG_3752.jpg
IMG_3753.jpg IMG_3757.jpg
 
Thanks, NJ and MaxQ.

I built a contraption to get an idea of where the cg is on this model. I slid a piece of rail guide over the rail buttons and then attached a wood stake with nuts on bolts, etc. to two chains and suspended the model from one of the patio ceiling rafters. I remember Bob Krech reporting a different method of using two saw horses and balancing a large model on two wood boards and taking the cg to be in the mid-point of the board gap. I mention that method, because it might be simpler and less work. I had this method etched in my mind, so I went this route. This method worked pretty good, once it was set up, but the set-up took time.

View attachment 294403 View attachment 294404 View attachment 294405
View attachment 294406 View attachment 294407

Will it be ready for Hellfire?
 
Will it be ready for Hellfire?

Joe, it will be ready.

I'm looking at putting in some outboards motors. That is why I was checking the c.g. It looks like the c.g. is not too far from what it was before. Also, the overall weight is similar to what it was before. I am thinking of canting two 29 mm outboard motors so that the line of thrust goes through the center of gravity. Using two F15-0's should be a piece of cake, because they are very low thrust. Two G33's is a little bit more worrisome, but perhaps not too bad.
 
Excellent!

Thanks, MaxQ. BTW I like your work on the Saturn 1B 1/23 scale. It is going to be terrific!

According to the Atlas-Mercury write-up in Peter Alway's book "Rockets of the World" the new section of 10" tube on this model is right about at the location of the frost line on the Atlas. So, I masked the rocket and painted the frosted parts with Rust-oleum flat white. In the color scheme of Peter's write-up he shows the lines that cross over into the frosted regime as silver. I decided to go with that scheme, because if I ever decide to go back to the silver production-line scheme, I can just put chrome over the white.

IMG_3758.jpg IMG_3761.jpg IMG_3763.jpg
IMG_3764.jpg IMG_3766.jpg
 
Last edited:
she looks beautiful!! I love the frosted tank...looks fantastic!!

Thanks, NJ!

I made motor mount tubes that fit into the Atlas outboard locations. Unfortunately, when I made the model I used PML coupler tubes for the Atlas outboard locations. In some ways it would have been better, if I had used the PML 3" diameter air-frame tubes. Then I could have slid in coupler tubes with the canted 29 mm motor tubes. Nevertheless, I made the canted tube inserts as shown in the attached photo. Calculations show that the tubes should be canted about 10 degrees from the model centerline, but there is not quite enough room for this large of an angle, so I went with about 8 degrees. As I stated in an earlier post the canted motors will help alleviate a pitching moment if only one outboard motor fires. I also think that structurally the canting will help because the model is constructed more solidly in that direction. I am going with 29 mm Estes BP F15-0's in the outboards. If I don't like the effect, I can go with G33's next time.

IMG_3770.jpg IMG_3773.jpg
 
Thanks, NJ!

I made motor mount tubes that fit into the Atlas outboard locations. Unfortunately, when I made the model I used PML coupler tubes for the Atlas outboard locations. In some ways it would have been better, if I had used the PML 3" diameter air-frame tubes. Then I could have slid in coupler tubes with the canted 29 mm motor tubes. Nevertheless, I made the canted tube inserts as shown in the attached photo. Calculations show that the tubes should be canted about 10 degrees from the model centerline, but there is not quite enough room for this large of an angle, so I went with about 8 degrees. As I stated in an earlier post the canted motors will help alleviate a pitching moment if only one outboard motor fires. I also think that structurally the canting will help because the model is constructed more solidly in that direction. I am going with 29 mm Estes BP F15-0's in the outboards. If I don't like the effect, I can go with G33's next time.

View attachment 296988 View attachment 296989

Love 'em...exactly what I need for the Saturn 1B !
 
Love 'em...exactly what I need for the Saturn 1B !

Thanks, MaxQ, I love your work on the Saturn 1B!

I applied a home vacuum cleaner to the E-bay vent port and got the test light on the drogue chute ejection, which is on the piston, to light up. So that feature is now ready.

IMG_3828.jpg IMG_3830.jpg IMG_3831.jpg
 
We had a very successful launch of the "God Speed, John Glenn" Atlas/Mercury at Hellfire-21 with very little damage. All motors did fire as they should. I am hoping to have pictures later, but so far I have none.

The two F-15's fired simultaneously with the K570. I could not detect any delay in the motors and the take-off was very fast. I used G2Q2 igniters with the little red tube holders for the F-15's. The vernier engines A10's used the Estes igniters with pyrogen. I did have the molding for the vernier engine on the back side break off during all the transportation and moving, so I removed the motor and mount, but the igniter remained and did fire. The escape tower did jettison about 2 seconds before apogee using an Estes A8-3 and another G2Q2 igniter.

The ejection charge in the piston fired as it should and the phono jack electric disconnect worked fine. The PML canister only holds about 2 grams of 4FG powder, but I was fortunate enough to find a cardboard tube in my tool box that had the same diameter as the canister. I used masking tape to extend the canister to fit the required total of 5 grams. I used the PML orange cap on both the motor ejection charge and the piston-electronic ejection charge to prevent one charge setting off the other charge. I tend to believe that the electronic charge went first. The parachute opening did not seem to be as late as the previous two flights.
 
Congrats on a successful and technically challenging flight.

that is AWESOME!! can't wait to see the pictures!

Thanks, Rich and Rick! It was a challenging flight and took all day to prep. I need to find ways to go faster. I am looking forward to having pictures,too.

I was pleasantly surprised to not have a zipper, especially since there is a 1" x 1" vent hole in the black adapter section right below the Mercury capsule. The re-build using two concentric PML phenolic tubes for the parachute tube helped strengthen things to prevent a zipper along with the more timely electronic ejection. The first two flights relied on the motor ejection and both had zippers.

This was the first time that I used the StratoLogger for electronic ejection charge firing and I am happy with the results. I used the apogee settings for the main chute and did not need to do much re-programming. Last week I bought the downloading electronics for the StratoLogger and discovered that I have data for the flight. It is interesting to compare the data to the RocSim9 prediction. The RocSim prediction by comparison is optimistic on the upward flight, probably because the actual flight is not exactly straight up. I did not include the two F15's in the RocSim model, because I could not readily find the thrust-time data, but the inclusion of these two motors would not have appreciably changed the flight. The descent is slower in RocSim than the data. I've attached the graphs for both RocSim and the StratoLogger data. RocSim has a peak altitude of about 1400' versus about 1200' for the StratoLogger. The RocSim peak velocity is about 270 fps versus 230 for the StratoLogger.

Atlas Mercury RocSim9 HF-21.jpg Atlas Mercury StratoLogger HF-21.jpg
 
Aerosadt...really cool data! I am amazed at the technology in the MPR and HPR rockets...just amazing. How big of a chute do you use for her? Truly an amazing build and the repair was nothing short of a spectacular save.

Thanks, Rich and Rick! It was a challenging flight and took all day to prep. I need to find ways to go faster. I am looking forward to having pictures,too.

I was pleasantly surprised to not have a zipper, especially since there is a 1" x 1" vent hole in the black adapter section right below the Mercury capsule. The re-build using two concentric PML phenolic tubes for the parachute tube helped strengthen things to prevent a zipper along with the more timely electronic ejection. The first two flights relied on the motor ejection and both had zippers.

This was the first time that I used the StratoLogger for electronic ejection charge firing and I am happy with the results. I used the apogee settings for the main chute and did not need to do much re-programming. Last week I bought the downloading electronics for the StratoLogger and discovered that I have data for the flight. It is interesting to compare the data to the RocSim9 prediction. The RocSim prediction by comparison is optimistic on the upward flight, probably because the actual flight is not exactly straight up. I did not include the two F15's in the RocSim model, because I could not readily find the thrust-time data, but the inclusion of these two motors would not have appreciably changed the flight. The descent is slower in RocSim than the data. I've attached the graphs for both RocSim and the StratoLogger data. RocSim has a peak altitude of about 1400' versus about 1200' for the StratoLogger. The RocSim peak velocity is about 270 fps versus 230 for the StratoLogger.

View attachment 299259 View attachment 299260
 
Pics please!!!

Marcus and Rick, I finally got some pictures. For awhile I was almost resigned to the idea that there would be no pictures. Now, if only I can find some video. I had some great helpers from UROC (Jason Evans and his Dad along with Josh Borget) including my wife help set up the launch. John Borget was essential, because he was the one that was most familiar with this far-away pad. I think Josh Heil was with us taking the pad pictures. I used alligator clips on like some jumper wires to hook help the cluster. It may look like a wire mess, but it was very quick to set up. It is good to set up quickly, because it seems like the heat and glare starts to me feel heat delirious. I'm beginning to really like the flat white LOX look.

69090025.jpg 69090026.jpg

69090021.jpg 69090022.jpg
 
Last edited:
Here are some still photo's of the flight. There is a lift-off picture from a distance. There is smoke from the two BP outboard motors, but no flame compared to the central K-motor. There are some photo's of the main booster and the mercury capsule descending under chute.

69090019.jpg 69090018.jpg

69090016.jpg 69090015.jpg
 
Spectacular!! just beautiful shots...it looks real! You need a RC helicopter to circle the capsule when it lands to pick up the astronaut!


Here are some still photo's of the flight. There is a lift-off picture from a distance. There is smoke from the two BP outboard motors, but no flame compared to the central K-motor. There are some photo's of the main booster and the mercury capsule descending under chute.

View attachment 300314 View attachment 300315

View attachment 300316 View attachment 300317
 
I am The Surfduke. I just found this thread. Yes I really exist. I had a few rough years and went net quiet. Would love to see more of this project and would be glad to provide the latest refinements I have done on this and many other projects. I don't have a website and I have had my work pirated/sold by Asian and Russian sites. That others profited from my work and not me hurt. I would love to work with honest fans if any are interested.

Duke Out
 
Hi, Surfduke. This project still exists and resides in a closet in the basement. It has flown 3 times, but not for several years now. I have 2 big models, but they currently don't both fit in my utility trailer so I may forgo another year for the Atlas/Mercury in favor of my other model. If you have some work that you would like to share, you can always post on TRF. Perhaps, you might want to start your own thread.
 
Hi, Surfduke. This project still exists and resides in a closet in the basement. It has flown 3 times, but not for several years now. I have 2 big models, but they currently don't both fit in my utility trailer so I may forgo another year for the Atlas/Mercury in favor of my other model. If you have some work that you would like to share, you can always post on TRF. Perhaps, you might want to start your own thread.

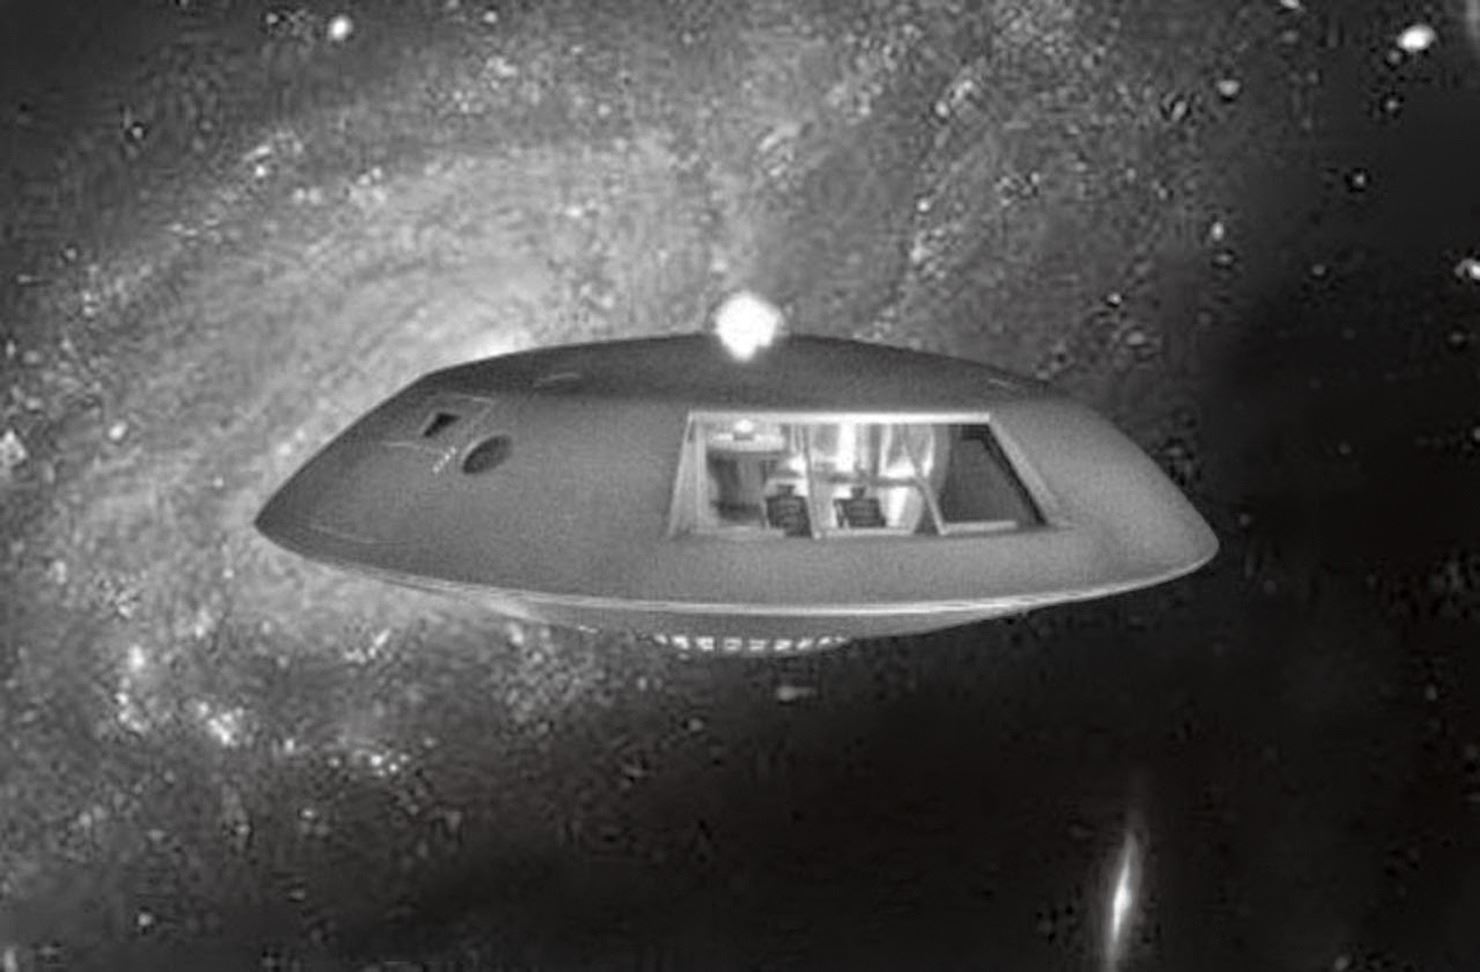
Right now I am working on the Jupiter 2. From the original lost in space. Just finished the upper deck. Publish it soon to selective folks. I never stopped designing static and flying rockets over the years offline. I just haven't published them. If there is a hosting option here I would be glad to share some of that work with others. My Saturn family would be cool builds that can be scaled up or down as you wish with lots of details.

Be safe
 
Right now I am working on the Jupiter 2. From the original lost in space. Just finished the upper deck. Publish it soon to selective folks.

35004867_4.jpg
 
Nice still shot. Love the look of the craft. Simple clean model. The interior has been a research nightmare.

Stay safe
 
Back
Top