My Jawstand build

The Rocketry Forum

Help Support The Rocketry Forum:

This site may earn a commission from merchant affiliate links, including eBay, Amazon, and others.

burnout

Well-Known Member
Joined
Jan 6, 2013
Messages
148
Reaction score
4
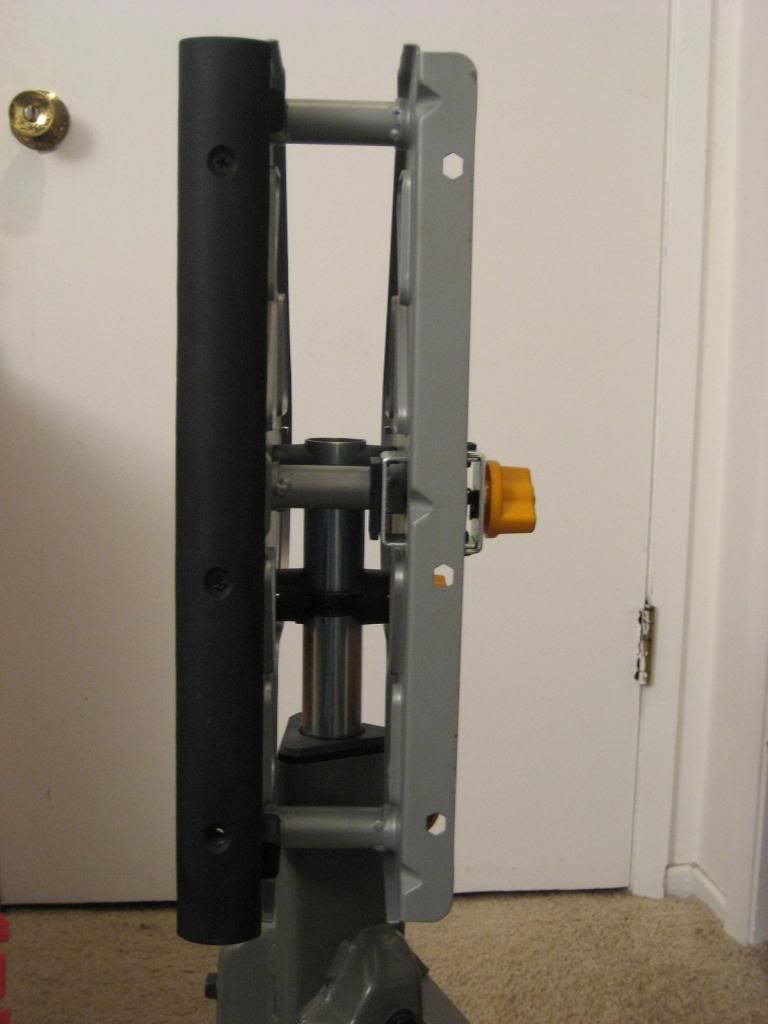
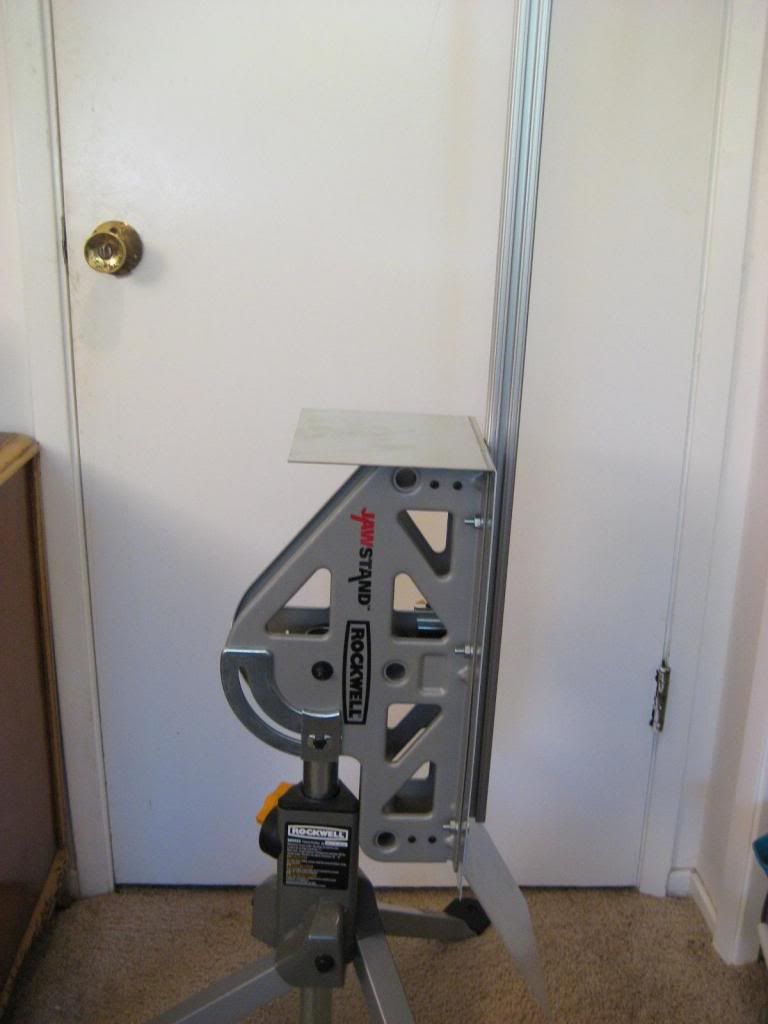
I opted to attach my system to the Rockwell Jawstand using hardware instead of the jaw clamp. It seemed more sturdy and only takes a couple of minutes to disassemble using a ratchet. I don't like working with wood unless I have to. I will also have to modify the blast shield as I spaced out and didn't make room for the fins up against the aluminum plate. I will probably cut a hole through the center for the rail to pass through and install it on the highest pair of holes. Either that or just use the 90 degree flat surface as a pad.

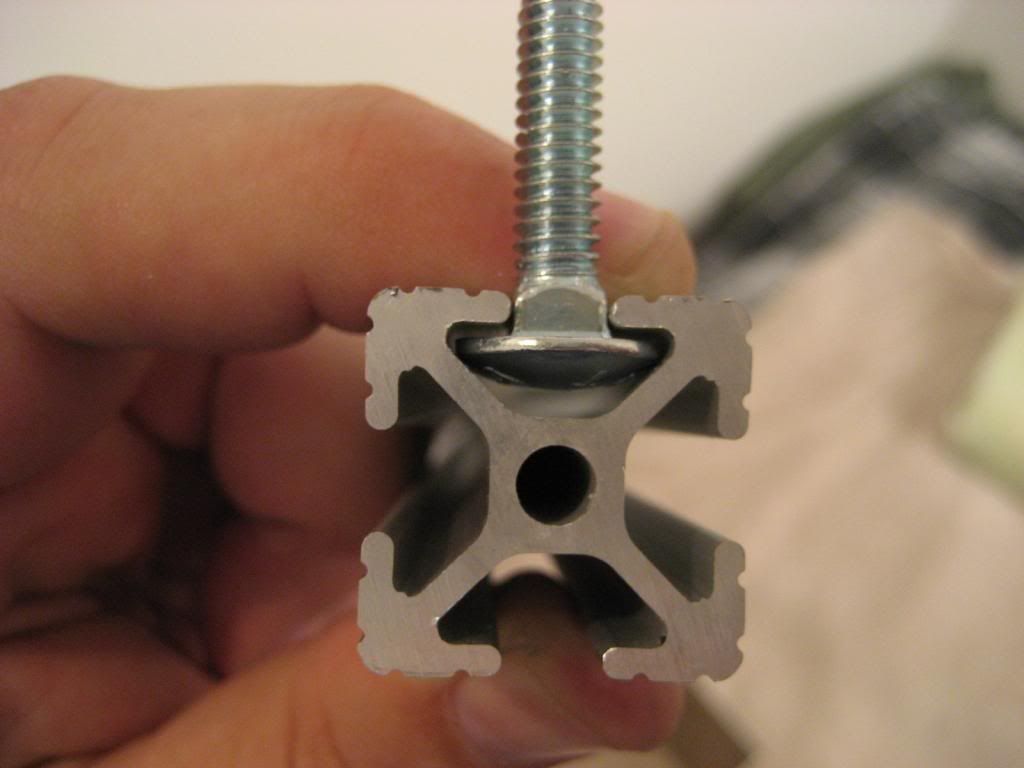
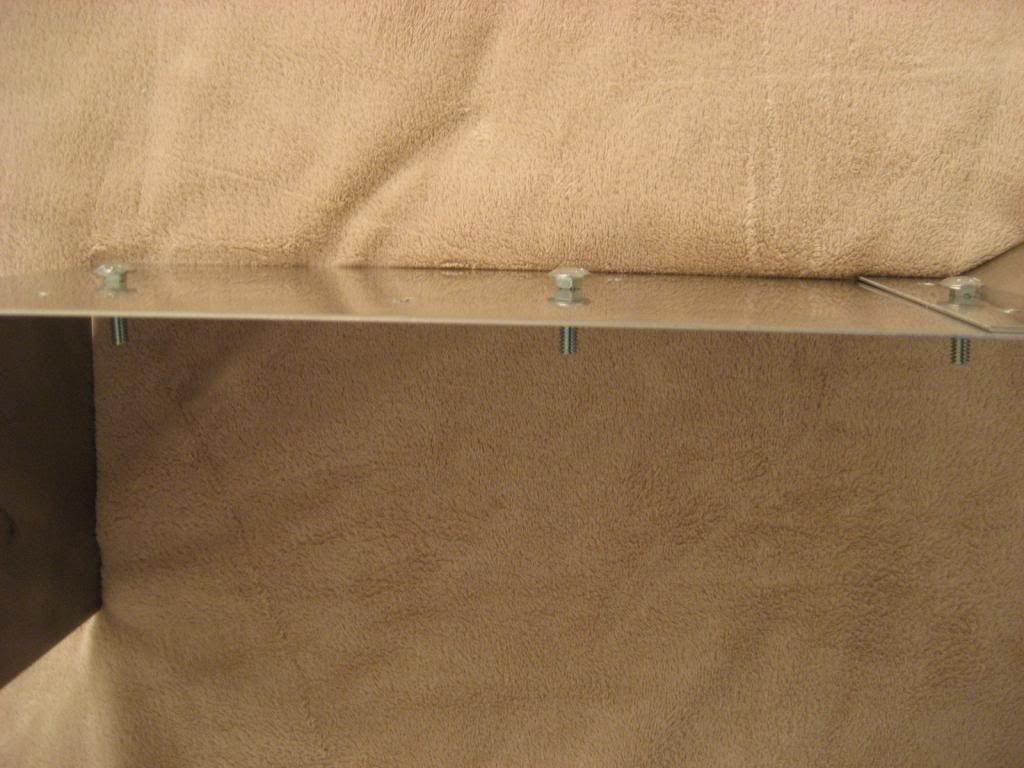
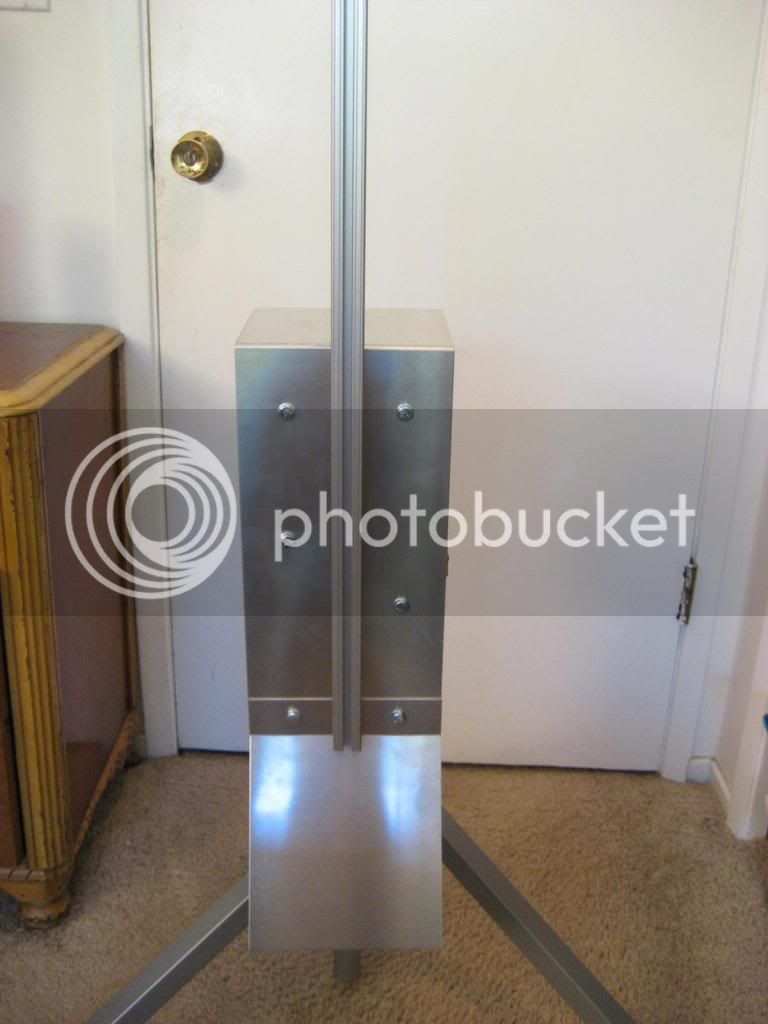
Three carriage bolts attach the 6' rail to the center of the piece of aluminum. I had to file the edges of the heads ever so slightly to get them to fit inside the rail.
Picture492_zps87b1a8a0.jpg


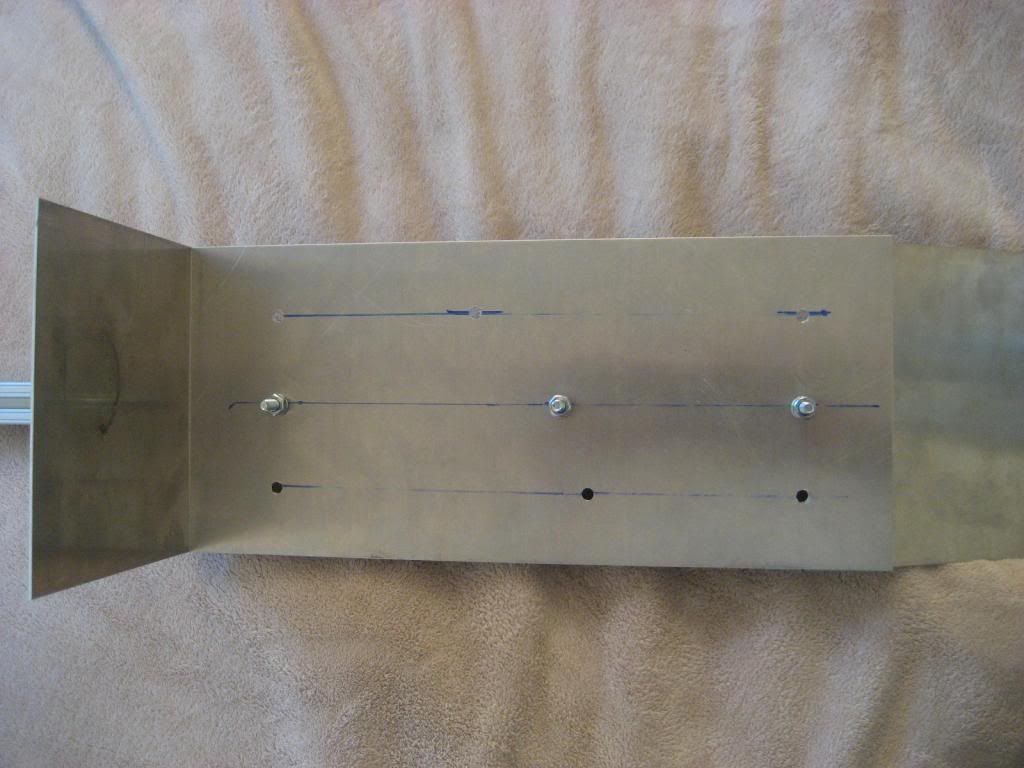
I removed the plastic protector off of the stand and used the 6 bolt holes to attach the aluminum plate.
Picture495_zpsf70b15c0.jpg


Picture496_zps72e87745.jpg
 
Last edited:
Well done! This set up uses all of the rail. I like it.
I've got the 97" rail but it's still up in the air as to how I'm going to build the stand.
:cheers:

JP
 
I will also have to modify the blast shield as I spaced out and didn't make room for the fins up against the aluminum plate.

Your launch pad is looking really good :cool:

One thing to consider -- These motors will burn holes through an aluminum plate (been there, done that.) You might consider either a steel plate or a ceramic tile plate. Either could just sit on top of the aluminum plate.
 
Your launch pad is looking really good :cool:

One thing to consider -- These motors will burn holes through an aluminum plate (been there, done that.) You might consider either a steel plate or a ceramic tile plate. Either could just sit on top of the aluminum plate.
I thought of that but since I had this metal on hand I thought I would give it a try anyway. Worst case scenario is a cool melted hole and I start over with 16ga. stainless. I wont be running anything more than a G-80 so we'll see. Thanks for the tip.
 
Last edited:
I just test fitted my Arreaux and it will fit all the way down to the angled pad as it is a 3 fin rocket. A 4 fin rocket probably wont fit so they will just launch from the platform 1' higher up the rod.
 
Last edited:
Pretty cool design. Can you post another view? I am trying figure out how goes together.
 
I'd be happy to take any more pics you need. If this doesn't help let me know.


Here is the carriage bolt fit into the rail,I had to file the edges slightly to get it to fit.
Picture504_zps24a0c73e.jpg


I used three of them pictured here
Picture503-1_zps893b9b85.jpg


Here is the jaw stand with the plastic cover (left). I removed both of them and attached to the metal frame(right)
Picture505_zpscf261bcb.jpg
 
Last edited:
I wont be running anything more than a G-80 so we'll see. Thanks for the tip.

Mine burnt through on an E :y: For some reason that I don't understand a flat plate will not burn through as quick as an angled plate.
 
I'm a little surprised as how little burn time there is on the pad. Do you recall what ga. aluminum it was?
 
Last edited:
No I don't recall. I just went and looked for it but I think I threw it out. It was fairly thin.

It had an angled section (about 45 degrees) and a flat section. When the motor exhaust was sitting above the angle section it burnt a hole every time. When the motor exhaust was sitting above the flat section it would last a couple of flights. I figured it would have been the other way around. The painted wood under the plate never burnt or caught fire.

Just keep an eye on it and if the holes start to form you can always add an additional flat section above it.
 
Now I got it. Thanks. I missed the bolts lone up with the holes in the jaw stand. I have 2 at home that I have not start the build on yet. The deployment interrupted my plans.
 
Jawstand stabilizer for larger rockets.

The 8' rail is attached to a piece of 2"x2" with 1/4" carriage bolts and clamped using the jaw stands side clamp. We've been using this for the last 6 months on level ground with good results, i.e. no tip-overs. A galvanized steel blast deflector (not shown) with a 1" square hole slides over and down the rail.
Art Applewhite
Rail Stablizer 1.JPG Rail Stablizer 2.JPG
 
I used alum 3x4 rectangle, bolted the rail right to it and then bolted on the deflector. Those stands are awesome.

YUwKQ9R6wPuh0P3FvxH_SFjQ8Ic-7n2H6zb-kkdRRUkLLlm-AO3nj_JGItMRwbfNi2FsHdCX_pX5_2ZISuJgWbtq2Ys-KESmzuIMfmFUyRw2ecsYHXSQVd2zutIPL9A3Yov52VvDpa9HVTeoHejhISGcRxIvsSrEfObVd5wHdVaFAQ62Zhe7uau6PdY58ZCUJZYfkH6R0zthnQ8gMo4Rp-PYHPMrVCGeJmqejVDQ98SicQyjxrdsxXZEtKXxfMJNY95KZmzIdcSw_yHkJFBvJlXxp8R0guO9XjnUv7ZWrnx5Pp4tfNdvk-AYAcKNNXnDTGh9hBImQVMKzh4qzOHDmy7659pkPcUfn0LozwEWFMHLxWiQ3i_PSkQEXPnIPWsU2Z8yhSt84YtAzlaS932uARY8yuzw2BfgyRw45LJjjnbllScv6ihTbMfHWmsoNpr-_CDBlm8PeLavrz0bfrto45Gx7G9uLBzqqA45nA6cuOpXv_NvUE9ONT93wQDtXUe6sgTfK0XVOvg4UCJZO_f_R1fzpfCMn7kSV_GGbtcDGP1GdFbfNg-iq4sChHodZPwa1mrqPBGtrHGkdAbaP3A201pPdD9BtC3bBpu5-dFp7VUiVNbVtmqtF5ZB9L4TpzvKr-3CvL6hv8zIyzj43iV9norj4x3ig_do=w1264-h948-no
 
I thought of that but since I had this metal on hand I thought I would give it a try anyway. Worst case scenario is a cool melted hole and I start over with 16ga. stainless. I wont be running anything more than a G-80 so we'll see. Thanks for the tip.
This is from a G-80. 060" copper I had in my junk pile, used it mainly because it was there. I just rotate it away from the hole. Yours may do better with the angled defector?20190208_123759.jpg
 
On only beef with the jaw stands is that they tend be Too larger, heavy, or rickety. You get a choice but you are likely going to get 1-2 out of three of those depending on you set up. I have two. I keep looking for a better design.
 
I'd like a few more photos. I'm sitting here looking at mine (just picked it up from Home Depot), and while I like the general idea, there seem to be lots of different methods to use it. The first problem that I questioned was how to attach the 1010. I saw the photo of the carriage bolt and I like that idea but if you bolt it to where one of the non-skid "slides" are then what do you do with the other one? You couldn't mount two 1010s. I also saw the 1010 bolted to the 2x4 and then the board clamped in the stand - that made sense too. There must be a thousand ways to set something up!
 
I made a plate for mine ..then added a pair of shaved carriage bolts to hold the 1010 rail .

Can be parked in the firing line or next to my prep table to display a bird on the rail .

To break down, loosen wing nuts on under plate, slide rail out, fold up and put in vehicle - tool free and the stand doesn't take up too much more room than a bagged folding chair .

Kenny
 

Attachments

  • 20190405_185304.jpg
    20190405_185304.jpg
    182.7 KB · Views: 214
  • 20190405_185324.jpg
    20190405_185324.jpg
    141.9 KB · Views: 220
  • 20190405_185358.jpg
    20190405_185358.jpg
    134.1 KB · Views: 198
Last edited:
Some pics as requested...

The L brackets are just something I had sitting around but you could easily make some from flat stock. The bolts are just standard carriage bolts.

A 2x6 is a better choice for clearance. I have a couple with fins that just barely clear the stand.

The deflector is just a piece of sheet metal that I screwed right through the rail.

I have a similar setup using a 1/4” rod and one with a 3/8” rod that I can swap out.

E55CB7E7-B12C-4C0B-826E-46AAACEDC89E.jpeg 1CC240E8-32AF-42FD-9EB6-AAB2C4E45D36.jpeg
 
Some pics as requested...

The L brackets are just something I had sitting around but you could easily make some from flat stock. The bolts are just standard carriage bolts.

A 2x6 is a better choice for clearance. I have a couple with fins that just barely clear the stand.

The deflector is just a piece of sheet metal that I screwed right through the rail.

I have a similar setup using a 1/4” rod and one with a 3/8” rod that I can swap out.

View attachment 379377 View attachment 379378
I like it jnobels. Thanks for sharing!
 
Thanks for all of these. I think I have decided on a design (which I will post once assembled).
Thanks again for all the images!
Slothead Tom
 
Back
Top