What did you do rocket wise today?

The Rocketry Forum

Help Support The Rocketry Forum:

This site may earn a commission from merchant affiliate links, including eBay, Amazon, and others.
Started dialing in the tracking on the Walker Turner. I replaced the rubber with urethane tires, but the saw is designed such that it wants you to glue and crown the tires regardless of what they are physically composed of, so I began the process.
Man! This thing is going to be SWEEET!!!!
I shot a coat of rubberized undercoating on the wheel covers too to hide any of the imperfections that I might miss, and I'll put one more layer of .5 glass cloth on top of that before I add the inserts for the mounting hardware that I designed myself. And then paint ofcourse.. I'll share the details on those at a later date, but like rockets, the design came to me in my waking moments, and today I cut the parts from aluminum stock. The covers are a later variant, and the little tabs that the mounting posts go through were riveted on, but my design will make them look like they are part of the mold, and do away with the rivets and the old mount tabs.
The Bell and Gosset motor is just being used as a surrogate to make things move at a manageable rate, so disregard it's irrelevance.
I simply start work when I visualize it, with whatever power source is most economical. Having a Library of sources makes sense.
Crowning Urethane 2016-10-19 001.jpgCrowning Urethane 2016-10-19 002.jpgWheel covers 2016-10-19 001.jpgWheel Covers 2016-10-19 002.jpg
 
Last edited:
My Estes clearance sale box came! Lots of goodies for me, lots of goodies for my daughter, most of which were hidden away for Christmas. But I kept one in the box for her when we "opened" it together. The weather was good so of course we had to fly it!

20161019_161316.jpg
 
I've started filling the spirals in the tubing on my son' Mega Der Red Max.

He stays busy working and it looks like if I'm going to watch it go up it's up to me to complete it...
 
My Estes clearance sale box came! Lots of goodies for me, lots of goodies for my daughter, most of which were hidden away for Christmas. But I kept one in the box for her when we "opened" it together. The weather was good so of course we had to fly it!

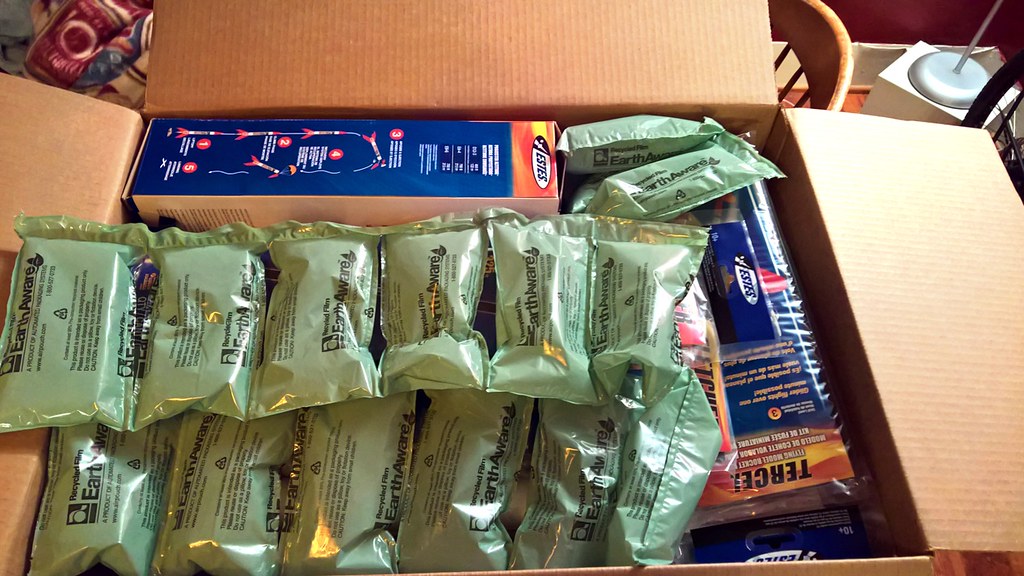
I got mine yesterday too. In my case, they're all for me, but they'll mostly be ferreted away anyway. It was nice of Estes to throw in one of the new Christmas ornaments, since I forgot to add one to the cart. My box arrived intact, unlike many other recent reports:

30332557252_441e1aeeba_b.jpg


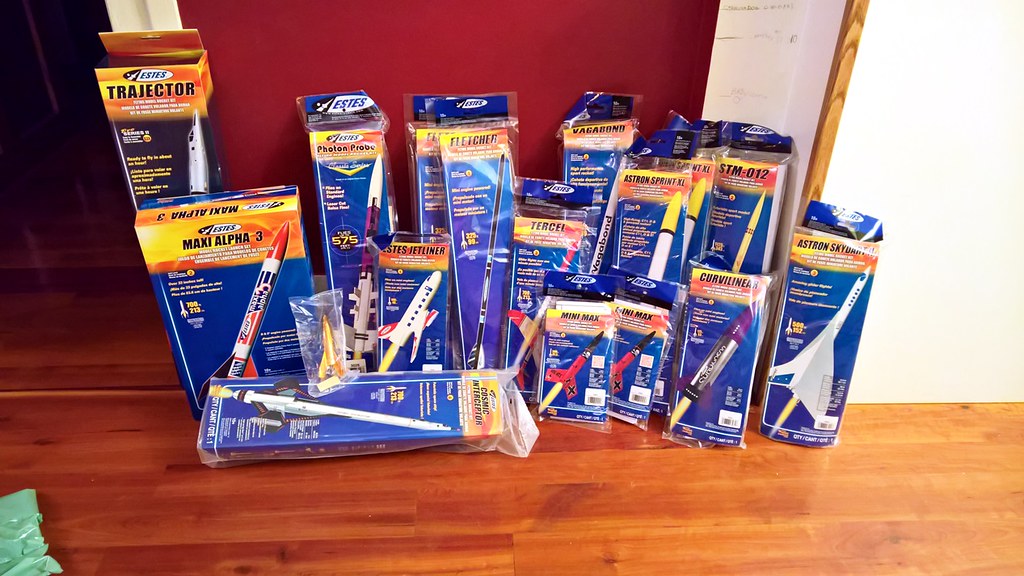
It was packed reasonably and sealed up well. However, the package itself is a light-duty box from U-line, and wouldn't have withstood a lot of abuse had UPS not decided to play nice. It was packed snug enough that if the box deformed, the product inside probably would too (in my experience, you shouldn't use the package contents to support the package. This isn't an Atlas rocket). Anyway, it all seems to have survived OK. The tubes in the STM-012 seem to be slightly squeezed, but I understand this is common for that kit and not boxing related. The full content (I may have gotten carried away with the sale):

29818381774_e9e8c74364_b.jpg
 
I ordered using their mobile site, so the ornament was a surprise to me. So were the booster cans they included; apparently they are giving them away with each ARF kit. Nice!

PS the Fletcher makes an excellent 18mm conversion.....

20161020_083005.jpg
 
More Tuning. This will be my Fin Maker, so it has to work always.

I made it look like the representation.

Likr The Old One 2016-10-20 002.jpgLikr The Old One 2016-10-20 001.jpgLikr The Old One 2016-10-20 004.jpg
 
Third Batch of Estes rockets ordered on this sale... ugh. First crates should arrive tomorrow per UPS. My kids will think it is Christmas! The local Ace Hardware also started carrying Estes motors. They have the 3 packs of 18mm for 9.99. This weekend is a 1/2 off anything that fits in the bag sale. I think I'm going to try my luck at 4.99 packs of C6-3's. :)
 
Third Batch of Estes rockets ordered on this sale... ugh. First crates should arrive tomorrow per UPS. My kids will think it is Christmas! The local Ace Hardware also started carrying Estes motors. They have the 3 packs of 18mm for 9.99. This weekend is a 1/2 off anything that fits in the bag sale. I think I'm going to try my luck at 4.99 packs of C6-3's. :)

Man, I wish my local would. That's awesome!
 
Got the stepper motors responding for my CNC router project. Really wasn't bad controlling with an Arduino Uno and GRBL shield. No overheating issues and plenty of speed and torque even at lower amps. Looks like I'll be ordering the more spendy bits soon.

I followed this video to get the electronics and steppers running.

[video=youtube;1ioctbN9JV8]https://www.youtube.com/watch?v=1ioctbN9JV8[/video]
 
Last edited:
Thursday, received motors, props, and 20 amp ESC’s (Electronic Speed Controllers) for the Quadrotor Lunar Module project. Unfortunately, I ordered 30 Amp ESC’s, not 20 Amp. Good thing is the dealer mailed me the 30 amp ESC’s the same day and they’ll get here Monday, with no delay to the project (Won't be wiring up ESC's till after Monday anyway).

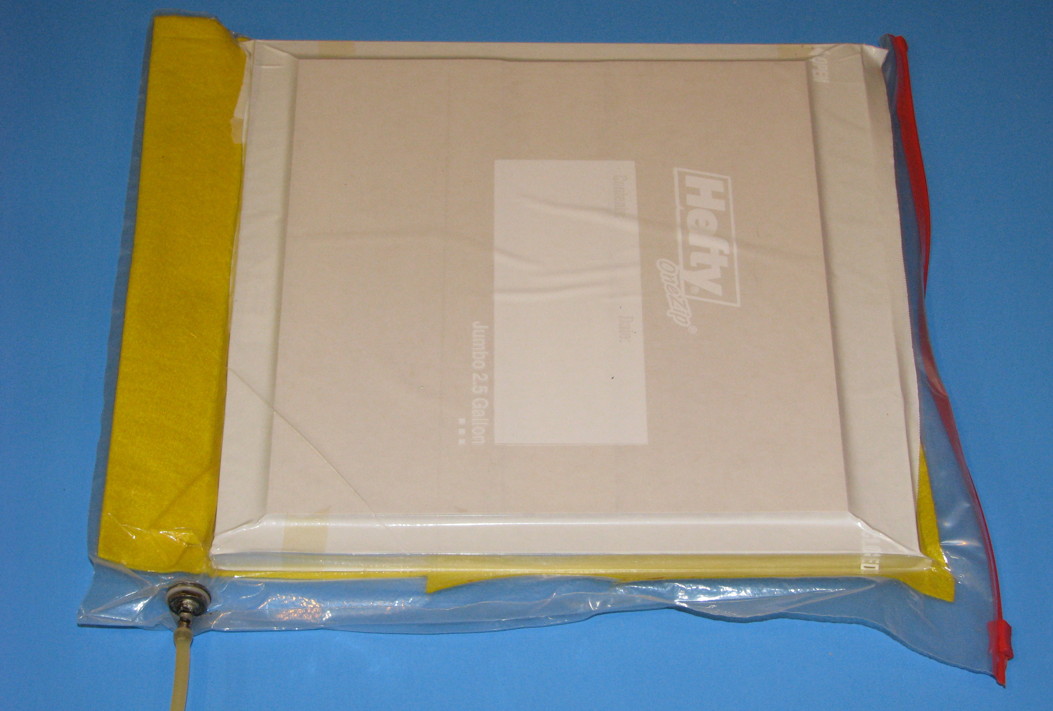
Meanwhile, glued 1/16” basswood sheets into two 10 x 10” sheets, and used laminating epoxy to bond them together at 90 degrees, such that after cutting to shape there are opposing 45 degree grains along the axes of the legs. Vacuum bagged the two laminated sheets, I like to use one gallon ZipLoc bags for small bagging projects, the Ziploc seal works well with the vacuum reservoir type pump system. Yellow stuff is breather felt cloth to allow vacuum to distribute evenly. Slight wrinkles in the bag because I had disconnected the vacuum system when I took the photo. To ensure it cured flat, a flat 3/4" thick particleboard panel was inside, the vacuum compressing the basswood sheet onto it (with Freezer paper used to prevent excess oozed epoxy from bonding to the wrong places)

6QmomZ3.jpg


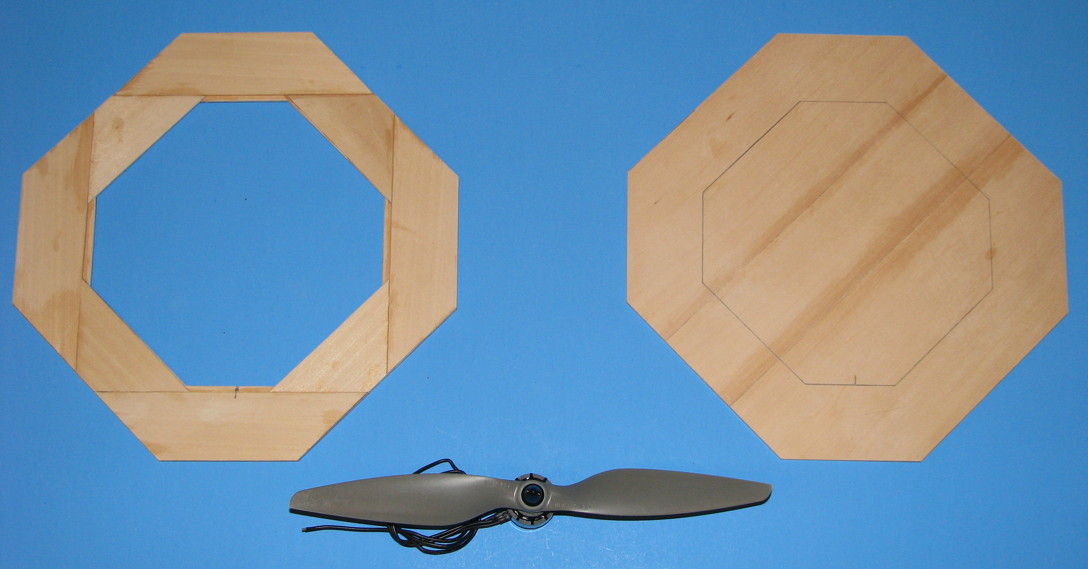
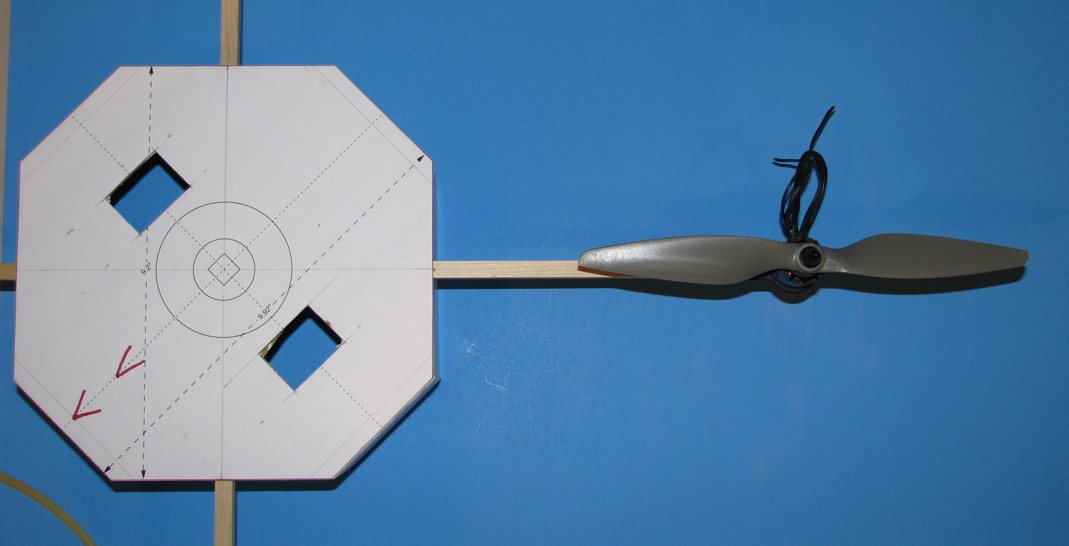
After curing overnight in a “hot box”, I took the now 1/8” thick 2-layer ply basswood plate out and cut it to the octagonal shape matching the lower frame assembly. This will be the top plate of the Descent Stage. In the photo below, the new top plate is at the right. A lot of markings need to be made to it, top and bottom, for alignment of the 10mm square tube beams for the motors, upper leg attachment, Flight controller anti vibration mount, GPS module mount, and so forth. Same for the lower frame, to mark where the blind nuts will go for the lower leg strut attachments (will use two 4/40 nylon bolts so in a hard landing/crash the bolts will be the intentional weak link to minimize structural damage to the Descent stage octagon). At the bottom of the image is one of the motors, with a 10 x 4.5” prop.

QtTSFQF.jpg


Image below, the motor and prop laid in place at the end of one of the arms of the mock-up. The legs will be at 45 degrees to the arm locations. This will be an “X” orientation Quad (most common), not a “+” orientation quad (which are rare)

C6hMkOy.jpg


Hopefully will have the Decent stage structurally assembled by Monday night. But lots of preliminary steps to get there due to interfacing issues (do not want to do much “ship in a bottle” work on stuff inside when I can do a lot of it before assembly)
 
Last edited:
I went to Hobby Lobby and used the 40% off coupon to buy the $0.99 booster............
 
+1 on both counts. :)

Man, those side pods are huge. Should be impressive on the pad.

If I were more seasoned and confident in my abilities, I probably could have modified the design to make the boosters functional, but I've never clustered anything, even in my younger days. Maybe I'll do a LPR downsize of this design at some point and give clustering a try.

The shop sign was purchased on Amazon. ;)
 
My dad and I found his rocket after a month and a half of it out in the woods. Time to pull the video from the camera :)
 
I made a forward centering ring. Machined 6061 aluminum. To put a 98mm mmt in a 6" a/f.

Fits like a machined part. :wink:

Other than to hold a small ply bulkhead deep inside the nosecone, the build will use absolutely no epoxy at all. :eyepop: :rofl:
 
after 4 months of looking at a 29mm minimum dia. scratch built rocket hang in my neighbors tree( launched it at the park behind us) I got it back today! gotta thank the tree service that came through clearing the electrical lines for that. don't think it could have fell, packed the chute and shock cord back in, got the NC back on, and land nose 1st in 50'.
so now I have a FG 29mm NC needing a rocket.
maybe time to venture into Fg construction.
 
Jeweled the aluminum table extensions for my bandsaw.
She's nearly complete now, and fully operational for cutting stuff.
I just need to finish the wheel covers so that I don't need to hold them on with zip ties to use it, then fabricate some blade guards and she'll be ready to make the old timey looking cabinet pedestal stand.

jeweling 2016-10-24 001.jpgTable Extensions Jeweled 2016-10-24 002.jpg
 
So many very serious rocketeers on this board! I have just completed an old Estes Cobra rocket and have started on an old Columbia space shuttle rocket, also by Estes. Toy stuff compared to the master powerhouses so many of you build. The sport has come so far since I was actively launching rockets back in the 70's! (My rockets are primarily from that long ago era).
 
Jeweled the aluminum table extensions for my bandsaw.
She's nearly complete now, and fully operational for cutting stuff.
I just need to finish the wheel covers so that I don't need to hold them on with zip ties to use it, then fabricate some blade guards and she'll be ready to make the old timey looking cabinet pedestal stand.

View attachment 303883View attachment 303884

Feel like refurbishing my old Sprunger band saw? Needs the same treatment as yours...I'll get to it someday...

ImageUploadedByRocketry Forum1477358542.532182.jpg
 
Feel like refurbishing my old Sprunger band saw? Needs the same treatment as yours...I'll get to it someday...

View attachment 303886

Oh Man!
That is SWEEET!!!
My jaw dropped and I nearly drooled on the keyboard when I saw that!

When you get around to bringing her into the light, there's a great forum I've been going to to get advice for my restoration/clean-up, and it is www.owwm.org
The folks there have steered me in the right directions while getting mine tuned up. It ran and cut just fine before, but it was gifted to me, so I owed it and the previous owner the respect of a good clean-up and tuning before I go making it work for me. The process is so very enjoyable that I'm going to do a full clean-up/re-paint on my Craftsman Drill Press when I'm done with the saw. That one is from 1937, but you would never know it by they way it runs. It was made by Atlas, and is only missing a few parts that I can find pretty easily.
It turn out that there are lots of folks that are just as obsessed with fixin' up old woodworking machines as we all are with rockets. I'm obsessed with both now.
Thankfully, the hobbies compliment one-another nicely, as the machines make making the rockets that much easier.
I'de used my drill press to make stuff before, but having a great bandsaw to cut fins with is like a dream come true!
 
Finished my second Odd'l Cyclone, hope this one will hold together.
attachment.php


Such a fun little build.
 

Attachments

  • ImageUploadedByRocketry Forum1477432693.431191.jpg
    ImageUploadedByRocketry Forum1477432693.431191.jpg
    142.9 KB · Views: 18
Very slow work on the Lunar Quad. Various issues, time, printing problems, and trying to work out the assembly sequence steps so that things will be glued or assembled at the right time. Or for things to be done later, making sure that they can be done later and not have to undo anything. And even some cases of having to "pre-invent" something I knew that would need to be done eventually, things that could not wait for me to figure out after certain things were done first. A really mundane one was how to secure the batteries in a way that would be strong and secure enough without adding excessive weight or a PITA to swap batteries

Oddly enough attaching the upper struts for the leg assemblies, to the upper bulkhead for the descent stage, was the first thing I need to actually glue/attach to the upper bulkhead. Would be a huge hassle to try to do that after assembling the Descent Stage structure, and not as strong as doing it first.

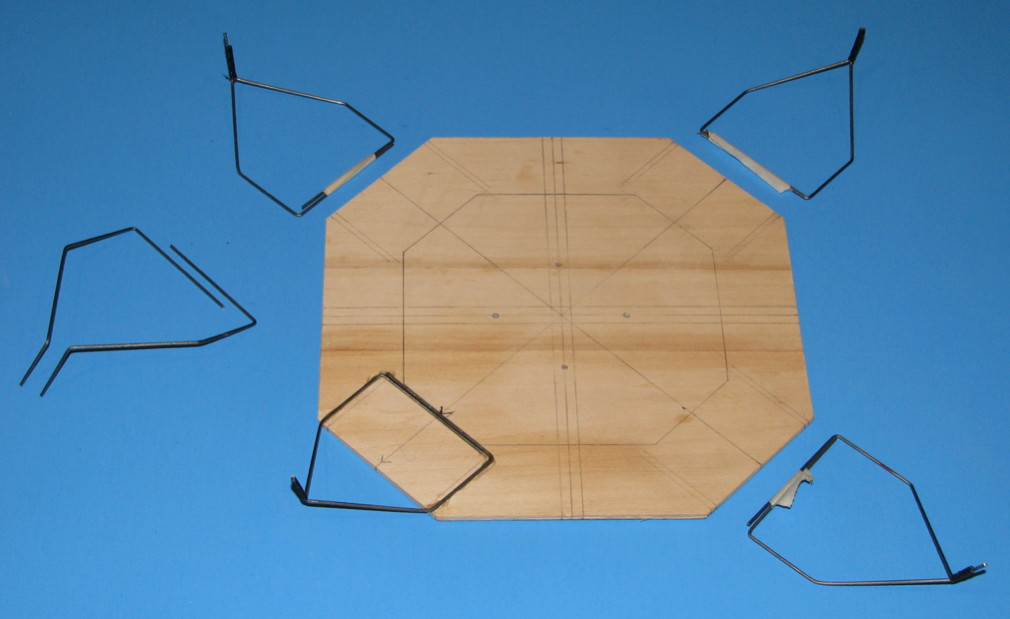
Photo below, shows the upper bulkhead, flipped upside down. 1/16” music wire for the “V” part of the near-horizontal upper struts, some interesting time spent working out the bend angles for those things. Each one made as two mirror-image matching sets, with one end (where the top of the legs attach) of the two pieces attached by wrapping with black thread and applying CA to the thread-wrapped joint. That thread-wrapped area will have increasing sizes of plastic tubing slipped over it for attaching the legs. At far left is a spare set not joined (not thread wrapped) like the other 4 (and not inverted in the pic, either).

4yldP3m.jpg


For the near horizontal “V” portions of the 1/16” wire, plastic tubing will be added later to build up the correct diameter (Slit along the length to allow clipping into place, fortunately gold foil or black tape will cover over the slits and joints). The one leg tack glued on, the arrow marks indicate that will be the "forward" flight direction for the Flight controller. That's where the ladder will go, and the front of the Ascent stage.

I wanted to at least get one leg tacked in place for a photo before calling it a night. I’ll be adding the other 3 legs, then add reinforcements to keep them from being able to pry away.

Then hopefully have things start to go more quickly, get the 10mm arms for the motors added, a few other things, then finally structurally assemble the Lunar Module, top and bottom bulkheads connected by vertical columns and 1/16” balsa sheeting added for the 8 side panels. Then finally after those steps, start installing the actual QuadCopter parts - motors, ESC’s, Flight Controller, and other electronics and wiring.
 
Last edited:
Today, I looked up the dims on AeroTech 98mm motors. Found what I needed. Working on the drawing today, I'll be receiving a shipment of metal tomorrow, and machine work on the retainer can begin the next day.

And I have no idea why I'm typing this here.
 
Back
Top