What did you do rocket wise today?

The Rocketry Forum

Help Support The Rocketry Forum:

This site may earn a commission from merchant affiliate links, including eBay, Amazon, and others.
With the kevlar shock cord it's a good idea to toughen up the end of the body tube where the cord passes over it. One way is to make up a little epoxy and with a glove on (Latex or whatever you use) rub it into the cardboard to make it more resistant to cutting. Medium CA also works good for this. A wrap of some kind of plastic tape on the cord where it passes through the end is also a good idea. It spreads the load.

All of this is to help with NOT learning another new skill, the repair of the Dreaded Zipper ;)

Thanks for the tip Dave, I've been re-enforcing my LPR birds with CA and plan on doing the same with this one. I am also going to wind some tape around the cord where it rubs on the body tube as you suggested.

cheers - mark
 
Thanks for the tip Dave, I've been re-enforcing my LPR birds with CA and plan on doing the same with this one. I am also going to wind some tape around the cord where it rubs on the body tube as you suggested.

cheers - mark


Yah, it's amazing the ability of Kevlar to slice through things. Hope this saves you some work down the road :)
 
Did another round of putty and primer on replacement MDPM fins.

Also started updating Vindicator DD nose for tracking sled including custom centering ring for coupler for bulkhead attachment.

Layed first round of FG for Funk Saucer , slated for Jim Waters and the LV drag race.

Bought an RV for LDRS ..

Kenny

1443564253394.jpg
 
Did another round of putty and primer on replacement MDPM fins.

Also started updating Vindicator DD nose for tracking sled including custom centering ring for coupler for bulkhead attachment.

Layed first round of FG for Funk Saucer , slated for Jim Waters and the LV drag race.

Bought an RV for LDRS ..

Kenny

Did it come with the kid, or did you have to add that? They always get you with the add ons.

Also, I think that bought an RV belongs in an entirely different list than the rest of those activities. Congrats on the new rig though.
 
Did it come with the kid, or did you have to add that? They always get you with the add ons.

Also, I think that bought an RV belongs in an entirely different list than the rest of those activities. Congrats on the new rig though.

She is the first thing I put in it !

Kenny
 
Started to build the MIM-23B improved. Mostly cut tubes but also started to work on ebay, fin can and motor mount.

2f2f008eeb8810752dc298439458d804.jpg


Here are the fins.

2d49d69db2cad4e131297809827abe44.jpg
 
I am working on detailing my PML AMRAAM 3. I hope to fly it on Saturday.

My PML AMRAAM 3.jpg

I guess maybe you can see one of my other passions in the background. :dark:
 
Amen to epoxy at the mouth of the airframe.

Also, get kevlar pull tape from Aerocon and make it loooooooooong. The stuff is cheap and light and very compact. Just don't throw it in the washing machine with your socks after a days' worth of flights. It frays and unravels. Waiting on my replacement kevlar as we speak. Woops!
 
I was able to finish testing the pyro channels for my homebrew flight computer. Ten igniters through each channel without fail. Due to my ematches not always opening (they continue to short) after ignition I devised a super capacitor circuit which is slowly charged off of the main battery through a diode and current limiting resistor and and then is controlled via a transistor with signal from the microcontroller... All in all I'm very happy!

The barometer, GPS, IMU (accelerometer, gyroscope, magnetometer), temperature, 70cm transceiver, all are working and good to go for a test flight with real time tracking in Google Earth... Woohoo
 
I worked on the Tiny Pterodactyl I'm building for my daughter. Today all I got done was sanding the tail smooth after filling it with epoxy/milled fiber. Tomorrow I'll start fin fillets, one at a time....

image.jpg
 
Worked some on FLAIL, MIM-23B HAWK Improved, and designed a toughened version of Der Red Max (Der Tough Max) to fly on Aerotech D10s and D21s. It should also handle Estes C6s I want this to be an indestructible workhorse :)
 
Went along to my club meeting last night. Had a super dinner with the good folk there and talked rockets!

Oh, I also left with two 18" lengths of 4" body tube & a coupler to suit along with a 2" long crayon money bank!

Krusty
 
Found two Booster-55s at Hobby Lobby on clearance for 99 cents each. The plastic reminds me of the plastic used on the legs of the old Mini Marz Lander. Paint would not stick to them. Has anyone tried painting one of these Booster-55s? I'm thinking of trying a lacquer to see if it will "bite" into this slippery plastic.
 
I am attempting to glue and reinforce my dinged blue tube coupler for my Blue By You so I don't have to redo the sled and electronics orientation.

Did another saucer lay up

Kenny

1443671614055.jpg
 
Last edited:
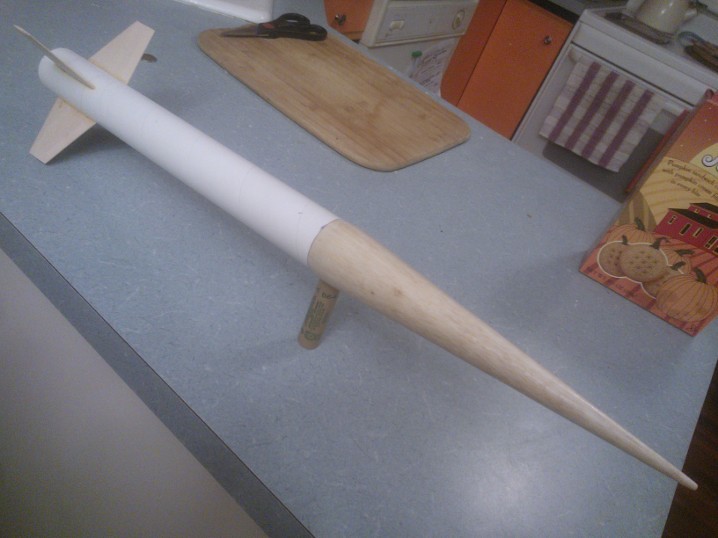
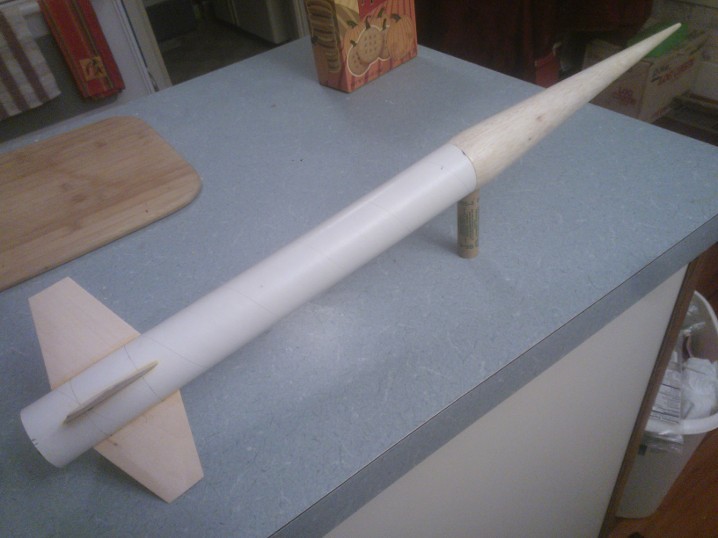
Last night I finished gluing up a BT-60 sized Nike Smoke, which I drew up after finding that Semroc offers a nose cone in that size for. My PSII Nike Smoke is cool, but maybe a bit big for certain fields. With 1.6" tube, this model is about 22" long. Pics to follow.
 
I built this 3-tier PVC rocket prep/work stand in ~30 min (cost ~$28):

It can't take credit for the design but I did prepare a build document that includes the construction steps, cut sizes, and parts list. It can be downloaded from the Bridgeton Area Rocket Club's (BARC) website - this page

Actually, it was so easy I got more materials and made a second stand - one for home and one to take to the launch site. :smile:

MDZ_Rkt Stand_092515.jpg
 
Last night I finished gluing up a BT-60 sized Nike Smoke, which I drew up after finding that Semroc offers a nose cone in that size for. My PSII Nike Smoke is cool, but maybe a bit big for certain fields. With 1.6" tube, this model is about 22" long. Pics to follow.
I want to see it! Do you have an OR file for it?
 
Continuing fillets on a Solar Warrior. There's alot of joints to do on this one. Started working on a Landviper. I'm documenting my work and will have a build thread in LPR soon.
 
The other day I stated stripping the paint and decals off my Darkstar jr (Extra work with the extra stage). Getting ready to start putting paint on, but before I do can someone point me in the direction of a good how to thread for painting. My paint jobs always end up looking ok for about 5 mins before hanger rash comes into play. I see the paint jobs on other rockets and mine get jealous.
 
As I've mentioned earlier I was stripping the paint from my darkstar jr. Well I finally finished. Then got an idea:
ImageUploadedByRocketry Forum1443754182.953086.jpg

Count the fin sets, that's three stages. The bottom one is a min diameter booster that I made for some really fun flights. But the three stages will probably happen at some point or another. Probably around the time that I have money for that many motors, and when I make a new booster stage, as the current one in the middle isn't set up to be a proper upper/middle stage
 
Pretty :)

Did you turn the nosecone yourself?

No, like I said in the previous post - that's from Semroc/eRockets. My only gripe is that its balsa - I've had poor luck with long, skinny cones and balsa breakage. On my Binary Star, both cones have had the tips break off, and now both are truncated. I've had similar things happen elsewhere as well. If this cone were turned out of basswood, it would be a lot more durable and there'd be no need to add nose weight for scale fins. But, I've coated it in CA, which seems to help. I wonder if a layer of epoxy would be better?
 
Back
Top