Project ALTDuino - A homemade altimeter

The Rocketry Forum

Help Support The Rocketry Forum:

This site may earn a commission from merchant affiliate links, including eBay, Amazon, and others.
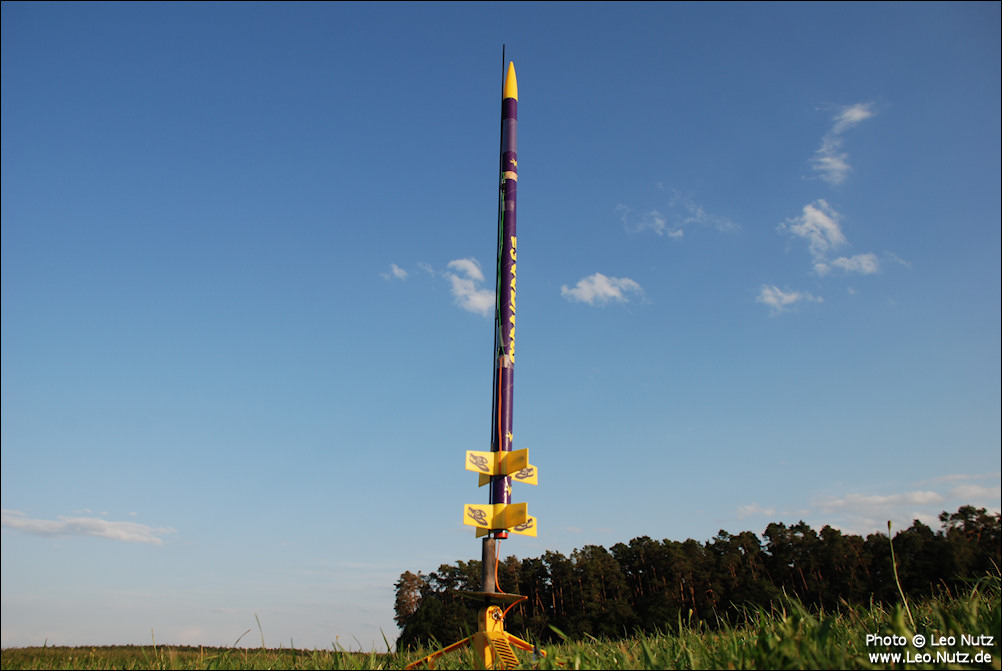
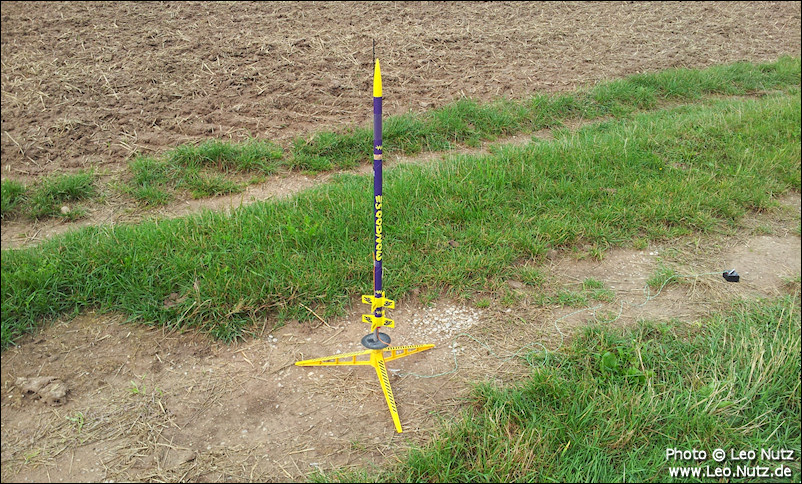
Today I upped it by flying the rocket under windy and cold conditions. I also placed a camera on the rocket to make the test even more challenging. My major concern was stability with the new rocket under the bad conditions.

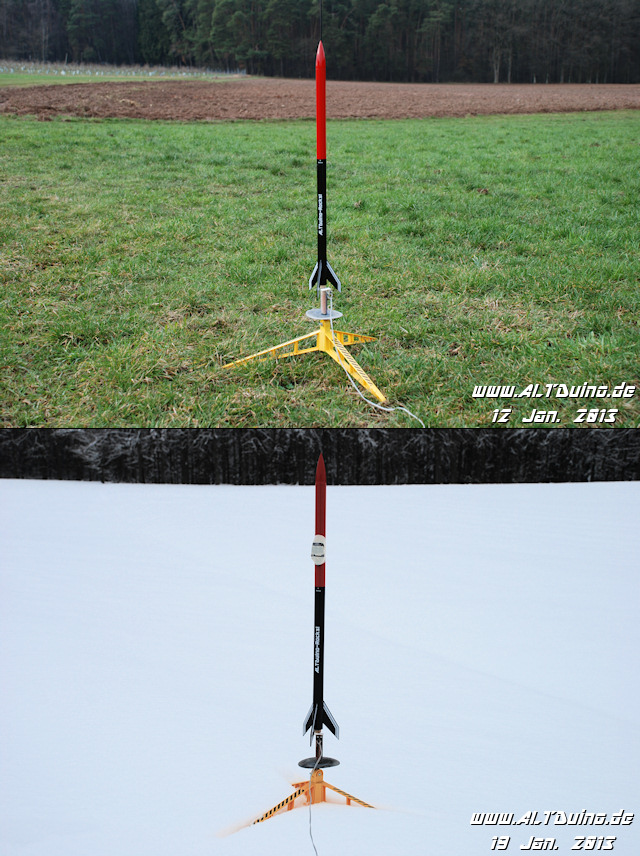
Look at how the weather has changed in just 7 days compared to my last launch :eyepop:

7DaysApart.jpg


Well, my concerns were unjustified :)

Graph and video can be found on my ALTDuino site.
 
Last edited:
Today was suppose to be flight number 31 but it turned out to be a not so funny April fools joke :(

Here the complete action as it happened:

[YOUTUBE]qS1j0qcoW3Q[/YOUTUBE]

The upper section including the altimeter escaped any damage.

Time to build another lower section for my altimeter.
 
Bummer. Had an Estes E12 go Roman Candle on one of my test flights last year. I've stopped painting my test vehicles because of it, and because I'm lazy too... :)

Good to hear your payload was OK, it's actually pretty hard to kill one of these things. I had a boosted dart with a B6 get hung up on top of the booster, and the exhaust plume burned through the bulkhead and charred the Eggtimer proto that had just airstarted it. Cleaned it off with trichlor, hooked it up to a new battery, and downloaded the flight data just fine. I haven't had the nerve to try to fly it again, especially since that was 3 or 4 prototypes ago.
 
...
Good to hear your payload was OK, it's actually pretty hard to kill one of these things. ...

Agreed.

Alsom, the advantage of using small rockets for DD. They cost a lot less to repaire :)
 
Leo,

I really love this project and would like to create my own super mini dual deploy platform. I understand most of the hardware based on the screen shots, but am having troubles with the latest edition which includes the Cap and external resistor. Can you tell me how those are wired into it? I suspect they are used as part of the deployment firing circuit, but I am uncertain.

Thanks

Kevin
 
Kevin,

the Cap is there to set off the e-match. After it was set-off the resister will charge the Cap for a defined time period. Wiring depends on the type of Mosfet your using.
 
Time for a project update (detailed updates on my project site www.ALTDuino.de).

I built a new lower section after losing my first rocket due to a cato and resulting fire.

Altduino-Rocks!2.jpg


The rocket had it's maiden flight on Saturday. It was a dandy flight :)

I've been working on the FW. Most importantly the altimeter now does 25 samples per second as apposed to 20 samples per second.

The graphical interface is more or less done, has lots off new functions, so I've declared it to version 1.0.

ALTDuino_UI-2809.png


Here are 4 of the last flights I've done including the maiden flight of my ALTDuino-Rocks! 2.
[YOUTUBE]H7ssqlmG_EY[/YOUTUBE]
[YOUTUBE]QwjEpAvoXSQ[/YOUTUBE]

So far I've had 100% rates with my hard- and software which makes me very happy.

The next step is to build an altimeter with 4 pyro output channels so I can start work on actual staging flights. The Firmware is ready. It should be exciting.
 
I have 4 because I use 2 channel mosfets. In my opinion 3 Pyros are sufficient.
 
Here is something I find cool.

The following graph shows 2 independent flights taken on 2 different days.

Weather conditions were slightly different.

Engines came from the same pack dated 14 August 1977.

Liftoff weight on both flights was identical.

ALTDuino_UI-3231.png


The altitudes were nearly identical with measured 610,51 feet and 610,35 feet respectively :cool:

The decent was slightly off due to different weather conditions.
 
Last edited:
I've been following this thread as I'm in the process of developing a hybrid controller on an Arduino platform. It will operate a servo, take pressure readings from the supply tank and do some rudimentary decision making. Is there anything you have found in writing/implementing the code to watch out for?

Edward
 
Hello I am doing some similar things. Memory usage can be an issue especially when you write messages to the port.
If you look at my datalogger test program which I am working on at the moment
https://rocket.payload.free.fr/index.php?option=com_content&view=article&id=13&Itemid=11&lang=en
if you look at the code in
https://github.com/bdureau/RocketFlightLogger

Rather than doing
Serial.println("Done erasing file");
I do
Serial.println(F("Done erasing file"));
If you don't use the F when you do lot's of messages you will run out of memory and your program will not behave properlly
Boris
 
I've been following this thread as I'm in the process of developing a hybrid controller on an Arduino platform. It will operate a servo, take pressure readings from the supply tank and do some rudimentary decision making. Is there anything you have found in writing/implementing the code to watch out for?

Edward

That sounds like an interesting project and easily done with an Arduino.

There is nothing much I can say. I programmed the device straight forward.
You should decide which part of your code segments need to run fast which may result in bigger code or speed is not an issue with the result of smaller code.
Also I'd use bit-shifting functions whenever possible to improve speed.
 
Also do your calculations as much as possible using integers instead of floating points.
 
We had a big break in the weather today so I decided to launch a rocket.

This time I strapped on my camera to the rocket for some onboard video.

My main goals were to see if the fins have been put on straight so that the rocket will not spin. Secondly I wanted to see if the sustainer ignition sequence would work properly.

[YOUTUBE]GSo4wqxnOXw[/YOUTUBE]

A very gratifying launch :)
 
Here is my latest version.

I call it the "ALTDuino II".

It's the same size as the first version I built but is lighter with 7 grams and now has 4 channels (Apogee, Main, Ignition sustainer for 2 stage, Ignition sustainer for 3 stage).

ALTDuino_II.jpg


It might fly this coming weekend.
 
I've had many flights with the altimeter since my last post.

I did lose my BT-50 based version. Simulated flight altitude was 550 meters (1800 feet). It flew out of sight and only at the last moment could the chute be seen before we lost it. It was quite windy it drifted into a large cornfield and was never to be found. I have since built a new rocket.

On Monday (1st October) was the 58th flight.

Here is a video of the flight:

[YOUTUBE]sXTc715r9qM[/YOUTUBE]

To date the success rate of my home made altimeters is at 100% which I'm quite happy about.

Beside my Estes Mongoose these two work horses are constantly in action:

ALTDuino_Fleet_10_2013.jpg

Left: BT-55 size, Right: BT-50 size

I'm preparing to fly the altimeter with a 18mm hybrid rocket motor:

ALTDuino-Rocks!_2_Hybrid.jpg


ALTDuino-Rocks!_2_Hybrid_Mount.jpg
 
I know a person near where I live who made me one. I should have my first flight in a couple of weeks.
 
Very nice, Leo!

One day I may try to tackle the home-brew electronics, but for now I am content to enjoy watching your successful projects!

Greg
 
A lot has happened since my last post.

In May I successfully achieved Level 1 and my altimeter was on-board.

On Monday I hit the 100th successful flight mark using my homemade altimeter.

For the first time the second stage was ignited by means of the altimeter and it worked like a charm.

Btw, the Estes Mongoose seen in the below video had it's 48th flight. It's taking quiet a beating.

Mongoose_2-Stage_ALTDuino.jpg


At sustainer ignition the hot gases leaked through the two holes where the wires were going through the motor casings causing a hole in the booster stage.

It was windy and the rocket weather-cocked quiet badly. However it was a good test for the altimeter.

The rocket only reached 718 feet and landed further away than I would have wished for.

[youtube]PvdqXnt--Z4[/youtube]
 
Great stuff Leo.

Thanks!

Did a second test flight this morning using electronic sustainer ignition. Worked like a charm :)

Mongoose_2-Stage_ALTDuino_1.jpg


If all goes to plan I will have my altimeter fly in a high power 2 stage rocket this coming weekend.
 
Back
Top