Wildman Blackhawk 38mm Build thread

The Rocketry Forum

Help Support The Rocketry Forum:

This site may earn a commission from merchant affiliate links, including eBay, Amazon, and others.

BLKKROW

Well-Known Member
TRF Sponsor
TRF Supporter
Joined
Aug 18, 2011
Messages
1,459
Reaction score
57
Hello The Rocketry Forum,

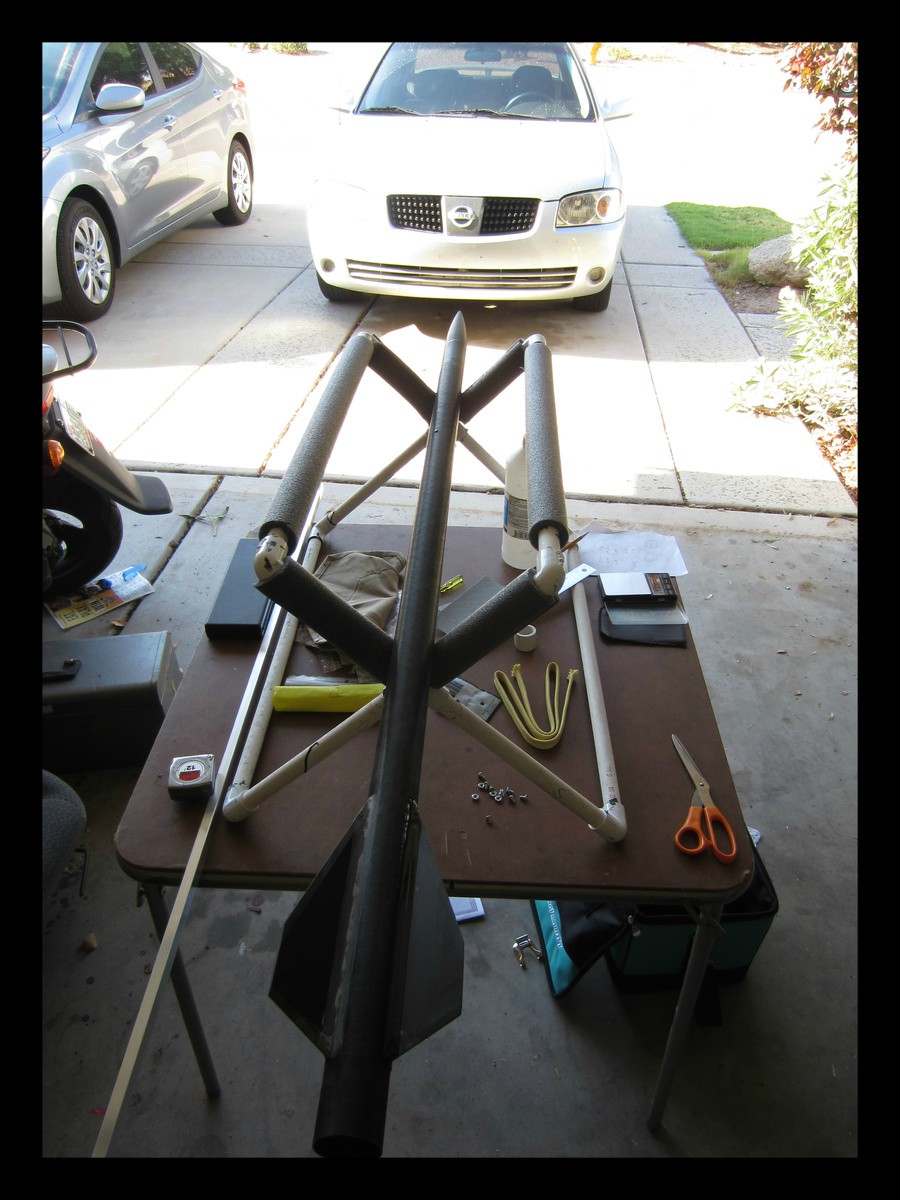
As stated in the title, this is a build thread for the famous Black hawk. I will be using this rocket for my level one certification, which is a huge goal and a big jump from any previous rocket I have built.

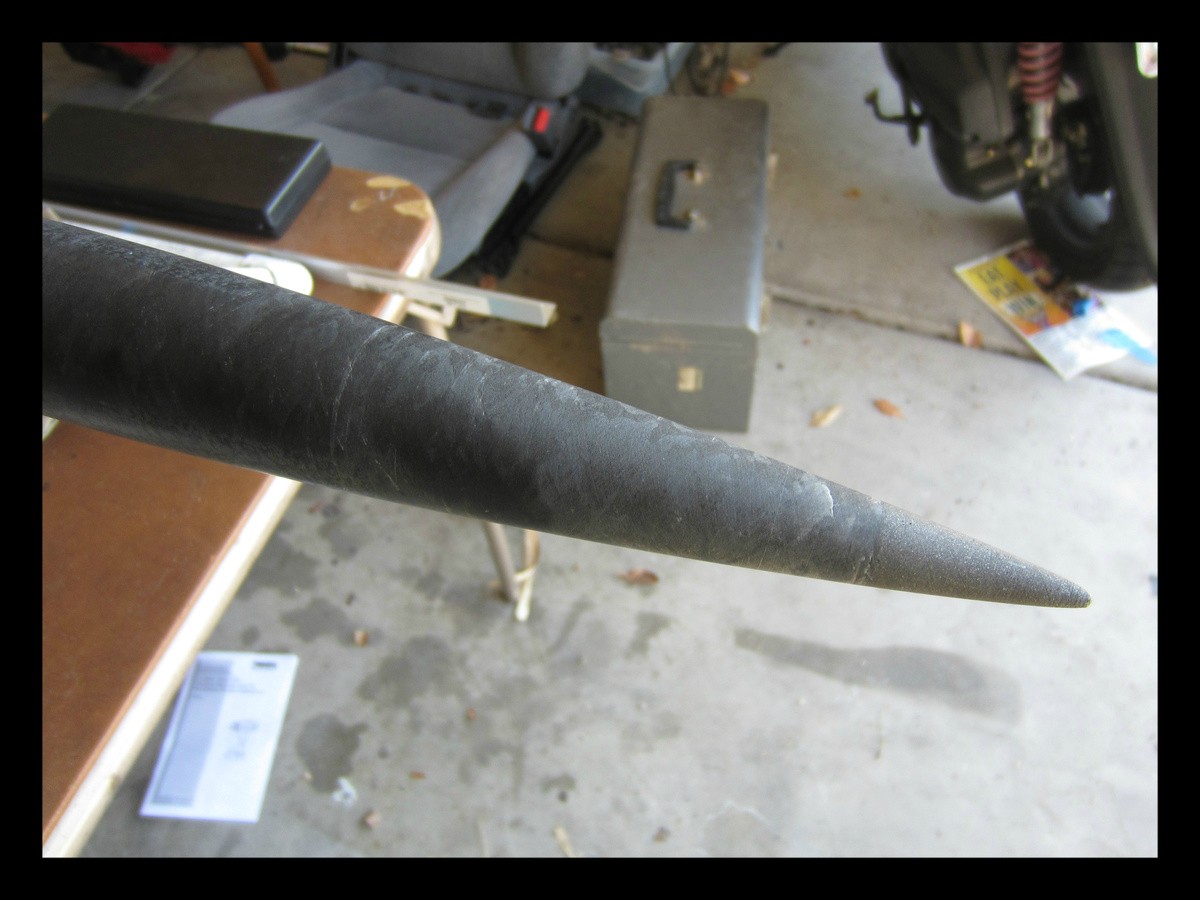
The goal: I was debating for a long time to either use my existing PML Spitfire, or build something new and push my abilities in rocketry. After reading numerous threads I decided its best to jump in the Level one pool, with both feet. This will be my first dual deploy rocket, the first with an altimeter controlled deployment. Also my first minimum diameter rocket, so I figured this would be perfect. This might also be my first rocket that need tracking, I am still debating on that aspect.

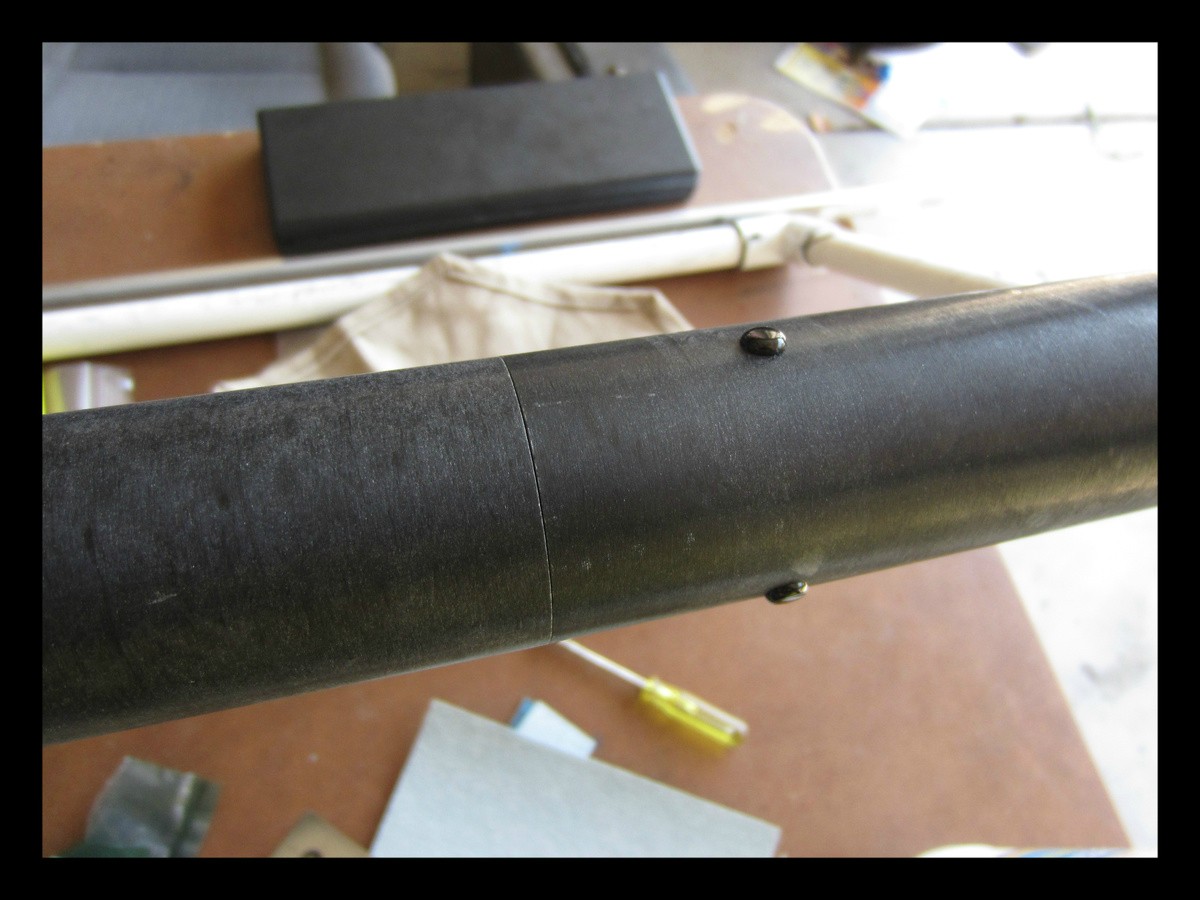
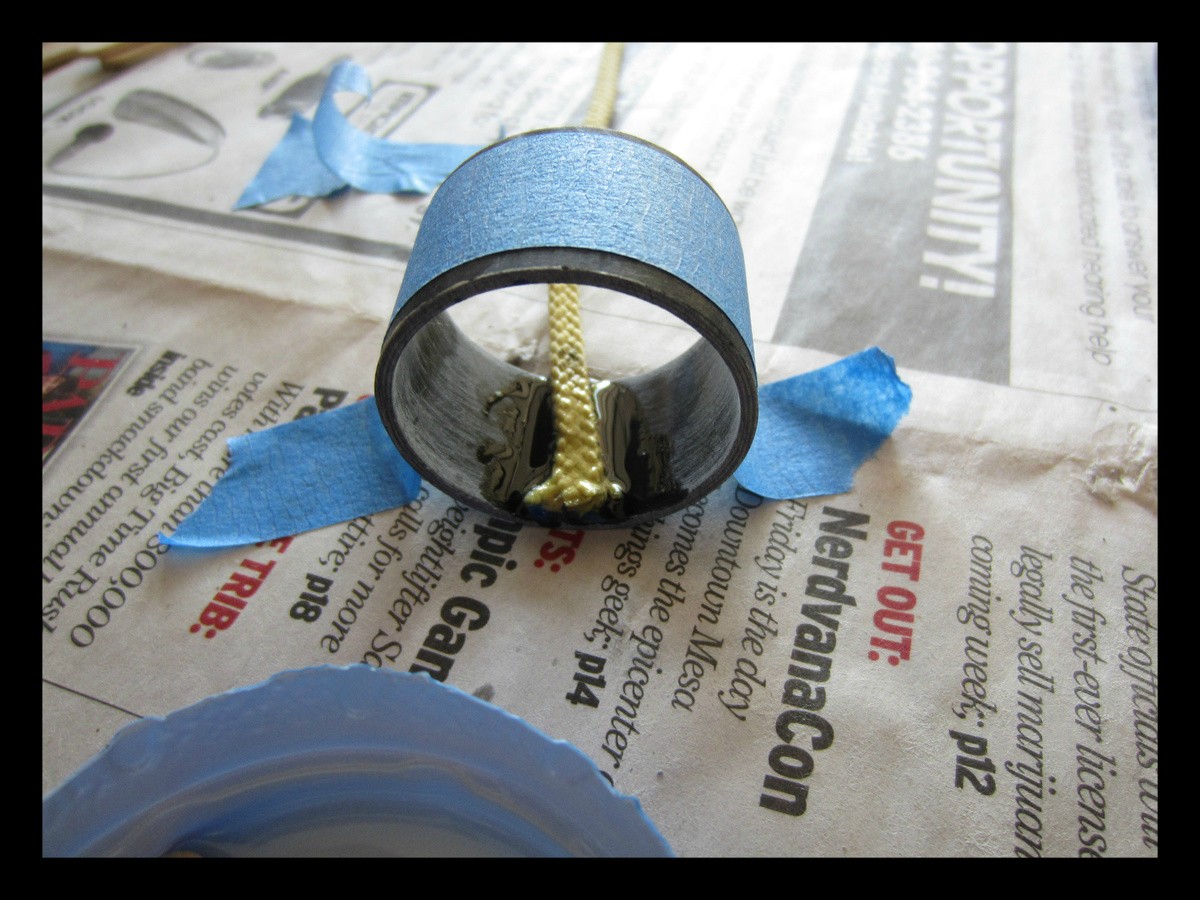
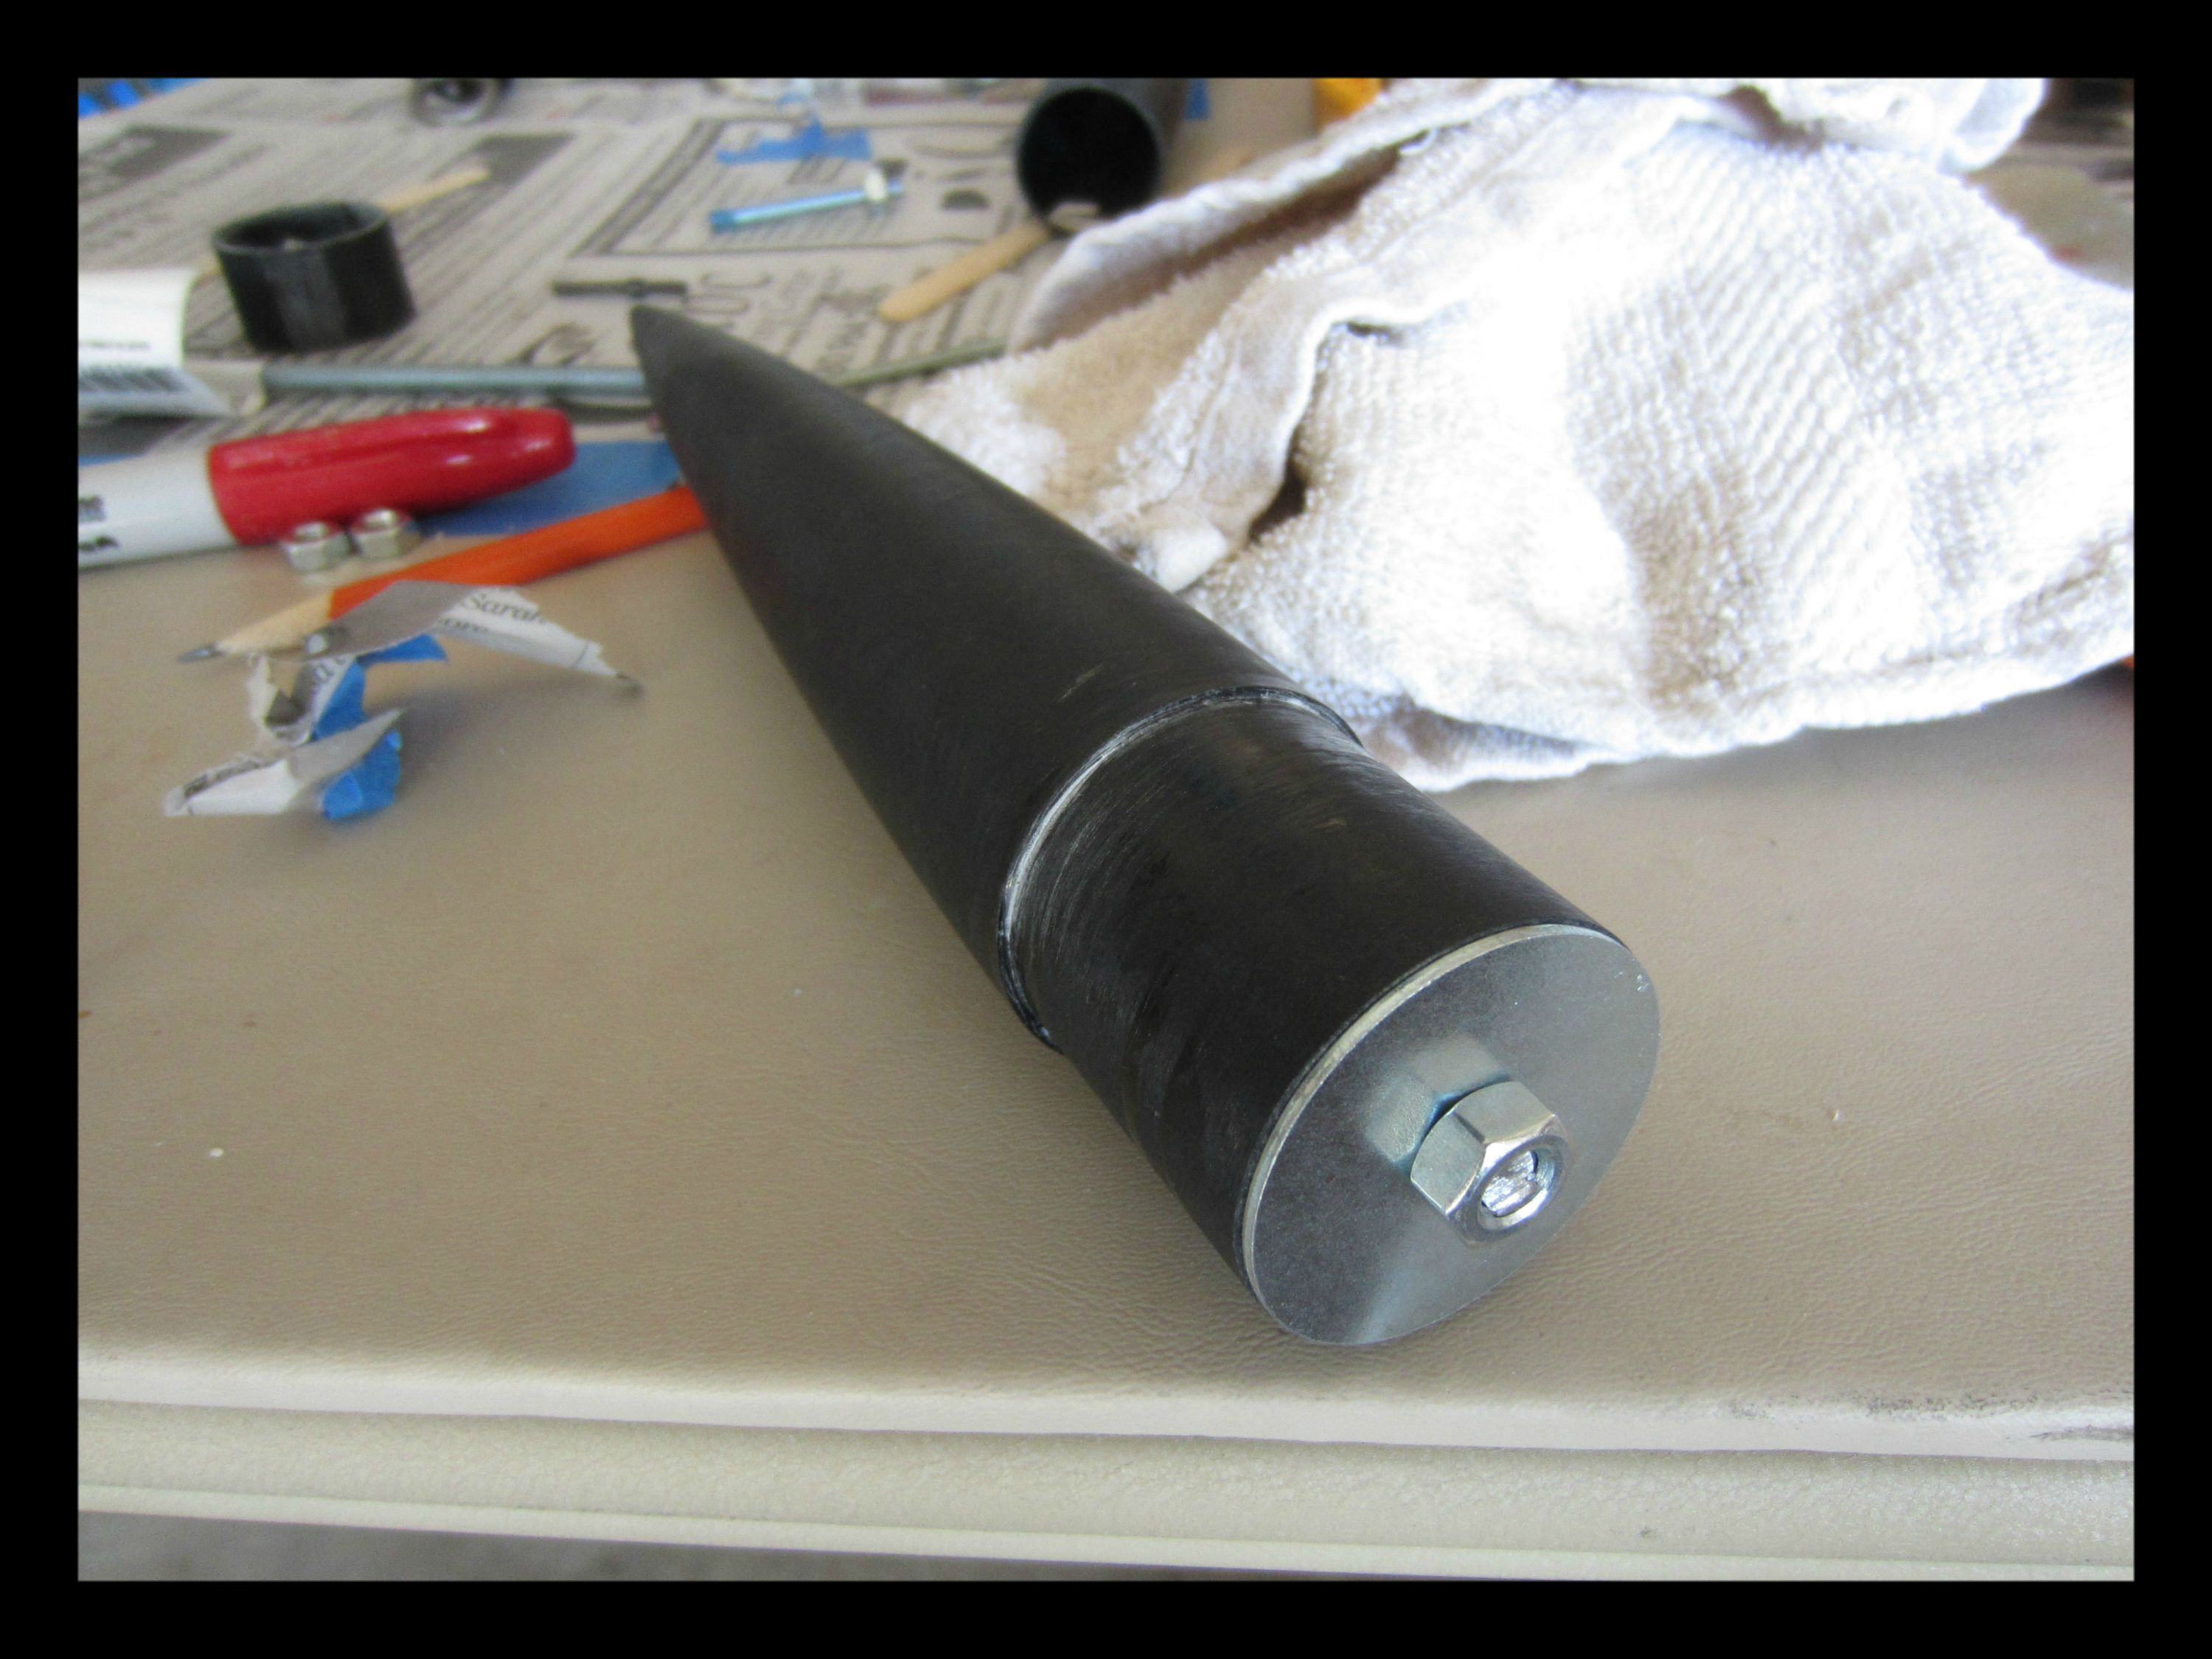
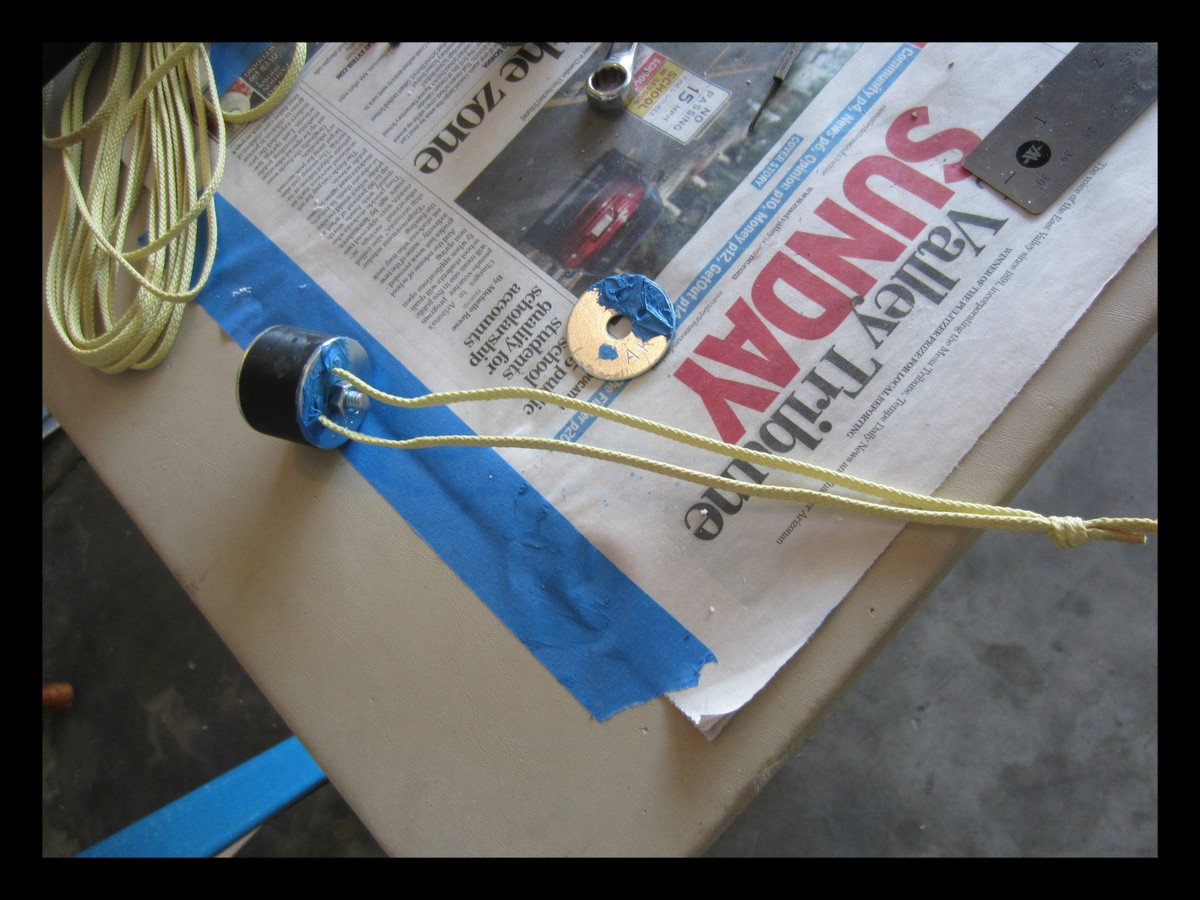
The issue: The launch site only has a 4,000 foot waiver with a call in window to 4,500 feet. So for this build I am not trying to push out every inch of performance. I will be using the smallest impulse motor to qualify for a Level one certification, but to keep it under that flight window. Also I will be using plastic rivets to hold the collar for the shock cord, and the coupler, and don't forget the launch lugs. With all of these it should keep it under that 4,500 feet range.

I forgot to mention, I will be using a CTI motor for this beast. I was looking into the H123, but I am still researching what motor I would like to use.

I also included the RASAERO/Open Rocket files for the rocket, these are exact measurements to my kit via a digital caliper.

View attachment bh38.alx1

View attachment Blackhawk 38, Stock.rkt.ork
 
Last edited:
I do apologize in advance, this thread might go a little slower then one would like. As i work 40 hours a week, plus my school semester is starting in two weeks.

To begin the fincan, as you can see I prepped the tube with space for sanding.

Then I laid down the fillets, and the final picture is how my first set of fillets ended up. It was not the best, but oh well, I can always sand it down lightly.

fincanrez.jpgfillets1rez.jpgfilletsrez.jpg
 
Awesome kit! just need some finishing touches on mine. 'twas my first minimum diameter kit as well. Unfortunately due to dry conditions(like most everywhere) I won't be able to fly it until fall, maybe even spring. Fillets are a little tricky to get smooth and clean. (my last set was definitely better than the first). Enjoy the rest of the build!
 
A little update, yesterday I hoped to finish the last set of fillets. But I had less epoxy then I thought, so I did one fillet. Now there is only one side of a fin that does not have a fillet. I plan on ordering more epoxy from Wildman during my lunch break today.

Also i am receiving a large order of misc. parts for my AV-Bay/Recovery from Rocketry Warehouse today, I highly recommend purchasing from them I ordered last Thursday and it should be waiting at home for me today, they where also very easy to work with even though there where issues with tracking information.

I am also waiting on an order from MC-Master Carr, so the AV-Bay should be completed soon and everything except the fincan.
 
Interesting that you ran out of ProLine. Did you use it for the initial tacking? I just want to ensure that I don't run out as well (of course it might be a good reason to order up some proline....).

It seems that most of the 38mm H motors sim to over 4k. I did a few runs on 29mm H motors and you might be in better shape with that. The catch is adapting down to 29. Using an AeroPack adapter might work but you may have to get tricky with the tape. If I have time later I'll see if this is even an option since I have both the AP adapter and some 29mm CTI cases.
 
I ran into the same problem with the epoxy, measured carefully with a good scale and ended up a little skinny on the last two. I did manage to get the last two done but there was definitely none left over. Using the recommended 15 grams for the fist two sets left me with about 11 for the last two. Which was just barely enough.
 
Interesting that you ran out of ProLine. Did you use it for the initial tacking? I just want to ensure that I don't run out as well (of course it might be a good reason to order up some proline....).

It seems that most of the 38mm H motors sim to over 4k. I did a few runs on 29mm H motors and you might be in better shape with that. The catch is adapting down to 29. Using an AeroPack adapter might work but you may have to get tricky with the tape. If I have time later I'll see if this is even an option since I have both the AP adapter and some 29mm CTI cases.

I ran into the same problem with the epoxy, measured carefully with a good scale and ended up a little skinny on the last two. I did manage to get the last two done but there was definitely none left over. Using the recommended 15 grams for the fist two sets left me with about 11 for the last two. Which was just barely enough.


I did not use it for the fin tacking just the fillets, I also measured mine out with a precision scale. When I did the first set I thought I was using a lot of epoxy so I downed from 15 grams to 12, the same with the second set I put it down to 12grams. Then the last one I only had 7 grams, so I did one side and left it.
 
I did not use it for the fin tacking just the fillets, I also measured mine out with a precision scale. When I did the first set I thought I was using a lot of epoxy so I downed from 15 grams to 12, the same with the second set I put it down to 12grams. Then the last one I only had 7 grams, so I did one side and left it.

Did OK with the Proline 4500 as shipped on my Blackhawk 29, but used JB Weld for the initial tacking. However, I followed CJ's advice and mixed the whole lot and did the fillets all at once, thus allowing me to add-subtract from location to location until everything was even. Had plenty (although doing the whole bunch of fillets was a harrowing experience...the 4500 was runny when first mixed and I feared that I'd only get one set of fillets done due to the consistency. But shortly, the epoxy slowly began to set up allowing me to do them all before it actually cured. No time to dawdle, but it CAN be done...)
 
I also tacked with JB Weld and I used a 1/2" CPVC CTS pipe dipped in alcohol to smooth the fillets. Specified at 0.625 it is slightly less than half the size of the recommended 1" PVC pipe and I used about half of the provided epoxy. I am not worried about my fillets being insufficient but if folks are worried about running out of epoxy 3/4" PVC might be a good size for forming fillets to insure you have enough.
 
Is the nosecone that came with your kit one of the new filament wound cones?
 
Is the nosecone that came with your kit one of the new filament wound cones?

It looks like the filament-wound cones that I have on my other WM rockets but it is black "profusion" with a high-temp epoxy tip and a coupler that needs to be epoxied or bolted on for a shoulder. I can snap a picture of it if you want.
 
It looks like the filament-wound cones that I have on my other WM rockets but it is black "profusion" with a high-temp epoxy tip and a coupler that needs to be epoxied or bolted on for a shoulder. I can snap a picture of it if you want.

Mine did have the shoulder that needed to be attached to the nosecone, with a metallic/composite tip.
 
Interesting idea...paint the BlackHawk?

No thanks! Haha, well I got my second order of stuff from Mc-Master Carr.

So far:

Launch Buttons
Shear Pins
Forged Eyebolts
Threaded Rods
G10 Plate for Av Sled
Plastic Rivets.
Nomex

Time to work on this baby some more, I have the next 3 days off! Too bad the epoxy I will be using takes 24 hours to cure. So some of the misc. stuff will take a while. But I am ready to start building the AV- Bay tomorrow. I ordered the epoxy for the fillets yesterday, now its just time to see how long this order takes to get to me.

Stuff left to order, adapter for the Li-Poly batter, and magnetic switch from featherweight.
 
So today I spent about 3 hours working on this rocket.

I first started by drilling the holes for the plastic rivets to hold my AV-Bay, I was debating between just epoxying it into place and using the rivets. I figured currently I am not going for altitude, I am just trying to learn dual deploy and if need be I can swap out the AV-Bay now instead of making it permanent.

CP3Eg.jpg


Naturally that means the AV Bay needed to be completed also.

5wzcK.jpg


Trimming the threaded rod.

kUyy9.jpg


After getting all of that installed, I put all the pieces together to see what she looks like in all her beauty

RxF3o.jpg


The last thing was to glue in the Shock Cord into the coupler.

OHPMW.jpg


Lastly I am including a picture of the nosecone, hopefully someone can tell me if it is a filament wound nosecone or not.

DUSaP.jpg


Things to do tomorrow:

Glue other side of the shock cord to coupler, cut AV-Bay sled.
 
Coming along nicely, what sizes of rivets you use and from where? And yes that is a filament wound nosecone look on the inside and see how smooth it is like the outside.
 
Coming along nicely, what sizes of rivets you use and from where? And yes that is a filament wound nosecone look on the inside and see how smooth it is like the outside.

I am using the small rivets from Rocketry Warehouse, when I first received them I thought the length was to small. But as it turns out it is spot on, they fit really tight.

I only have a few things to purchase, like battery harness and magnetic switch from Featherweight. Other then that it is really all ready to go. Oh and the last fillet needs to be finished, and the others sanded and perfected.
 
Nice progress.

BTW, I have that same Makita drill and the matching driver. Absolutely fantastic. I haven't touched my two Dewalt cordless drills or my corded drill since I got the Makita's.
 
Nice progress.

BTW, I have that same Makita drill and the matching driver. Absolutely fantastic. I haven't touched my two Dewalt cordless drills or my corded drill since I got the Makita's.

I also have the driver, I used to use a corded drill for a lot of my hobby's. I had to drill into 1/2" and thicker acrylic, which was tough on my old 12v Ni-Cad cordless. Then I used a friend Makita and I loved it.

It has been in my hand ever since.
 
Build looks great. My only concern would be the shock cord mount that you show. That can and WILL rip out if any significant force is applied. I'd really hate to see you lose your booster.

I'd recommend using your Dremel to cut a slot lengthwise out of the OD of the 1" piece of coupler wide and deep enough for the Kevlar to fit in. Tie the Kevlar so that the loop goes down the OD of the coupler, back up the ID of the coupler, and then tied off. Glue this assembly in the rocket and that should be MUCH more solid than the current set up.

Hope this helps!
 
...as a follow up you "can" use a 29 > 38 MM adapter in this but securing the adapter might be a bit of a trick. You'd have to wrap around the butt end of the rocket securely and I'm not sure that you'd want to risk the case/adapter potentially blowing out the back. I don't think that you can get a good friction fit with the adapter itself.
 
Funny, I have the same drill and driver set as well. Looks like the build is coming along nicely. I haven't actually come to terms with how I am going to mount the recovery harnesses on mine yet. I am actually leaning toward a threaded forward closure on the motor casing and an eye bolt. I would love to be able to fly 29mm in it, I'm wondering if one were to use the Aeropack min dia motor mount and a tapped closure on the 29mm motor, in conjunction with a 29-38mm adapter, then you wouldn't have the problem of trying to friction fit an adapter, but that would be adding a good bit of weight. Of course the real trick on these kits is, where do you put a tracker?
 
Very nice. I might try to go as light as possible with mine and use aluminum hard ware.
 
Build looks great. My only concern would be the shock cord mount that you show. That can and WILL rip out if any significant force is applied. I'd really hate to see you lose your booster.

I'd recommend using your Dremel to cut a slot lengthwise out of the OD of the 1" piece of coupler wide and deep enough for the Kevlar to fit in. Tie the Kevlar so that the loop goes down the OD of the coupler, back up the ID of the coupler, and then tied off. Glue this assembly in the rocket and that should be MUCH more solid than the current set up.

Hope this helps!

I was planning on doing something very unique to attach the Kevlar cord to the nosecone, now you gave me reason to do the same method to the coupler.

Hopefully if home depot has everything I need you should see some pictures of it today.
 
Well today was a test of my patience, you know the times when tools and man cannot coexist peacefully? That happened today, a couple of sanding wheels on my dremel flew apart in a couple of piece. Plus much more.

Lets start off with the updated coupler. I was planning on using this method for the nosecone, so I figured why not just transfer that same method to the coupler. It is really simple as you can tell its two washers some threaded rod and some nuts. I was originally going to just tie the kevlar off the threaded rod but I got concerned about it shearing upon full tension. So I decided to drill two holes in the washer to loop the Kevlar through. I then filled the holes with a silicon used for making gaskets, that was when the Kevlar becomes tight it would provide some protection from the edge of the washer.

ojR1o.jpg


Then the same method used for the nosecone, except on the top washer I had to cut off the side to allow for it to slip up into the coupler then when flattened it would grip onto the top of the coupler. The Kevlar will be attached the same way for this.

Ee2zR.jpg


My reasoning behind this that I can remove it whenever I would like plus it leaves room on top for a tracker. I am still debating about the tracker. this does add more weight to the bird but again, I am not worried about altitude. I can give up a couple of grams, for less altitude.

I also cut the AV-Bay sled, no need for pictures because my cuts where ugly. Plus there is nothing installed on it yet, I am waiting to order the magnetic switch in the next few days as my paycheck comes into my bank account.

Tomorrow I plan on finishing the coupler/nosecone then getting the coupler placed into the body. Plus a few holes and some glue for the rail buttons.

Then after that, I just need to get the AV-Bay ready, and make the bird shine with some gloss.
 
For those of you watching, I did some more work today. I got the coupler all worked out, as you can see on the washer's there is a blue layer of silicon used to help prevent the Kevlar from shearing on the washer. That got put into place inside the body also and retained with three rivets.

jkHrq.jpg


Then I also received the epoxy in from Wildman. Thanks Wildman for the speedy turn around time!

PBPw6.jpg


Today I was also looking a table saw, my family and I have been in dire need of one. So I was watching on Craigslist and found one, its a Makita also is slightly used the gentlemen I bought it from after purchasing it bought another one for his work place. Then realized he did not need two, so I got the benefit of his over purchasing. $80 well spent, more pics of that to come.

Thanks for watching.
 
Back
Top