Centuri Design Contest X-Wing Fighter

The Rocketry Forum

Help Support The Rocketry Forum:

This site may earn a commission from merchant affiliate links, including eBay, Amazon, and others.

Fishhead

Huge Member
Joined
Jan 20, 2009
Messages
4,016
Reaction score
817
This plan was in the issue of Rocket Times that came with my first Centuri catalog in 1978. https://www.ninfinger.org/rockets/catalogs/centuriRT77FallWinter/77FallWintercenRT8.html I always wanted to try building it, but in 1978 I had no outlet for Centuri parts and no way to mail order them. The subject was brought up on YORF a couple of weeks back, which got me reinterested. A Semroc order later and I'm rollin'.:rolleyes::cool:

CenturiX-Wingparts.jpg


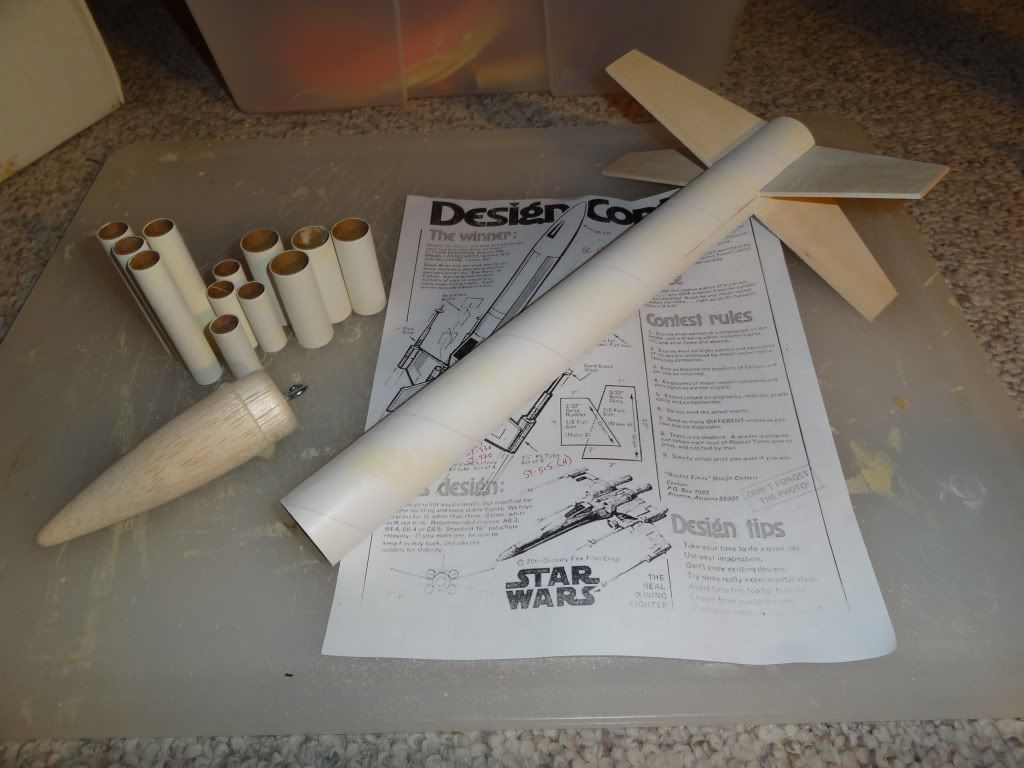
There is no real "plan" to this, more of a construction "suggestion". YMMV. I sealed and sanded all the tubes before putting any of them together because otherwise it would make me crazy. Wings are done in 3/32" basswood.

CenturiX-Wingwithmotortubes.jpg


At the moment, my feeling is that the main body tube is too long, but I plan to finish construction before I make a decision about removing any of the tube.

CenturiX-Wingwithmotortubesattached.jpg


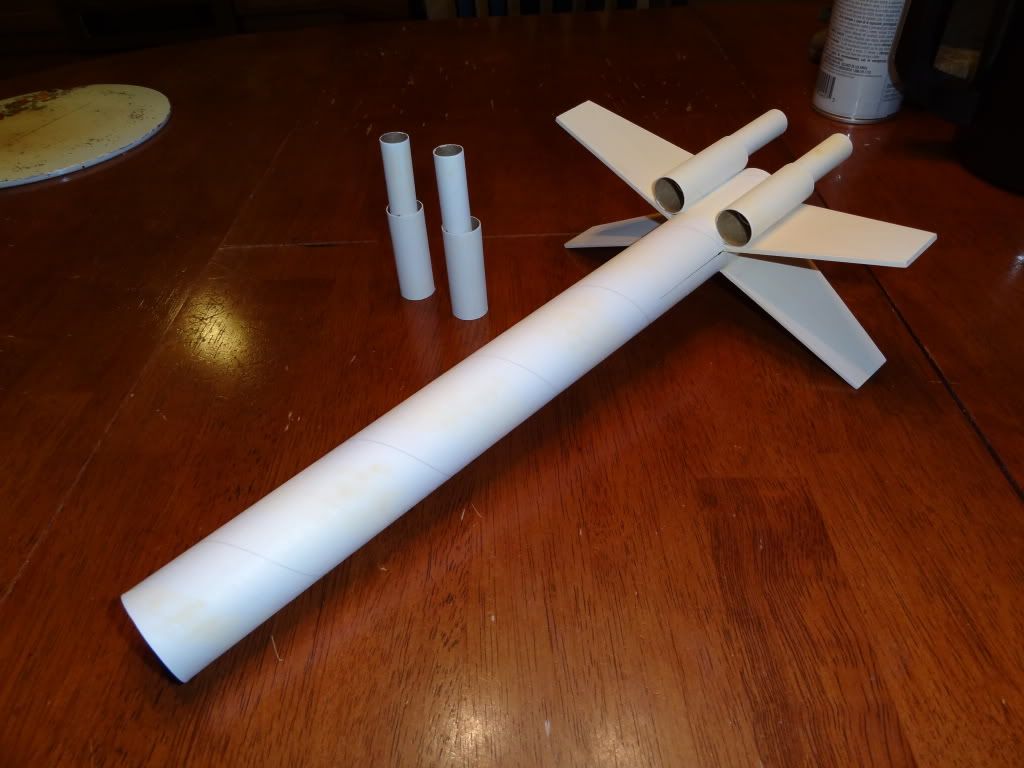
I'm knocking off construction for the night, but I'm hoping tomorrow will be a good day for sitting around getting this bird to the primer stage or further.
 
FH:

Jerry built one and did some awesome artwork on it. Check out the thread in the Archived Section here... BTW I am following both posts of yours on this.

BRAVO52: If you see this thread, can you post other stats for your DOM X-Wing: fin measurements / templates and BT lenghts...
 
Last edited:
Well, that low level B flight is just what I wanted to hear. I'm building this for my nephew and B6-4 Field comes by the name honestly.:wink:
 
Good shot, Wedge! It looks like a fun build. Might try that one myself one day.
 
I think it was me who posted the DOM X-Wing. I been looking at it for a year now and thought I would try it using Estes parts.

Both builders live in Ft. Thomas, KY
I guess you are Bill!
And Fish is in both names.
I guess I'm slow on the uptake!
 
Last edited:
I been looking at it for a year now and thought I would try it using Estes parts.

A wise man once said "Semroc is almost always the answer.":cool:

Both builders live in Ft. Thomas, KY
I guess you are Bill!
And Fish is in both names.
I guess I'm slow on the uptake!

Even better, we both live in the same house! (But he doesn't do windows.:mad:)
:wink:
 
I wonder if you would want to cut/carve/sand the nose cone to give it the semi-squared-off front end of the actual X-wing.

The end result in the archive thread is pretty awesome looking.
 
Last edited:
I wonder if you would want to cut/carve/sand the nose cone to give it the semi-squared-off front end of the actual X-wing.

The end result in the archive thread is pretty awesome looking.

Why stop there?:confused2:
Build the body/fuse too!:neener:
 
I've been thinking of doing an X-wing myself. Thanks for sharing this project. Can't wait to see the end result!

~
Giggles
 
I built this rocket out of an Estes Patriot kit. Michael's was selling them cheap at one time and I bought a bunch and scratch built everything from an X-wing to a SR-71...all upscale to fit the BT60. I think I scanned the downloaded plans at 125% to fit the BT... Here are a few pics...

https://www.rocketryforumarchive.com/showthread.php?t=42554&highlight=centuri+x-wing

It flew very well.

I also built this out of an Estes Patriot....

wolverinegrass1.JPG
 
This has inspired me to dig through my tote of parts and that has culminated in two BT-55 based Builds, one, this X-wing, and a 1.25 upscale Colonial Viper. I think I'm starting to like BT-55 size rockets. These two along with my BT-60 based Delta IV Heavy with mini shuttle, I'm gonna be up late nights this week.
 
IMG_0488.jpgIMG_0489.jpgIMG_0490.jpgIMG_0491.jpg

I came across this blast from the past and thought I would try and throw one together. All the tubes were rolled from index cards, engine hook is from the metal strip of a wiper blade. Main body tube is from a wrapping paper roll. I found a paper model of an Xwing on the web that I tried to scale to build a cardstock nose cone for this one. First try came out way too big, second one was way too small, hopefully the third one will be just right.

PEW! PEW! PEW! PEW

https://jleslie48.com/gallery_models_scifi.html
 
Last edited:
IMG_0493.jpg
This is about the size I was shooting for, just a little overhang around the body tube. Now my journey is complete, except for paint and decals.

Of course I realize now, with the overhang of the nose, I need to remount the launch lug on a stand-off so the rod will clear the nose cone.
 
Last edited:
Nice work! I like the details, especially on the cannons. Looking forward to the finished X-wing! :)

ps - I've lost R2!!!
 
First coat of sanding sealer and primer are down, starting to look like an X-wing. With paper rolls that are not made for rocketry, you get fuzzies when you first paint them, so I like to brush some sanding sealer all over the paper tube when I coat the fins, it helps a little.

I was thinking, maybe it is time to make an updated version of this Design Contest Model for the Force Awakens X-Wing resistance fighter, would just need a few small tweaks to keep the construction simple like the original:

https://www.revell.com/model-kits/entertainment/85-1823.html

85-1823-lg.jpg
 
The new resistance x wing uses a 24mm tube cut in half and 13 mm tube also cut in half for half of the length and glued inside. The wings get split on the outboard half. The laser cannons will use a smaller tube diameter, rolled around a 3/8" dowel, it seems that the newer weapons tech is more efficient. The rest is basically the same as the original design.

IMG_0494.jpg
 
The story so far,

IMG_0495.jpg

I will probably use the same canopy and nose cone on this one.
 
Last edited:
IMG_0496.jpg

They look very similar, just a few slight changes to the wings, and a slightly smaller nose cone for this one. They will look more the part after the appropriate color decals for the red and blue versions. They will make a nice pair.
 
This is awesome. It's like the stretch limo of rebel fighters. Excellent solution for and execution of the nose cone as well.
 
The ST-1313 is 13.5" long, and it looks like in the original plan picture the afterburner tubes should be flush with the end of the main body tube, which would push the wing fins trailing edge forwards to 1.5" from the aft end of the body tube. I mounted the fins at the end of the tube so the after burner tubes overhang by 1.5", which makes engine access a little challenging. I was thinking about cutting off some of the main body tube so that it does not look so stretched, but hey this is Fun Size, so as long as it flies straight.

I also toyed with the idea of putting in flame fins (i.e. like in Dr. Zooch kits) in the after burner tubes instead of the additional stabilizing fins, but since I already mounted those aft of the engine tube, I thought they might get burned by the engine plume.
 
IMG_0497.jpg

I decided to trim the body tube down to a more realistic length. I thought I had let the primer dry thoroughly and shot it with a first coat of white, but got some crinkling in spots. Not sure if the rocket was too warm in the house and the paint was too cold in the garage when painting, if that contributes to the crinkle. Will have some more sanding to do and get a crinkle free top coat before adding some decals. I like the shape better with the shorter body tubes.
 
Last edited:
think one could fashion them from a launch lug and toothpick.
Rex
 
yup, toothpick and launch lug will work. used a 1/8" lug 3/16" long sliced in half, then drilled a 1/16" hole for the toothpick. for me the hard bits were, holding onto the thing for drilling/ gluing. with a bit of practice I think I could probably turn out some that look better(this was 1st attempt).
Rex
*edit*
for a round dish thingy I would suggest a sequin.

lasercannon.jpg
 
Last edited:
The new resistance x wing fighter with decals. I tried to keep this one simple in line with the original design contest model. I only had one sheet of decal paper left, so I tried to make the decals simple enough to fit both x wings on the one sheet.

For the tips of the laser cannons I first wrapped a thin cardstock strip around the end to make a shoulder near the end. Then, for the dish part, I rolled a cardstock tube around a 3/8" dowel, drilled some holes in it to fit the 1/8" laser canon dowel, spaced far enough apart so when I cut it into slices wide enough the holes were in the center of each strip. Then I cut those strips in half lengthwise. The cardstock body tubes were rolled a few layers thick to give them some extra strength.

IMG_0505.jpg
 
Thanks! Glad I got these out of my system. I will try to get them balanced for B or C engines, if I can swing test them properly. Probably too heavy and draggy for decent flights on A's.

You have to count down this one like this: "Launch of the Centuri Design Contest X-wing in 5, 4, 3, PEW!, 1, lift-off!"
 
Back
Top