Nike Hercules MMX

The Rocketry Forum

Help Support The Rocketry Forum:

This site may earn a commission from merchant affiliate links, including eBay, Amazon, and others.

peter_stanley

Well-Known Member
Joined
Apr 11, 2009
Messages
222
Reaction score
1
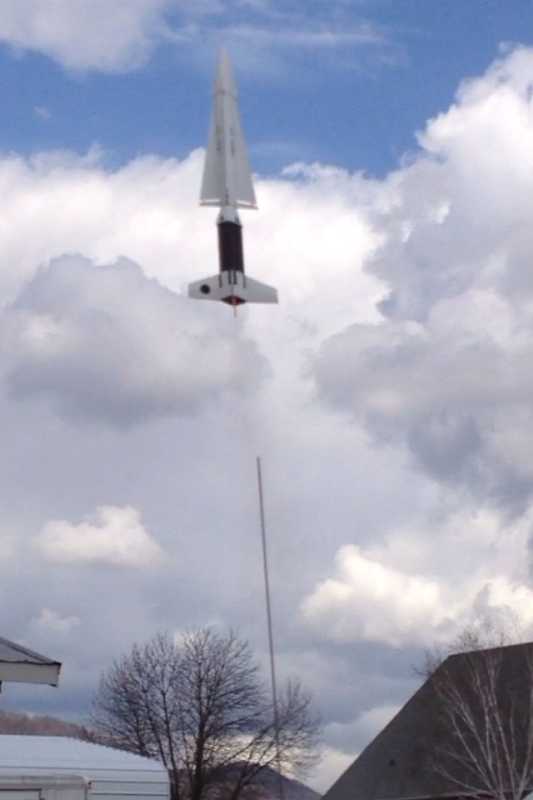
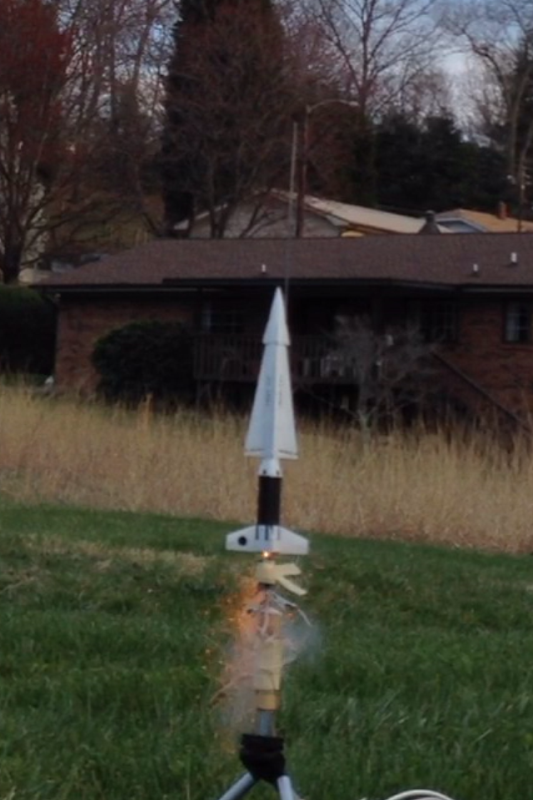
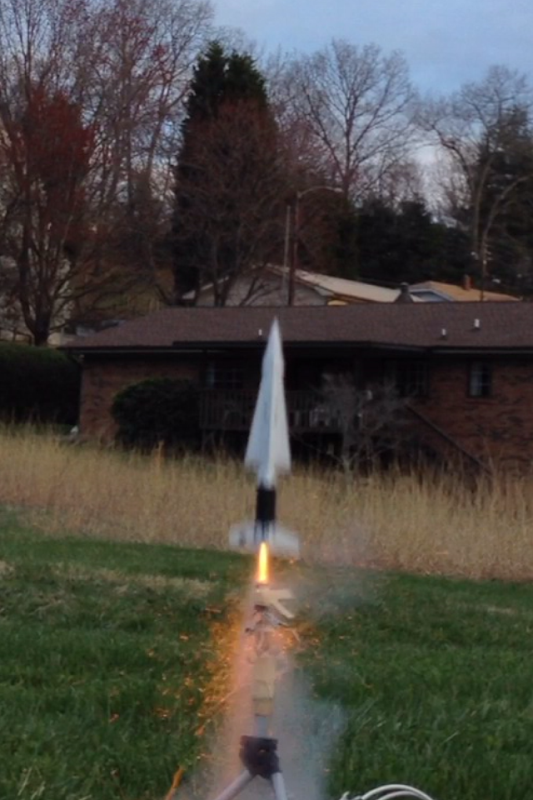
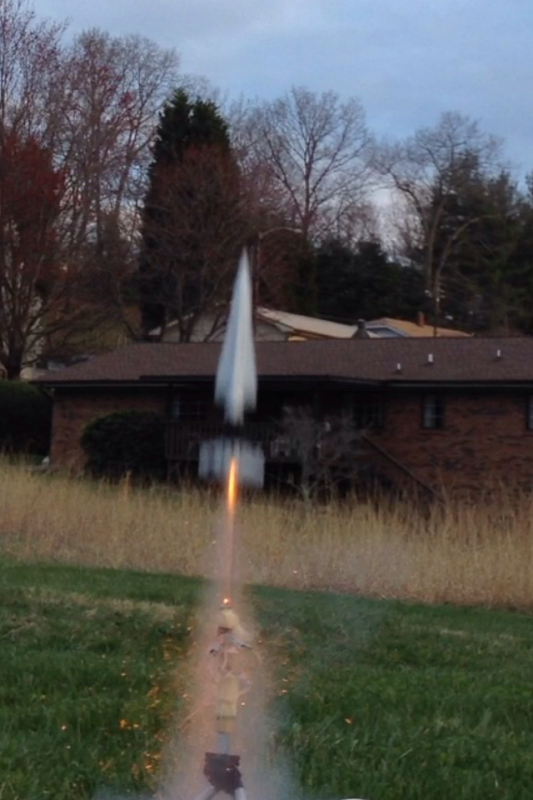
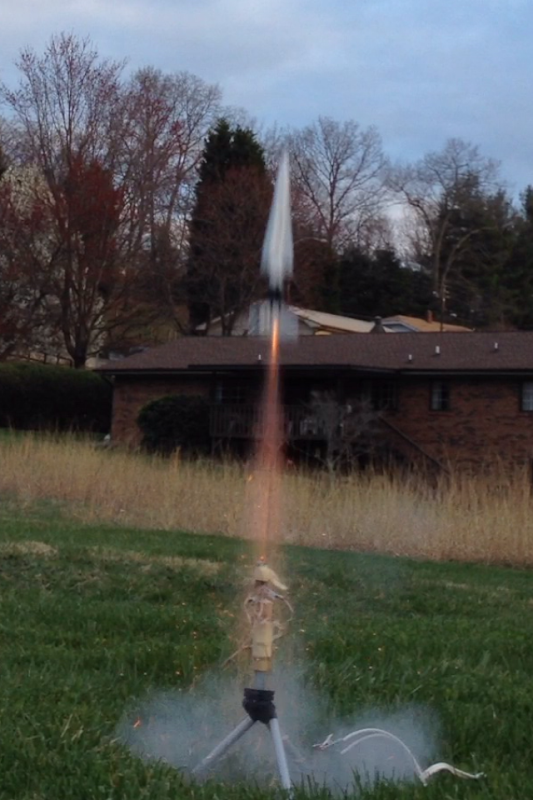
I designed a micro scale Nike Hercules, and started working on the sustainer this week. I ordered most of the parts from Fliskits.

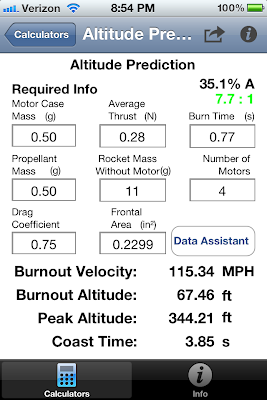
I plan to fly the full stack as a single stage, four motor cluster. I did install a motor mount in the sustainer in case I figure a good way to stage it. I might fly the sustainer by itself if it's not too heavy.

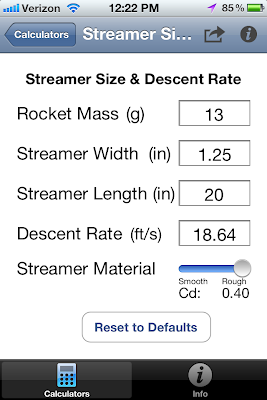
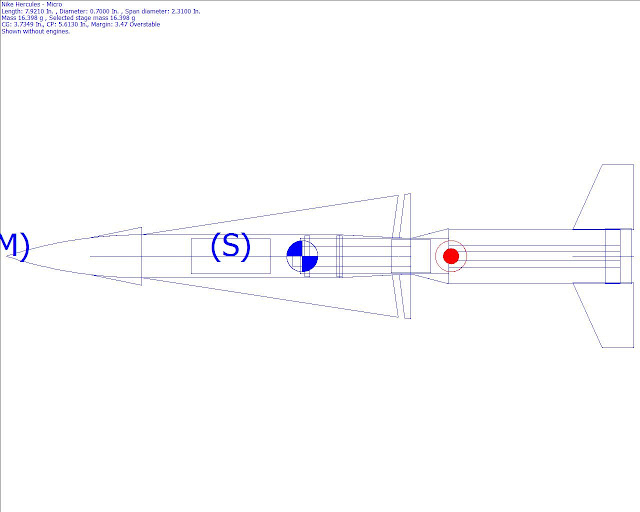
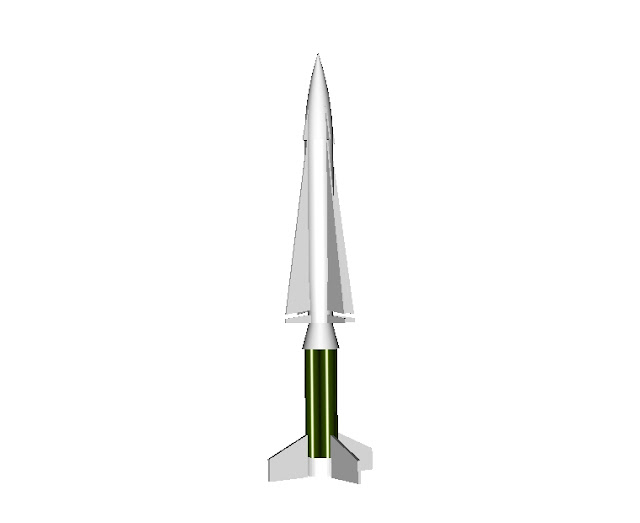
Here are some pics of the build so far. I'm also attaching the Rocksim file, but the most current one can always be found on my site.
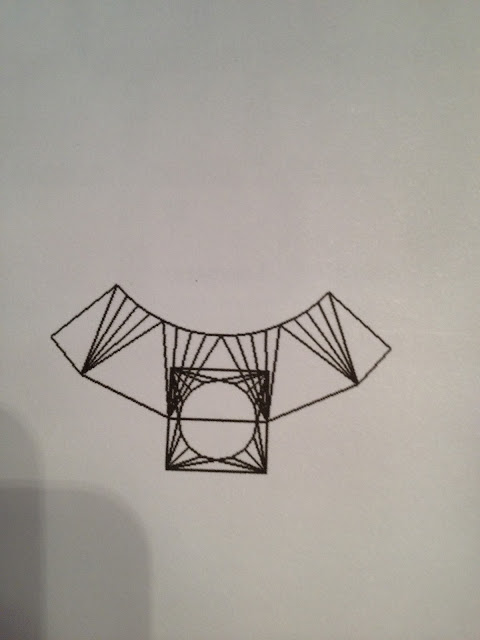
Rocksim images:
nh_mmx2d_2.jpg


nh_mmx3d_2.jpg


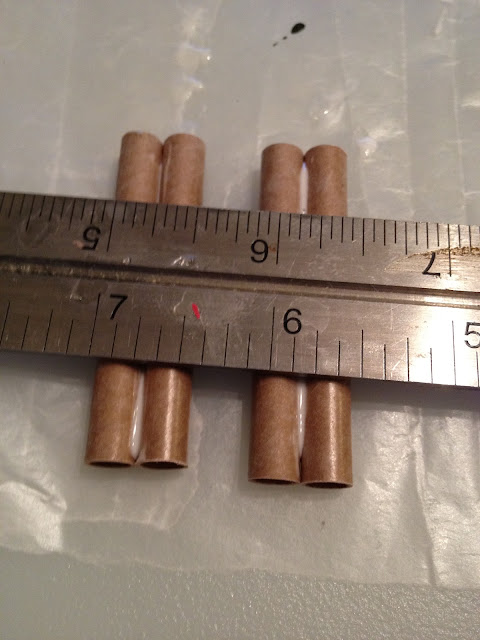
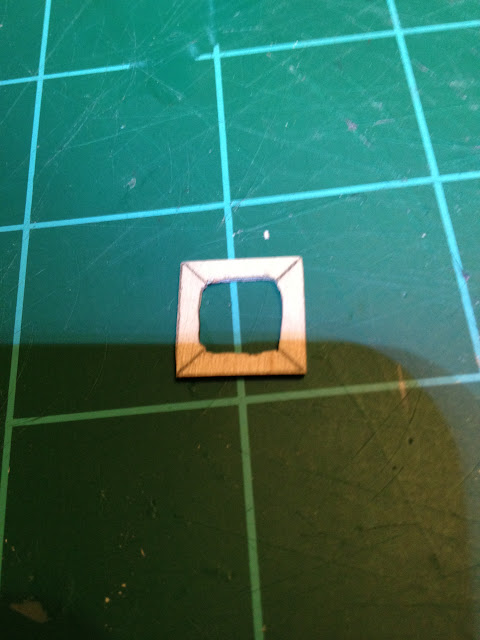
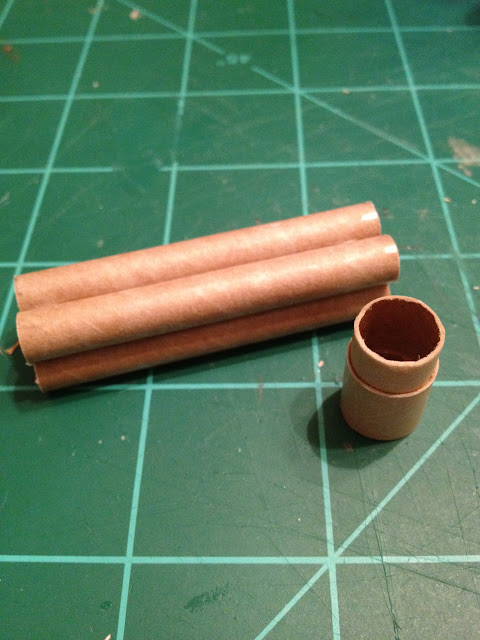
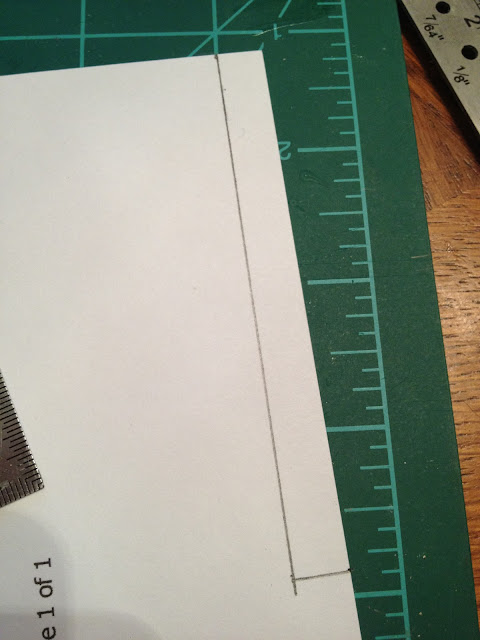
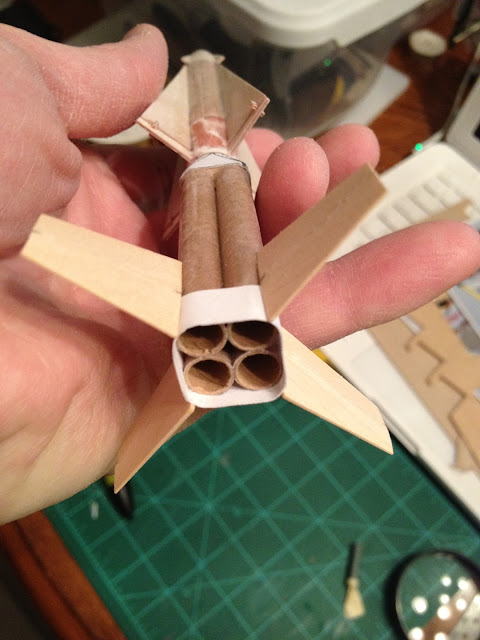
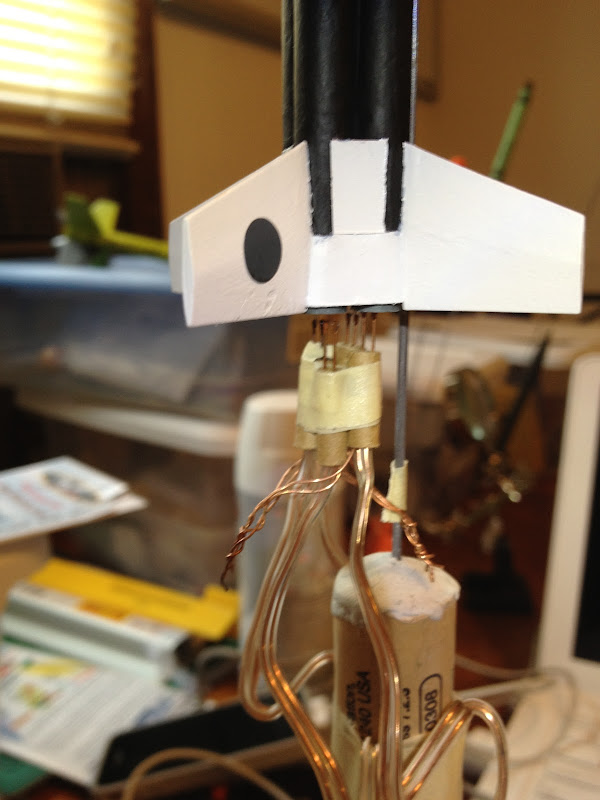
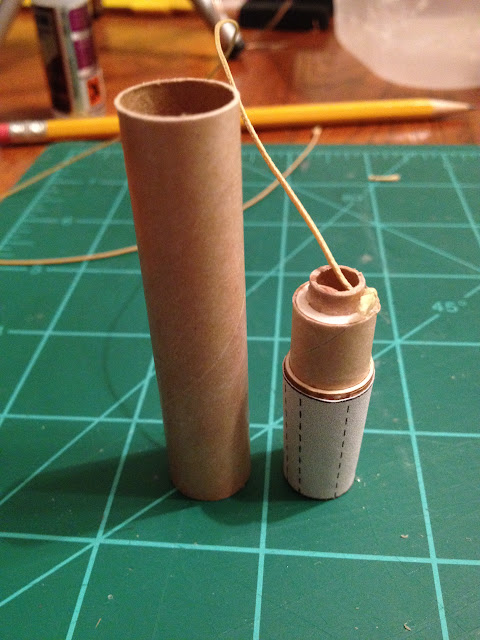
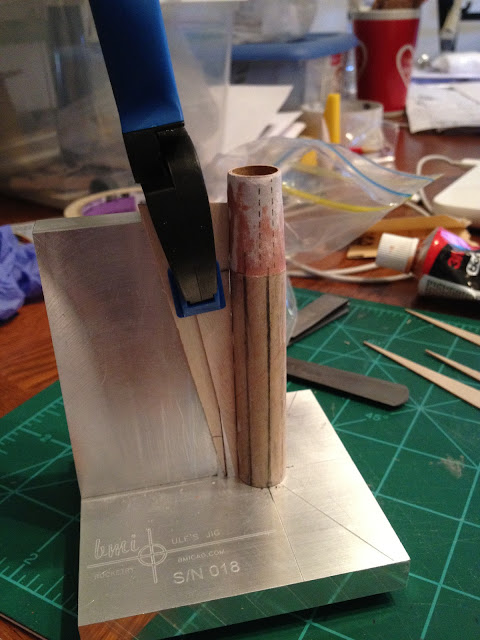
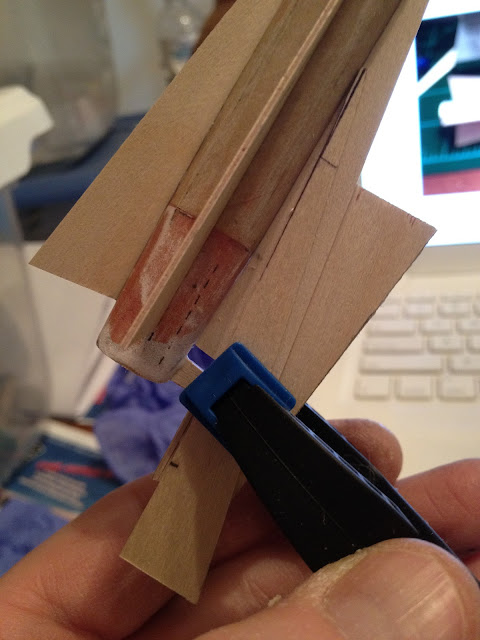
The motor mount/tail cone assembly parts:
IMG_0800.JPG


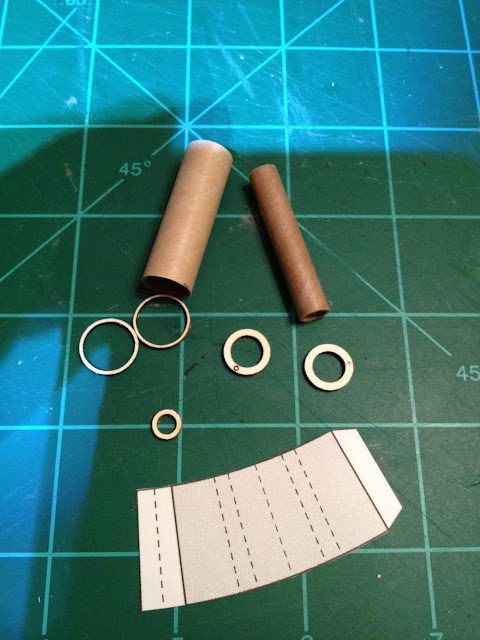
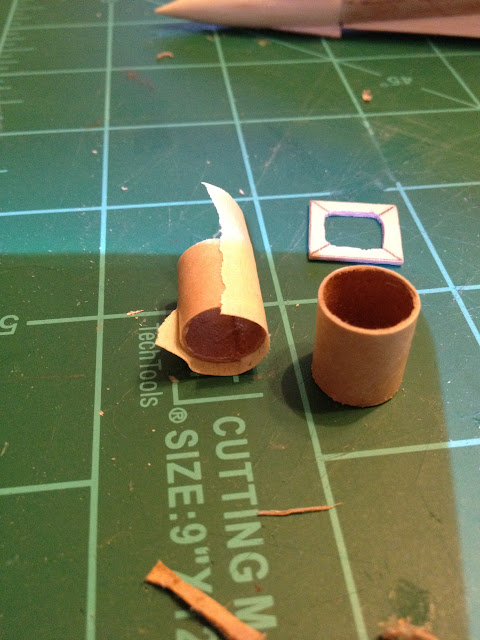
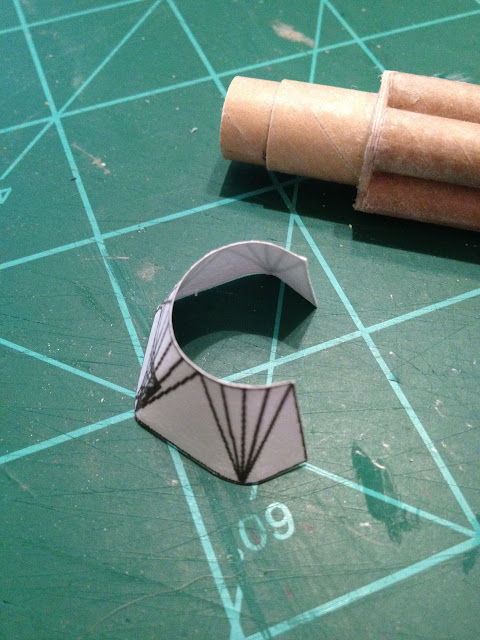
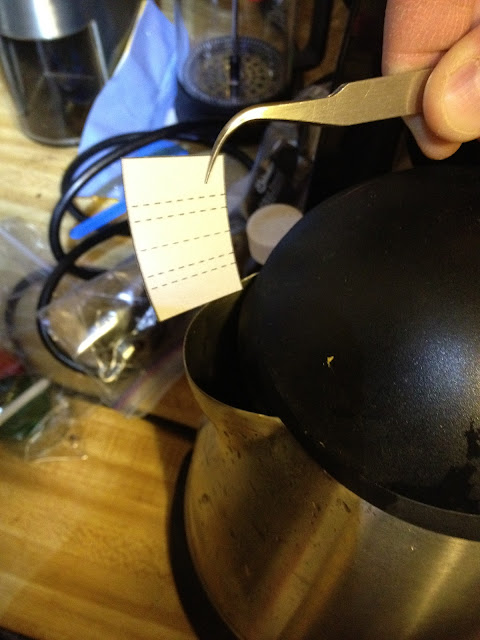
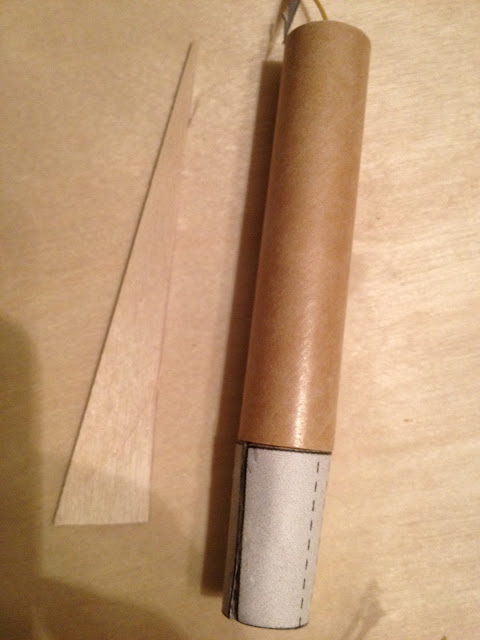
I steamed the tail cone wrapper to help form it.
IMG_0801.JPG


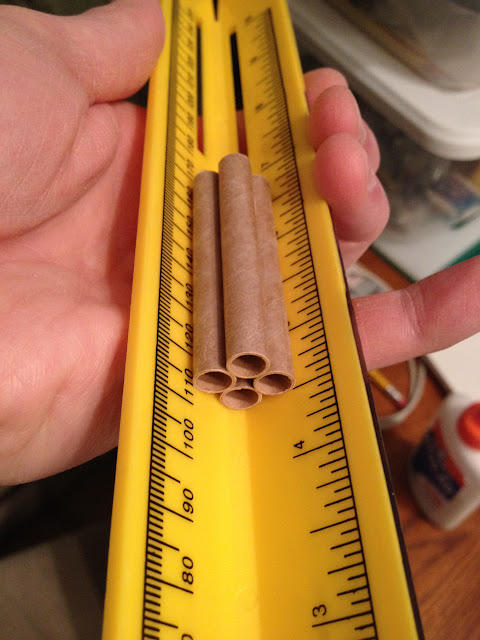
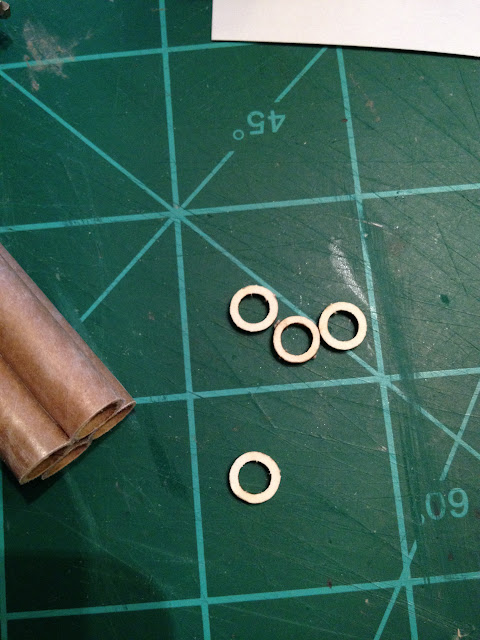
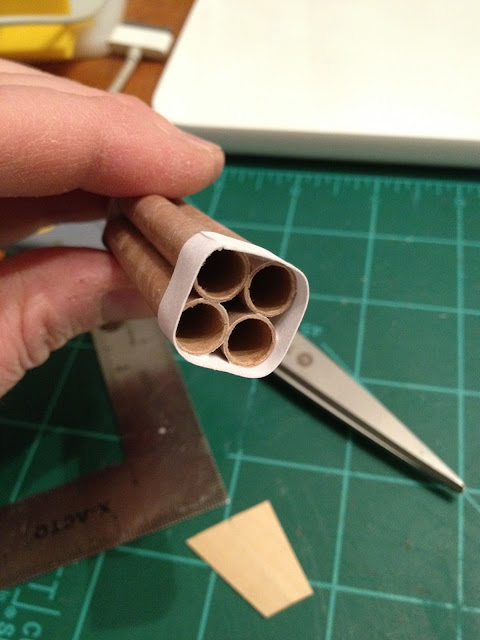
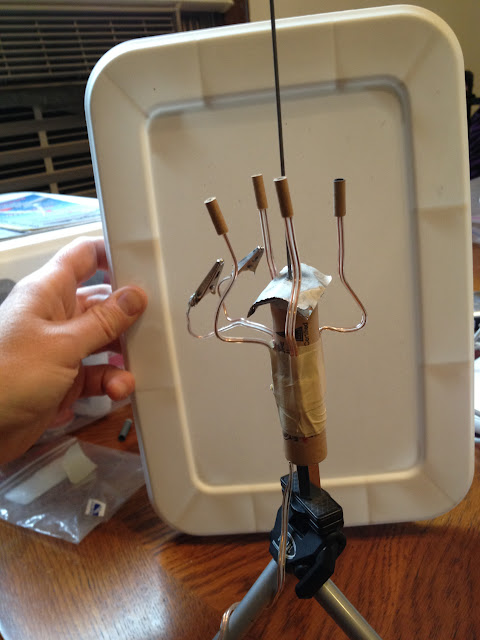
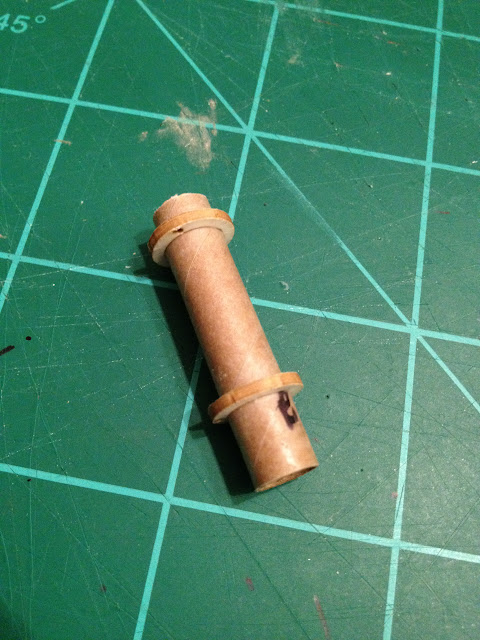
Motor mount: (I'm getting used to these tiny parts)
IMG_0805.JPG


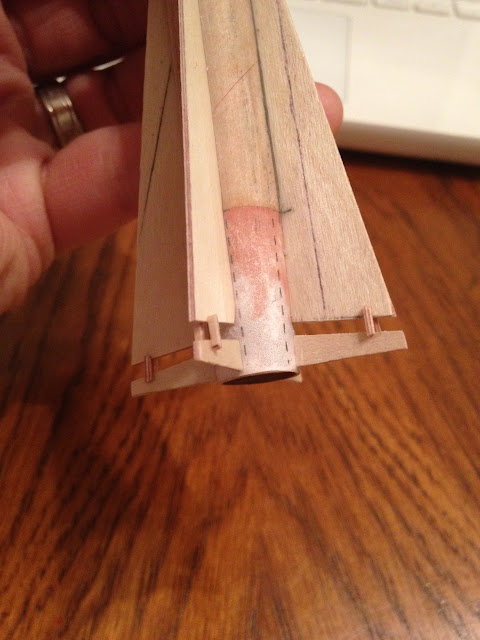
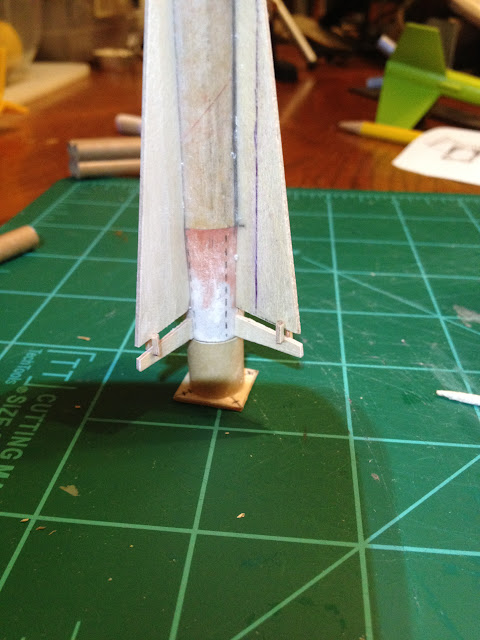
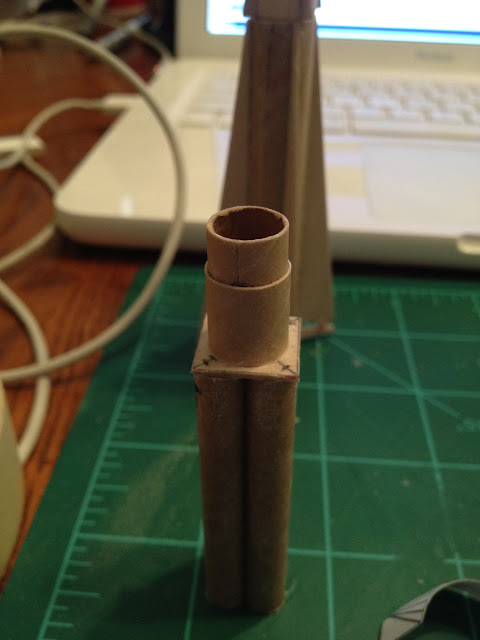
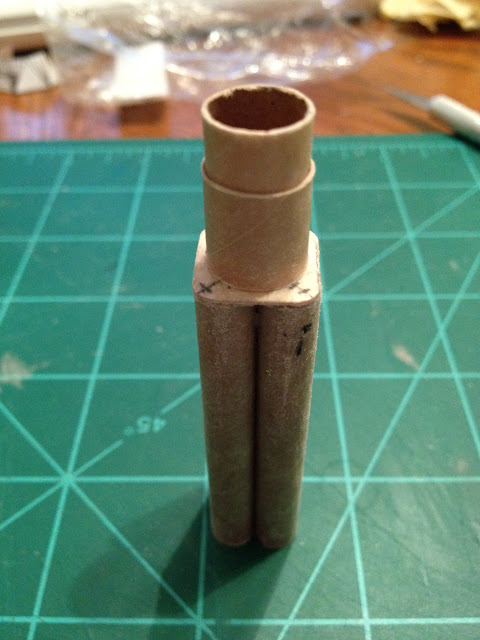
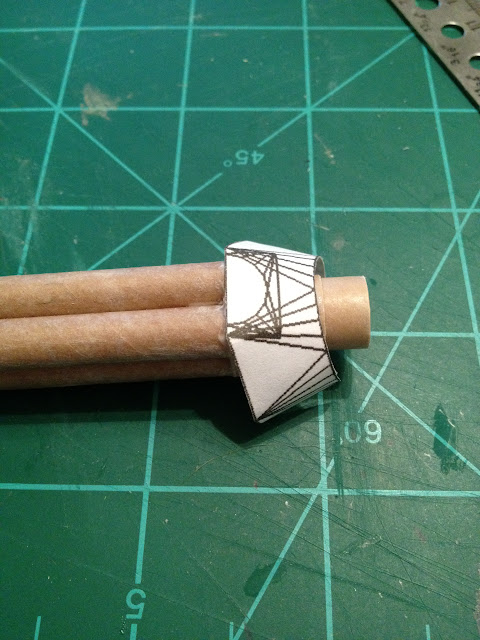
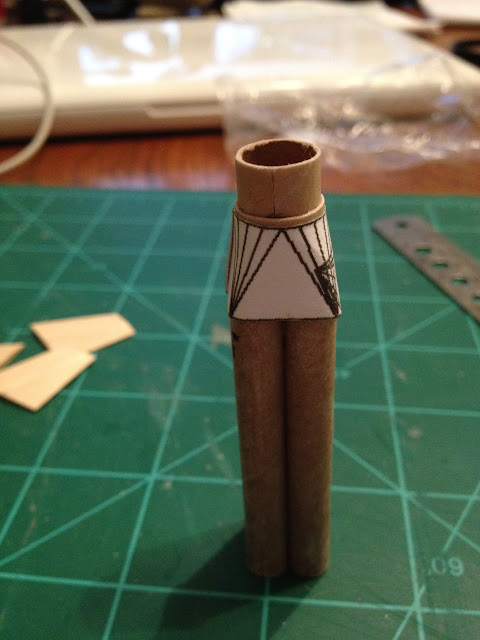
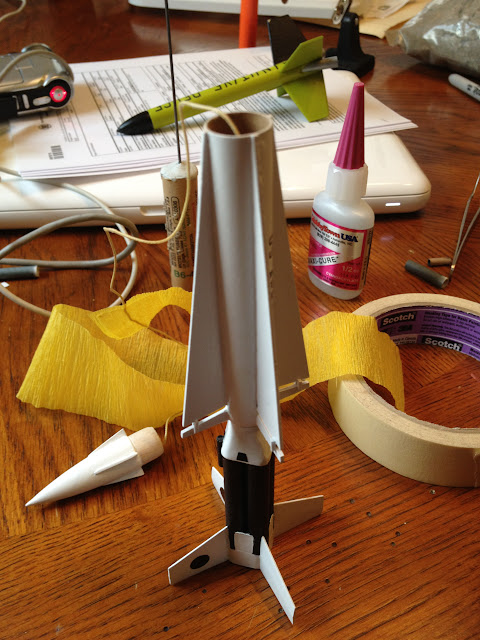
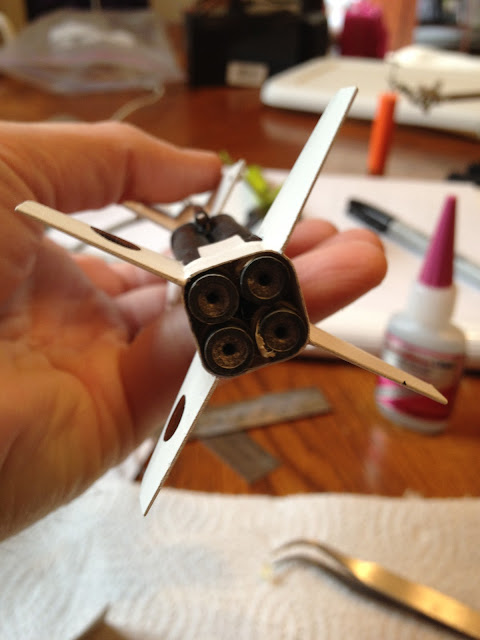
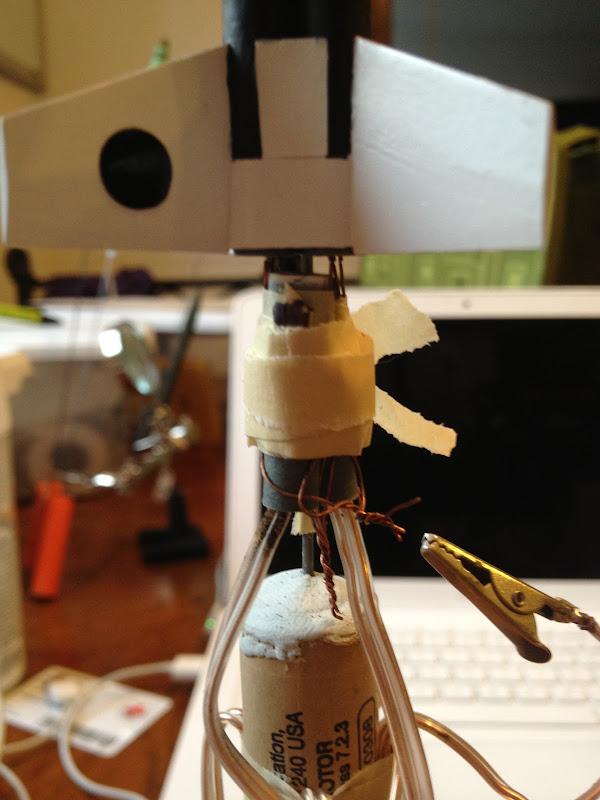
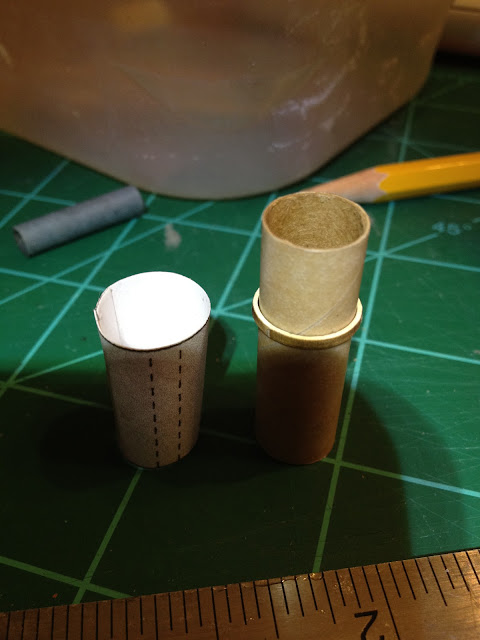
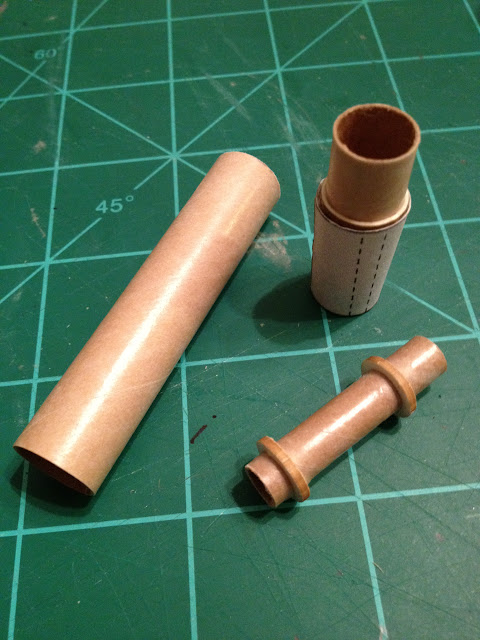
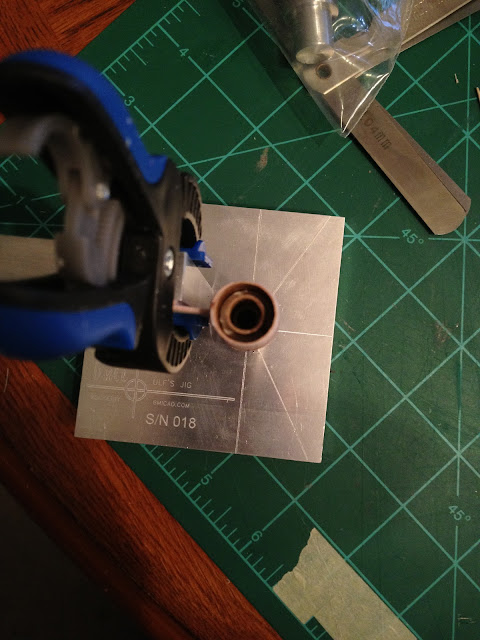
Some pics of the tail cone assembly:
IMG_0807.JPG


IMG_0808.JPG


IMG_0809.JPG


IMG_0811.JPG


IMG_0819.JPG


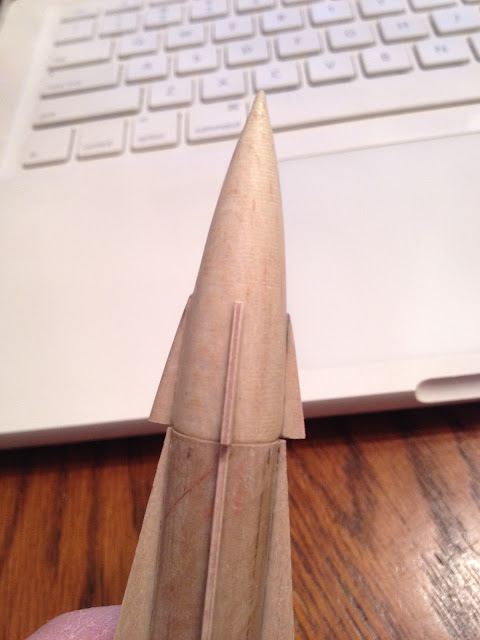
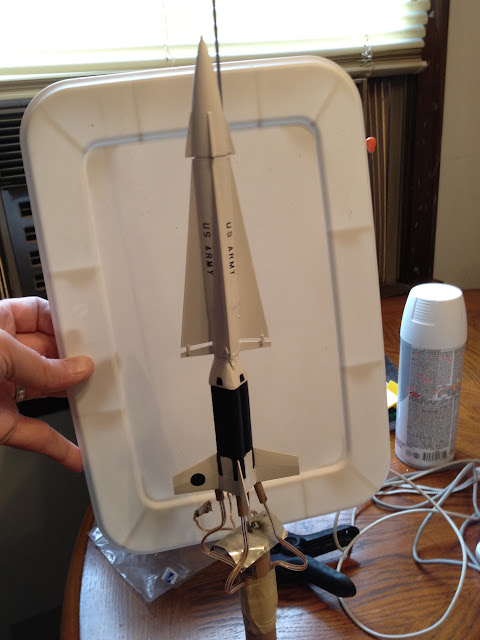
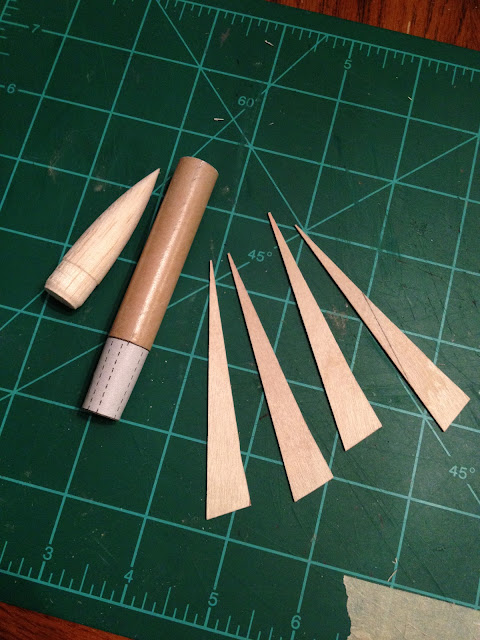
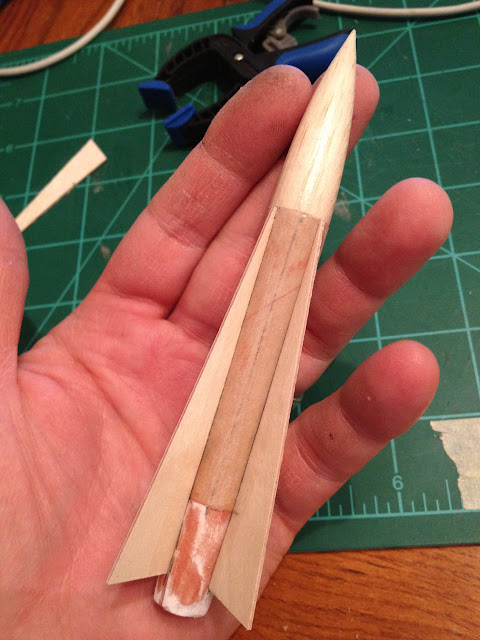
The new Fliskits NCB-5K nose cone is pretty close to the shape and length I needed.
IMG_0821.JPG


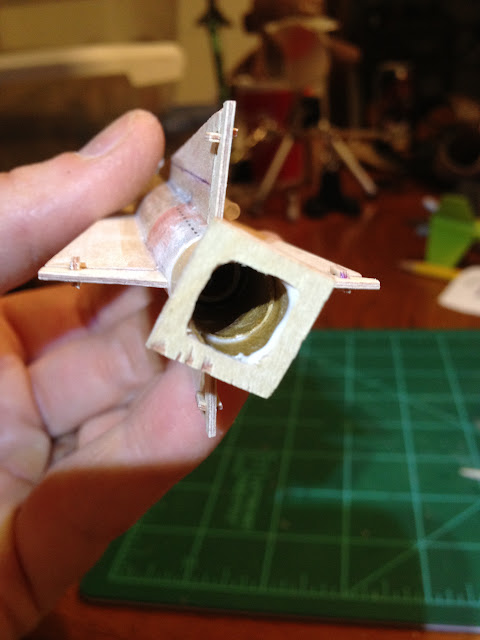
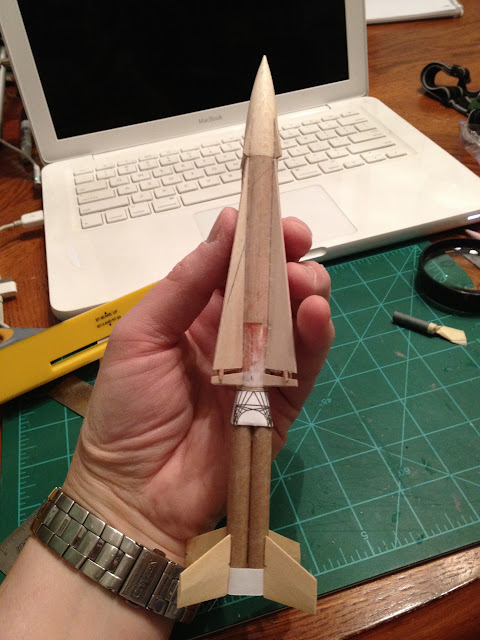
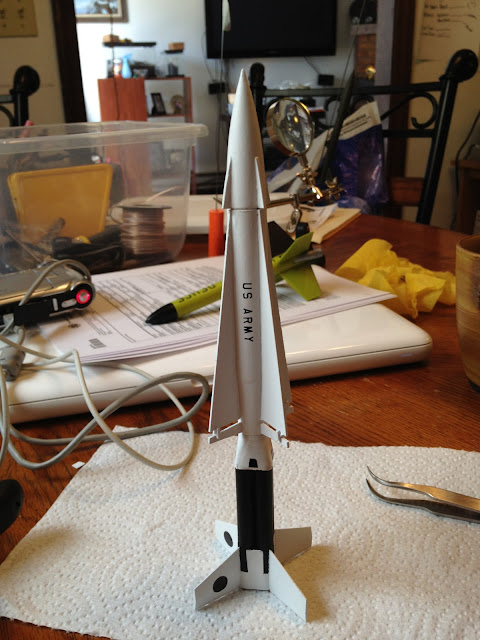
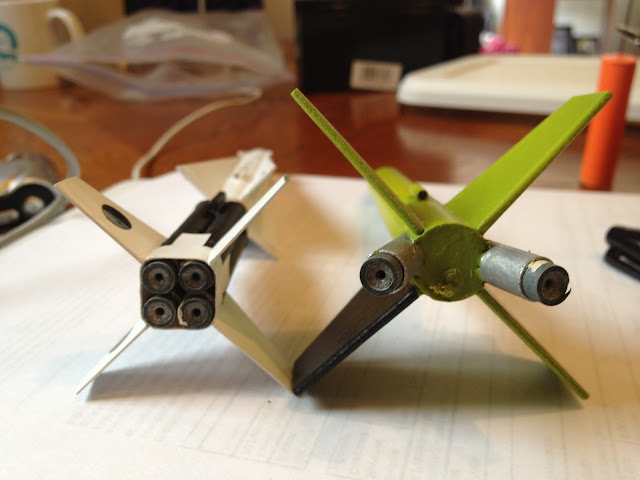
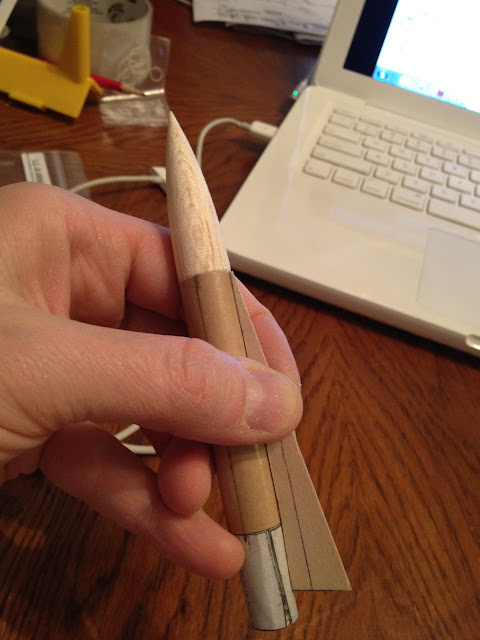
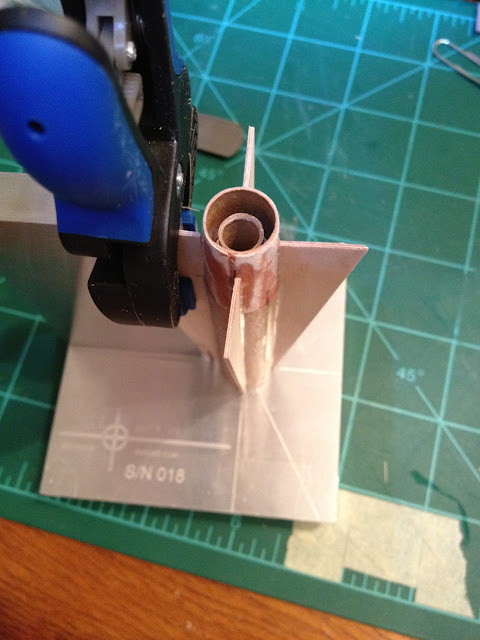
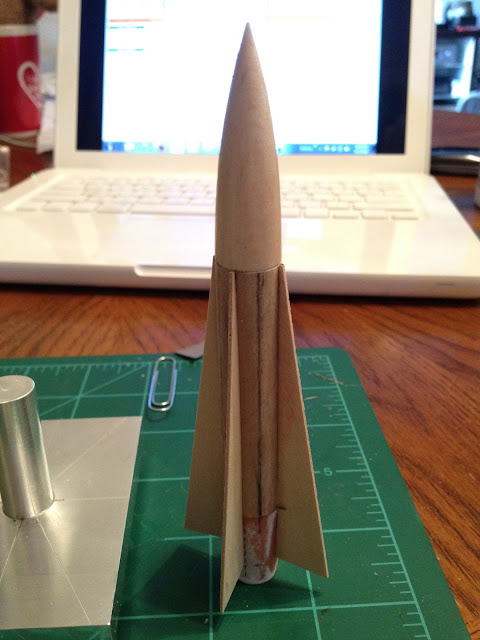
Roughly holding it together here:
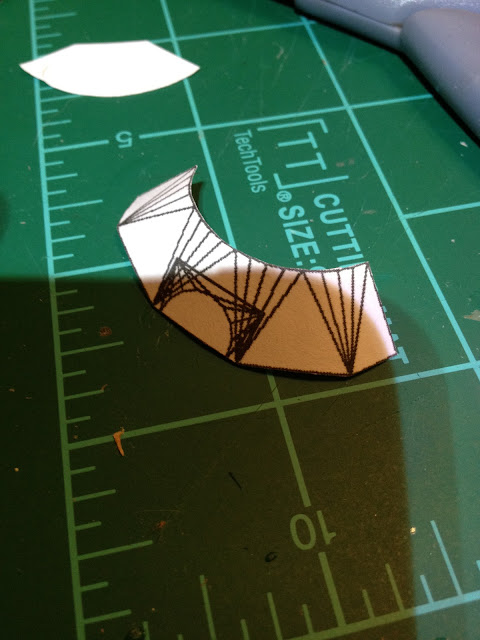
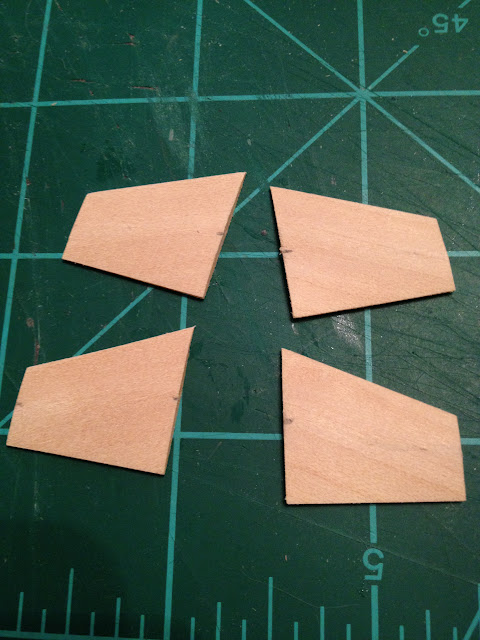
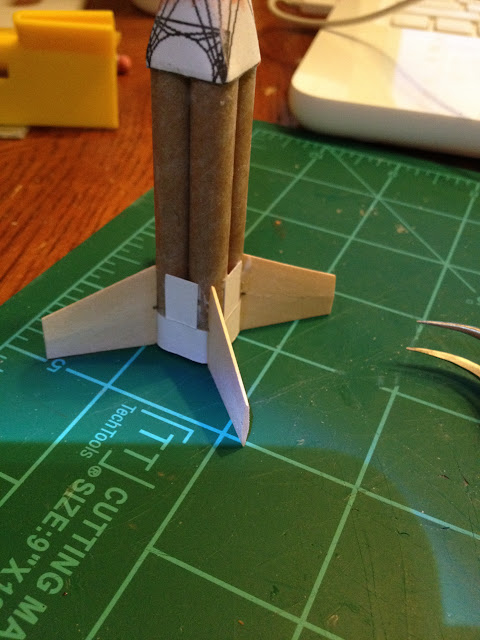
IMG_0822.JPG


Fins:
IMG_0823.JPG


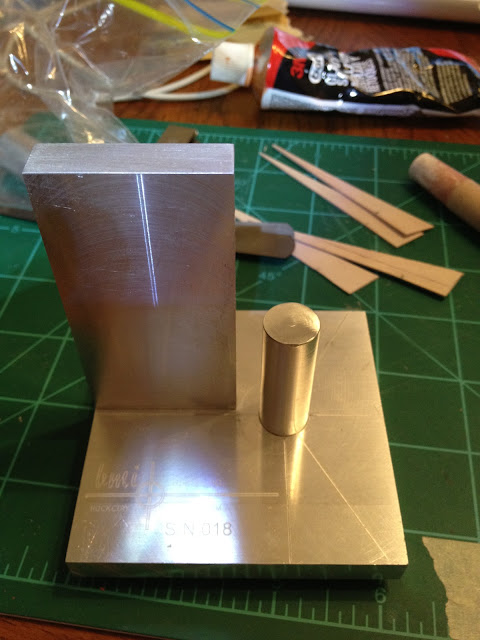
I'm finally making use of my Ulf's fin jig:
IMG_0824.JPG


IMG_0826.JPG


IMG_0827.JPG


IMG_0831.JPG


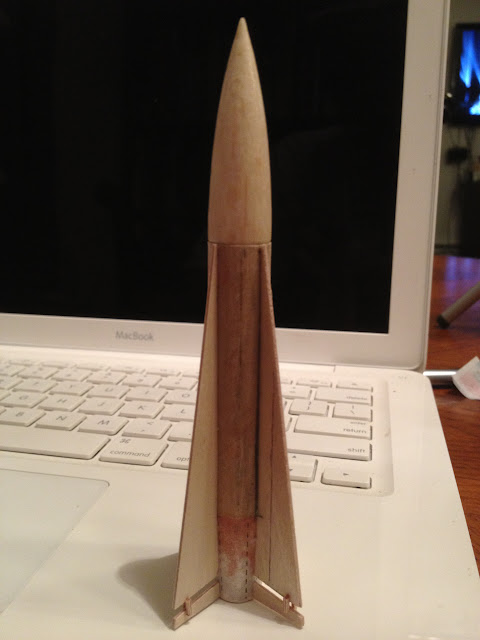
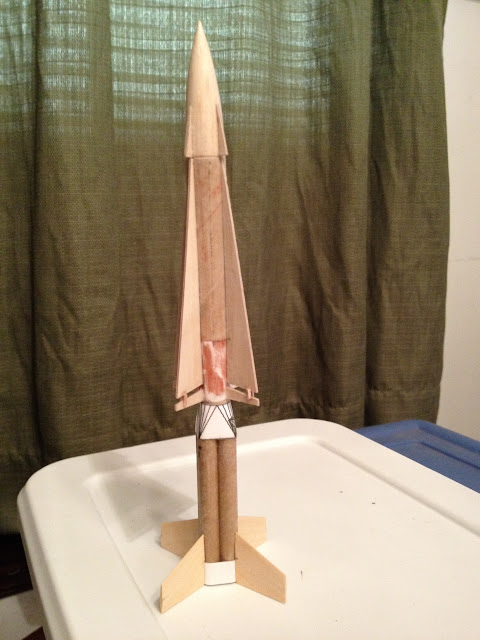
Starting to look really cool:
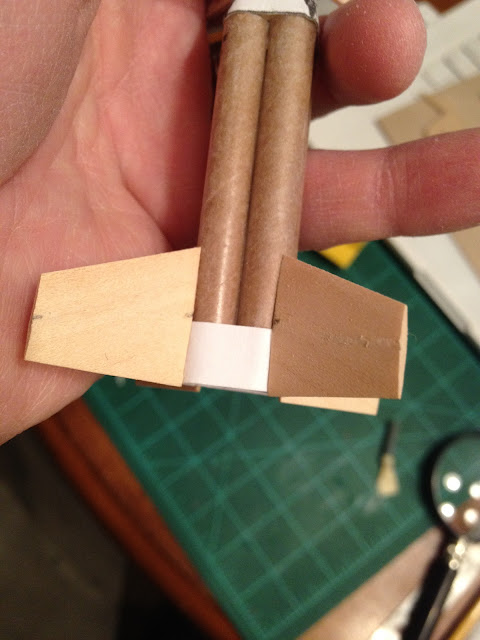
IMG_0832.JPG


IMG_0837.JPG


Bottom fins:
IMG_0839.JPG


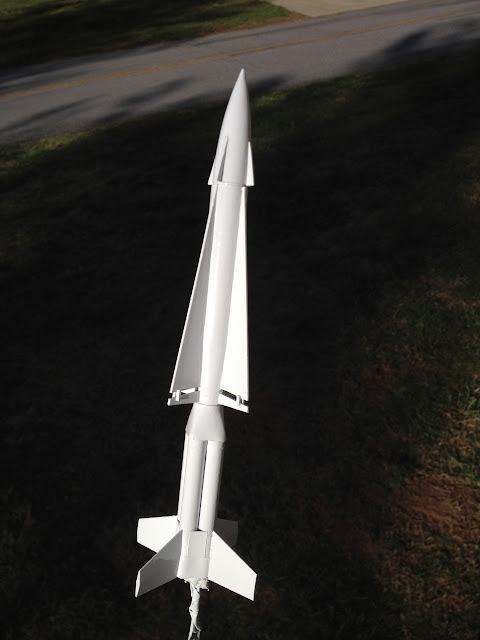
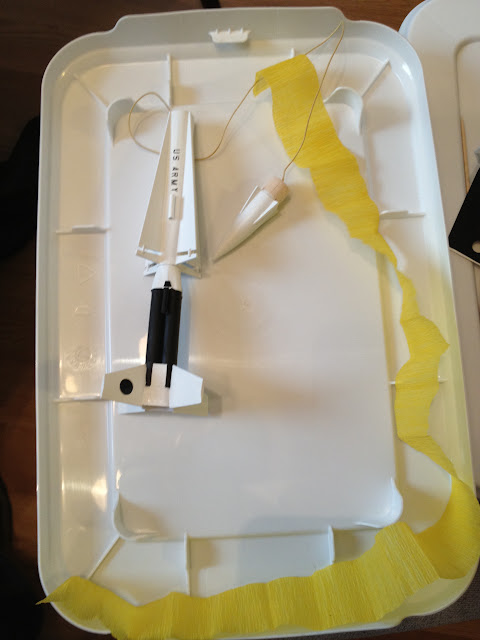
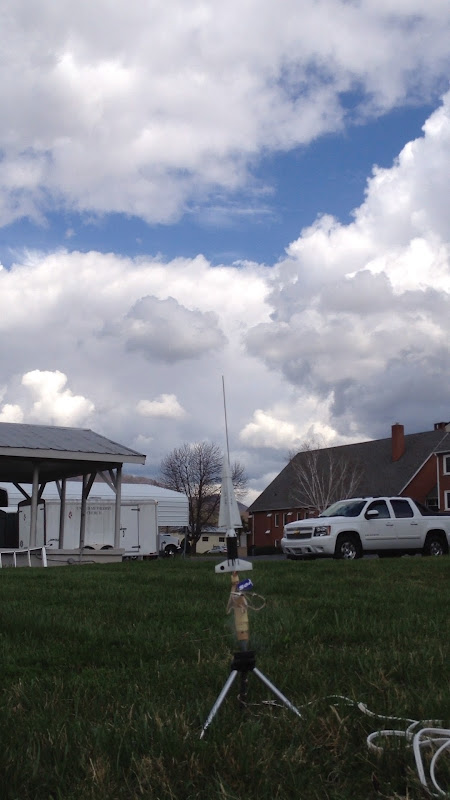
That's pretty much where I'm at with it now.

View attachment nh_mmx2.rkt
 
Very nice and a cool subject to pick. Working in such a small scale is a HUGE effort, thanks for sharing,staying tuned. H
 
I built mine about 7 years ago.

Here it is on the far right an NARAM 45.

The kit was put together by Carl Talanko.

G-10 fins.

DSCN0654.jpg
 
Thanks guys for all the comments. Here are two more pics. I'm officially done for the night. :)

IMG_0842.JPG


IMG_0843.JPG
 
Nike Hercules MMX :cool2:

You have my full and undivided attention.:pop:
 
I'm mostly finished with the build. Here are the pics of what I've done so far.

Nose cone fins:
IMG_0895.JPG


Booster square to round transition. For a detail description of my convoluted method to produce this see here:
IMG_0855.JPG


BT2.5 booster tubes:
IMG_0856.JPG


IMG_0857.JPG


Booster assembly:
IMG_0860.JPG


Making a BT-4 coupler:
IMG_0861.JPG


IMG_0862.JPG


IMG_0863.JPG


IMG_0864.JPG


IMG_0865.JPG


IMG_0868.JPG


IMG_0871.JPG


Tapered 1/16" basswood:
IMG_0870.JPG


IMG_0872.JPG


IMG_0873.JPG


IMG_0875.JPG


Bottom wrap:
IMG_0876.JPG


Motor blocks:
IMG_0877.JPG


IMG_0879.JPG


IMG_0881.JPG


IMG_0885.JPG


IMG_0889.JPG


IMG_0890.JPG


IMG_0891.JPG


IMG_0893.JPG
 
Nice!

Can you post a PDF of the patterns?


Thanks everyone for the kind words. I have all the templates and any related files in a Google docs collection here. The link should work without requiring a login. If anyone has trouble with it though, let me know and I'll post as an attachment.
 
Micromeister said:
Very nicely done Peter!
KEWL looking model. Wonderful method on the transition Thanks for sharing the method.

Thanks and you're welcome! Glad it can be of use.
 
Man, this just keeps getting better and better :) That thing is sweet from tip to tail! Can't wait to see it painted!

jim
 
I started finishing, so far have primed and applied a good base coat of white. I'm going to let this dry a while before doing the detailing.

IMG_0908.JPG


I'm probably going use the same scheme as my TLP Nike Hercules (Plan Pak version).

IMG_1432.JPG
 
I don`t visit this section of the forums very often ,and I can see that this is a big mistake ,as I may have missed this superb build of yours.

Very ,very impressive work and on such a small scale :y:

Lovely work :handshake:

Paul T
 
sodmeister said:
I don`t visit this section of the forums very often ,and I can see that this is a big mistake ,as I may have missed this superb build of yours.

Very ,very impressive work and on such a small scale :y:

Lovely work :handshake:

Paul T

Thanks Paul! I'm planning to start detailing it soon.
 
I finished the detailing and re-did my launcher to accommodate clustering. Everything is ready to go. The weather is a little iffy, so may not launch today. I also want to recheck the CP in Rocksim. It looks marginally stable now, but might add a little nose weight to be safe.

IMG_1315.JPG


IMG_1316.JPG


I don't have a lot of streamer stuffing room. Originally I wanted to use 1 3/4 in crepe paper, but had to cut it down to 1 1/4 in. I'm calculating an 18.64 ft/sec descent rate with a 20 in x 1.25 in crepe streamer.

IMG_1319.PNG


IMG_1320.JPG


Motors loaded:

IMG_1322.JPG


Next to the deuce:

IMG_1323.JPG


The new launcher:

IMG_1325.JPG


IMG_1326.JPG


I'm estimating 344 ft, but if I have to add some nose weight, it'll be a little less.

IMG_0918.PNG


I'll post some pics after I launch it.
 
what a fantastic job!! The Nike Hercules was always a sweet missile..and you have brought her back to life! awesome work!
 
Can you explain how the cluster wiring on your launcher works?

It was partly based on Crazy Jim's method described here. Although I deviated from his plan for clustering by twisting the leads together. I made two launch attempts and both failed with only one ignitor/motor working. Both times I tried a variation of twisting the leads. The first time I taped the igniter holders together:

IMG_1341.JPG


For the second attempt I taped the igniters to opposite sides of spent motor casings and taped the two casings together. This gave me the correct spacing.

IMG_1363.JPG


I think twisting the short leads on so many motors is the problem. Something is probably touching where it shouldn't.

I'm going to try CJ's micro clustering method and wire several clips to a terminal block (or maybe just make a tiny clip whip). This will require a trip to Radio Shack.

My liftoff shots are still pretty cool with only one motor lit (at least for the first 10 feet). I did add 3 grams of nose weight to move the CG up some, just to be safe. This affects my predicted altitude for all 4 motors by about 90 feet, and changes my estimated descent rate to 21 ft/s.

Here are my liftoff shots: (These are stills from video taken with my iPhone mounted on a stick)

Flight 1:

IMG_1349.JPG


IMG_1350.JPG


IMG_1351.JPG


IMG_1352.JPG


IMG_1353.JPG


IMG_1354.JPG


IMG_1361.PNG


Flight 2:

IMG_1380.PNG


IMG_1381.PNG


IMG_1382.PNG


IMG_1383.PNG
 
It was partly based on Crazy Jim's method described here. Although I deviated from his plan for clustering by twisting the leads together. I made two launch attempts and both failed with only one ignitor/motor working. Both times I tried a variation of twisting the leads. The first time I taped the igniter holders together


Okay. I thought the wires that went through the cardboard tubes somehow connected to the ignitors. But that gives me idea that I want to try and maybe you can use. I've used these things mounted on a piece of circuit board for a 5 cluster. They work but they're not adjustable. If you solder a pair on those pieces of speaker wire and connect all the speaker wires in parallel. You should come up with something adjustable that won't short. By the way, nice looking flight even if only one motor fired.
 
Peter & Bill:
You might also want to try using a Relay ignition method. I've been using this method for almost 30 years now and since switching to it I can count the number of unlit motors on one hand after litterally thousands of clustered model launches.
Attached below is the Rangebox Relay drawing (just about everything is RS parts), & cluster wiring setups I've used all these years.
Use of the mil-Max connectors could be a fine idea as long as they are used with an adjustable spacing fixture with flexable lead wiring. I use the .100" size with my floating head micro Piston & ignitors.
One thing to keep in mind; Give the motor/igniter connection enough wire to move a bit. NO Two motors will ignite exactly simultaneously no matter how well you match motors, igniters, wire gauge, lengths etc. Clusters NEED a little bit of first motion movement allowance to give the remainder of the motors time to lit before stripping the ignitor from contact with the BP.
I use this method with all type BP motors MMX to E9's in clusters 2 to 12 motors.

Your Nike Herc. 4 motor cluster is exactly like my 4 motor Ranger, which has flown 17 times with all motors working. Heres a pic of one Ranger liftoff to give an idea of the Smoke & Fire you should be getting:)
Hope this helps.

RangeBox Relay_Rev Drawing & Wiring-b_01-31-96 Rev.06-23-10.jpg

Range Box Relay-c2_5pic photos. dwg & parts_06-23-10.jpg
 
Last edited:
Micromeister said:
Peter & Bill:
You might also want to try using a Relay ignition method. I've been using this method for almost 30 years now and since switching to it I can count the number of unlit motors on one hand after litterally thousands of clustered model launches.
Attached below is the Rangebox Relay drawing (just about everything is RS parts), & cluster wiring setups I've used all these years.
Use of the mil-Max connectors could be a fine idea as long as they are used with an adjustable spacing fixture with flexable lead wiring. I use the .100" size with my floating head micro Piston & ignitors.
One thing to keep in mind; Give the motor/igniter connection enough wire to move a bit. NO Two motors will ignite exactly simultaneously no matter how well you match motors, igniters, wire gauge, lengths etc. Clusters NEED a little bit of first motion movement allowance to give the remainder of the motors time to lit before stripping the ignitor from contact with the BP.
I use this method with all type BP motors MMX to E9's in clusters 2 to 12 motors.

Your Nike Herc. 4 motor cluster is exactly like my 4 motor Ranger, which has flown 17 times with all motors working. Heres a pic of one Ranger liftoff to give an idea of the Smoke & Fire you should be getting:)
Hope this helps.

John,
Thanks for the info! It's very helpful.
 
Back
Top