SEMROC Cherokee D Build Thread

The Rocketry Forum

Help Support The Rocketry Forum:

This site may earn a commission from merchant affiliate links, including eBay, Amazon, and others.

SteveA

Well-Known Member
Joined
Jan 12, 2010
Messages
1,464
Reaction score
3
Location
Kansas
Introduction
According to SEMROC's literature, the Cherokee D was designed by Gene Street and introduced by Estes in 1969. Eventhough I was around by that time, being in Kindergarten (Yeah, I know, I'm a pup) I was more interested in Kaptain Kangaroo than I was in model rockets, but that year the rocketry pumps were being primed whether I knew it or not. Unfortunately, by the time I was able to build rockets, I did not have the opportunity to build the Cherokee. I had contemplated cloning this kit but never got around to it, so you can imagine my delight when SEMROC released their kit as one the winter releases. This kit builds into the original design of the Cherokee D before Estes lengthened the body tube to 18 inches and replaced the balsa nose cone with a plastic one.

The Good Stuff
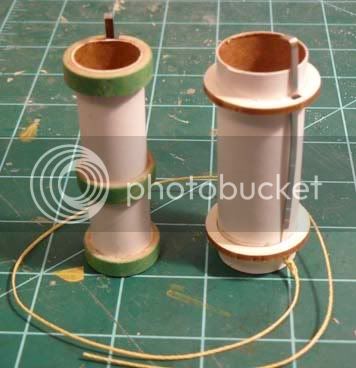
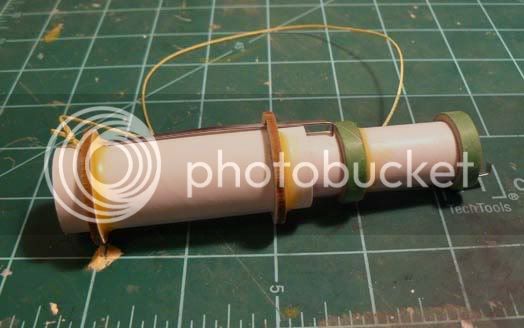
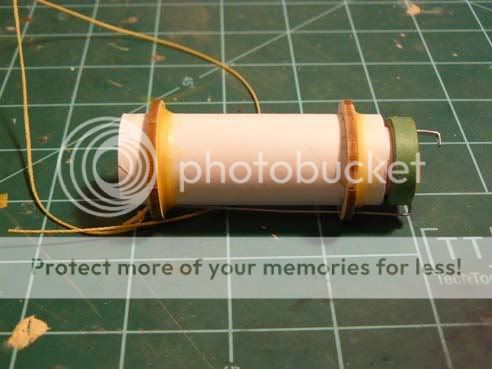
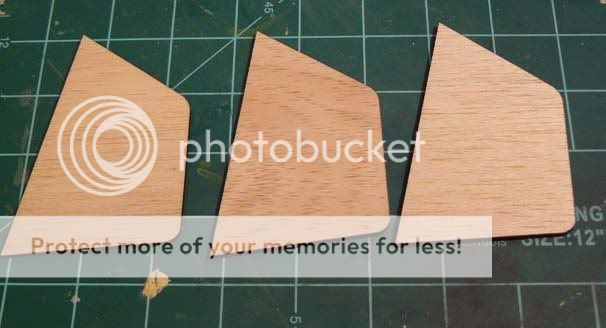
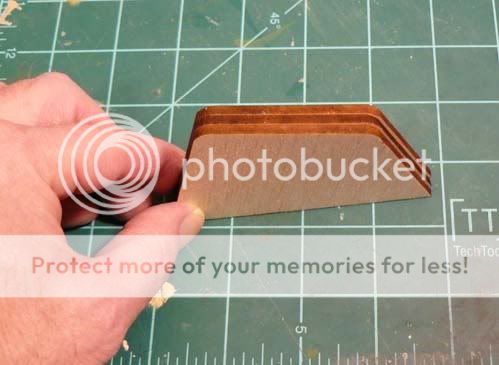
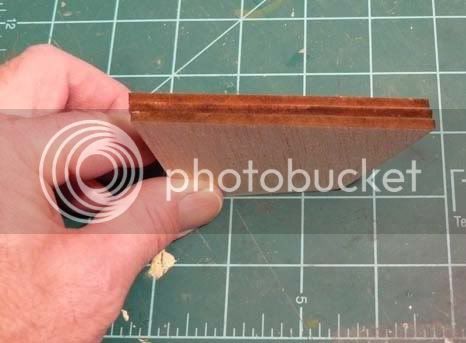
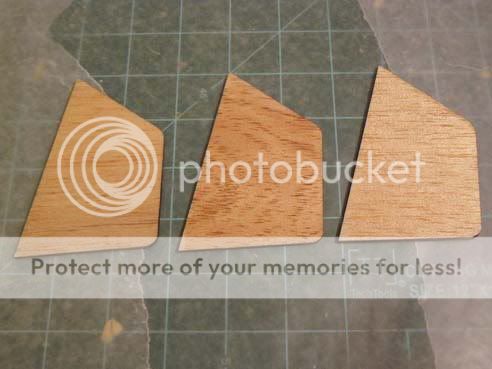
Upon first inspection of the package, you'll note that this Cherokee D comes with two motor mounts; one, for 24mm motors and one to serve as a converter to an 18mm for those pesky tight launch areas. This, I think, is a neat idea. In addition, the laser cut fins have already been removed from the fret and in their own package and from the looks of them, require very little (if any) additional sanding. The decals are crisp and in register, but I wasn't too thrilled to find them rolled up and shoved into the body tube. It seems like this could become an issue when it's time to apply them. Overall, this kit looks to be a straight-forward build and could easily be a first kit for someone who is starting into rocketry. The instructions are well written and easy to follow and they have been pre-punched for a three ring binder to archive them if you should so choose! I'm not 100% sure, but I don't recall any of my other SEMROC instructions coming that way. If this is something new as well...I think it's another neat idea.:) Or as Astro Baby would say, " All that and a bag of chips." :D

Coming Soon
I will continue this thread later with the construction of the motor mount and converter.

CherokeeD1.jpg
 
This kit builds into the original design of the Cherokee D before Estes lengthened the body tube to 18 inches and replaced the balsa nose cone with a plastic one.
By far the best looking. The "stretched" version just doesn't look right to me. It's like watching 4:3 content stretched to 16:9. :eyepop:
 
Semroc just keeps hitting them out of the ballpark.

I have close to a dozen Semroc kits already assembled with several more in my “To Build Box” and a whole lot more on my wish list, including the “Cherokee D”.
 
I love the Cherokee-D. It was one of the first rockets I ever built that came out looking anything like the picture in the catalog.

It too disappeared over the years in my great lost rocket box. :(

Maybe over the summer... :rolleyes:

And it's little brother the Cherokee-C would be fun too.

Maybe I'll scratch-build a Mini-Cherokee for 13mm motors.

Or maybe a Cherokee-E in BT-60. (I know other people have done the up-scaling thing far far beyond that point.)
 
Last edited:
I'm seriously contemplating ordering a Cherokee-D soon from Semroc. Hard not to like the looks of THIS rocket. Keep the build pics comin'; hopin' to get my tax return soon.

Douglas
 
Subscribed.

I've got one of these in my build queue. Love the looks of it.

For the decals, if they don't unroll on their own, I suggest a little gentle persuasion to gradually flatten them out a little bit at a time over a couple days.
 
I'm glad too, to see this release, looking forward to your complete impression of the kit. While I've flown both, and picked up the semroc kit, the long version is the one that looks more *right* to me, since that's the first version I built back in the day. I think I've lost more of these than I've built. I'd recommend a streamer.

Don't forget the "D-Power" decal!
 
Semroc just keeps hitting them out of the ballpark.

I have close to a dozen Semroc kits already assembled with several more in my “To Build Box” and a whole lot more on my wish list, including the “Cherokee D”.


it's an estes design
 
By far the best looking. The "stretched" version just doesn't look right to me. It's like watching 4:3 content stretched to 16:9. :eyepop:

The "stretched" version actually looks normal to me. However, I didn't start flying until after the shorter version was pretty much sold out. :(
 
I love the Cherokee D, but I never built one as a kid. It would make an awesome 3" upscale.
 
I love the Cherokee D, but I never built one as a kid. It would make an awesome 3" upscale.
I agree. A 3" version would be impressive.

I built an upscale with Series 225 tube from Semroc and they also have the correct nose cone in that size. The 30" long tube is just about right for the short version.

And before anyone does the math and asks. No, I did not cut 1" off of the tube to make it an accurate upscale.
 
Does anyone remember that the original short version Cherokee 'D' came with 2 piece fins?

They used 3" wide balsa for the fins and they wouldn't fit so there was a small triangular piece that needed to added to the bottom of the fin.

I still have my original and I can see the seam on all three fins. I guess back then I wasn't as concerned with a great finish.
 
it's an estes design

It may have originally been an Estes design but Estes hasn’t produced it in; how long?

Semroc not only resurrected this rocket from the dust bin of history but up-graded it enormously with better features and parts quality.

I call that a “Homerun”.
 
It may have originally been an Estes design but Estes hasn’t produced it in; how long?

Semroc not only resurrected this rocket from the dust bin of history but up-graded it enormously with better features and parts quality.

I call that a “Homerun”.

I agree!!:)
 
The Business End

SEMROC's instruction sheet calls for the construction of the main D motor mount first and the converter to be built later on in step 19. I wanted to build them at the same time for the sake of this thread and, to be honest the building of both in actual construction time, is the most involved phase of the entire build. (It took me longer to think of how I would write this up than it did to build both mounts.) Plus, I could be working on fins or watching the Big Bang Theory waiting for the mounts to dry.

The D mount consists of two fiber centering rings parts RAH 5055S which are easily separated from the fret with an Xacto and requires a couple of gentle swipes with the sand paper to knock-off the nubbins. The fit onto the body tube is perfect. No gaps, no sloppiness. However, I was a little worried when sliding them on that I could snap them in half if I hit any resistance. (Which is why I used white glue to tack them in place rather than yellow since the new formula seems to freeze parts so easily.) Also included is an engine hook an engine block, and Kevlar thread. The block, again, is a perfect fit and required no sanding. As per the instructions, I looped the Kevlar under the engine hook, hit the knot with some CA, and glued the centering rings in place and wham-bam-thank you mam, you have a completed motor mount. The instructions also require that you wrap the middle of the engine hook and motor tube with masking tape, but I will do that after I fillet the rings on the motor mount.

A Conversion
The converter is an 18mm tube when built with the centering rings, will be the same size of a 24mm motor. ( Again, I think this is a neat idea.) This assembly consists of the tube, an engine hook, engine block and two centering rings AR2050 and one split ring, AR 2050 S. Construction begins with the split ring glued into place at the end of the tube and then adding the engine hook located 1/4 from the top of the tube and then the middle ring 1 3/8" from either ends of the tube. Last is the addition of the last ring and the engine block. As with the D mount, this mount essentially falls together. That said, I did not check the fit of the engine block and had to use a little force when I glued it into place so it wouldn't be a bad idea to maybe check the fit here in case you need to do some sanding. In addition, the split ring required some clamping. The ring wanted to pull away from the mount wall near the split so I just used some wire clamps from my Tamiya paint stand to hold it into place while it dried.

The completed motor mounts
CD1.jpg


The converter slides into the 24mm tube
CD2.jpg


The hook for the 24mm retains the converter
CD3.jpg


Da Fins!

Just beautiful. They come out of the package pretty much ready to attach. There isn't really anything to sand on them, but I went ahead and passed them across some 400 grit sand paper just to knock-off the fuzz and the residue from the laser cut.
CD10.jpg

CD9.jpg

CD8.jpg


Whilst I was waiting for the motor mounts to dry enough to snap some shots, I went ahead and prepped the fins. I sanded a wee airfoil onto the leading edge ( I didn't want to change the shape of those fins too much) and then I sealed them with sanding sealer. I like to seal and then fill. I know some folks don't, but I don't mind the extra step.
CD7.jpg


So, far, I would say that the majority of your time will be spent in the motor mounts. You could, start building this on a Friday night and for those of you who despise paint, could be flying it by Sunday afternoon. From what I've experienced so far, I love this kit. Would I recommend it to anyone else? YES. Is this a good kit for a beginner or someone who has at least built one rocket? Yes.

Next Show
Provided the weather holds, I'll begin final assembly and get her primed by the weekend. I will probably end up painting this one with an airbrush and will stay true to the stock look because I just cannot see this painted any other way. To me, it would detract from the simplicity and elegance of this rocket's lines.
 
so I was looking at the rocsim file (semroc version) using the latest OR and noticed a couple of things...nose cone was reported as eliptical(when it is closer to being a von karmen), and the launch lug was in the wrong location(should be at 60 degrees). then there is (to my eye) a stability issue...added 7g to the screw eye to bring the cg to 1.31 calibres ahead of the cp. I would suggest that anyone who builds this one (or clones the estes version) check the cg before flying it.
rex
 
Does anyone remember that the original short version Cherokee 'D' came with 2 piece fins?

They used 3" wide balsa for the fins and they wouldn't fit so there was a small triangular piece that needed to added to the bottom of the fin.

I still have my original and I can see the seam on all three fins. I guess back then I wasn't as concerned with a great finish.

YES!! I still have the fin pattern from that build!

IIRC, the Cherokee-D NC shape is a Secant Ogive.

Yep IIRC, it is the nose from the ARCAS kit.
 
Back
Top