


Hey Bret ,that`s what I`m talking about......PARTS ,PARTS and more PARTS......
Now it gets interesting.
Paul T
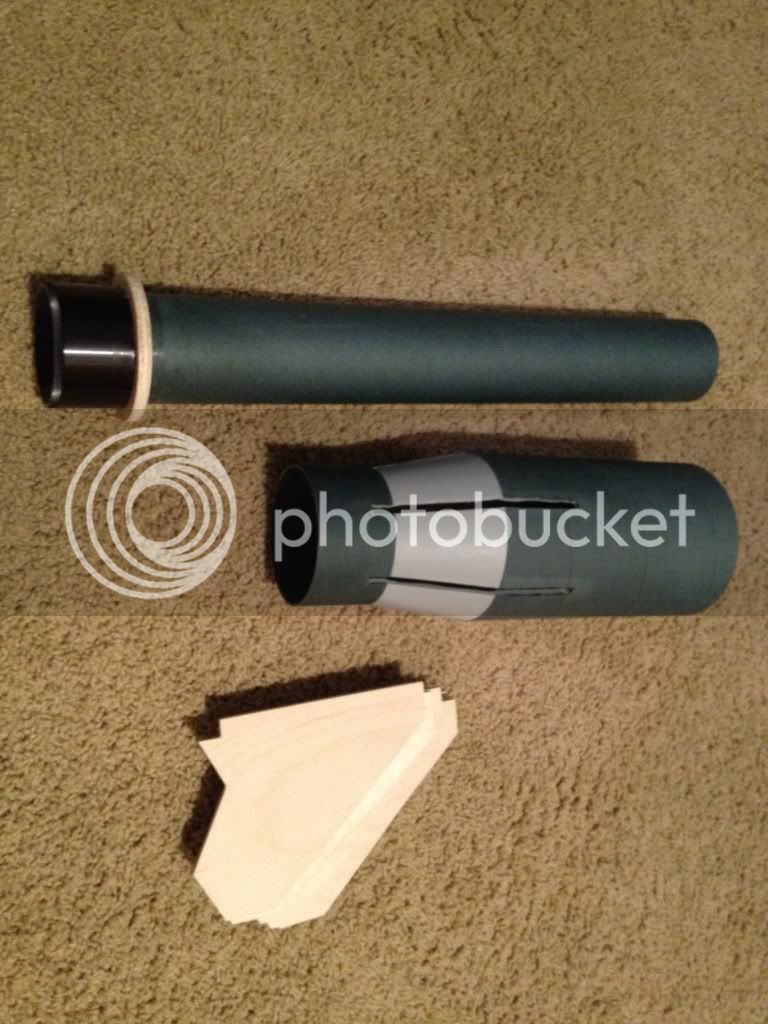
Here ya go, some more parts put together. The booster (although it's just a dry fit) and the view of the booster business end:


Hey Bret ,that`s what I`m talking about......PARTS ,PARTS and more PARTS......
Now it gets interesting.
Paul T


Started on the sustainer today. I tried a new technique (new to me anyway) to cut the fin slots. I used a Dremel Multimax tool. I marked the slots, then taped around them with painter's tape. Then I clamped a piece of anlge steel along the edge of the slot to be cut. I used the steel to guide the Multimax blade. Turned out to be a very a very accurate and straight cutting method...
Hey Bret ,good idea ,and I plan on using the alum. angle as a straight edge ,but not with that particular tool.
I`m in the proccess of cutting some short 1/4" wide x 1 1/2" long slots in BlueTube aft section of a project.Normally I use a sled and carbide spiral bit in my router table ,but since these are short slots,I was going to cut them freehand with my Dremel rotary tool.
Have you ever done this with that little "circular saw" blade and arbour attachment or just the heavy abrasive cutting wheel ?
Thanks
Paul T

Thanks Bret ,I`m off to THE home depot in the next hour.
You`re not talking about this one are you ?
Thanks
Paul T


I find this rendition looks very much like an artillery round or upscale .50 cal. round.
Both are good !!


Got a couple more "small" things done today, 1) installed the aft PML rail lug on the booster (which will be removed for painting), and 2) fabricated the two rail lug mounts for the sustainer (I cannot install them yet until I figure out the order in which I will install the MMT and centering rings in the sustainer)...
Sweet rocket!
I was using PML rail lugs on my first two builds. I found that they bound on the launch rails that Aeropac uses - with enough friction that the rocket may not have gotten off the pad and if it did, with questionable stability. I'm not sure if the rail lugs are out of spec or the rails themselves are. Fortunately I was able to borrow a couple of rail buttons. What I'll probably do is mill the slots in the lugs out a bit to give them more clearance.


Have you ever used Dyna -Wind ?
May I ask you how on earth you made that boat tail , I can`t seem to figure that one out ,but I like it .......well actually I like boat tails on rockets period !
What kind of transition are you using there ,if I may ask?


Steely,
Your recent history with new designs suggests that after you build a "little one" to practice on, you follow it up with an upscale. I want to see a 10" booster with a 7.5" sustainer with 98mm MMTs. N to M or N to N staging would be cool. What do you think?
Z
BTW, your designs are unbelievably cool. Could you please get GLR or Binder to kit this thing?
RS,
Don't you know I've already done those scaling calculations... that bird in two stage configuration would be over 16 feet tall. I'm guessing it would weigh in well over 120 lbs dry. It would be cool, but I'm not going to get ahead of myself. I need to make this one work as planned before I start thinking about a jumbo version. Hey, I appreciate the compliment too. Actually I think it would be kind of cool if someone marketed a pair of kits that could be purchased and flown separately and then combined into a two-stage bird. It would be expensive. Don't know if there is a market for it...
Cheers,
Bret


Enter your email address to join: