rdh8
Well-Known Member
- Joined
- Feb 13, 2009
- Messages
- 162
- Reaction score
- 2
Thanks for your help, Robert. A few follow-up questions if you don't mind:
On the fins that had the leading edge erosion, were you using high temperature epoxy and/or carbon fiber?
Where did you get your 1800F nosecone paint?
How smooth was the nosecone surface after the flight?
Do you have data on cooling of your av-bay during descent?
Was your av-bay connected to the end of your motor during the descent?
Thanks again.
The leading edge of the fins was Cotronics epoxy and carbon.
Home Depot, BBQ paint.
The nosecone was not smooth after the flight.
https://www.geocities.com/rdh82000/NmotorRocket/images/Nose.jpg
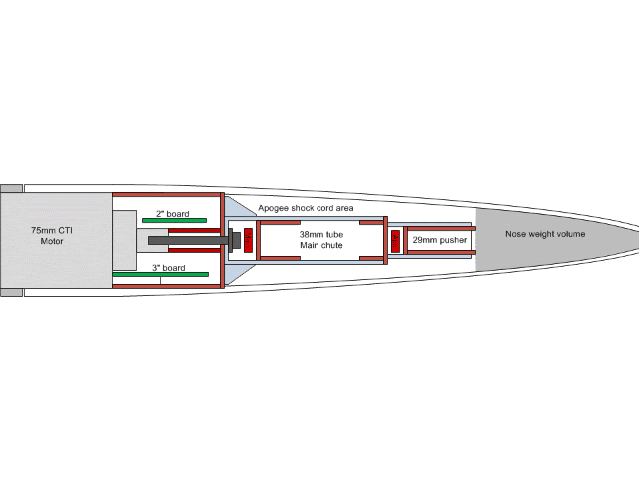
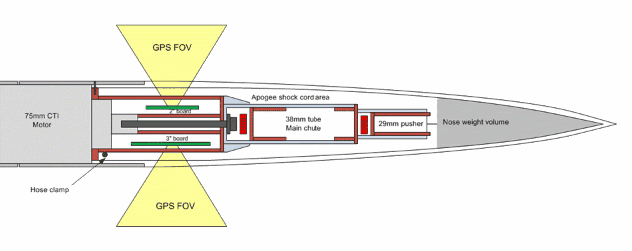
av-bay was in the nosecone. No data on temperature.
Robert
 op:
op: