


mjmcneese
Active Member
- Joined
- Aug 7, 2011
- Messages
- 29
- Reaction score
- 0
Hi all! This is my first post here. I've been snooping around for a while, picking up a lot of tips and learning quite a bit.
Like many others, I was in the hobby when I was younger, doing rocketry in 4-H. And now I've got a little boy (3) who is crazy about anything rockets or space, so he has given me a great excuse to get back into it. So far, we have two E2X kits, and I built him an Estes Honest John - and we've been having great fun with those. But, now I want to get into a two-stager - something I've never done before.
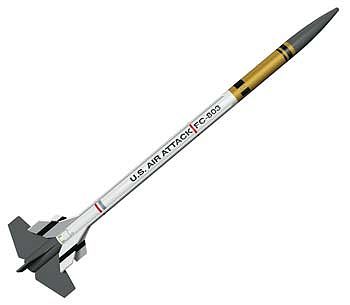
None of the local hobby shops had the Air Commander in stock, so we ordered from an online retailer. Apparently, this is a new kit in the Estes line-up, released just this summer. The kit is still on its way to our home. Chose the Air Commander because it's a beautiful-looking rocket, it's bigger than anything else we have, and it's a two-stage.
As I said, I've learned quite a bit from poking around here, so this will be the first build where I will be using some new techniques: just simple things like Wood Filler on the fins and body tube seams (I want to fins to have NO wood grain showing when finished, and I want the seams to be invisible), gonna try Kilz as the primer, Scotch tape for masking, beveled leading edges on the fins, etc.
I'll be posting some pics as I trudge my way through this...not to show off, but just to document the process. Please let me know of any tips or tricks that you might be willing to share. I really wanna do this one justice! Then, when it's all done I'll be sure to get some video of our first launches - assuming we make it past the first one")
Like many others, I was in the hobby when I was younger, doing rocketry in 4-H. And now I've got a little boy (3) who is crazy about anything rockets or space, so he has given me a great excuse to get back into it. So far, we have two E2X kits, and I built him an Estes Honest John - and we've been having great fun with those. But, now I want to get into a two-stager - something I've never done before.
None of the local hobby shops had the Air Commander in stock, so we ordered from an online retailer. Apparently, this is a new kit in the Estes line-up, released just this summer. The kit is still on its way to our home. Chose the Air Commander because it's a beautiful-looking rocket, it's bigger than anything else we have, and it's a two-stage.
As I said, I've learned quite a bit from poking around here, so this will be the first build where I will be using some new techniques: just simple things like Wood Filler on the fins and body tube seams (I want to fins to have NO wood grain showing when finished, and I want the seams to be invisible), gonna try Kilz as the primer, Scotch tape for masking, beveled leading edges on the fins, etc.
I'll be posting some pics as I trudge my way through this...not to show off, but just to document the process. Please let me know of any tips or tricks that you might be willing to share. I really wanna do this one justice! Then, when it's all done I'll be sure to get some video of our first launches - assuming we make it past the first one


