You are using an out of date browser. It may not display this or other websites correctly.
You should upgrade or use an alternative browser.
You should upgrade or use an alternative browser.
I think I screwd up buying spray paint.
- Thread starter pick1e
- Start date


Help Support The Rocketry Forum:
This site may earn a commission from merchant affiliate
links, including eBay, Amazon, and others.
MarkII
Well-Known Member
- Joined
- Jan 18, 2009
- Messages
- 8,250
- Reaction score
- 46
I always give coats of spray paint a good 24 hours to dry before I handle the model. The dry times listed on the label might be true in places like Arizona, but in most other places they are a bit optimistic. Rustoleum is very, very good spray paint. It has many fans in this hobby, including this one.
Mark & FC are right on Pick1e. Most Rattle can colors ARE gloss enamels. but that's not really the question. Pay attention to the lable instructions.
Rustoleum is great stuff, regardless of the sub-series....... I mix "Painters Touch" and Standard Rustoleum colors constantly. Recoat times are what we watch")
Be Patient! Finishing of anything ALWAYS takes much longer then building.
Rustoleum is great stuff, regardless of the sub-series....... I mix "Painters Touch" and Standard Rustoleum colors constantly. Recoat times are what we watch
Be Patient! Finishing of anything ALWAYS takes much longer then building.
rcktnut
Well-Known Member
So I had the bright idea that spray gloss enamel would would be nice and shiny and tough without a clear coat. I sprayed two models probably 6 hours ago and they still feel tacky. I didn't spray too heavily, they still need a second coat. This is over Rustoleum gray sandable primer. Reading the can more carefully it says apply additional coats within 1 hour or after 48 hours. Now I'm thinking it's going to take weeks to finish these models with a few colors. What I picked up was Rustoleum gloss enamel.
Did I screw up? Should I get different paint?
You must have used the Stops Rust enamel. This takes longer to "dry to the touch" and over all dry than the Painters Touch or the Proffesional. 2-4 hours under ideal conditions as compared to 15 minutes to the touch.
I've used all depending on the color I wanted, The slower drying paints will provide an over all better finish if applied properly (not to heavy as to run) as the longer drying time allows the paint to "flow" longer making for a smoother finish, especially on larger projects.
After carefull prep before finish coating, you should try to get all final coats on at one time meaning within that first hour as long as you don't have an error to sand out within any of the coats.
Even in Arizona, patience is your friend. I usually get two light coats in, wait no more than an hour and add a medium coat. If I'm adding another color, I wait a minimum of two days before masking and spraying the second color. With +100* weather and less than 10* humidity, it still takes several hours for it to "feel" dry. Build a rocket in half a day, and spend the rest of the week finishing it.....
luke strawwalker
Well-Known Member
- Joined
- Jan 18, 2009
- Messages
- 9,147
- Reaction score
- 40
So I had the bright idea that spray gloss enamel would would be nice and shiny and tough without a clear coat. I sprayed two models probably 6 hours ago and they still feel tacky. I didn't spray too heavily, they still need a second coat. This is over Rustoleum gray sandable primer. Reading the can more carefully it says apply additional coats within 1 hour or after 48 hours. Now I'm thinking it's going to take weeks to finish these models with a few colors. What I picked up was Rustoleum gloss enamel.
Did I screw up? Should I get different paint?
No, not really... welcome to the world of post-VOC regs rattlecan spray painting... :kill:
IF (and that's a BIG IF) you could find what you need in LACQUER, it would go much faster, but basically lacquers are becoming harder to find than hen's teeth due to the VOC regs the gov't is imposing. 97% of the paint out there now (in rattlecans) is going to be some kind of enamel. It dries slow, can't be helped.
Doing multi color paint jobs takes time... don't try to rush it or you'll end up regretting it and ruining a WHOLE bunch of work! Be sure you're prepared and ready to shoot the multiple coats necessary to finish a color in the allotted time... (don't spray the first coat just before you head off on errands for the day or whatever; you want to get all the coats necessary for that color on and curing within the "window" of time rather than have to wait a day for it (or more) to cure to put a SECOND coat on and have to wait for it TOO.
Be sure the paint is "hard" enough before masking off for the next color as well, so you don't ruin the first color with the masking tape. Use a low-tack masking tape as well... Nothing's worse than ruining the first color with the masking tape after you've put all the work into it.
Make sure your cans are spraying well (do test patterns on cardboard or something before you spray the rocket) and make sure everything is compatible... (DON'T mix lacquers and enamels! Enamel can be applied over lacquer but NOT the other way around!)
Just realize it's a time-consuming project and take your time, don't rush. You can work on another rocket while that one's in the paint booth!
Later and good luck! OL JR
Dave Scarpa
Member
- Joined
- Jun 22, 2011
- Messages
- 9
- Reaction score
- 0
Not only Painting but gluing in Humid weather is tough, We've been getting hammered with humid weather , not to mention tornado's in western mass and White glue takes forever to dry
MarkII
Well-Known Member
- Joined
- Jan 18, 2009
- Messages
- 8,250
- Reaction score
- 46
Some modelers apply clear coats over the final color coat, but I never do. I don't know what it is supposed to do for them. If the paint gets a little bit scuffed, well, that just shows that the rocket has been flown. If the paint job is really messed up, say as a result of structural repairs, then I repaint the model.
Clear coat over decals is an interesting issue. Many people do it, and so did I when I started. But then I noticed that my spray paint clear coats didn't last very long, and would flake off. I apply clear acrylic floor finish over most decals now. I apply it by dipping a small sponge into a bowl containing some floor finish, squeeze out at least half of it so that the sponge is wet but not dripping, and then swipe it over the decals and the rest of the rocket. Applying acrylic floor finish is a popular method for sealing decals. The product to use for this is Pledge with Future Shine, formerly known as Future Floor Finish. I actually use a knock-off version of it from Family Dollar. It seems to be just as good while being a whole lot less expensive.
I apply a few coats of either Microscale Liquid Decal Film, acrylic floor finish, or often both (decal film first, followed by floor finish), onto waterslide decals before I cut them out and apply them. I do that to make them a bit less fragile and able to survive my sometimes fumble-fingered application technique. Replica decals, such as those from Excelsior Rocketry, require this treatment because they are so thin. With decals that are already coated like this, I'm not even sure that post-application clear-coating is even really necessary, but I do it.
I have never clear-coated either flat or fluorescent paint. The only flat paints that I have used were for camouflage paint schemes, and any scuff marks that they picked up simply contributed to the effect. I can see a rationale for applying a clear coat over fluorescent colors, because they are easily scuffed and pick up dirt marks, so maybe I'll do that the next time I paint with them. (I don't use day-glo colors very often.) I'm not sure how it affects the vibrancy of the colors, though.
I don't have much experience with vinyl decals, so I'm not sure if they ever need any coating. The vinyl itself is very durable, I understand.
luke strawwalker
Well-Known Member
- Joined
- Jan 18, 2009
- Messages
- 9,147
- Reaction score
- 40
Some modelers apply clear coats over the final color coat, but I never do. I don't know what it is supposed to do for them. If the paint gets a little bit scuffed, well, that just shows that the rocket has been flown. If the paint job is really messed up, say as a result of structural repairs, then I repaint the model.
Clear coat over decals is an interesting issue. Many people do it, and so did I when I started. But then I noticed that my spray paint clear coats didn't last very long, and would flake off. I apply clear acrylic floor finish over most decals now. I apply it by dipping a small sponge into a bowl containing some floor finish, squeeze out at least half of it so that the sponge is wet but not dripping, and then swipe it over the decals and the rest of the rocket. Applying acrylic floor finish is a popular method for sealing decals. The product to use for this is Pledge with Future Shine, formerly known as Future Floor Finish. I actually use a knock-off version of it from Family Dollar. It seems to be just as good while being a whole lot less expensive.
I apply a few coats of either Microscale Liquid Decal Film, acrylic floor finish, or often both (decal film first, followed by floor finish), onto waterslide decals before I cut them out and apply them. I do that to make them a bit less fragile and able to survive my sometimes fumble-fingered application technique. Replica decals, such as those from Excelsior Rocketry, require this treatment because they are so thin. With decals that are already coated like this, I'm not even sure that post-application clear-coating is even really necessary, but I do it.
I have never clear-coated either flat or fluorescent paint. The only flat paints that I have used were for camouflage paint schemes, and any scuff marks that they picked up simply contributed to the effect. I can see a rationale for applying a clear coat over fluorescent colors, because they are easily scuffed and pick up dirt marks, so maybe I'll do that the next time I paint with them. (I don't use day-glo colors very often.) I'm not sure how it affects the vibrancy of the colors, though.
I don't have much experience with vinyl decals, so I'm not sure if they ever need any coating. The vinyl itself is very durable, I understand.
Got a question for you Mark...
Have you ever put FUTURE over flourescent colors?? Just wondering if it's possible/advisable and what the results were...
Later! OL JR
MarkII
Well-Known Member
- Joined
- Jan 18, 2009
- Messages
- 8,250
- Reaction score
- 46
Nope; haven't tried it. I'm curious about it, too. I'm also a bit curious about using it on the ultimate uncoatable paint - metallic. I did use some a long time ago over copper leafing paint (Krylon paint pen) on the nose cone of my Gauchito. I don't remember if it worked out OK or not; I can't tell by looking at it now. (Such were my painting skills at the time...Got a question for you Mark...
Have you ever put FUTURE over flourescent colors?? Just wondering if it's possible/advisable and what the results were...
Later! OL JR
) If it did work it would be a minor miracle. Metallic paint is famously uncoatable.Fluorescent paint really picks up dirt easily, so I can see the logic of coating it with something.
Rex R
LV2
- Joined
- Apr 21, 2010
- Messages
- 6,392
- Reaction score
- 384
clear coat over flourescent paint tends to make them look darker partly from the 'wetting' action and partly because they tend to block some of the UV. I've got several boats that, on a cloudy day appear to be painted dark green...but get them in the sunlight...almost need shades to look at them(I like to be able to See what my race boats are doing from 80 yards away ). I have used clear coat over my vinyl too(for boats I tend to use 3-4 coats) to keep it from peeling(remarkable how fast you can peel vinyl when you get water moving across it at 40+mph).
rex
). I have used clear coat over my vinyl too(for boats I tend to use 3-4 coats) to keep it from peeling(remarkable how fast you can peel vinyl when you get water moving across it at 40+mph).rex
o1d_dude
'I battle gravity'
Jumping in here just a little...
Luke, I spray Rusto "Stops Rust" Crystal Clear Enamel over Rusto fluorescents all the time. It works beautifully but it is somewhat prone to chipping on the nose cone. I'm partial to the fluro pink and use Rusto Metallics Midnight Black (with sparkles) for the trim.
Here's a closeup of the final result. Yes, there was a LOT of masking tape involved.
o1d_dude
'I battle gravity'
Now that's the ticket!That's a good point. *Scuttles off to the hobby shop*
Painting can be frustrating but keep at it. The thing to remember is that no matter how good the paint job is, you're still going to light off BP or AP underneath it and hope the chute deploys. They all look great in the air. If it survives the launch and the recovery: BONUS! You get to do it again.
It's all just cardboard and balsa anyway.
MarkII
Well-Known Member
- Joined
- Jan 18, 2009
- Messages
- 8,250
- Reaction score
- 46
Ooo, ooo! Maybe this needs to be a separate thread (in fact, it will be): how do you mask off tube fins effectively when you want to paint the interiors a different color from the exterior. I have a great need to get this worked out. Respond in the new thread that I am about to create. (HERE)Jumping in here just a little...
Luke, I spray Rusto "Stops Rust" Crystal Clear Enamel over Rusto fluorescents all the time. It works beautifully but it is somewhat prone to chipping on the nose cone. I'm partial to the fluro pink and use Rusto Metallics Midnight Black (with sparkles) for the trim.
Here's a closeup of the final result. Yes, there was a LOT of masking tape involved.
Last edited:
MarkII
Well-Known Member
- Joined
- Jan 18, 2009
- Messages
- 8,250
- Reaction score
- 46
You just have so much more of a sense of accomplishment, too. I don't entirely agree with OD's statement that "[t]hey all look good in the air." While I think that's true when you are watching rockets built by other people, the perception changes when one of your own is thrown into the mix. No other rocket looks quite as good, or catches your eye quite as much, as the one that you have painted yourself. After they are all lined up on the rack prior to launching, I usually find my eye favoring the look of my rockets over the others, even when the others have expertly-done paint schemes and mine are just wearing coats of primer! :cyclops: :roll:All true. The chain hobby stores around here have the RTF models, which are nice if you want to blast it off into oblivion because you haven't wasted your time building the thing
Has anyone tried Testors Laquer? They had a bunch of nice bright colors at the hobby shop. It claims to dry in minutes. I might try some in the future unless you all already know they're junk.
I used Testors Laquer on my LOC Nuke Pro Maxx:

It dries much faster than enamel, and you can apply the clear any time after the color coat is dry. That's just a few minutes here in sunny AZ. I added the clear coat over the "Stickershock" decals with no issues. The nosecone is the rust-oleum fluorescent, which dries fast too. "Duke Nukem" flew twice one weekend, the second flight was my L-1 certification flight and it got drug almost 100 ft. through the desert. I took it home and added another coat of clear and you can hardly see the scratches. I tried "future" on the nosecone and didn't like what it did, so I washed it off and added Testors "Glosscote" with excellent results. Lacquer is a lot easier to work with, especially if you have no patience....
Has anyone tried Testors Laquer? They had a bunch of nice bright colors at the hobby shop. It claims to dry in minutes. I might try some in the future unless you all already know they're junk.
I recently used Testors Purplicious One Coat Lacquer. It worked great (on top of Rustoleum gray auto filler primer that was sanded and then coated with Valspar white primer). I then topcoated it with Duplicolor metallic clear lacquer for extra sparkle (and to give sparkle to the fins which were flourescent yellow).
Where's a pic? (searches, finds)

Built this one for the Mrs.. She liked the metallic clear on a different rocket and told me to make her a purple one!
What a coincidence! My wife Sharon didn't like the purple body tubes on her Estes Eliminator, so I sprayed it with the same purple Lacquer Mark used. It's hard to tell under the huge sticker that was added, but this was one of my slickest paint jobs ever. At least on rockets.

Can you tell we have been married for over twenty years?
Can you tell we have been married for over twenty years?
MarkII
Well-Known Member
- Joined
- Jan 18, 2009
- Messages
- 8,250
- Reaction score
- 46
My god those are beautiful paint jobs. I have worked ardently for years to cultivate my painting techniques (which is why I have so many opinions about spray painting) and I have indeed improved by leaps and bounds during that time. But I still can't produce anything close to the kind of look that those rockets have. :bang:
Testor's/Model Master's Acrylic Lacquer paints are very highly regarded. I have seen posts asserting that they are the very best out there. On my income they are a bit pricey, though, so I haven't tried them yet. The stuff that I have seen that's been painted with them has uniformly been jaw-dropping gorgeous, including the rockets in the photos posted above.
Even the best paint that you can buy is only as good as the surface that has been prepared for it and the skill with which it has been applied, though. Skillful painters can produce stunning results with cheap paint, too; I've seen it. It really is the painter, not the paint. My hat is off to all of you master painters.
o1d_dude
'I battle gravity'
Testors paint is very nice but a bit on the expensive end of the spectrum. On the other hand, NO ONE has the range of metallic and candy colors that is available from Testors. The lime green and purple-licious are excellent colors for a Super Neon or Super Neon XL if you're so inclined.
As to wanting to do the best possible paint job you can, well, there may come a day when you decide you'd rather not fly if the field conditions are a little rougher than you'd hoped for. At that point, you have to decide if you really want to build display models or rockets that fly.
In my own case, I went to Diary Aire last year for my first "big" launch. The field was dirt and the wind was blowing 12-15 mph. I just couldn't bring myself to launch my oh so pretty rockets. That's when I realized the value of doing the paint job "well enough" to satisfy my need for the feeling of accomplishment while still being able to put the bird up in less than desirable conditions. It's a balancing act.
PS. I will admit to still touching up paint chips and such after a day out on the range so I'm not 100% out of the woods yet.
o1d_dude
'I battle gravity'
Nice looking birds, Wayco.
I'm partial to the Loc Nuke series. They're simple, strong, and fly pretty darn well. Your paint and decal work is great, too.
I'm partial to the Loc Nuke series. They're simple, strong, and fly pretty darn well. Your paint and decal work is great, too.
For those considering the Testors paints, Micheals and Hobby Lobby carry them. Bring coupons and lots of money!
I'm waiting for one of those "25% off your whole order" coupon weeks; I'll stock up. Meanwhile I use the 40% off coupons one at a time. It helps!
I'm waiting for one of those "25% off your whole order" coupon weeks; I'll stock up. Meanwhile I use the 40% off coupons one at a time. It helps!
Wayco: the zigzag frill thing just aft of the nose cone of the Eliminator... how did you do that? Sticker? Or some special masking technique? Awesome work.
<makes "we're not worthy" motions>
<makes "we're not worthy" motions>
MarkII
Well-Known Member
- Joined
- Jan 18, 2009
- Messages
- 8,250
- Reaction score
- 46
I do admit that most of my rockets do most of their flying while covered only in primer. The warm season is relatively brief here and warm dry days are scarcer still, and I spend a lot of time on base prep, soooo......getting the color coats on (let alone the decals) takes awhile. Plus I'm a bit fussy about doing a good job, as you can tell. So I'm not ashamed to fly them in just their underwear. Getting them to their job-interview best is the goal, though. And they do get there eventually.In my own case, I went to Diary Aire last year for my first "big" launch. The field was dirt and the wind was blowing 12-15 mph. I just couldn't bring myself to launch my oh so pretty rockets. That's when I realized the value of doing the paint job "well enough" to satisfy my need for the feeling of accomplishment while still being able to put the bird up in less than desirable conditions. It's a balancing act.
PS. I will admit to still touching up paint chips and such after a day out on the range so I'm not 100% out of the woods yet.


Thanks for all the compliments guys. I have been painting for a while, my first real paint job was on a 1947 Chevy convertible. I think I was 14 at the time. The nicest one was on a Cessna Skylane, wish I had a picture of that beauty. Model rockets with rattlecans are a lot easier, even if I do still screw one up once in a while. It really does help to have nice warm, dry conditions. Sharon's Eliminator comes with lots of decals, and that one at the base of the nosecone is one of them. I probably could duplicate it with an air brush, but why? I suppose someday I will have enough sense to not fly a rocket on a windy day (that I have spent ten or twenty hours painting,) but that hasn't happened yet. But I'm also the guy that owns a $50,000 Jeep Rubicon and does this to it:
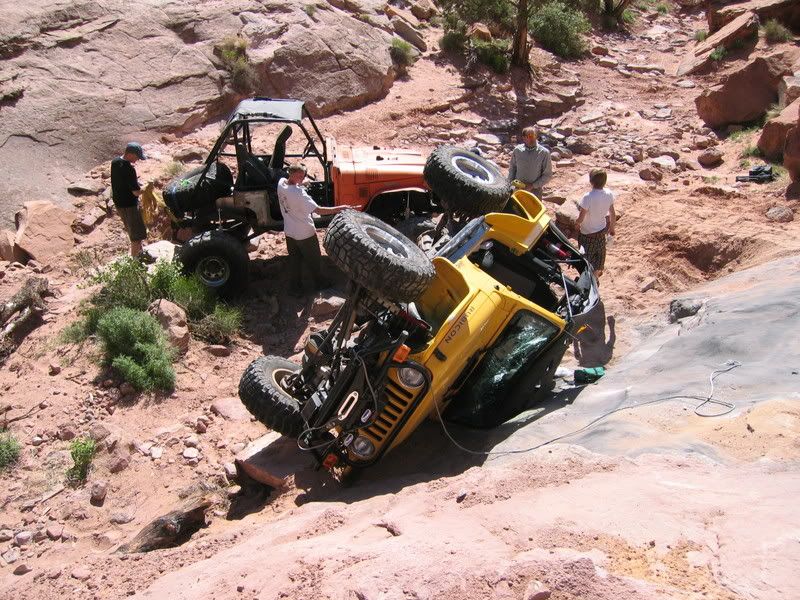
Yeah, I've painted it too, a few times.... And we did drive it out of Pritchett Canyon in Moab, one of the hardest Jeep trails I have ever been on.
Yeah, I've painted it too, a few times.... And we did drive it out of Pritchett Canyon in Moab, one of the hardest Jeep trails I have ever been on.
luke strawwalker
Well-Known Member
- Joined
- Jan 18, 2009
- Messages
- 9,147
- Reaction score
- 40
Jumping in here just a little...
Luke, I spray Rusto "Stops Rust" Crystal Clear Enamel over Rusto fluorescents all the time. It works beautifully but it is somewhat prone to chipping on the nose cone. I'm partial to the fluro pink and use Rusto Metallics Midnight Black (with sparkles) for the trim.
Here's a closeup of the final result. Yes, there was a LOT of masking tape involved.
Yeah I bet! That looks REALLY good.
I know that you can clearcoat over it and it tends to lose a bit of it's flourescent properties (not sure how much of it has to do with the "chalky" texture of the paint grabbing UV rays bouncing around down in the paint skin or something) but I was specifically wondering about the FUTURE floor polish... I know it works well over regular paints and was curious about the effect on flourescents.
@ Mark: I don't think ANYTHING works well over metallics, but I'd be PLEASANTLY surprised and glad to be proven wrong!!!
Later! OL JR
luke strawwalker
Well-Known Member
- Joined
- Jan 18, 2009
- Messages
- 9,147
- Reaction score
- 40
Has anyone tried Testors Laquer? They had a bunch of nice bright colors at the hobby shop. It claims to dry in minutes. I might try some in the future unless you all already know they're junk.
Yes, Testors is good paint... but it's VERY expensive for those little bitty cans...
shame they don't sell them in larger cans at a better price-- but cest la vis'...
Later! OL JR
luke strawwalker
Well-Known Member
- Joined
- Jan 18, 2009
- Messages
- 9,147
- Reaction score
- 40
Even the best paint that you can buy is only as good as the surface that has been prepared for it and the skill with which it has been applied, though..
Couldn't have said it better myself... ABSOLUTE TRUTH!
There are a lot of things in life that are only as good as the first step-- garbage in, garbage out. Even if you do the first step right, there's still plenty opportunity to mess it up in subsequent steps, but painting is one of those things that if step one (prep) is shoddy, no matter HOW good a paint you use or HOW skilled you are with a can, airbrush, or spray gun, the results are NEVER going to be as good as they could have been had the prep work been done to *perfection* (relatively speaking).
Skillful painters can produce stunning results with cheap paint, too; I've seen it. It really is the painter, not the paint. My hat is off to all of you master painters.
Yes, that's true. I'm not what I'd call a "master" painter but this ain't my first rodeo, either, and your statement is really true... If you know what your'e doing, you can do good work with just about anything. If you don't know what you're doing, $700 a gallon automotive two-part polyurethane isn't going to help you...
Personally, I've had really good luck with the Walmart Colorplace 99 cent a can stuff... only basic colors but it produces good results. I've had pretty decent luck with the new Krylon, but I've heard SO many horror stories that I can't recommend the stuff, and would suggest newbies to painting stay away from it. A GOOD paint should be a bit forgiving, not finicky like new Krylon is... Ya know, we could probably all stop calling it "new" Krylon since it's been out a couple years now and the old stuff is basically completely going away... I've heard some say that they can't even get it from the industrial supply houses anymore (old Krylon, the good lacquer spray paint everybody was so fond of for those who don't know). I've heard pretty good stuff about Rustoleum, and a LOT of good stuff about Valspar...
Later! OL JR
MarkII
Well-Known Member
- Joined
- Jan 18, 2009
- Messages
- 8,250
- Reaction score
- 46
I do really like the Colorplace Stops Rust paint. So far I have only used the Gloss White, but I love how it covers and how easy it is to get a smooth coat. It has become my "go to" white paint.Personally, I've had really good luck with the Walmart Colorplace 99 cent a can stuff... only basic colors but it produces good results.
Similar threads
- Replies
- 5
- Views
- 320