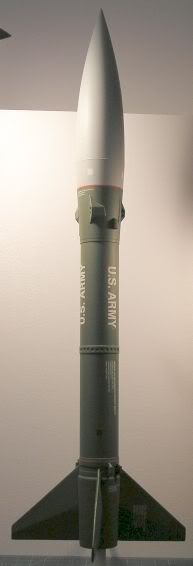
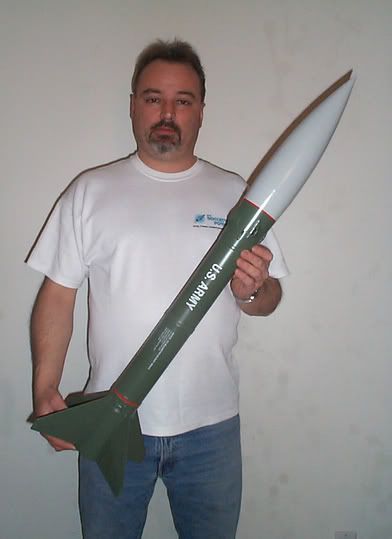
PERSHING 1A build

The Rocketry Forum

Help Support The Rocketry Forum:

This site may earn a commission from merchant affiliate links, including eBay, Amazon, and others.
Man, those are some heinous looking spirals. I can't judge how deep the grooved ones are from the pictures, but the raised ones look like small mountians.
Are all LOC tube like this? Four inch tube = lotsa surface area.
Your gonna need Santas little helpers to smooth that tube!
What's the plan?
 
The spirals look worse than they really are ,certainly not as bad as PML phenolic BT.I do as always ,Bondo spot filler ,lay a blob on the spiral ,then tale a 1/2" wide S.S. spatula and run it down the spiral ,then clean up both sides and let dry (20 mins.) then I sand w/ 320. A BT this size might take me 10 minutes to fill and maybe 10 mins. to sand (320 and 400 final ,just to get rid of fuzzies)
The raised parts are only in one spot ,but again ,not as bad as it looks.

Speaking of body tubes ,remember the thread about TLP kits,and how some dude did not like the kits at all(lousy nose cones ,lousy body tubes ,lousy balsa, blah blah blah...) ? Well ,I must say ,I`m working on the Harpoon ,and that BT has some of the SMOOTHEST spirals I`ve ever seen ! Wish LOC could do that .

Paul
 
something I've always done on any kit or scratchbuild , before I even start a build or look at the instructions ...fill the spirals.

it completely eliminates that step of filling,drying,sanding around obsticles...ect in the middle of the construction phase.

suprised more people don't do this, infact some people avoid filling spirals for that reason. It's so easy to do with the raw tube ahead of time.

well ..lol.. thats my tip of the day. the rocket is coming along nicely !

I usually do exactly that, in fact on the TLP Harpoon I`m building ,the spirals are filled as well as the tail cone and sanded smooth.Not sure what the what I was thinking on this project......but it`s all DONE ...and it was pretty easy going :D
But yes indeed ,spirals and blemishes first ,sand the filler and remove the glassline layer are the normal "orders of the day" .

I actually don`t mind filling spirals all that much.The Bondo spot putty makes very short work of it and may be done in under an hour ,waiting for dry times being the time eater.Now filling and sanding wood fins......not my favorite job !

Cheers

paul
 
I came up with doing that cause well ...frankly I'm lazy and try to find the easy way out of sanding. The persing doesn't have many obsticles so no biggie anyway.

I can't say much about your work, it's been very impressive and your a fellow TLP builder ..

Ignore me and please continue...
 
Go Paul!
I love build threads like this! Lots of pictures, minimal distractions and its getting done fast! Are you going to add like 12 lbs of nose weight? :D
 
Go Paul!
I love build threads like this! Lots of pictures, minimal distractions and its getting done fast! Are you going to add like 12 lbs of nose weight? :D

He won't need to add quite that much. The nose cone is basswood so it's pretty heavy.

BTW, this may help.

The CG should be just a tad below the nose cone/body tube joint.

View attachment Pershing1Abt101.rkt

pershingrocksim.jpg
 
Last edited:
Go Paul!
I love build threads like this! Lots of pictures, minimal distractions and its getting done fast! Are you going to add like 12 lbs of nose weight? :D

Scott ,like Gordon said, that NC is a BIG hunk of lumber.I`m almost to the point of paint ,just need to hang a few things off the body tube and get her painted during Xmas holidays.

I`m not sure what color scheme I really want to do to be honest with you ,as i have one done up in the usual test/display round (green ,white &black NC with orange bands) I better decide soon and get some paint from the hobby shop if I need Olive Drab or similar (Testors me thinks)

Cheers

Paul

PS- More pics comming soon and less chit-chat :D
 
While you wait for paint to dry check this out.

I couldn't upload the whole manual (it's 128 pages) and I forgot where I found it but here is page 26 of the Pershing 1a manual.

Note where the CG is on the real one!

I guess a tactical nuke is pretty heavy!

Oh, and a picture of a test round, lots and lots of stripes!

View attachment Page 26.pdf

pershing_1_05.jpg
 
That picture is the bomb! :rofl:
(post #40)
 
Last edited:
That picture is the bomb! :rofl:

Which pic are you referring to?

There are a lot of them in this thread.:D

Ahh. I see your edit...and raise you an edit.

That is an unusual paint scheme.

Black, white, orange brown or is that green, and lots and lots of stripes. Sorta looks like somebody got carried away with the decals.
 
Last edited:
Gordy, I `ve seen that round and have given it much thought ,I like it ...nice and different(I ain`t scared of no stripes).I saw one with an olive drab main body and a black nose cone ,that looked pretty nice ,but not much for decals and overall "glitz".

I did buy the decals from you already ,so i may even do my own thing....you know ,carte blanche ;)

If someone has any ideas or more pictures ,let`s see them !

Paul
 
Ahh. I see your edit...and raise you an edit.

That is an unusual paint scheme.

Black, white, orange brown or is that green, and lots and lots of stripes. Sorta looks like somebody got carried away with the decals.


Yes it is unusual, I haven't seen it before. I can't tell if the color of one of the bands is OD green or a flat brown either. What is it Paul?
 
Looks like brown ,but it`s probably black. I have these i found in my favorites.

Paul

p1a.jpg

pershingv1v2.gif
 
do it ....lol.. !

I modeled mine after a marines round I found somewhere on the net.

it's simple but different

HonestJohndone.jpg

meandHJ.jpg
 
Haha now we know where the goodies are kept.

Have you chosen a motor for first flight?

Oh goodness no ;) But seeing how it won`t fly until April/May....I`ve got a bit of time.The MMT is 29 mm ,and the box `o motors has a good selection....perhaps a Skidmark.

I`ll have more pictures up very soon.

Stymye - that looks great ,I like the color scheme.....rather than the usual olive drab.What kit is that ?...Estes ??


Paul
 
I guess a tactical nuke is pretty heavy!

They were big back in the Pershing's day. Now you can go thermonuclear in the size of a toteable tool box. IIRC, the W80 series was built to fit in the ALCM and later on in Tomahawks. They are probably only 200-300 lbs.
 
Stymye - that looks great ,I like the color scheme.....rather than the usual olive drab.What kit is that ?...Estes ??

Thanks , Estes Maxi
 
Finally some pictures before the new year ;)

The mid & forward retainer bands ,made of two layers of cardstock ,are glued in place ,soaked in super thin CA ,then sanded smooth.


Paul

DSCN0286.jpg

DSCN0287.jpg
 
The tunnel covers were made of two layers of Basswood for a full 1/4" thickness ,instead of Balsa.....too darn soft !
They were then sanded to the BT radius (I`m starting to hate that job) but before that,the ends were bevelled ,sanded,sealed and sanded again.They then got epoxied into place.

Paul :tree:

DSCN0288.jpg

DSCN0289.jpg

DSCN0301.jpg

DSCN0305.jpg
 
Some shots of the full body tube with retainers and tunnel covers in place.


Paul

DSCN0299.jpg

DSCN0300.jpg

DSCN0303.jpg

DSCN0304.jpg
 
Here I made the charge retainers out of flat styrene stock and styrene half round ,instead of cardboard or wood.These will get painted first, then applied last, as they fit over the US ARMY decals when the rocket is finished.

Next up is primer and paint, just need a final paint scheme.Knowing me ,I`ll opt for the most difficult :rolleyes:

Cheers

Paul :merry-christmas:

DSCN0310.jpg

DSCN0312.jpg

DSCN0313.jpg
 
I have decided to go with a variation of this paint scheme.Hope you like it.

Paul
 

Attachments

  • p1a.jpg
    p1a.jpg
    87.3 KB · Views: 18
I have decided to go with a variation of this paint scheme.Hope you like it.

Paul

I like the second one in post #45 better There would be a cool effect if it had a spin to it.

But it's your model.
 
Here I made the charge retainers out of flat styrene stock and styrene half round ,instead of cardboard or wood.These will get painted first, then applied last, as they fit over the US ARMY decals when the rocket is finished.

Next up is primer and paint, just need a final paint scheme.Knowing me ,I`ll opt for the most difficult

Cheers

Paul

Paul, How do you make or especially get the contour on these styrene parts? Do you put an object under the styrene and then some how heat it?

Bob
 
I like the second one in post #45 better There would be a cool effect if it had a spin to it.

But it's your model.

Gordy ,I think I will incorporate that paint work into the nosecone.

You really want me to mask all those stripes.....don`t you :eyeroll:

Ok...ok.....I`ll do it.

Paul
 
:snowman:
Paul, How do you make or especially get the contour on these styrene parts? Do you put an object under the styrene and then some how heat it?

Bob

The charge retainers are pretty narrow ,so fitting the BT contour should not be a problem.But I have done what you a talking about ,using aluminum pipes or brass etc. and a heat gun to soften the styrene sheet then roll it oner the pipe, and sometimes plunge it into cold water to freeze the shape.

Don`t know what I would do without styrene and cardstock and cut out pieces of body tube.I used to do some scratch building on model aircraft ,so my use of styrene started there.

Cheers

Paul
 
Back
Top