Estes - Fat Boy (#2139) Gallery

The Rocketry Forum

Help Support The Rocketry Forum:

This site may earn a commission from merchant affiliate links, including eBay, Amazon, and others.
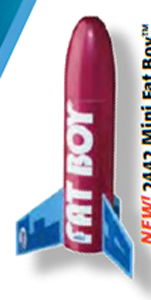
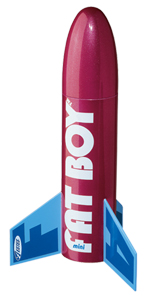
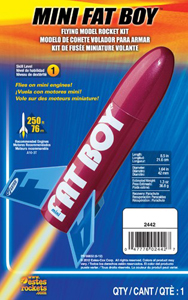
Here's my newly completed Mini Fat Boy (Estes kit no 2442).

Completely box stock. The light blue is Rustoleum 2X Spa Blue, and the Red is Duplicolor Cherry Red, all over Duplicolor Primer.

-Dave

10583998723_115777beb1_c.jpg
 
Last edited by a moderator:
Here is my Estes Fat Boy. Given the mods, and with the help of Mark at Stickershock, it has been renamed "Fat'er Boy."

Other than the obvious the mods include a Kevlar recovery cord up to the end of the BT then about 3 feet of elastic. With the addition of the new 7x18mm motor mount approx. 2oz of nose weight was needed to keep the CG around where it should be. Finally, due to the added weight of the NC I chose not to use the plastic loop molded into the NC and instead drilled holes and used paracord for a stronger attachment.

IMG_20131101_093327_669.jpgIMG_20131101_092318_291.jpgIMG_20131101_092501_529.jpgIMG_20131101_092336_954.jpg
 
Estes Mini Fat Boy (#2442) Basic Information.

estes.gif
Estes Industries

MODEL NAME: Mini Fat Boy Also known as:

NUMBER: #2442

Introduced: 2013
Final Year:
Designer:

Type: Sport, Downscale
Motor Mount: 1x13mm
Recovery: Parachute
Stages: 1
Length: 8.5 in (21.6 cm)
Diameter: 1.64 in (42 mm)
Span:
Weight: 1.3 oz (36.8 g)

Mfg. Description: No Significant text in 2013 Catalog

=====

Mini engine powered! Short and stubby! A whole lot of fun!

A must have addition to your collection of mini engine powered rockets. A simple build and waterslide decals will have you flying this rocket in no time at all. And what a fun little rocket it is! (Estes 2013 Web Ad)


Advertising Liveries

estes-mini%20fat%20boy%202442-2013%20cat.jpg
2013 Catalog

estes-mini%20fat%20boy%202442-2013%20web.jpg
2013 Web Ad


Face Card(s)

estes-mini%20fat%20boy%202442-face%201.jpg


Instruction Header(s)

estes-mini%20fat%20boy%202442-instr%201.jpg


First post in this thread featuring this rocket.

See Also:
TRF Build Threads

TRF Applicable Threads

LINKS
EMRR
RocketReviews
Mfg. Page


If you have any additional information on this rocket and/or catalog photos please let us know.
 
Last edited:
I've had many Fat Boy's over the years... I had a couple stock 18mm Fat Boy's back in the day, and I thought I was getting crazy when I built one with a 24mm mount. Years later I win a Fat Boy in a raffle at a launch, not overly excited. At that launch, I was told that they were being discontinued (which ended up being true). Anyway, since I fly mainly high power these days, I decided to put a 38mm mount in it. A little carbon fiber over the body tube and fins and it was ready to fly at 11oz :surprised:

It has flown 3 times on I218R's and I went for an I357T at MWP a few weeks ago!
IMG_0093.jpgIMG_0092.jpg
 
Copy of Image10-nsv-on-pad.jpgGI Joe and the Spiral of Death - Image14.jpgImage4-nsv-liftoff.jpgImage7-nsv-pilot.jpg

Probably one of the odder Fat Boy mods out there. Inspired by the "Mercury Joe" videos and the GI Joe Adventure Team of the 1970s, I wanted to build an action figure carrying rocket with a capsule. I collect 12" GI Joes, but such a project was beyond my skills and budget, so I went with a rocket sized for the more modern 3 3/4" figures. It's closer to a stock Fat Boy than you'd think. Fins are actually stock except for a couple glued-on additions. The "horizontal stabilizer," is actually two fins from some random Estes BT-20 starter kit rocket I had laying around. Then there are the motor pods, which are those sub-T-20 tubes included with kits to push motor blocks into place. A couple bits of scrap balsa from the fin sheet were glued on as "wingtips." The cockpit bubble is half of a plastic Easter egg and is designed to removable. I designed the decals myself and printed them on some clear inkjet label material. The other modification was a 24MM motor mount. The problem with the model is that is was very heavy and under-powered on an 18mm C (with an adapter) and it proved to be quite squirly on a D, doing a bit of corkscrew before becoming stable and shooting off at whatever angle it happened to be pointing at the time. I later added a stretch tube that solved the stability problem, but sadly killed the model. That's another post though.
 
The NSV-1 was already VERY heavy (most of that weight in the nose) so to solve the stability problem, I spliced on an extension tube (4" I think) of BT-80 to the front. The problem being that the BT-80 I used was not Estes, but another supplier, and the ID was slightly smaller. The shoulder on the blow-molded Fat Boy cone is VERY long. I sanded and sanded the ganged thing, but it was always tight, and eventually I called "good enough." It was not "good enough." The extension worked beautifully for its intended purpose. The rocket boosted straight as an arrow on a D12. Unfortunately, the nose cone completely refused to budge, and the rocket lawn-darted in, smashing the cone into bits on hard-packed earth. Oh, the humanity, the "astronaut" was in pieces, arms and legs everywhere.

But we can rebuilt him. We have the technology...

AT NSV IMG_5023.JPGAT NSV sized IMG_5024.JPGAT NSV sized IMG_5025.JPGAT NSV sized IMG_5026.jpgIMG_5023.jpgIMG_5024.jpgIMG_5025.jpgIMG_5026.jpg
 
I just finished one that will fly on c engines have yet to launch it though.

PYRO1962
 
Four sizes, body diameter in inches (motor mount in mm):

1.64 (18)
2.6 (24)
4 (29)
5.5 (54)
 

Attachments

  • IMG_20160705_203351_789-1.jpg
    IMG_20160705_203351_789-1.jpg
    55.6 KB · Views: 66
Need to put on last fin decal. The fin "T" Can someone please post a pic that shows how it goes on. Looks like it will fit both ways.
 
Like so many of my rockets, this one was acquired from someone dumping their collection and needed a complete rebuild. There was one straight fin on the thing. The other two were bent presumably from laying on its side for a long time. The bottom of the tube was crushed and the paint was a disaster. It was stripped down to the bare body tube inside and out and I started over. I removed the shock cord mount and the motor mount pulled right out. The inside was sanded smooth. A full length coupler was added to fix the dents. It stops about an inch from the top to allow for the nose cone to fit.

Two of the original fins were able to be removed and reused. I had to cut the third one. I rebuilt with ply centering rings, 24mm mount, Kevlar leader and about 6ft of 1/4" Elastic. The nose cone base was cut down and a bulkhead added with screw eye. After that I still needed a 1/2oz of nose weight to bring the CG back where it needed to be.

Vinyl was cut by hand before I bought my Cricut. Turned out pretty well I think. Flight below is on a C11-5.IMG_8628.jpg
View attachment Video.mov
 
Build another Fat Boy. Got this one from a forum member and decided I wanted to go big. Rebuilt with a 29mm motor mount, papered fins and a full length coupler to strengthen the body tube.

Paint is Krylon Glitter Blast Blue and Black.

50.jpgLaunch_10-22-23_8.jpg
 
Back
Top