Snap Ring Motor Retention Method - Enter CNC Router!

The Rocketry Forum

Help Support The Rocketry Forum:

This site may earn a commission from merchant affiliate links, including eBay, Amazon, and others.

patelldp

Well-Known Member
Joined
Jan 23, 2009
Messages
5,647
Reaction score
101
I ordered a Shapeoko XXL (link) a few months ago. Fast forward a few months, move into a new house, plan a vacation...and all of a sudden I have time and space to build the darn thing! This tool is a very, very powerful machine for our needs as it cuts all common materials used in rocketry: plywood, G10 fiberglass, carbon fiber, and even aluminum! Even the beginner is capable of cutting out parts with basic design skills using software that is free from Carbide 3D.

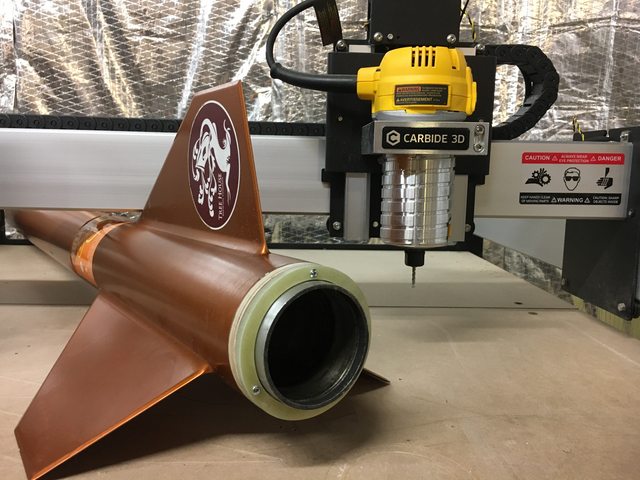
For a few years I've been looking at my 3.72" OD Hawk Mountain Proteus downscale. This flying season I finally got around to flying it on a 76-2G and a 76-5G blue. The rocket has grown on me because of those two great flights, but I had to deal with caveman style motor retention because I never made provisions for it when I built it. The 2G was retained via friction fit (which required very violent extraction methods) while the 5G was retained at the fore end of the 24" long MMT with tape, slipped in from the fore end, and then the thrust ring was installed from the aft. Both required a lot of time dedication to get right, so I needed a new solution!

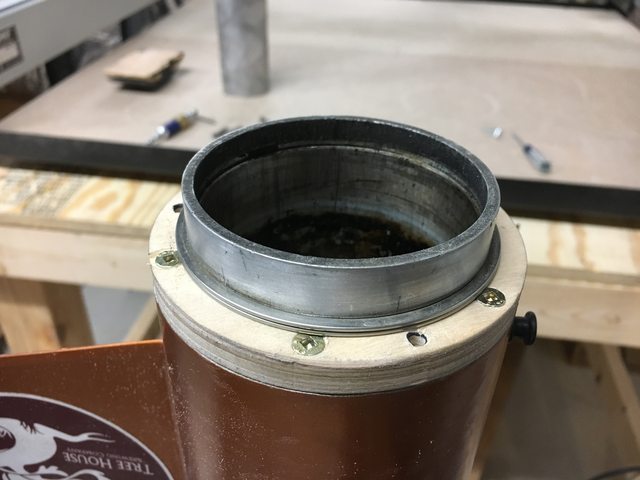
Here's the back end of rocket after 2 flights:

kgba0fZl.jpg
 
An AeroPack wouldn't work without trimming the OD of the flange and the bolt pattern is too large of a diameter. So it's time for a custom solution using my new tool!

Step one was to cut a 3/8" ply ring that matched the OD of the body tube and a slip fit on the 76mm motor case. That ring was to have a circular pattern of six holes to allow screws to pass through into the existing aft CR and be countersunk. Three more holes are drilled and countersunk on the backside to allow three 4-40 tee nuts to be installed and still sit flat against the existing CR.

kNZvEiwl.jpg


The ring was then slipped on a dummy case (partially finished 76-2500...need a new lathe) and down to the existing CR to check fit. It all looks good, but note that the counter sinking was done by hand, not the router.

S5VunCPl.jpg
 
Once the fit was confirmed it was time to affix the ring to the aft CR with the screws. 3/4" long square drive screws sucked the ring right down.

sw31zzml.jpg


The bread and butter of the whole design is the retention ring. The key is the recessed inner diameter to allow clearance for the external thrust ring on my motor cases. This allows the ring to sit flat and look good on the OD. Three holes pass through for the 4-40 bolts to engage the aforementioned tee nuts to hold it all together.

vd0hvmsl.jpg
 
Slip the motor case into the motor tube:

qujwksdl.jpg


Slip the retention ring over the motor and thrust ring:

rNulMWxl.jpg


Install the retention bolts! It all fits and looks great!

iqgQ6L9l.jpg
 
One proud router-papa with its handiwork. This thing is awesome and I can't wait to keep pushing my own envelope and learn the ways of CNC.

OuSzDl3l.jpg
 
Very nice!!!

Now for myself, I'd have to.go ahead and fill/finish the retainer(s) edges to match that nice copper finish (too anal I know).

From the Ether...
 
Very nice!!!

Now for myself, I'd have to.go ahead and fill/finish the retainer(s) edges to match that nice copper finish (too anal I know).

From the Ether...

That's the next step. I am actually going to pull it back off and apply Rocketpoxy to the faces and screws. That will improve the holding power but also fill any gaps for finishing.
 
Obvious next question...anyone interested in this as a product? 38-76mm, I have the stock and the machinery.

PM with interest?


Sent from my iPhone using Rocketry Forum
 
Decided to drop the plywood thrust plate and go G10. This plate is 1/3 the thickness but required some modification of the tee nuts to work. It’s affixed to the rear CR with six screws and JB Weld.

IMG_0092.jpg

IMG_0091.jpg

IMG_0090.jpg
 
Could you recess these into the tube such that it sits flush?

Sure. This was a retrofit of an odd sized tube, but a 3” MMT in a 4” or larger tube can easily be recessed.
 
Last edited:
Simple and elegant, always a perfect combo. Nice work.


Sent from my iPad using Rocketry Forum
 
Cool project. I've had a SO3 XXL in the rocket shop for a while and it's super handy. Make or buy a dust shoe, cyclone separator, and homing switches if yours didn't come with them. Composites will rapidly dull nice endmills, use cheap diamond fluted bits to avoid that.

Also give adhesive work holding a shot: https://m.youtube.com/watch?v=g4K3Ni1NLpg

A friend on the forum recommended the same and pointed me to user "drillman1" on eBay. I've been running 1/8" fishtail chip breakers on G10. Need to get my 3D printer back from the manufacturer before I can print up a dust shoe, have a cyclone separator, and my Shapeoko came with the homing switches.

The clamps you see in the pics seem to be doing a great job and for other stuff I can run plain old double sided tape. I've gotten my zero'ing down well enough that I can use minimal tabs on my parts so nothing goes flying.

Thanks for the tips!

IMG_3908.jpg
 
Sure. This was a retrofit of an odd sized tube, but a 3” MMT in a 4” or larger tube can easily be recessed.
In that case I think this would be cool for something like 29mm in a 38mm tube or such where there isn't a ton of room for a bulky retainer like Aeropac.
 
Back
Top