I need a flight test workhorse for the rocketry electronics development I'm doing. When I developed the Featherweight Raven altimeter, I upgraded an Estes Blue Ninja for dual deployment and flew it countless times at a local school field. I'm about to start flight testing some new electronics and I'm currently living away from most of my rocketry stuff, so today I went to the local hobby shop and sprung for an $18 Patriot. If you have been to any organized launch in the last decade, chances are that someone was flying one off the low power racks. Normally these are for low-powered BP motors, but this is an upgrade build, so I bought a pack of 24mm motor mounts while I was at it.
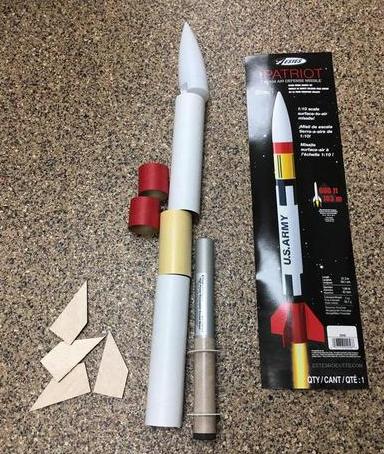
Kit parts plus the new motor mount loaded with the motor case of choice
My goal for this build is to fly it on anything from a C10 BP motor to a G65 to an F240, using dual deployment and GPS tracking. Sorta ridiculous to try to use a low-power Estes kit to be a dual-deployment test workhorse for hundreds of dollars of electronics? Why yes...yes it is.")
Tonight I'm going to start with the altimeter av-bay, since I like to build my rockets from the inside out. I'm using a Featherweight 38mm av-bay kit, which needs a 2.0" long 38mm coupler to clamp around. A phenolic or BlueTube coupler would be most appropriate for this build, but I don't have any of those handy. I do have some 38mm fiberglass coupler material though, so I'm going with that.
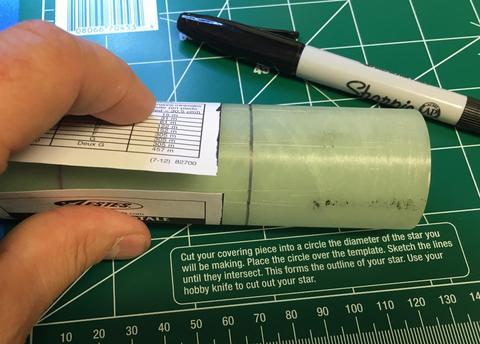
The traditional use of the Estes field size guide
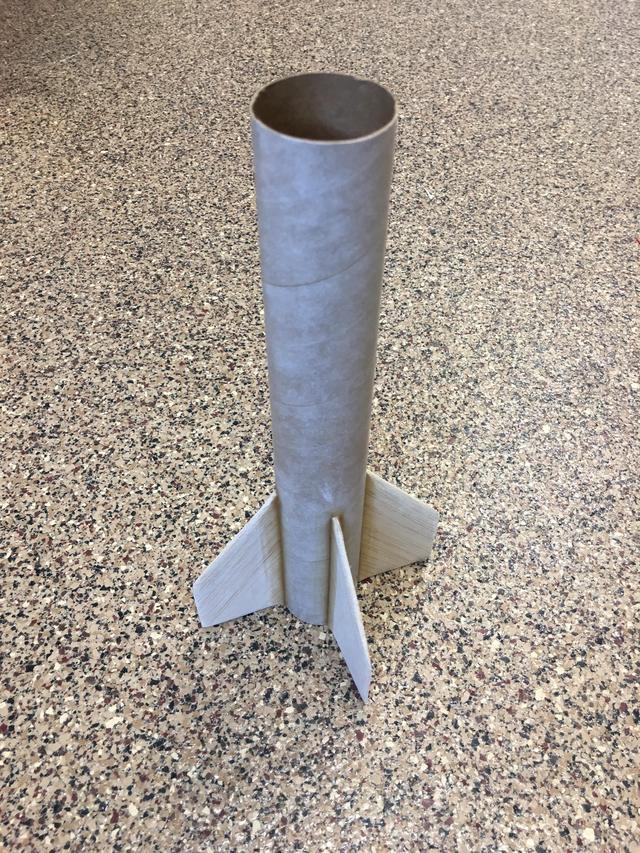
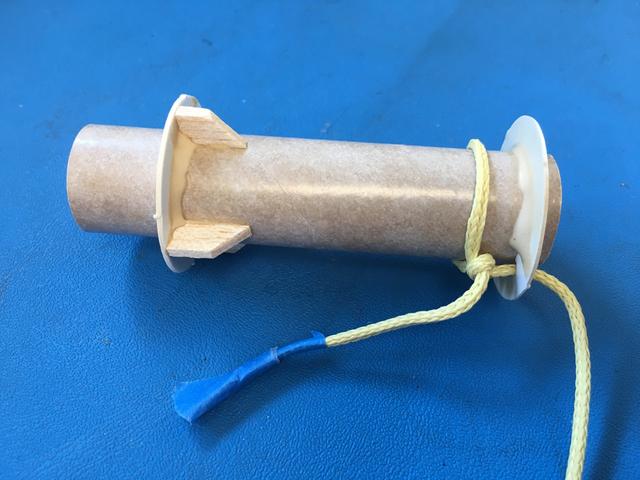
Here are a few photos of assembling the Featherweight 38mm av-bay:
Note the white silkscreen markings to figure out which way the wooden battery restraint pieces go together. They're asymmetrical!
The white silkscreen is covered
The assembled av-bay with Raven altimeter inside. The threaded rods double as deployment charge terminals.
The diameter of 38mm fiberglass coupler is a little too small for the BT-60 tubes, so I'm going to use a red cardboard couplers that came with the kit to make it the right diameter. The front end will be glued into the forward body tube (main chute holder) while the back end will be the coupler for the motor mount airframe tube. The glued end only needs about 0.5" overlap for a strong joint, leaving 1.5" overlap to make a coupler with decent leverage for the the back airframe tube. I cut the red coupler so that it will be in contact with the rear body tube at the forward-most and rearward-most points for best leverage. Since I still have some room between the cardboard couplers and the fiberglass coupler, I'm sandwiching the shock cord in between. Post cutting and gluing:
The longer section is the one that will be glued in, leaving half of it exposed for contact with the rear airframe tube.
Gap to be filled with another round of 5 minute epoxy
Fit check before gluing the airframe tube
Getting late. A fun evening of not writing software.:wink:
Kit parts plus the new motor mount loaded with the motor case of choice
My goal for this build is to fly it on anything from a C10 BP motor to a G65 to an F240, using dual deployment and GPS tracking. Sorta ridiculous to try to use a low-power Estes kit to be a dual-deployment test workhorse for hundreds of dollars of electronics? Why yes...yes it is.
Tonight I'm going to start with the altimeter av-bay, since I like to build my rockets from the inside out. I'm using a Featherweight 38mm av-bay kit, which needs a 2.0" long 38mm coupler to clamp around. A phenolic or BlueTube coupler would be most appropriate for this build, but I don't have any of those handy. I do have some 38mm fiberglass coupler material though, so I'm going with that.
The traditional use of the Estes field size guide
Here are a few photos of assembling the Featherweight 38mm av-bay:
Note the white silkscreen markings to figure out which way the wooden battery restraint pieces go together. They're asymmetrical!
The white silkscreen is covered
The assembled av-bay with Raven altimeter inside. The threaded rods double as deployment charge terminals.
The diameter of 38mm fiberglass coupler is a little too small for the BT-60 tubes, so I'm going to use a red cardboard couplers that came with the kit to make it the right diameter. The front end will be glued into the forward body tube (main chute holder) while the back end will be the coupler for the motor mount airframe tube. The glued end only needs about 0.5" overlap for a strong joint, leaving 1.5" overlap to make a coupler with decent leverage for the the back airframe tube. I cut the red coupler so that it will be in contact with the rear body tube at the forward-most and rearward-most points for best leverage. Since I still have some room between the cardboard couplers and the fiberglass coupler, I'm sandwiching the shock cord in between. Post cutting and gluing:
The longer section is the one that will be glued in, leaving half of it exposed for contact with the rear airframe tube.
Gap to be filled with another round of 5 minute epoxy
Fit check before gluing the airframe tube
Getting late. A fun evening of not writing software.:wink: