Semroc Lil' Augie (KA-38)... I got #8... So, where are the first seven?

The Rocketry Forum

Help Support The Rocketry Forum:

This site may earn a commission from merchant affiliate links, including eBay, Amazon, and others.

K'Tesh

.....OpenRocket's ..... "Chuck Norris"
TRF Supporter
Joined
Mar 27, 2013
Messages
22,530
Reaction score
14,925
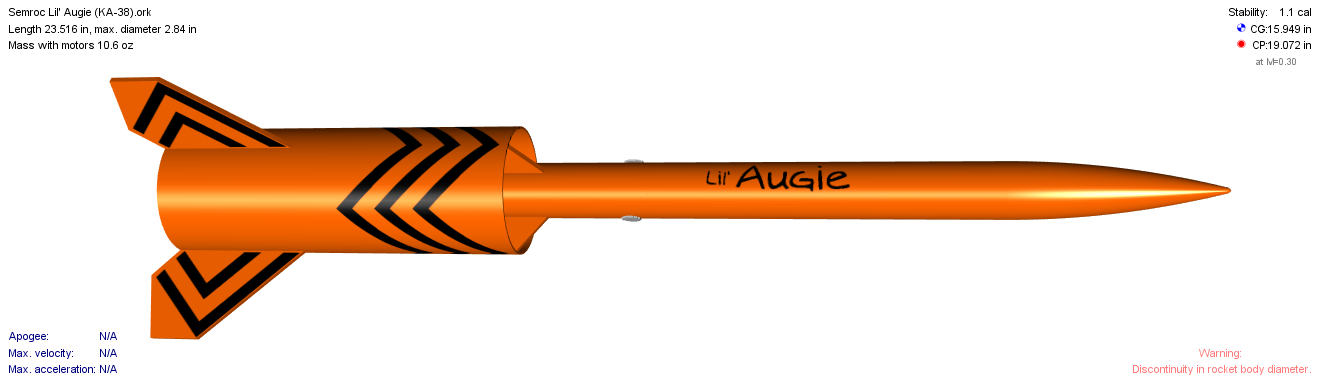
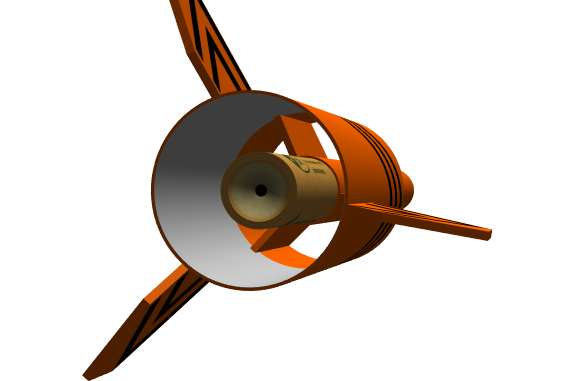
I just scored Semroc/eRocket's Lil' Augie (KA-38) #8 from Randy (and it's actually INTACT!!! :surprised:)... I think I need to sim this, but it's such a low production number, I hesitate to open the kit... Arrrrggghhh!

SLS_Lil_Augie_rocket__53338.1496884093.500.659.jpg


I'm curious, who has the other low number Lil' Augies?

Pointy Side Up!
Jim
 
Building Tips:

Before removing the binding post from the lower airframe tube/coupler, I'd suggest drawing a line on the body tube and coupler inline with the non-slotted end of the binding post. This will help aligning the parts again later.

When gluing the knot of the parachute's lines, DO NOT use CA glue. CA will wick into the fibers of the lines and harden them. As the lines flex, they will eventually break, causing the parachute to fail, or require replacement. White glue would be best for the knot.
 
K'Tesh, are you actually *building* now? Cool. Is this the first one?

Also, jeffyjeep is nearing the finish line on a build of one of these on YORF. Looks like his is #7.

I still don't understand how the staging is done on this thing. Seems weird.
 
K'Tesh, are you actually *building* now? Cool. Is this the first one?

Also, jeffyjeep is nearing the finish line on a build of one of these on YORF. Looks like his is #7.

I still don't understand how the staging is done on this thing. Seems weird.

I've opened the kit, and done a little work on it (mostly simmed it). However, the instructions call for epoxy, and I'm still waiting on that. I talked to Randy and he said that it could be built with white glue. So, we'll see which is better, my patience waiting for it, or white glue.

I was told the staging method is called "Chad Staging". I was told it was named after someone named "Chad" and that the letters aren't some kind of acronym. [EDIT] According to this thread it stands for "Cheap and Dirty Staging".[/EDIT] In this case, the booster's motor recesses into the sustainer's motor tube about 1/3", the sustainer's motor is then trapped by the tube coupler, and a retaining ring. The binding post (the metal part) locks the lower body tube and prevents the motor from blowing through the body tube. There's aluminum tape included to prevent the shroud from being burned by the motors.

Other CHAD staged rockets apparently are done by simply having a motor for the booster taped to the sustainer's motor. The idea is that the booster motor simply falls off at the staging event.
 
Ya, I know about CHAD staging but can't quite figure out the scheme here (even your description leaves me befuddled; I'll need to see some pictures of a finished model to understand it fully). The idea of CHAD staging a kit is odd to me, but it sounds like there is some specific accommodation here, which one day I'll understand. Not that I'm particularly interested in this kit, just the techniques used.
 
I helped in the development of this during the upscaleing. How it works is the sustainer motor is loaded where the airframe breaks above the binding post. There is a motor block located near the rear of the airframe to keep the sustainer motor from falling out and the coupler acts as the motor block to keep the motor from going forward. The Booster motor then is friction fit into the rear of the airframe. The Booster motor only goes into the body tube about 1/2".

The first time we flew this rocket it spit the sustainer motor when the ejection charge went off. Luckily it also ejected the parachute, but without the extra weight of the expended motor, I has to chase it quite a ways to recover it.
 
The .ork file is up (with Randy's blessing).

Here's a couple of images of it...


The shroud and staging of it was beyond OR's ability to sim the flight characteristics, but you might be able to wrap your head around how it works with this.

Oh, and I have applied some glue to parts, but I'm awaiting the arrival of some epoxy (which is OTW soon) before I really get going on it.
 

Attachments

  • Semroc Lil' Augie (KA-38).ork
    29.8 KB · Views: 41
My version has 4 fins whereas the production version only has three. I flew it on Saturday on a F 15/ E 16-6 motor combination. I had a Jolly Logic Altimeter 2 aboard and it flew to 1455 feet and flew flawlessly.
 
I got one a few days ago....no production number on mine.

I've seen Big Berthas flown CHAD staged. The Bertha has so much stability margin the extra weight hanging off the back is no issue.
 
I realize this is a old thread. I do not see this listed on eRockets. Did this get developed and released by eRockets by Randy and then discontinued as well? Was looking to clone.
 
I picked up one of their Lil' Augie kits a couple of years back and noticed that it was gone off their site a few weeks later. Not sure when it was officially retired but I know I haven't seen it listed in a very long time. Thankfully K'Tesh has created an extremely accurate SIM in open rocket so clones can be built.
 
I realize this is a old thread. I do not see this listed on eRockets. Did this get developed and released by eRockets by Randy and then discontinued as well? Was looking to clone.
http://www.spacemodeling.org/jimz/eirp_10.htm
also validates my contention that, at least in the “old days” nobody worried about a free falling empty 18mm motor casing. Always wise to check your field rules before flying this way.

btw, I built mine without the motor hook, I put a motor block in the sustainer at the appropriate depth, and used friction fit. Also the jetx fuse is completely unnecessary, although you may want to slip a small screw driver or awl into the nozzle of the sustainer and scrape a bit to make sure there is no clay blocking the nozzle. About the only ways to screw up non-gap black powder staging I can think of is to get the motors switched (Put zero delay in sustainer and delay motor in booster :facepalm:, yes I ALMOST did this but RSO caught it before I put it on pad), or put the sustainer motor in BACKWARDS (I have almost done this too, but I got lucky and caught it.). Not a bad idea to use a marker and color (black is a valid color) the NOZZLE end of the delay motor, to help prevent what should be an impossible (but unfortunately IS possible) mistake from occurring. Meconium happens, but its frequency can be reduced.

wish you two straight trails,
 
Last edited:
Back
Top